1997 CHEVROLET MONTE CARLO clock setting
[x] Cancel search: clock settingPage 120 of 358

Downloaded from www.Manualslib.com manuals search engine 0 Section 3 Comfort Controls and Audio Systems
In this section, you'll find out how to operate the comfort control and audio systems offered with your Chevrolet. Be
sure to read about
the particular systems supplied with your vehicle.
3-2 3-4
3-4
3-5
3-5
3-5 3-6
3-6
3-6
3-7 Comfort Controls
Air
Conditioning
Heating
Ventilation System
Ventilation Tips
Defogging and Defrosting
Rear Window Defogger
Audio Systems
Setting the Clock for Systems with
Automatic Tone Control
AM-FM Stereo with Cassette
Tape Player and
Automatic Tone Control (If Equipped) 3-1
1
3- 15
3-17
3-18 3-18 3-19
3
-20
3-20 AM-FM
Stereo with Compact Disc Player and
Automatic Tone Control (If Equipped)
Theft-Deterrent Feature Audio Steering Wheel Controls
(If Equipped)
Understanding Radio Reception Tips About Your Audio System
Care
of Your Cassette Tape Player
Care of Your Compact Discs
Fixed Mast Antenna
Page 125 of 358

Downloaded from www.Manualslib.com manuals search engine Rear Window Defogger
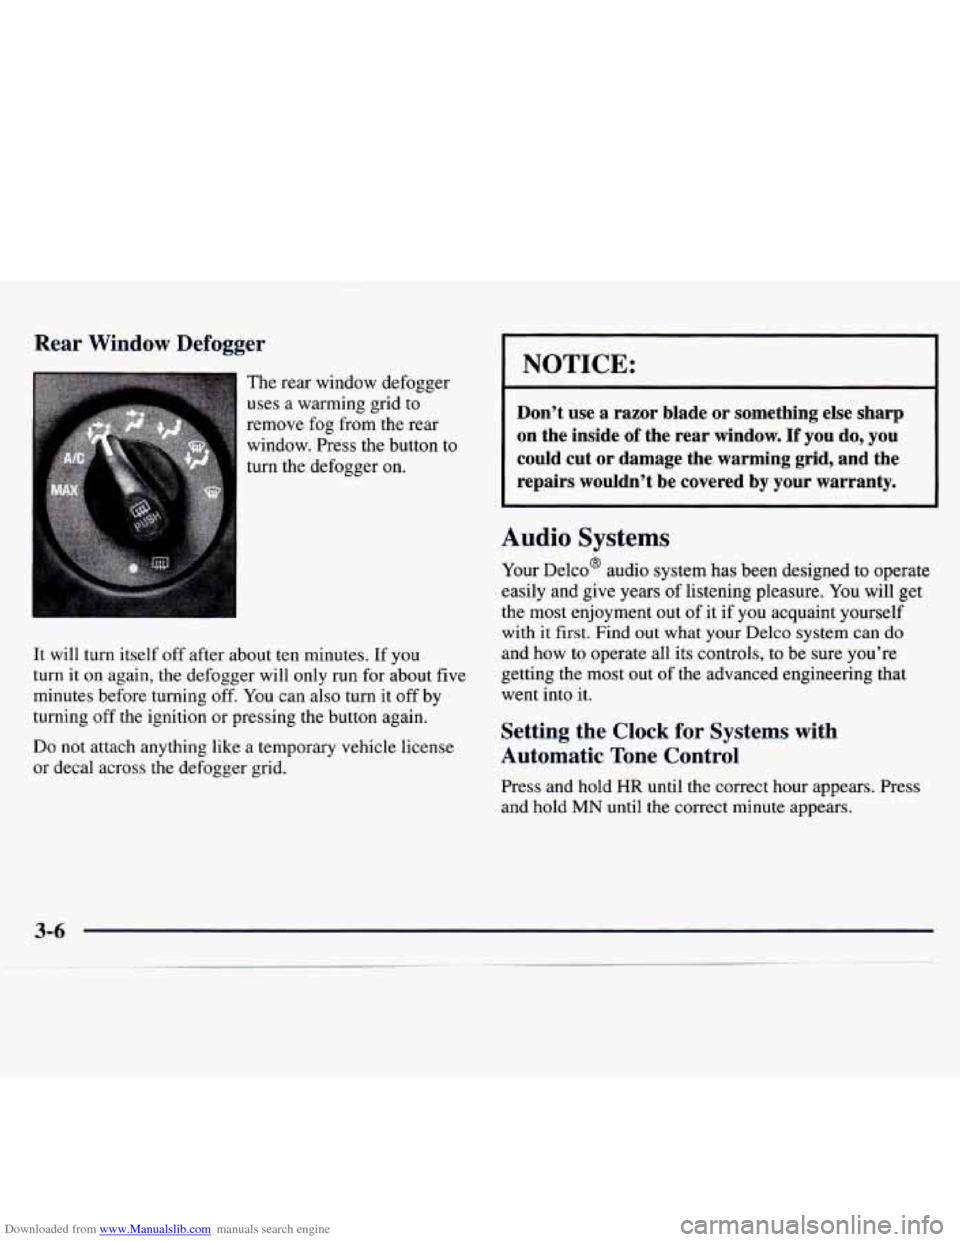
The rear window defogger
uses a warming grid to
remove fog from the rear
window. Press the button to
turn the defogger on.
It will turn itself off after about ten minutes. If
you
turn it on again, the defogger will only run for about five
minutes before turning off.
You can also turn it off by
turning off the ignition or pressing the button again.
Do not attach anything like a temporary vehicle license
or decal across the defogger grid.
NOTICE:
Don’t use a razor blade or something else sharp
on the inside
of the rear window. If you do, you
could cut or damage the warming grid, and the
repairs wouldn’t be covered by your warranty.
Audio Systems
Your Delco@ audio system has been designed to operate
easily and give years
of listening pleasure. You will get
the most enjoyment out of it if
you acquaint yourself
with it first. Find out what your Delco system can
do
and how to operate all its controls, to be sure you’re
getting the most out of the advanced engineering that
went into it.
Setting the Clock for Systems with
Automatic Tone Control
Press and hold HR until the correct hour appears. Press
and hold
MN until the correct minute appears.
Page 127 of 358

Downloaded from www.Manualslib.com manuals search engine PUSHBUTTONS: The six numbered pushbuttons let
you return to your favorite stations. You can set up to
18 stations (six AM, six FMl and six FM2). Just:
1.
2.
3.
4.
5.
6.
Turn the radio on.
Press AM-FM to select the band.
Tune in the desired station.
Press AUTO TONE to select the equalization that
best suits the type of station selected.
Press and hold one of the six numbered buttons. The
sound will mute. When it returns, release the button.
Whenever you press that numbered button, the
station you set will return and the AUTO TONE
equalization
that you selected will also be
automatically selected for that button.
Repeat the steps for each pushbutton. P.SCAN
or one of the pushbuttons again to stop
scanning. P.SCAN will be displayed whenever the tuner
is in the PSCAN mode. The channel number (Pl-P6)
will appear momentarily just before the frequency is
displayed. In FM mode, this function will scan through
both FMl and FM2 preset stations and FMl or FM2
will appear on the display.
Setting the Tone
BASS:
Press this knob lightly so it extends. Turn the
knob clockwise to increase bass and counterclockwise to
decrease bass. When
you use this control, the radio’s
AUTO TONE setting will switch to manual and the
AUTO TONE display will go blank.
TREB: Press this knob lightly so it extends. Turn the
knob clockwise to increase treble and counterclockwise
to decrease treble. When you use this control, the radio’s
~ ~
P.SCAN: Press this button to listen to each of your
favorite stations stored on your pushbuttons for a few
seconds. The radio will scan through each of the stations AUTO TONE setting will
switch to manual and the
AUTO TONE display will go blank. If a station is weak
or noisy, you may want to decrease the treble.
stored on your pushbuttons, except those stations with Push these knobs back into their stored positions when
weak reception. The AUTO TONE setting stored for you’re not using them.
that pushbutton will be automatically chosen. Press
Page 128 of 358

Downloaded from www.Manualslib.com manuals search engine AUTO TONE: This feature allows you to choose preset
bass and treble equalization settings designed for
classical, news, rock, pop, country/western and jazz
stations. C/W will appear on the display when you first
press AUTO TONE. Each time you press it, another
setting will appear on the display. Press it again after
JAZZ appears and the AUTO TONE display will go
blank. Tone control will return to the
BASS and TREB
knobs. Also, if you use the BASS and TREB knobs,
control will return to them and the AUTO TONE
display will go blank.
Adjusting the Speakers
BAL: Press this knob lightly so it extends. Turn the
knob clockwise for the right speakers and
counterclockwise for the left speakers. The middle
position balances the sound between the speakers.
FADE: Press this knob lightly so it extends. Turn the
knob clockwise to adjust the sound to the front speakers
and counterclockwise for the rear speakers. The middle
position balances the sound between the speakers.
Push these knobs back into their stored positions when
you’re not using them.
Playing a Cassette Tape
Your tape player is built to work best with tapes that are
30 to 45 minutes long on each side. Tapes longer than
that are
so thin they may not work well in this player. If
a tape is inserted when the ignition is on but the radio
is
off, the tape will begin playing. A tape symbol is shown
in the center of the graphic display whenever a tape is
inserted. When a tape is active, the tape symbol will be
accompanied by a direction arrow.
While the tape
is playing, use the VOL, AUTO TONE,
BAL, FADE,
BASS and TREB controls just as you do
for the radio. Other controls may have different
functions when a tape is inserted. The display will show
the tape symbol and an arrow to show which side of the
tape is playing.
If you hear nothing or hear just a garbled sound,
it may
not be in squarely. Press EJECT to remove the tape and
start over.
The player is able to detect a tight or broken tape, and
will eject the tape. The radio will
go back to playing the
last station selected.
The player automatically senses the cartridge for metal
or Cr02 and sets the pre-emphasis. Anytime a tape is
inserted,
the top side is selected to play first.
Page 132 of 358

Downloaded from www.Manualslib.com manuals search engine P.SCAN: Press this button to listen to each of your
favorite stations stored on your pushbuttons for a
few seconds. The radio will scan through each of the
stations stored on your pushbuttons, except those
stations with weak reception. The AUTO TONE
setting stored for that pushbutton will be automatically
chosen. Press PSCAN or one of the pushbuttons again
to stop scanning. P.SCAN will be displayed whenever
the tuner is in the P.SCAN mode. The channel number
(PI-P6) will appear momentarily just before the
frequency is displayed.
Setting the Tone
BASS: Press this knob lightly so it extends. Turn the
knob clockwise to increase bass and counterclockwise
to decrease bass. When you use this control, the radio’s
AUTO TONE setting will switch to manual and the
AUTO TONE display will go blank.
TREB: Press this knob lightly so it extends. Turn the
knob clockwise to increase treble and counterclockwise to decrease treble. When you use this control, the radio’s
AUTO TONE setting will switch to manual and the
AUTO TONE display will go blank. If a station is
weak
or noisy, you may want to decrease the treble.
Push these knobs back into their stored positions when
you’re not using them.
AUTO TONE: This feature allows you to choose
preset bass and treble equalization settings designed
for classical, news, rock, pop, country/western and jazz
stations.
C/W will appear on the display when you first
press AUTO TONE. Each time you press it, another
setting will appear on the display. Press it again after
JAZZ appears and the AUTO TONE display will go
blank. Tone control will return to the BASS and TREB
knobs. Also, if you use the BASS and TREB knobs,
control
will return to them and the AUTO TONE
display will
go blank.
Adjusting the Speakers
BAL:
Press this knob lightly so it extends. Turn
the knob clockwise for the right speakers and
counterclockwise for the left speakers. The middle
position balances the sound between the speakers.
FADE: Press this knob lightly so it extends. Turn the
knob clockwise to adjust the sound to the front speakers and counterclockwise for the rear speakers. The middle
position balances the sound between the speakers.
Push these knobs back into their stored positions when
you’re not using them.
Page 348 of 358

Downloaded from www.Manualslib.com manuals search engine Climate Control System ........................... 3-2
Clock. Setting the
................................ 3-6
Comfort Controls
................................ 3- 1
Compact Disc Care
............................. 3-20
Compact Disc Player
............................ 3- 11
Compact Disc Player Errors ....................... 3- 14
Compact Spare Tire
............................. 5-35
Console Storage
................................ 2-39
Control
of a Vehicle .............................. 4-6
ConvenienceNet
............................... 2-39
Convex Outside Mirror
.......................... 2-37
Coolant
....................................... 6-20
Adding
..................................... 6-23
Bleedvalves
................................. 5-21
Checking
................................... 6-22
Heater. Engine
............................... 2- 15
RecoveryTank ............................... 5-17
Whattouse ................................. 6-21
Cooling System
................................ 5- 15
Courtesy
Lamps ................................ 2-35
Courtesy Transportation
........................... 8-8
Cruise Control ................................. 2-30
Cupholders
............................... 2-37. 2-38
Customer Assistance for Text Telephone Users
......... 8-4
Customer Assistance Information
................... 8- 1
Customer Satisfaction Procedure
.................... 8-2
Damage. Finish
............................... 6-52
Damage. Sheet Metal
............................ 6-5 1
Daytime Running Lamps ......................... 2-34 Dead Battery
................................... 5-3
Defects. Reporting Safety
........................ 8-10
Defensive Driving ............................... 4-2
Defogger. Rear Window
.......................... 3-6
Defogging
..................................... 3-5
Defrosting ..................................... 3-5
Dimensions. Vehicle ............................ 6-64
Dolby@
B Noise Reduction ....................... 3-10
Dome Lamp Bulb Replacement .................... 6-36
DoorLocks
..................................... 2-4
Door Storage Compartment
....................... 2-38
Drive Position. Automatic Transaxle
................ 2-18
DriverPosition
................................. 1-13
Driving
City
........................................ 4-19
Defensive .................................... 4-2
Drunken
..................................... 4-3
Freeway
.................................... 4-20
InaBlizzard
................................. 4-26
In Foreign Countries
........................... 6-4
IntheRain
.................................. 4-16
Night
...................................... 4-14
OnCurves ................................... 4-9
On Grades While Towing a Trailer
............... 4-36
On Hill and Mountain Roads
.................... 4-22
On Snow and Ice
............................. 4-25
Throughwater
............................... 4-18
WetRoads .................................. 4-16
Winter
...................................... 4-24
With a Trailer
................................ 4-34
DrunkenDriving
................................ 4-3
9-3
. ...... -,-.--- ..