1997 CHEVROLET MONTE CARLO service
[x] Cancel search: servicePage 230 of 358
Downloaded from www.Manualslib.com manuals search engine Engine Oil Additives
Don’t add anything to your oil. Your Chevrolet dealer is
ready to advise if you think something should be added.
When to Change Engine Oil
If any one of these is true for you, use the short tripkity
maintenance schedule:
Most trips are less than 5 to 10 miles (8 to 16 km).
This is particularly important when outside
temperatures are below freezing.
Most trips include extensive idling (such as frequent
driving in stop-and-go traffic).
Most trips are through dusty areas.
You frequently tow a trailer or use a carrier on top of
0 The vehicle is used for delivery service, police, taxi
your vehicle.
or other commercial application.
Driving under these conditions causes engine oil to
break down sooner. If any one of these
is true for your
vehicle, then you need to change your oil and filter
every
3,000 miles (5 000 km) or 3 months -- whichever
occurs fiist. (See “Change Oil Soon” Light in
the Index.)
If none of them is true, use the long triphighway
maintenance schedule. Change the oil and filter every
7,500 miles (12 500 km) or 12 months -- whichever
occurs first. Driving a vehicle with a fully warmed
engine under highway conditions causes engine oil
to
break down slower.
(See “Change Oil Soon” Light in the Index.)
What to Do with Used Oil
Did you know that used engine oil contains certain
elements that may be unhealthy for your skin and could
even cause cancer? Don’t let used oil stay on your skin
for very long. Clean your skin and nails with
soap and
water, or a good hand cleaner. Wash or properly throw
away clothing or rags containing used engine oil. (See
the manufacturer’s warnings about the use and disposal
of oil products.)
Used oil can
be a real threat to the environment. If you
change your own oil, be sure to drain all free-flowing oil
from the filter before disposal. Don’t ever dispose of oil
by putting
it in the trash, pouring it on the ground, into
sewers, or into streams or bodies of water. Instead,
recycle it by taking
it to a place that collects used oil. If
you have a problem properly disposing of your used oil,
ask your dealer, a service station or a local recycling
center for help.
6-15
Page 231 of 358
Downloaded from www.Manualslib.com manuals search engine Air Cleaner
F
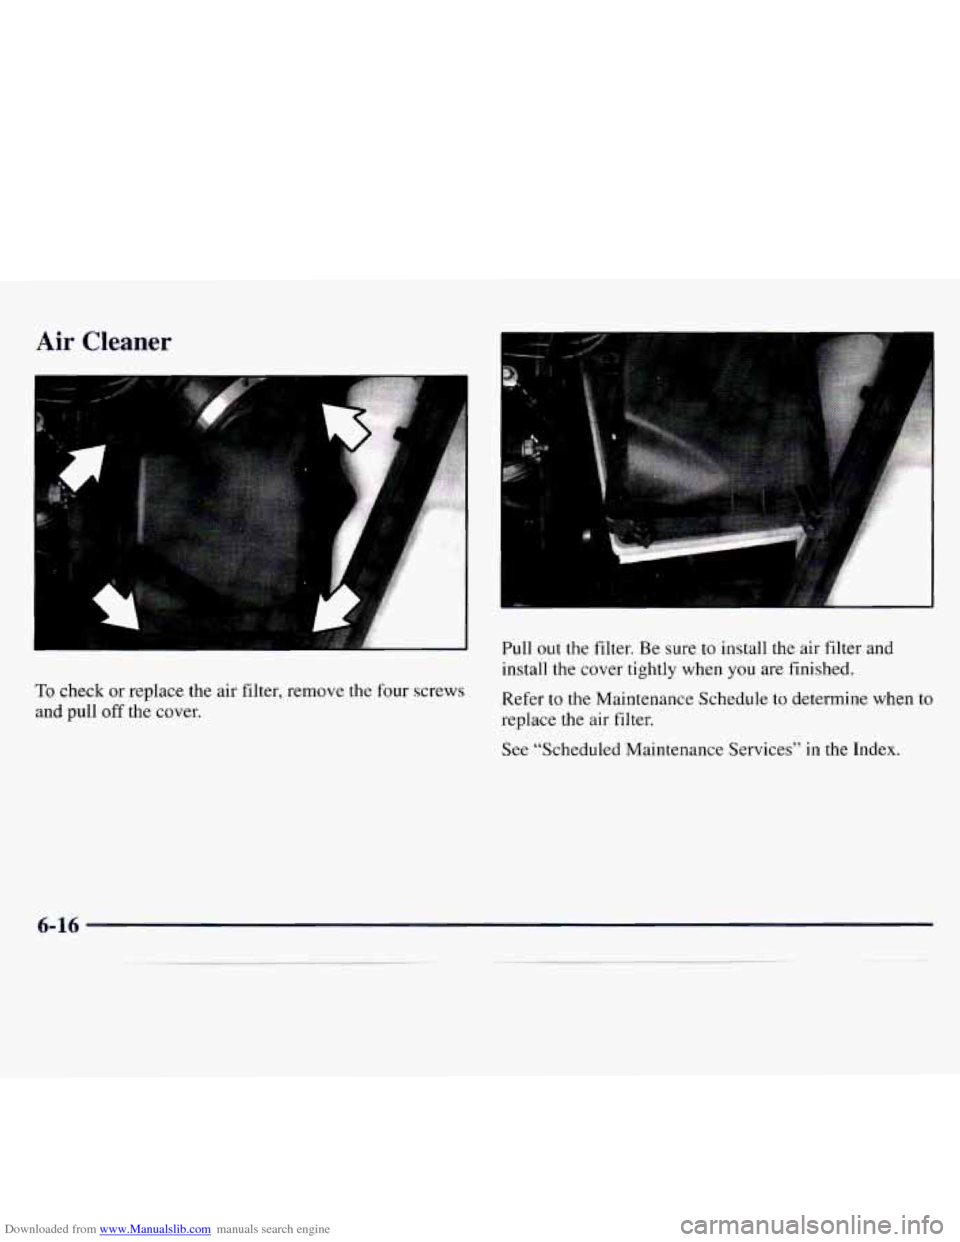
To check or replace the air filter, remove the four screws
and pull
off the cover. Pull out the filter.
Be sure to install the air filter and
install the cover tightly when you are finished.
Refer to the Maintenance Schedule to determine when to
replace the air filter.
See “Scheduled Maintenance Services”
in the Index.
Page 232 of 358
Downloaded from www.Manualslib.com manuals search engine r--
Operating the engine with the air cleaner off can
cause you or others to be burned. The
air cleaner
not only cleans the air, it stops flame if the engine
backfires.
If it isn’t there, and the engine
backfires, you could be burned. Don’t drive with
it off, and be careful working on the engine with
the air cleaner
off.
I NOTICE:
If the air cleaner is off, a backfire can cause a
damaging engine fire. And, dirt can easily get
into your engine, which will damage
it. Always
have the
air cleaner in place when you’re driving.
Automatic Transaxle Fluid
When to Check and Change
A good time to check your automatic transaxle fluid
level
is when the engine oil is changed.
Change both the fluid and filter every
50,000 miles
(83 000 km) if the vehicle is mainly driven under one or
more of these conditions:
0 In heavy city traffic where the outside temperature
regularly reaches
90°F (32°C) or higher.
0 In hilly or mountainous terrain.
0 When doing frequent trailer towing.
0 Uses such as found in taxi, police or delivery service.
If you do not use your vehicle under any of these
conditions, the fluid and filter do
not require changing.
See “Scheduled Maintenance Services” in the Index.
Page 233 of 358
Downloaded from www.Manualslib.com manuals search engine How to Check
Because this operation can be a little difficult, you may
choose to have this done at your Chevrolet dealership
Service Department.
If you do it yourself, be sure to follow all the instructions
here,
or you could get a false reading on the dipstick.
NOTICE:
Too much or too little fluid can damage your
transaxle.
Too much can mean that some of the
fluid could come out and fall on hot engine parts
or exhaust system parts, starting a fire. Be sure to
get an accurate reading if you check your
transaxle fluid.
Wait at least 30 minutes before checking the transaxle
fluid level if you have been driving:
When outside temperatures are above 90 "F (32°C).
0 At high speed for quite a while.
In heavy traffic -- especially in hot weather.
While pulling a trailer.
To get the right reading, the fluid should be at normal
operating temperature, which is
180°F to 200°F (82°C
to
93°C).
Get the vehicle warmed up by driving about 15 miles
(24 km) when outside temperatures are above 50°F
(10°C). If it's colder than 50°F ( 10°C), you may have
to drive longer.
Checking the Fluid Level
0
0
0
0
Park your vehicle on a level place. Keep the engine
running.
With the parking brake applied, place the shift lever
in PARK
(P).
With your foot on the brake pedal, move the shift
lever through each gear range, pausing for about
three seconds in each range. Then, position the shift
lever in PARK (P).
Let the engine run at idle for three
to five minutes.
Page 244 of 358
Downloaded from www.Manualslib.com manuals search engine Brake Wear
Your Chevrolet has front disc brakes and rear drum
brakes if it is equipped with the
3 100 engine. It has
four-wheel disc brakes if it is equipped with the
3.4L
DOHC engine.
Disc brake pads have built-in wear indicators that make a
high-pitched warning sound when the brake pads are worn and new pads
are needed. The sound may come and go or
be heard all the time your vehicle is moving (except when
you
are pushing on the brake pedal firmly).
I
The brake wear warning sound means that soon
your brakes won’t work well. That could lead to an accident. When you hear the brake wear
warning sound, have your vehicle serviced.
I NOTICE:
Continuing to drive with worn-out brake pads
could result in costly brake repair.
Some driving conditions or climates may cause a brake
squeal when the brakes are first applied or lightly
applied. This does not mean something is wrong with
your brakes.
Properly torqued wheel nuts are necessary to help
prevent brake pulsation. When tires are rotated, inspect
brake pads for wear and evenly torque wheel nuts in the
proper sequence to GM specifications.
If
you have rear drum brakes, they don’t have wear
indicators, but if
you ever hear a rear brake rubbing
noise, have the rear brake linings inspected. Also, the
rear brake drums should be removed and inspected each
time the tires are removed for rotation or changing.
When you have the front brake pads replaced, have the
rear brakes inspected, too.
Brake linings should always be replaced as complete
axle sets.
See “Brake System Inspection” in Section 7 of this manual
under
Part C “Periodic Maintenance Inspections”.
Page 251 of 358
Downloaded from www.Manualslib.com manuals search engine Back-up Lamp
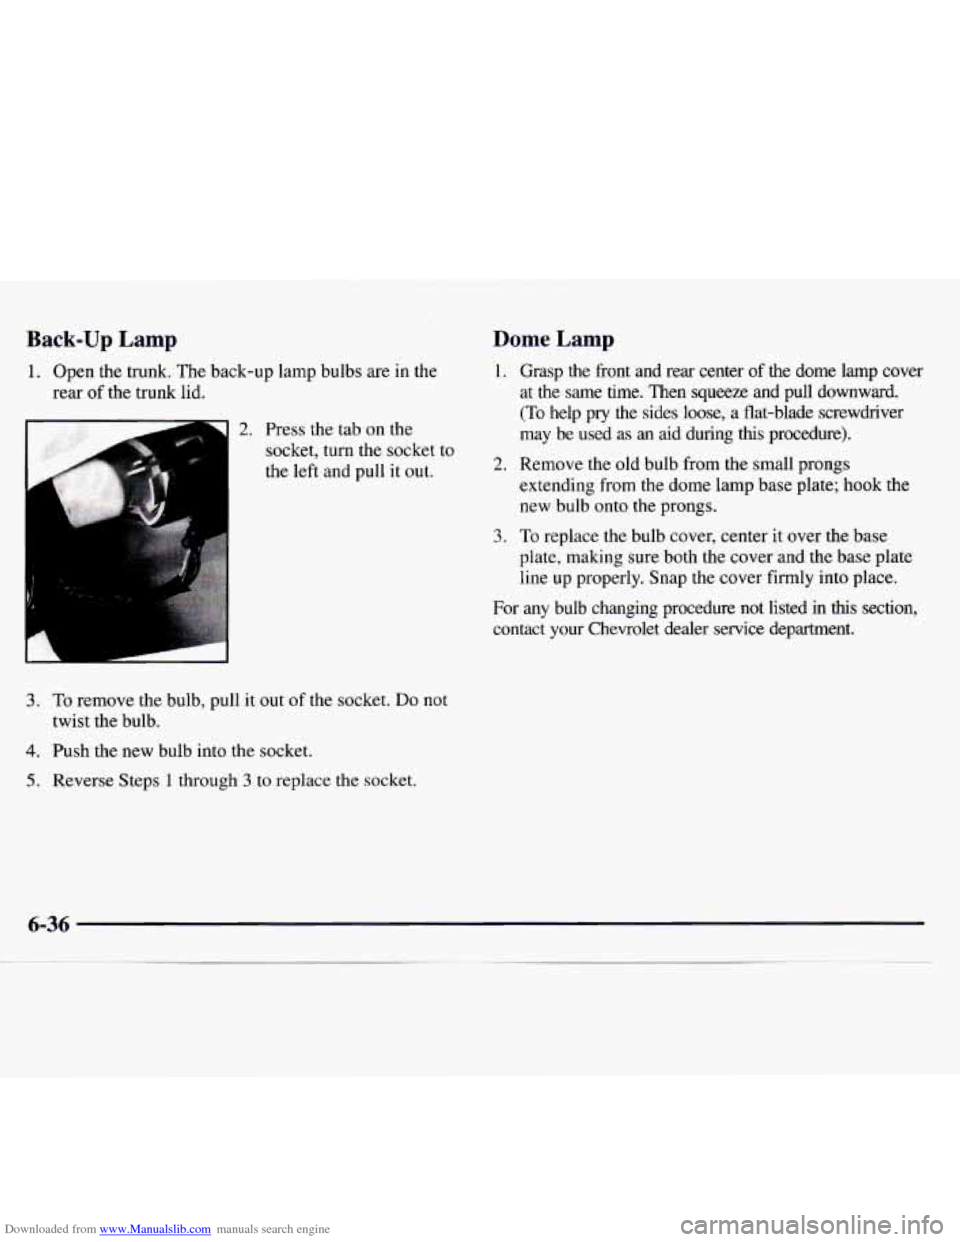
1. Open the trunk. The back-up lamp bulbs are in the
rear of the trunk lid.
2. Press the tab on the
socket, turn the socket to
the left and pull it out.
3. To remove the bulb, pull it out of the socket. Do not
4. Push the new bulb into the socket.
twist the
bulb.
5. Reverse Steps 1 through 3 to replace the socket.
Dome Lamp
1. Grasp the front and rear center of the dome lamp cover
at the same time. Then squeeze and pull downward.
(To help pry the sides loose, a flat-blade screwdriver
may be used as
an aid during hs procedure).
I. Remove the old bulb from the small prongs
extending
from the dome lamp base plate; hook the
new bulb onto the prongs.
3. To replace the bulb cover, center it over the base
plate, making sure both the cover and the base plate
line up properly. Snap the cover firmly into place.
For any bulb changing procedure not listed in
this section,
contact your Chevrolet dealer service department.
Page 252 of 358

Downloaded from www.Manualslib.com manuals search engine Windshield Wiper Blade Replacement
Replacement blades for your vehicle are 22 inches
(559 mm) in length.
1. Turn the wipers on to the lowest intermittent setting.
2. Turn off the ignition while the wipers are at the
outer positions
of the wiper pattern. The blades are
more accessible for removal/replacement while in
this position.
3. Pull the windshield wiper arm away from
the windshield.
4. While holding the wiper arm away from the glass,
push the release clip from under the blade
connecting point and pull the blade assembly down
towards the glass to remove
it from the wiper arm.
5. Push the new wiper blade securely on the wiper arm
until you hear the release clip “click” into place.
For wiper blade replacement length and type, also see
“Capacities and Specifications”
in the Index.
Tires
Your new Chevrolet comes with high-quality tires made
by a leading tire manufacturer. If you ever have
questions about your tire warranty and where to obtain
service, see your Chevrolet Warranty booklet for details.
A CAU I I
Poorly maintained and improperly used tires
are dangerous.
0 Overloading your tires can cause overheating
as a result of too much friction. You could
have an airout and a serious accident. See
“Loading Your Vehicle” in the Index.
CAUTION: (Continued)
Page 254 of 358
Downloaded from www.Manualslib.com manuals search engine When to Check
Check your tires once a month or more.
Don’t forget your compact spare tire. It should be at
60 psi (420 kPa).
How to Check
Use a good quality pocket-type gage to check tire
pressure. You can’t tell
if your tires are properly inflated
simply by looking at them. Radial tires may look
properly inflated even when they’re underinflated.
Be sure to put
the valve caps back on the valve stems.
They help prevent leaks by keeping out dirt and moisture.
Tire Inspection and Rotation
Tires should be rotated every 6,000 to 8,000 miles
(10 OOO to 13 000 km). Any time you notice unusual wear,
rotate your tires as soon as
possible and check wheel
alignment.
Also check for damaged tires or wheels. See
“When It’s Time for New Tires” and “Wheel
Replacement” later in
this section for more information. The
purpose
of regular rotation is to achieve more
uniform wear
for all tires on the vehicle. The first
rotation
is the most important. See “Scheduled
Maintenance Services’’ in the Index for scheduled
rotation intervals.
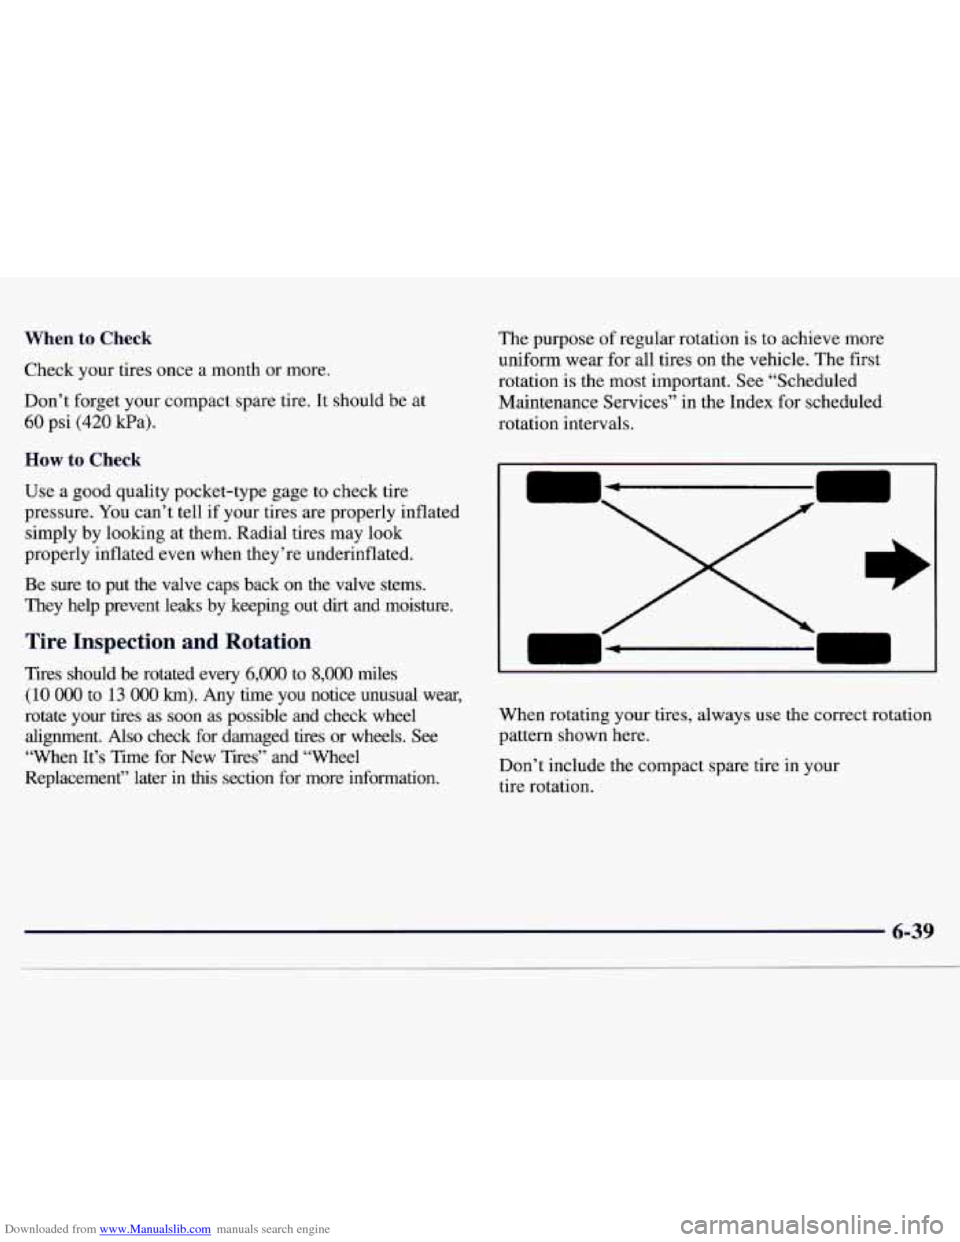
When rotating your
tires, always use the correct rotation
pattern shown here.
Don’t include the compact spare tire in your
tire rotation.