1997 CHEVROLET BLAZER ECO mode
[x] Cancel search: ECO modePage 98 of 402
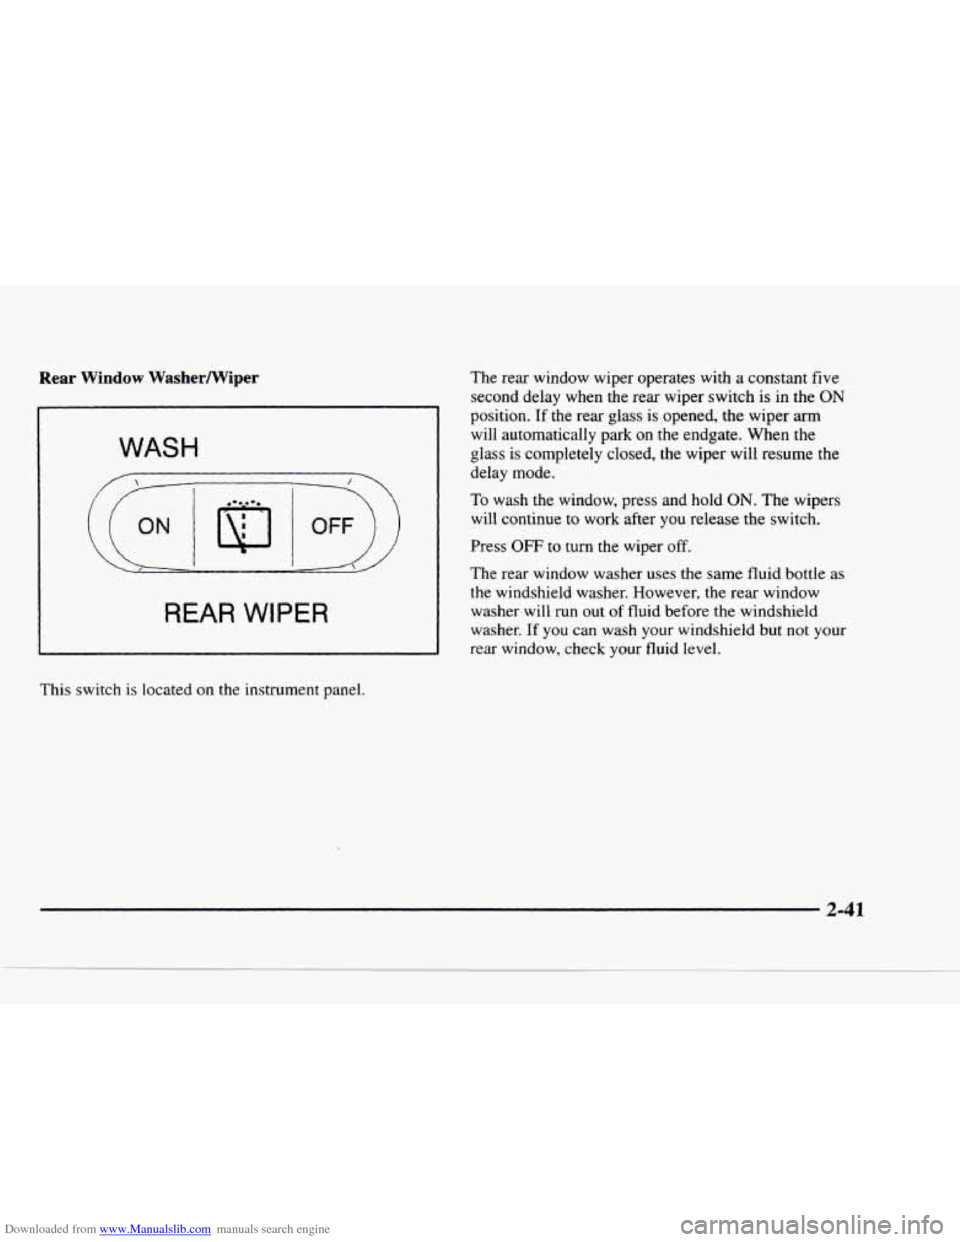
Downloaded from www.Manualslib.com manuals search engine Rear Window WasherIWiper
WASH
REAR WIPER
This switch is located on the instrument panel. The rear
window wiper operates with
a constant five
second delay when the rear wiper switch
is in the ON
position. If the rear glass is opened, the wiper arm
will automatically park
on the endgate. When the
glass
is completely closed, the wiper will resume the
delay mode.
To wash the window, press and hold ON. The wipers
will continue to work after
you release the switch.
Press
OFF to turn the wiper off.
The rear window washer uses the same fluid bottle as
the windshield washer. However, the rear window
washer will run out
of fluid before the windshield
washer. If you can wash your windshield but
not your
rear window, check your fluid level.
2-41
Page 111 of 402
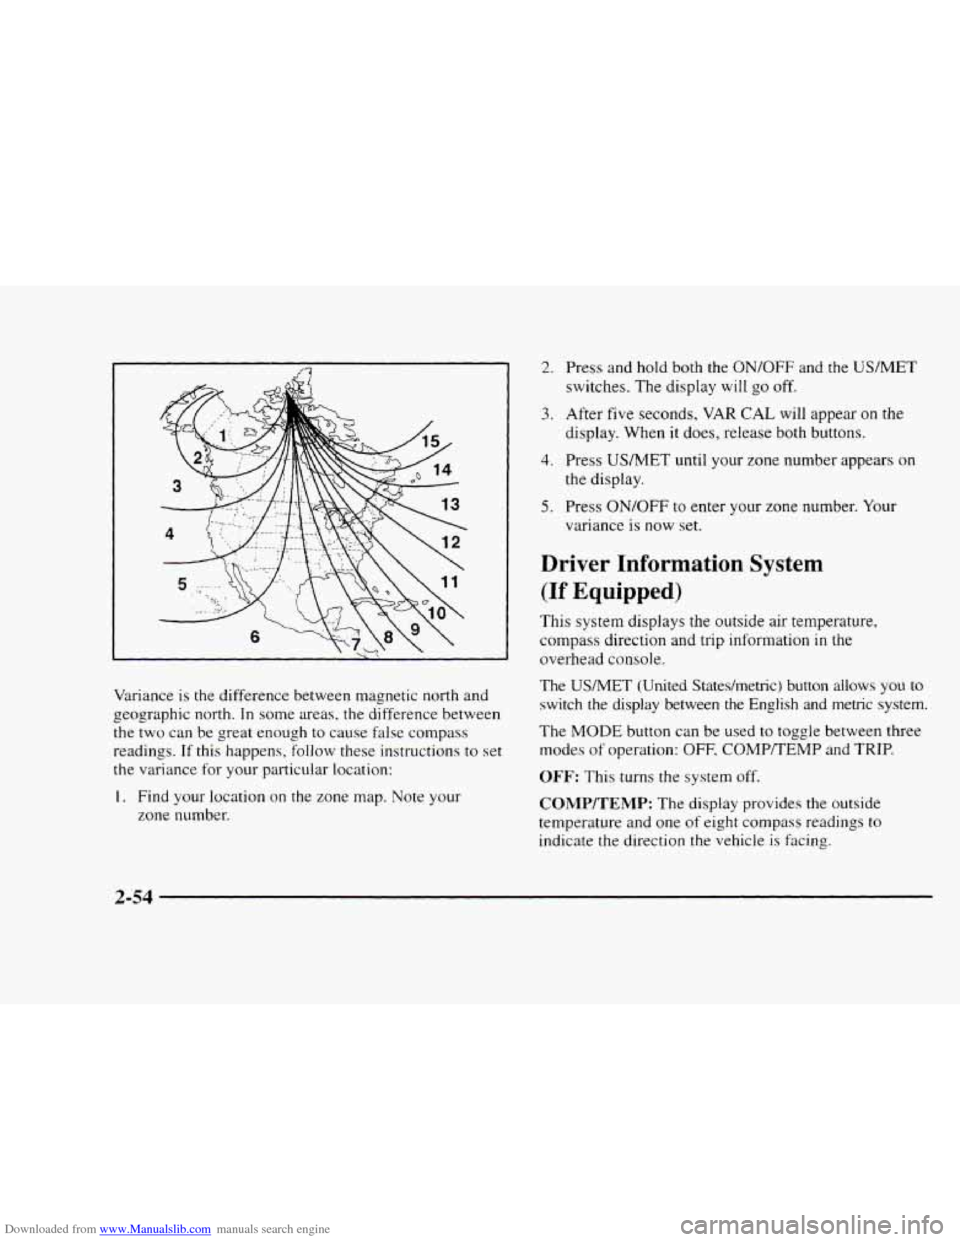
Downloaded from www.Manualslib.com manuals search engine Variance is the difference between magnetic north and
geographic north.
In some areas, the difference between
the
two can be great enough to cause false compass
readings. If
this happens, follow these instructions to set
the variance for your particular location:
1. Find your location on the zone map. Note your
zone number.
2. Press and hold both the ON/OFF and the USMET
switches. The display will go off.
3. After five seconds, VAR CAL will appear on the
display. When it does, release both buttons.
4. Press USMET until your zone number appears on
the display.
5. Press ON/OFF to enter your zone number. Your
variance
is now set.
Driver Information System
(If
Equipped)
This system displays the outside air temperature,
compass direction and trip information
in the
overhead console.
The
USMET (United Statedmetric) button allows you to
switch the display between the English and metric system.
The
MODE button can be used to toggle between three
modes of operation:
OFF? COMPEEMP and TRIP.
OFF: This turns the system off.
COMP/TEMP: The display provides the outside
temperature and one
of eight compass readings to
indicate the direction the vehicle is facing.
2-54
Page 112 of 402
Downloaded from www.Manualslib.com manuals search engine The compass is self-calibrating, so it does not need
to be manually set. However, if C (Calibration) is
displayed, the compass will need to be calibrated.
You may also place the compass in a noncalibrated
mode by pressing and holding the MODE and USMET
buttons simultaneously while in the COMP/TEMP
mode. After about
10 seconds, the compass will display
C and you can release the buttons. Drive the vehicle
in
a complete 360" circle three times at a speed of less
than
5 mph (8 km/h), and the compass will function
normally. Once the calibration is complete, the display
will return to a compass reading.
Variance is the difference between magnetic north and
geographic north.
In some areas, the difference between
the two can be great enough to cause false compass
readings.
If this happens, follow these instructions to
set the variance for your particular location:
1.
2.
3.
4.
Find your location on the zone map earlier in this
section. Note your zone number.
Press and hold both the
MODE and the US/MET
buttons
in the COMPREMP mode.
After five seconds, the compass will acknowledge
the variation mode by displaying the current zone
number. When
it does, release both buttons.
Press USMET until your zone number appears
on the display.
5. Press MODE to enter your zone number. Your
variance is now set and the display
will return to
the COMP/TEMP mode.
TRIP: Once in the TRIP mode, pressing the
MODE button will step
you through the following
TRIP functions:
AVG ECON: The average fuel economy since the
INST ECON: Instantaneous fuel economy for the
last
reset is displayed.
last second of driving is displayed.
RANGE: The display indicates the estimated
distance that can be travelled
with the remaining
fuel in the tank, based on the fuel economy for the
last few hours
of driving.
FUEL USED: The fuel used since the last reset
is displayed.
AVG SPEED: The average speed since the last
To reset the trip computer, press the
MODE and
USMET buttons simultaneously for
at least two
seconds. All functions
will be displayed for half a
second once the system is reset. Reset can only be
performed
in the AVG ECON, FUEL USED and
AVG SPEED modes. All three modes are reset
simultaneously. reset
is displayed.
2-55
Page 122 of 402
Downloaded from www.Manualslib.com manuals search engine This device complies with Part 15 of the FCC Rules.
Operation
is subject to the following two conditions:
(1) This device may not cause harmful interference, and
(2) This device must accept any interference received,
including interference
that may cause undesired operation.
Programming the Transmitter
Do not use the transmitter with any garage door opener
that does
not have the “stop and reverse’’ feature. This
includes any garage door opener model manufactured
before April
1, 1982.
Be sure that people crnd objects are clear of the garage
door j~ur are progrmnming!
Your vehicle’s engine should be turned off while
programming
the transmitter. Follow these steps to
program up to three channels:
1. If you have not previously programmed a universal
channel. proceed to Step
2. Otherwise, hold down the
two outside buttons on the universal transmitter until
the
red light begins IO !lash rapidly (approximately
20 seconds). Then release the buttons. This procedure
initialiLes
thc memory and erases any previous
settings tor all three channels.
2. Hold the end of the hand-held transmitter against the
bottom surface of the universal transmitter so that
you can still see the red light.
3. Decide which one of the three channels you want to
program. Using both hands, press
the hand-held
transmitter button and
the desired button on the
universal transmitter. Continue
to hold both buttons
through Step
4.
4. Hold down both buttons until you see the red light
on
the universal transmitter flash rapidly. The rapid
flashing, which could take up
to 90 seconds,
indicates that
the universal transmitter has been
programmed. Release both buttons once
the light
starts to flash rapidly.
11 you have trouble programming the universal
transmitter, make sure that you have followed
the
directions exactly as described and that the battery in the
hand-held transmitter is
not dead. If you still cannot
program
it, rotate the hand-held transmitter end over end
and try again. The universal transmitter may not work
with older garage door openers that
do not meet current
Federal Consumer Safety Standards. If you cannot
program the transmitter after repeated attempLs, consult
your
GM dealer.
Be sure to keep the original hand-held transmitter
in case
you need to erase and reprogram
the universal transmitter.
2-65
Page 153 of 402
Downloaded from www.Manualslib.com manuals search engine PUSHBUTTONS: The six numbered pushbuttons let
you return
to your favorite stations. You can set up to
18
1.
? -.
3.
4.
5.
6.
stations (six AM. six FM 1 and six FM2). Just:
Turn the radio on.
Press
AM-FM to select the band.
Tune
in the desired station.
Press
AUTO TONE to select the setting yo^^ prefer.
Press and
hold one of the four pushbuttons. The
sound
will mute. When it returns. release the button
Whenever you press that numbered button. the
station
you set will return and the tone you selected
will be automatically selected for that button.
Repeat
the steps for each pushbutton.
P.SCAN: The preset scan button lets you scan through
your favorite stations stored on your pushbuttons. Select
either the
AM. FM 1 or FM2 mode and then press
P.SCAN. It will scan through each station stored on your
pushbuttons and stop for
a few seconds before
continuing to scan through
all of the pushbuttons. Press
P.SCAN again or one of the pushbuttons to stop
scanning to listen
to ;1 specific stored station. P.SCAN
will light up on the display while in this mode. If one of
the stations stored on a pushbutton is too weak
for the
location you are in, the radio will skip the preset station
and the radio display
will show the channel number
(P1 through P6) for several seconds before advancing to
the next preset station.
3-14
Page 154 of 402
Downloaded from www.Manualslib.com manuals search engine Setting the Tone Adjusting the Speakers
BASS: Press lightly on this knob to release it froln its
stored position. Turn the
knob clockwise to increase
bass and counterclockwise
to decrease bass. When the
BASS control is rotated, the AUTO TONE setting will
change to MAN.
TREB: Press lightly on this knob to release it from its
stored position. Turn the knob clockwise
to increase
treble and counterclockwise
to decrease treble. When
the TREB control
is rotated, the AUTO TONE setting
will change to
MAN. If a station is weak or noisy. you
may want to decrease the treble.
Push these knobs back into their stored positions when
you’re
not using them.
AUTO TONE: Press this button to select among the
five preset equalization settings and tailor the sound
to
the music or voice being heard. Each time you press the
button, the selection will switch
to one of the preset
settings
of CLASSIC, NEWS. ROCK. POP or JAZZ.
The display will show which mode
the receiver is in. To
return to the manual mode, press and release this button
until MAN appears on the display. This will return the
tone adjustment
to the BASS and TREB controls. If a
BASS or TREB control
is rotated, the AUTO TONE
setting will change to MAN.
BAL: Press lightly on this knob to release it from its
stored position. Turn the control clockwise to adjust
sound
to the right speakers and counterclockwise to
adjust sound to the left speakers. The middle position
balances the sound between the speakers.
FADE: Press lightly on this knob to release it from its
stored position. Turn the control clockwise to adjust the
sound to the front and counterclockwise
for the rear
speakers. The middle position balances the sound
between the speakers.
Push these knobs back
into their stored positions when
you’re not using
them.
Playing a Compact Disc
PWR: Press this knob to turn the system on.
(Please note that you can also turn the system on when
you insert
a compact disc into the player with the
ignition
on.)
Insert a disc partway into the slot. label side LIP. The
player
will pull it in. Wait a few seconds and the disc
should play. CD and
a CD symbol will also appear on
the display. Anytime you are playing a CD. the letters
CD will be next
to the CD symbol.
Page 155 of 402
Downloaded from www.Manualslib.com manuals search engine REV (43: Press and ho16 REV to return rapidly to a
favorite passage. YCXI will hear the disc selection pIay at
high speed while you press the REV button. This allows
you to listen and find out when the disc is at the desired
selection. Release REV to resum playing.
FWD (6): Press and hold this butron to advance rapidly
within a track. You will hear the disc selection play at
high speed while YCNI press the FWD button. This allows
you to listen and find out when the disc is at the desired
selection. Release FWD to resume playing.
AM-FM: While in the CD mode. press this burton to
stop playing the CD and play the radio, The CD symbol
will still display but the word CD will be replaced with
either AM. FM I or FM2. (If the radio is turned off, the
disc stays in the player and will res~~rne playing at the
point where it stopped.)
KECALI,: Press this button to see what track is playing.
Press it again within five seconds to se.e how long the
CD has been playing that track. Elapsed titne is
displayed in minutes and tenths of a second. The track
number will also appear when ;I new track begins to
play. Press RECALL again to return to the time display.
3-16
Page 287 of 402
Downloaded from www.Manualslib.com manuals search engine Brake Pedal Travel
See your dealer if the brake pedal does not return to
normal height, or
if there is a rapid increase in pedal
travel. This could be
a sign of brake trouble.
Brake Adjustment
Every time you make a brake stop, your disc brakes
adjust for wear.
If your brake pedal goes down farther than normal. your
rear drum brakes may need adjustment. Adjust them by
backing up and firmly applying the brakes a few times.
Replacing Brake System Parts
The braking system on a modern vehicle is complex. Its
many parts have
to be of top quality and work well
together if the vehicle is to have really good braking.
Your vehicle was designed and tested with top-quality
GM brake parts. When
you replace parts
of your braking system -- for
example,
when your brake linings wear down and you
have to have new ones put in -- be sure you get new
approved
GM replacement parts. If you don‘t, your
brakes may
no longer work properly. For example, if
someone puts in brake linings that are wrong for your
vehicle, the balance between your front and rear brakes
can change
-- for the worse. The braking performance
you’ve come
to expect can change in many other ways if
someone puts in the wrong replacement brake parts.
Battery
Every new vehicle has a Delco Freedom@ battery. You
never have to add water to one
of these. When it’s time
for a new battery, we recommend a Delco Freedom
battery. Get one that has the replacement number shown
on the original battery’s label.
6-32