1997 BUICK PARK AVENUE reset
[x] Cancel search: resetPage 171 of 420
PUSHBUTTONS: The six numbered pushbuttons let
you return to your favorite stations. You can set up to
18 stations (six AM, six FMl and six FM2). Just:
1. Turn the radio on.
2. Press AM-FM to select the band.
3. Tune in the desired station.
4. Press TONE to select the setting you prefer.
5. Press and hold one of the six numbered buttons. The
sound will mute. When it returns, release the button.
Whenever you press that numbered button, the
station you set will return and the tone you selected
will be automatically selected for that button.
6. Repeat the steps for each pushbutton.
P SCAN: Press this button to listen to each of your
preset stations for a few seconds. The radio will go to
the first preset station, stop for a few seconds, then go
on to the next preset station. Press
P SCAN again to stop
scanning. If a preset station has weak reception, the
radio will not stop at the preset station.
AUTO SET Press this button and the system will seek
and set the
12 strongest FM or the 6 strongest AM
stations on your preset buttons (depending on which band (AM or
FM) you are listening to). AUTO SET will
flash while seeking and will remain on until this
function
is complete. To return to the stations you
manually set, press AUTO SET again.
Setting the Tone
BASS:
Press this knob lightly so it extends. Turn the
knob to increase or decrease bass.
TREB: Press this knob lightly so it extends. Turn the
knob to increase or decrease treble. If a station is weak
or noisy, you may want to decrease the treble.
Push these knobs back into their stored positions when
you're not using them.
TONE: This feature allows you to choose preset bass
and treble equalization settings designed for classical,
pop, rock, jazz, talk and country/western stations.
CLASS will appear on the display when you first press
TONE. Each time you press it, another setting will
appear on the display. Press it again after
C & W
appears and MANUAL will appear. Tone control will
return to the BASS and TREB knobs. Also, if you use
the BASS and TREB knobs, control will return to them
and MANUAL will appear.
3-19
ProCarManuals.com
Page 174 of 420
!
RECALL: Press this button briefly to recall the station
being played or to display the clock. To change what
is
normally shown on the display (station or time), press
the RECALL button until you
see the display you want,
then hold the RECALL button until the display flashes.
If you press the button when the ignition is off, the clock
will show for
a few seconds.
Finding a Station
AM-FM:
Press this button to switch between AM, FM1
and FM2. The display shows your selection.
TUNE: Press the up or down arrow to choose
radio stations.
SEEK: Press the up or down arrow to go to the next
higher or lower station and stay there. The sound will
mute while seeking.
SCAN: Press one of the SEEK arrows for two seconds
and SCAN will appear
on the display. Use SCAN to
listen to stations for a few seconds. The radio will go to
a station, stop for a few seconds, then go on to the next
station. Press one of the
SEEK arrows again to stop
scanning. The sound will mute while scanning.
PUSHBUTTONS: The six numbered pushbuttons let
you return to your favorite stations. You can set up to
18 stations (six AM, six FMl and six FM2). Just:
1. Turn the radio on.
2. Press AM-FM to select the band.
3. Tune in the desired station.
4. Press TONE to select the setting you prefer.
5. Press and hold one of the six numbered buttons. The
sound will mute. When it returns, release the button.
Whenever you press that numbered button, the
station you set will return and the tone you selected
will be automatically selected for that button.
6. Repeat the steps for each pushbutton.
P SCAN: Press this button to listen to each of your
preset stations for a few seconds. The radio will
go to
the first preset station, stop for a few seconds, then go
on to the next preset station. Press
P SCAN again to
stop scanning.
If a preset station has weak reception,
the radio will not stop at the preset station.
3-22
ProCarManuals.com
Page 175 of 420
AUTO SET Press this button and the system will seek
and set the 12 strongest FM or the
6 strongest AM
stations on your preset buttons. AUTO SET will flash
while seeking and will remain on until this function is
complete. To return to the stations you manually set,
press AUTO SET again.
Setting the Tone
BASS: Press this knob lightly so it extends. Turn the
knob to increase or decrease bass.
TREB: Press this knob lightly so it extends. Turn the
knob to increase or decrease treble. If a station is weak
or noisy, you may want to decrease the treble.
Push these knobs back into their stored positions when
you’re not using them.
TONE: This feature allows you to choose preset bass
and treble equalization settings designed for classical,
pop, rock, jazz, talk and country/western stations.
CLASS will appear on the display when you first press
TONE. Each time you press it, another setting will
appear on the display. Press it again after
C & W
appears and MANUAL will appear. Tone control will
return to the BASS and TREB knobs. Also, if you use
the BASS and TREB knobs, control will return to them and MANUAL will appear.
Adjusting the Speakers
BAL:
Press this knob lightly so it extends. Turn the knob
to move the sound
to the left or right speakers. The middle
position balances the sound between
the speakers.
FADE: Press this knob lightly so it extends. Turn the
knob to move the sound to the front or rear speakers.
The middle position balances the sound between
the speakers.
Push these knobs back into their stored positions when
you’re not using them.
Playing a Cassette Tape
The longer side with the tape visible should face to the
right. If the ignition and the radio are on, the tape can be
inserted and will begin playing. If you hear nothing or
hear a garbled sound the tape may not be in squarely.
Press EJECT to remove the tape and start over.
While the tape is playing, use the VOLUME, FADE,
BAL, BASS and TREB controls just as you do for the
radio. Other controls may have different functions when
a tape is inserted. The display will show an arrow to
show which side of the tape is playing.
If you want to insert a tape when the ignition or radio
is
off, first press EJECT or RECALL.
3-23
ProCarManuals.com
Page 177 of 420
CLN: If this message appears on the display, the
cassette tape player needs to be cleaned. It will still play
tapes, but you should clean it as soon as possible to
prevent damage to the tapes and player. See “Care of
Your Cassette Tape Player” in the Index. After you clean
the player, press and hold EJECT for five seconds to
reset the CLN indicator. The radio will display
--- to
show the indicator was reset.
Your cassette tape player automatically reduces
background noise from tapes encoded with Dolby NR.
You may turn Dolby off by pressing the number
six preset.
Dolby Noise Reduction is manufactured under a license
from Dolby Laboratories Licensing Corporation. Dolby
and the double-D symbol are trademarks of Dolby
Laboratories Licensing Corporation.
Playing a Compact Disc
Insert a disc partway into the slot, label side up. The
player will pull it in. The disc should begin playing.
If you want to insert a CD while the ignition or the radio
is
off, first press EJECT or RECALL. If
you’re driving on a very rough road or if it’s very hot,
the disc may not play and an error code may appear on
the display. When things get back to normal, the disc should play. If the disc comes out, it could be that:
E20: The disc is upside down.
E20: It is dirty, scratched or wet.
E20: There’s too much moisture in the air.
(Wait about an hour and try again.)
If any error occurs repeatedly or if an error can’t be
corrected, please contact your dealer. If your radio
displays an error number, write it down and provide it to
your dealer when reporting the problem.
PREV (1): Press this button to go to the start of the
current track, if more than eight seconds have played. If
you hold the button or press it more than once, the
player will continue moving back through the disc. The
sound will mute while seeking.
NEXT (2): Press this button to go to the next track. If
you hold the button or press it more than once, the
player will continue moving forward through the disc.
The sound will mute while seeking.
ProCarManuals.com
Page 184 of 420
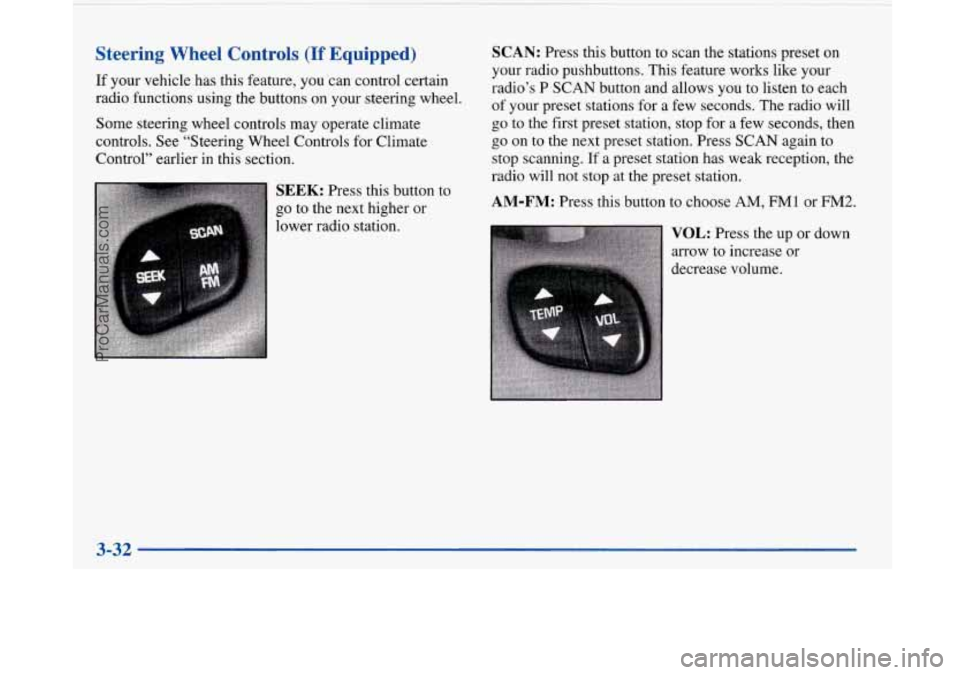
Steering Wheel Controls (If Equipped)
If your vehicle has this feature, you ‘can control certain
radio functions using the buttons on your steering wheel.
Some steering wheel controls may operate climate
controls. See “Steering Wheel Controls for Climate
Control” earlier in this section.
SEEK: Press this button to
go to the next higher or
lower radio station.
SCAN: Press this button to scan the stations preset on
your radio pushbuttons. This feature works like your
radio’s P SCAN button and allows you to listen to each
of your preset stations for a few seconds. The radio will
go to the first preset station, stop for a few seconds, then
go on
to the next preset station. Press SCAN again to
stop scanning.
If a preset station has weak reception, the
radio will not stop at the preset station.
AM-FM: Press this button to choose AM, FMl or FM2.
VOL: Press the up or down
arrow to increase or
decrease volume.
3-32
ProCarManuals.com
Page 186 of 420

Care of Your Cassette Tape Player
A tape player that is not cleaned regularly can cause
reduced sound quality, ruined cassettes or a damaged
mechanism. Cassette tapes should be stored in their
cases away from contaminants, direct sunlight and
extreme heat. If they aren’t, they may not operate
properly or may cause failure of the tape player.
Your tape player should be cleaned regul-arly after every
50 hours of use. Your radio may display CLN to indicate
that you have used your tape player for
50 hours without
resetting the tape clean timer. If this message appears
on the display, your cassette tape player needs to be
cleaned. It will still play tapes, but you should clean it as
soon as possible
to prevent damage to your tapes and
player. If you notice a reduction in sound quality, try a
known good cassette to see if it is the tape or the tape
player at fault. If this other cassette has no improvement
in sound quality, clean the tape player. Cleaning
may be done with a scrubbing action,
non-abrasive cleaning cassette with pads which scrub
the tape head as the hubs of the cleaner cassette turn.
A scrubbing action cleaning cassette is available through
your Buick dealership.
You may also choose a non-scrubbing action, wet-type
cleaner which uses a cassette with a fabric belt to clean
the tape head. This type of cleaning cassette may not
clean as thoroughly as the scrubbing type cleaner.
After you clean the player, press and hold EJECT for
five seconds to reset the CLN indicator. The radio will
display
--- to show the indicator was reset.
Cassettes
are subject to wear and the sound quality
may degrade over time. Always make sure the cassette
tape is in good condition before you have your tape
player serviced.
3-34
ProCarManuals.com
Page 280 of 420
Engine Oil Additives
Don’t add anything to your oil. Your Buick dealer is
ready
to advise if you think something should be added.
When to Change Engine Oil
If any one of these is true for you, use the short tripkity
maintenance schedule:
e
e
0
0
0
Most trips are less than 5 to 10 miles (8 to 16 km).
This is particularly important when outside
temperatures are below freezing.
Most trips include extensive idling (such as frequent
driving in stop-and-go traffic).
Most trips are through dusty areas.
You frequently tow a trailer or use a carrier on top of
your vehicle.
The vehicle
is used for delivery service, police, taxi
or other commercial application. Driving under these conditions causes engine oil to break
down sooner.
If any one of these is true for your vehicle,
then you need to change your
oil and filter every
3,000 miles (5 000 km) or 3 months -- whichever occurs
first. (See “Change Engine Oil Soon”
in the Index.)
If none of them is true, use the long triphighway
maintenance schedule. Change the oil and filter every
7,500 miles (12 500 km) or 12 months -- whichever
occurs first. Driving a vehicle with a fully warmed
engine under highway conditions causes engine oil to
break down slower.
If the optional CHANGE ENGINE
OIL SOON message
comes on, you will need to change your oil sooner than
either mileage specified. Depending upon driving habits,
the CHANGE ENGINE OIL
SOON message may come
on as early as
2,000 miles or less from the last time the
oil life index was reset. (See “Oil Life Index” in the
Index.)
Always reset the oil life monitor after every
oil change.
6-16
ProCarManuals.com
Page 292 of 420
Radiator Pressure Cap
NOTICE:
Your radiator pressure cap is a 15 psi (105 kPa)
pressure-type cap and must be tightly installed to prevent coolant loss and possible engine damage
from overheating. Be sure the arrows on the cap
line up with the overflow tube on the radiator
filler neck.
When you replace your radiator pressure cap, an AC@
cap is recommended.
Thermostat
Engine coolant temperature is controlled by a thermostat
in the engine coolant system. The thermostat stops the
flow
of coolant through the radiator until the coolant
reaches a preset temperature.
When you replace your thermostat, an
AC@ thermostat
is recommended.
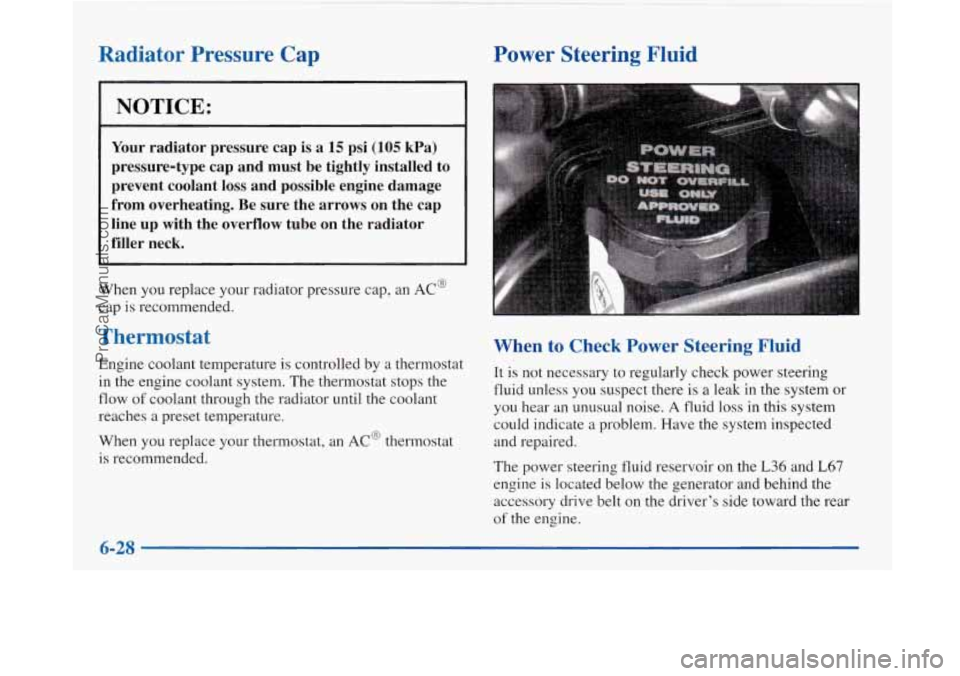
Power Steering Fluid
When to Check Power Steering Fluid
It is not necessary to regularly check power steering
fluid unless you suspect there
is a leak in the system or
you hear an unusual noise.
A fluid loss in this system
could indicate a problem. Have the system inspected
and repaired.
The power steering fluid reservoir on the L36 and L67
engine is located below the generator and behind the
accessory drive belt on the driver’s side toward the rear
of the engine.
6-28
ProCarManuals.com