Page 6 of 406

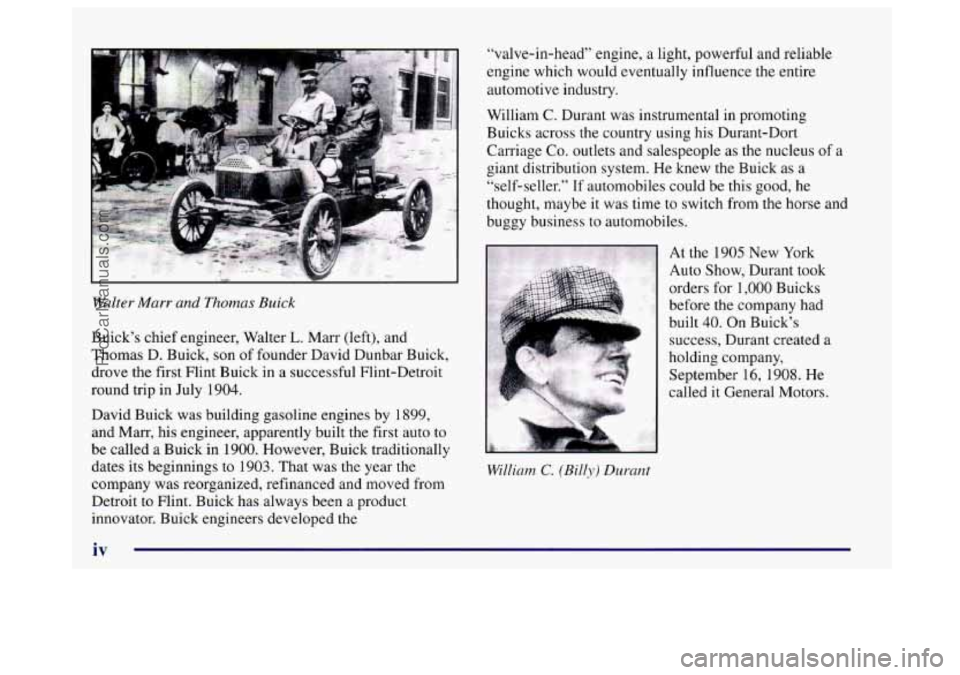
Walter Marr and Thomas Buick
Buick’s chief engineer, Walter L. Marr (left), and
Thomas D. Buick, son of founder David Dunbar Buick,
drove the first Flint Buick in a successful Flint-Detroit
round trip in July 1904.
David Buick was building gasoline engines by 1899,
and Marr, his engineer, apparently built the first auto
to
be called a Buick in 1900. However, Buick traditionally
dates its beginnings to
1903. That was the year the
company was reorganized, refinanced and moved from
Detroit to Flint. Buick has always been a product
innovator. Buick engineers developed the “valve-in-head” engine,
a light, powerful and reliable
engine which would eventually influence the entire
automotive industry.
William
C. Durant was instrumental in promoting
Buicks across the country using his Durant-Dort
Carriage
Co. outlets and salespeople as the nucleus of a
giant distribution system. He knew the Buick as a
“self-seller.” If automobiles could be this good, he
thought, maybe
it was time to switch from the horse and
buggy business
to automobiles.
William C. (Billy) Durant
At the 1905 New York
Auto Show, Durant
took
orders for 1,000 Buicks
before the company had
built
40. On Buick’s
success, Durant created a
holding company,
September
16, 1908. He
called it General Motors.
iv
ProCarManuals.com
Page 12 of 406
Vehicle Symbols
These are some of the symbols you may find on your vehicle.
For example,
these symbols
are used on an
original battery:
POSSIBLE A
CAUTION
INJURY
PROTECT EYES
BY
SHIELDING
CAUSTIC
BATTERY
CAUSE
BURNS
ACID COULD
&
AVOID
SPARKS
OR
FLAMES
SPARK
OR ,\I/,
COULD FLAME
EXPLODE BATTERY
. K
These symbols
are important
for you and
your passengers
whenever your
vehicle is
driven:
DOOR LOCK
UNLOCK
FASTEN SEAT
BELTS
These symbols have to do with
your lamps:
SIGNALS e
TURN
WARNING
A
HAZARD
FLASHER
RUNNING
' 0
DAYTIME rn
LAMPS .*
FOG LAMPS $0
These symbols
are on some
of
your controls:
WINDSHIELD
WIPER
WINDSHIELD DEFROSTER
WINDOW
DEFOGGER
These symbols are used
on
warning and
indicator lights:
ENGINE t
COOLANT - tm
TEMP -
CHARGING I-1
BATTERY
SYSTEM
BRAKE
(0)
COOLANT a
ENGINE OIL e,
PRESSURE
ANTI-LOCK
(@)
BRAKES
1
Here are some
other symbols
you may see:
FUSE
t
LIGHTER
HORN
)cr
SPEAKER
b
FUEL p3
ProCarManuals.com
Page 19 of 406

Head Restraints
Slide the head restraint up or down so that the top of the
restraint is closest to
the top of your ears. This position
reduces the chance
of a neck injury in a crash.
Safety Belts: They’re for Everyone
This part of the manual tells you how to use safety belts
properly. It also tells
you some things you should not do
with safety belts.
And
it explains the air bag system.
U I
Don’t let anyone ride where he or she can’t wear
a safety belt properly.
If you are in a crash and
you’re not wearing
a safety belt, your injuries
can be much worse. You can hit things inside the
vehicle or be ejected from it. You can be seriously
injured or killed. In the same crash, you might
not be
if you are buckled up. Always fasten your
safety belt, and check that your passengers’ belts
are fastened properly too.
‘
/d CAUTION:
It is extremely dangerous to ride in a cargo area,
inside or outside
of a vehicle. In a collision,
people riding in these areas are more likely
to be
seriously injured or killed.
Do not allow people to
ride in any area of your vehicle that is not
equipped with seats and safety belts. Be sure
everyone in your vehicle is in
a seat and using a
safety belt properly.
Your vehicle has a light
that comes on as
a reminder
to buckle
up. (See “Safety
Belt Reminder
Light” in
the Index.)
1-5
ProCarManuals.com
Page 25 of 406
Lap-Shoulder Belt
The driver has a lap-shoulder belt. Here’s how to wear
it properly.
1. Close and lock the door.
2. Adjust the seat (to see how, see “Seats’’ in the Index)
so you can sit up straight.
3. Pick up the latch plate and pull the belt across you.
Don’t let it get twisted.
The shoulder belt may lock
if you pull the belt across
you very quickly. If this happens, let the belt
go back
slightly to unlock it. Then pull the belt across you
more slowly.
4. Push the latch plate into the buckle until it clicks.
Pull up on the latch plate to make sure
it is secure.
If the belt isn’t long enough, see “Safety Belt
Extender’’ at the end
of this section.
Make sure
the release button on the buckle is
positioned
so you would be able to unbuckle the
safety belt quickly
if you ever had to.
1-11
ProCarManuals.com
Page 34 of 406
I
Air bags inflate with great force, faster than the
blink of an eye.
If you’re too close to an inflating
air bag, it could seriously injure you. Safety belts
help keep you in position before and during a
crash. Always wear your safety belt, even with air
bags. The driver should
sit as far back as possible
while still maintaining control of the vehicle.
1
An inflating air bag can seriously injure small
children. Always secure children properly in your
vehicle.
To read how, see the part of this manual
called “Children” and the caution label on the
right front passenger’s safety belt.
There is an air bag
readiness light
on the
instrument panel, which
shows the air bag symbol.
The system checks the air bag electrical system for
malfunctions. The light tells you
if there is an electrical
problem. See “Air Bag Readiness Light” in the Index
for more information.
1-20
ProCarManuals.com
Page 41 of 406
1.
2.
A
Pick up the latch plate and pull the belt across you.
Don’t let
it get twisted.
The shoulder belt may lock
if you pull the belt across
you very quickly. If this happens, let the belt go back
slightly to unlock it.
Then pull the belt across you
more slowly.
Push the latch plate into the buckle
until it clicks.
Pull up on the latch plate to make sure
it is secure. When the
shoulder belt is pulled out all the
way, it
will lock. If it does, let it go back all the way and
start again.
If the belt is not long enough, see “Safety
Belt Extender” at the end of this section. Make sure
the release button
on the buckle is positioned so you
would be able to unbuckle the safety belt quickly if
you ever had to.
I
3. To make the lap part tight, pull down on the buckle
e.nd
of the belt as you pull up on the shoulder part.
1-27
ProCarManuals.com
Page 53 of 406
6. Feed a small amount of harness slack back into
the slot.
7. Twist the harness slightly to remove it from the slot.
8. Move the harness up or down to the correct slot. The
correct slot is the one that will be at or just above the
top of the child’s shoulder.
1-39
ProCarManuals.com
Page 54 of 406
9. Twist the harness slightly to route it through the correct slot.
10. Pull on the harness. Make sure it is properly routed
and isn’t twisted or flipped over.
1 1. Repeat Steps 5 through 10 for the other side of the
harness. Be sure both sides are adjusted to the same
height.
seatback. Make sure the harness goes through the
slots
in the pad that match the height adjustment
slots being used.
12. Move the pad back against the child restraint
13. Press the upper edge of the pad against the
fastener strip.
1-40
ProCarManuals.com