Page 335 of 1399
BR1CD−01
BR−2
−
BRAKE TROUBLESHOOTING
984
Author�: Date�:
1996 LAND CRUISER (RM451U)
TROUBLESHOOTING
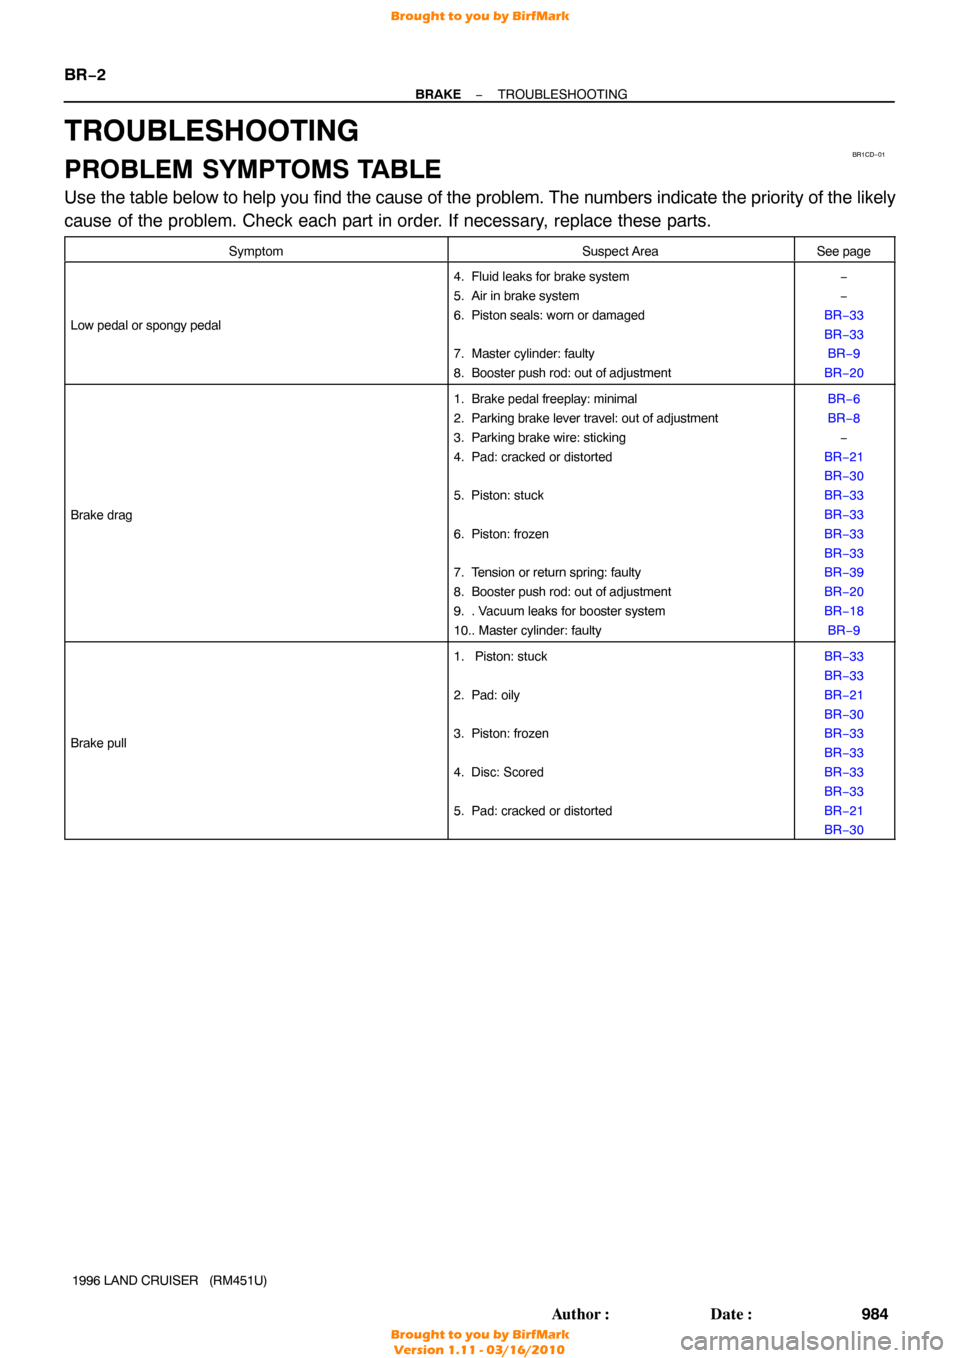
PROBLEM SYMPTOMS TABLE
Use the table below to help you find the cause of the problem. The numbers \
indicate the priority of the likely
cause of the problem. Check each part in order. If necessary, replace these parts.
SymptomSuspect AreaSee page
Low pedal or spongy pedal
4. Fluid leaks for brake system
5. Air in brake system
6. Piston seals: worn or damaged
7. Master cylinder: faulty
8. Booster push rod: out of adjustment−
−
BR−33
BR−33 BR−9
BR−20
Brake drag
1. Brake pedal freeplay: minimal
2. Parking brake lever travel: out of adjustment
3. Parking brake wire: sticking
4. Pad: cracked or distorted
5. Piston: stuck
6. Piston: frozen
7. Tension or return spring: faulty
8. Booster push rod: out of adjustment
9. . Vacuum leaks for booster system
10.. Master cylinder: faultyBR−6
BR−8 −
BR−21
BR−30
BR−33
BR−33
BR−33
BR−33
BR−39
BR−20
BR−18 BR−9
Brake pull
1. Piston: stuck
2. Pad: oily
3. Piston: frozen
4. Disc: Scored
5. Pad: cracked or distortedBR−33
BR−33
BR−21
BR−30
BR−33
BR−33
BR−33
BR−33
BR−21
BR−30
Brought to you by BirfMark
Brought to you by BirfMark
Version 1.11 - 03/16/2010
Page 336 of 1399
−
BRAKE TROUBLESHOOTING
BR−3
985
Author�: Date�:
1996 LAND CRUISER (RM451U)
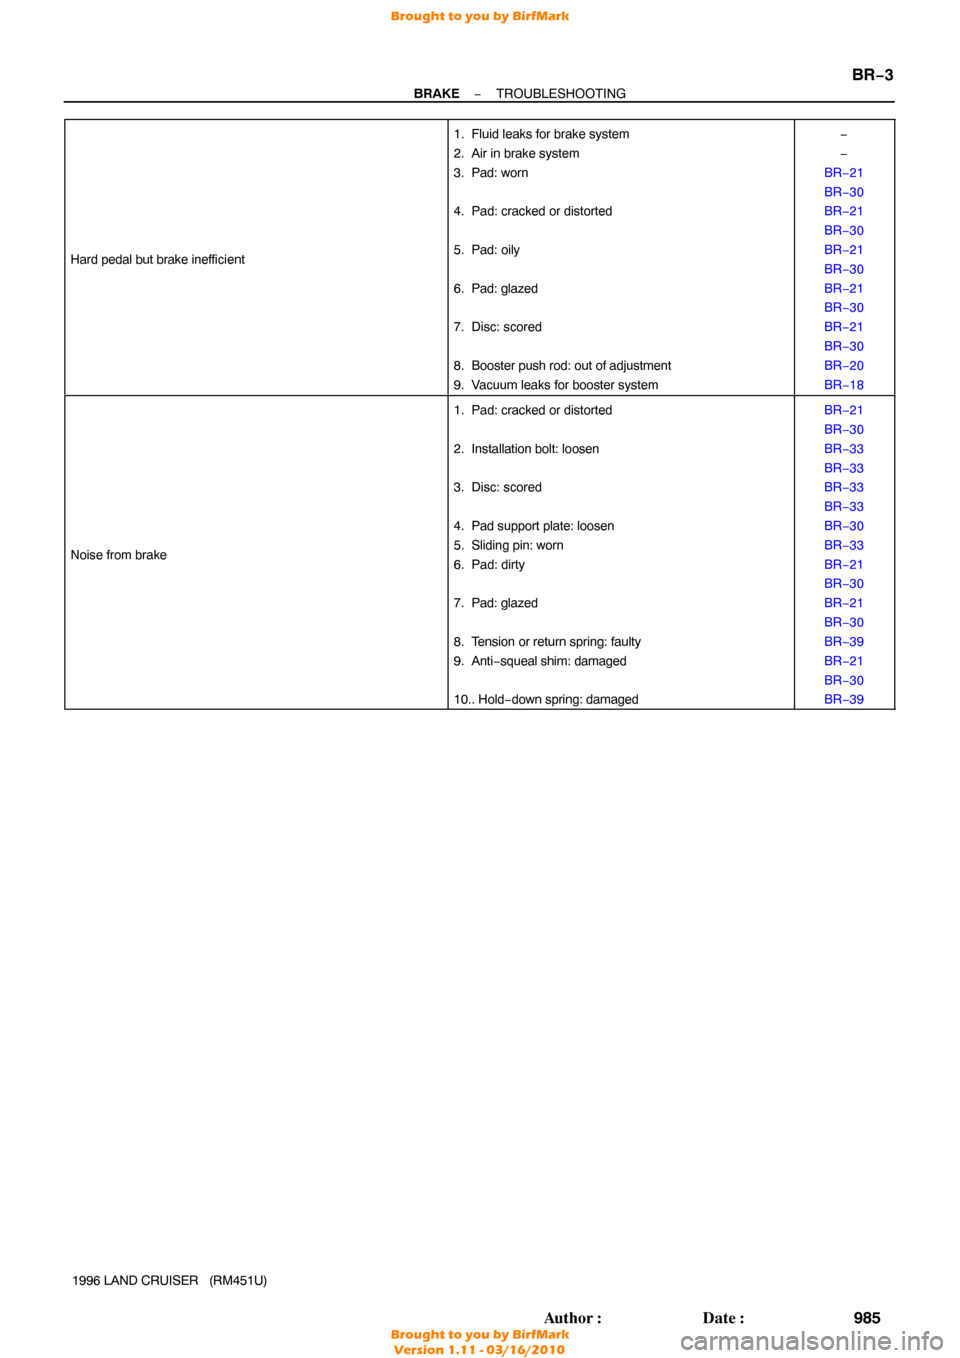
Hard pedal but brake inef
ficient
1. Fluid leaks for brake system
2. Air in brake system
3. Pad: worn
4. Pad: cracked or distorted
5. Pad: oily
6. Pad: glazed
7. Disc: scored
8. Booster push rod: out of adjustment
9. Vacuum leaks for booster system−
−
BR−21
BR−30
BR−21
BR−30
BR−21
BR−30
BR−21
BR−30
BR−21
BR−30
BR−20
BR−18
Noise from brake
1. Pad: cracked or distorted
2. Installation bolt: loosen
3. Disc: scored
4. Pad support plate: loosen
5. Sliding pin: worn
6. Pad: dirty
7. Pad: glazed
8. Tension or return spring: faulty
9. Anti− squeal shim: damaged
10.. Hold− down spring: damagedBR−21
BR−30
BR−33
BR−33
BR−33
BR−33
BR−30
BR−33
BR−21
BR−30
BR−21
BR−30
BR−39
BR−21
BR−30
BR−39
Brought to you by BirfMark
Brought to you by BirfMark
Version 1.11 - 03/16/2010
Page 347 of 1399
BR1CM-01
BR-14
-
BRAKE BRAKE MASTER CYLINDER
1996 LAND CRUISER (RM451U)
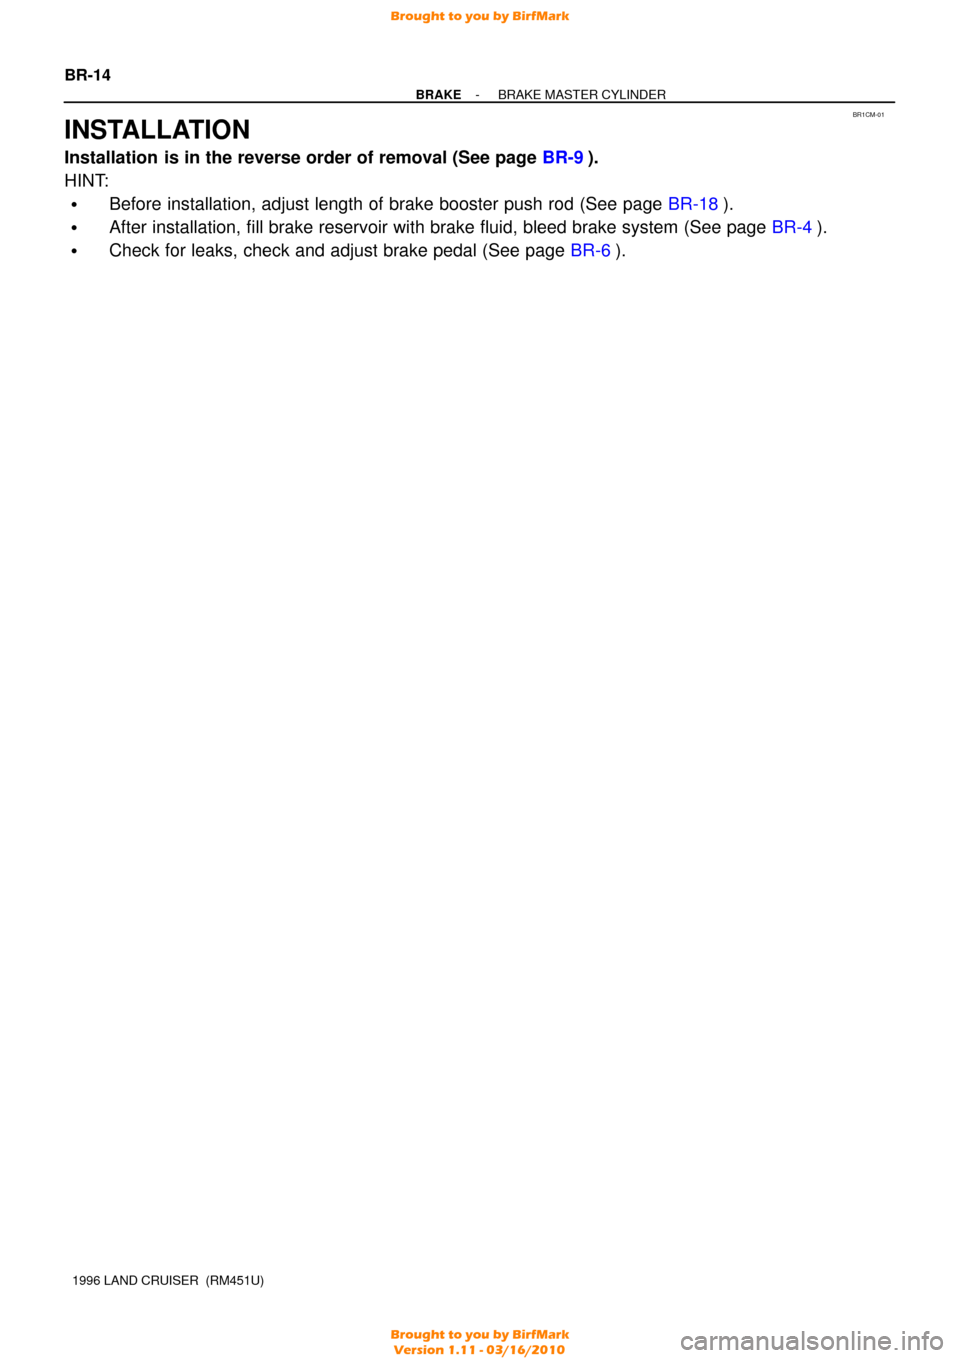
INSTALLATION
Installation is in the reverse order of removal (See page BR-9).
HINT:
�Before installation, adjust length of brake booster push rod (See page \
BR-18).
�After installation, fill brake reservoir with brake fluid, bleed brake s\
ystem (See page BR-4).
�Check for leaks, check and adjust brake pedal (See page BR-6).
Brought to you by BirfMark
Brought to you by BirfMark
Version 1.11 - 03/16/2010
Page 353 of 1399
BR1CQ−01
BR3976
SST
Gasket
R11347
SST
BR−20
−
BRAKE BRAKE BOOSTER ASSEMBLY
1996 LAND CRUISER (RM451U)
INSTALLATION
1. INSTALL BRAKE BOOSTER
(a) Install the booster and a new gasket.
(b) Install the clevis to the operating rod.
(c) Install and torque the booster installation nuts. Torque: 13 N·m (130 kgf·cm, 9 ft·lbf)
(d) Install the clevis pin into the clevis and brake pedal, and
install the clip to the clevis pin.
(e) Install the pedal return spring.
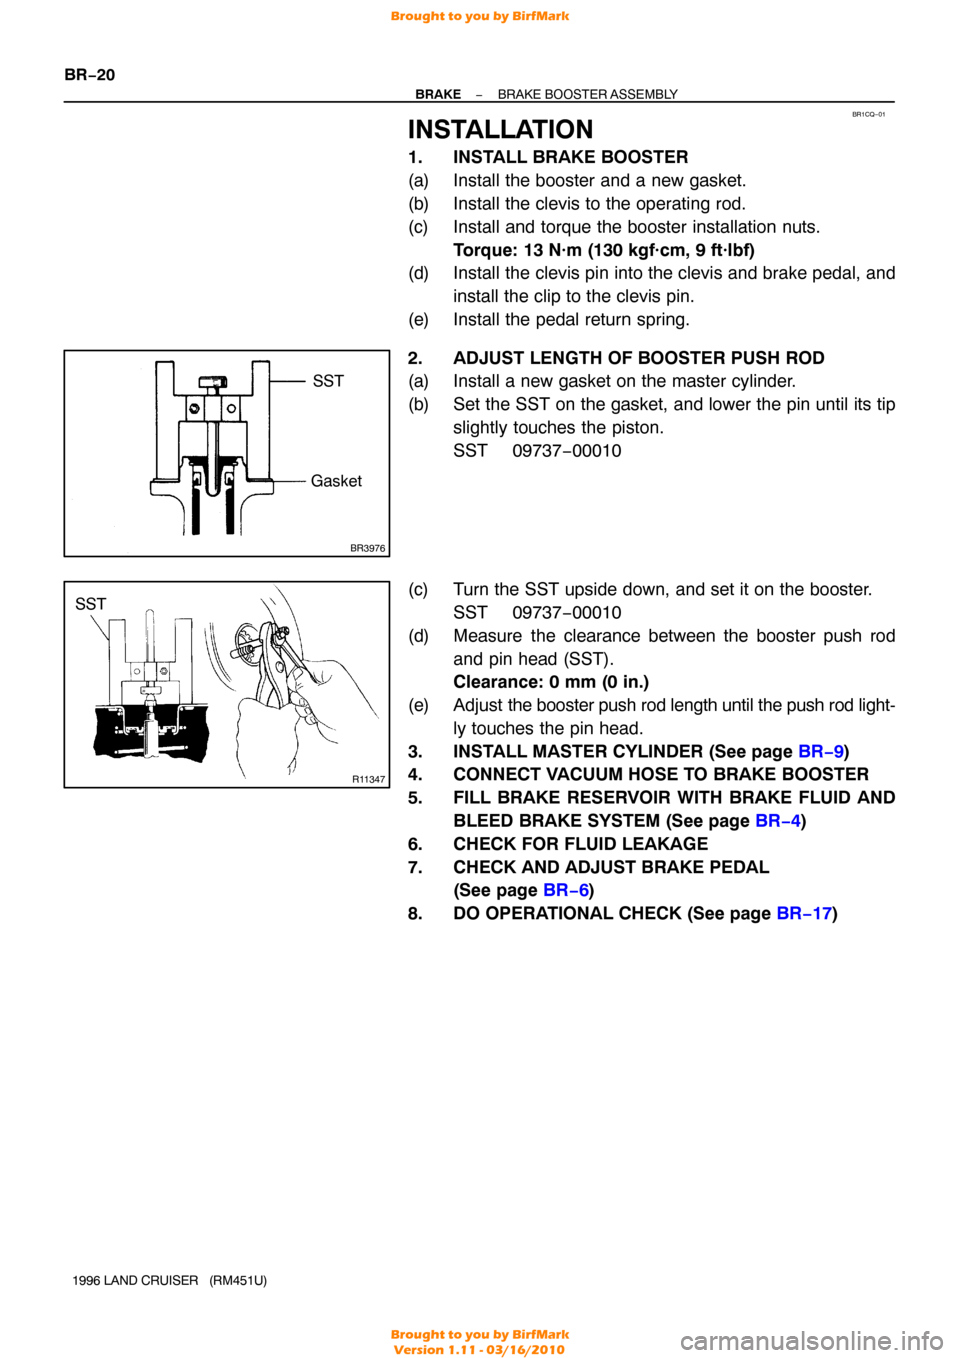
2. ADJUST LENGTH OF BOOSTER PUSH ROD
(a) Install a new gasket on the master cylinder.
(b) Set the SST on the gasket, and lower the pin until its tip slightly touches the piston.
SST 09737−00010
(c) Turn the SST upside down, and set it on the booster. SST 09737−00010
(d) Measure the clearance between the booster push rod and pin head (SST).
Clearance: 0 mm (0 in.)
(e) Adjust the booster push rod length until the push rod light-
ly touches the pin head.
3. INSTALL MASTER CYLINDER (See page BR−9 )
4. CONNECT VACUUM HOSE TO BRAKE BOOSTER
5. FILL BRAKE RESERVOIR WITH BRAKE FLUID AND
BLEED BRAKE SYSTEM (See page BR−4 )
6. CHECK FOR FLUID LEAKAGE
7. CHECK AND ADJUST BRAKE PEDAL (See page BR−6 )
8. DO OPERATIONAL CHECK (See page BR−17 )
Brought to you by BirfMark
Brought to you by BirfMark
Version 1.11 - 03/16/2010
Page 362 of 1399
BR1CY−01
−
BRAKE FRONT BRAKE CALIPER
BR−29
1996 LAND CRUISER (RM451U)
INSTALLATION
Installation is in the reverse order of removal (See page BR−25 ).
HINT:
After installation, fill the brake reservoir with brake fluid, bleed bra\
ke system (see page BR−4) and check
for leaks.
Brought to you by BirfMark
Brought to you by BirfMark
Version 1.11 - 03/16/2010
Page 371 of 1399
BR1D6−01
BR−38
−
BRAKE REAR BRAKE CALIPER
1996 LAND CRUISER (RM451U)
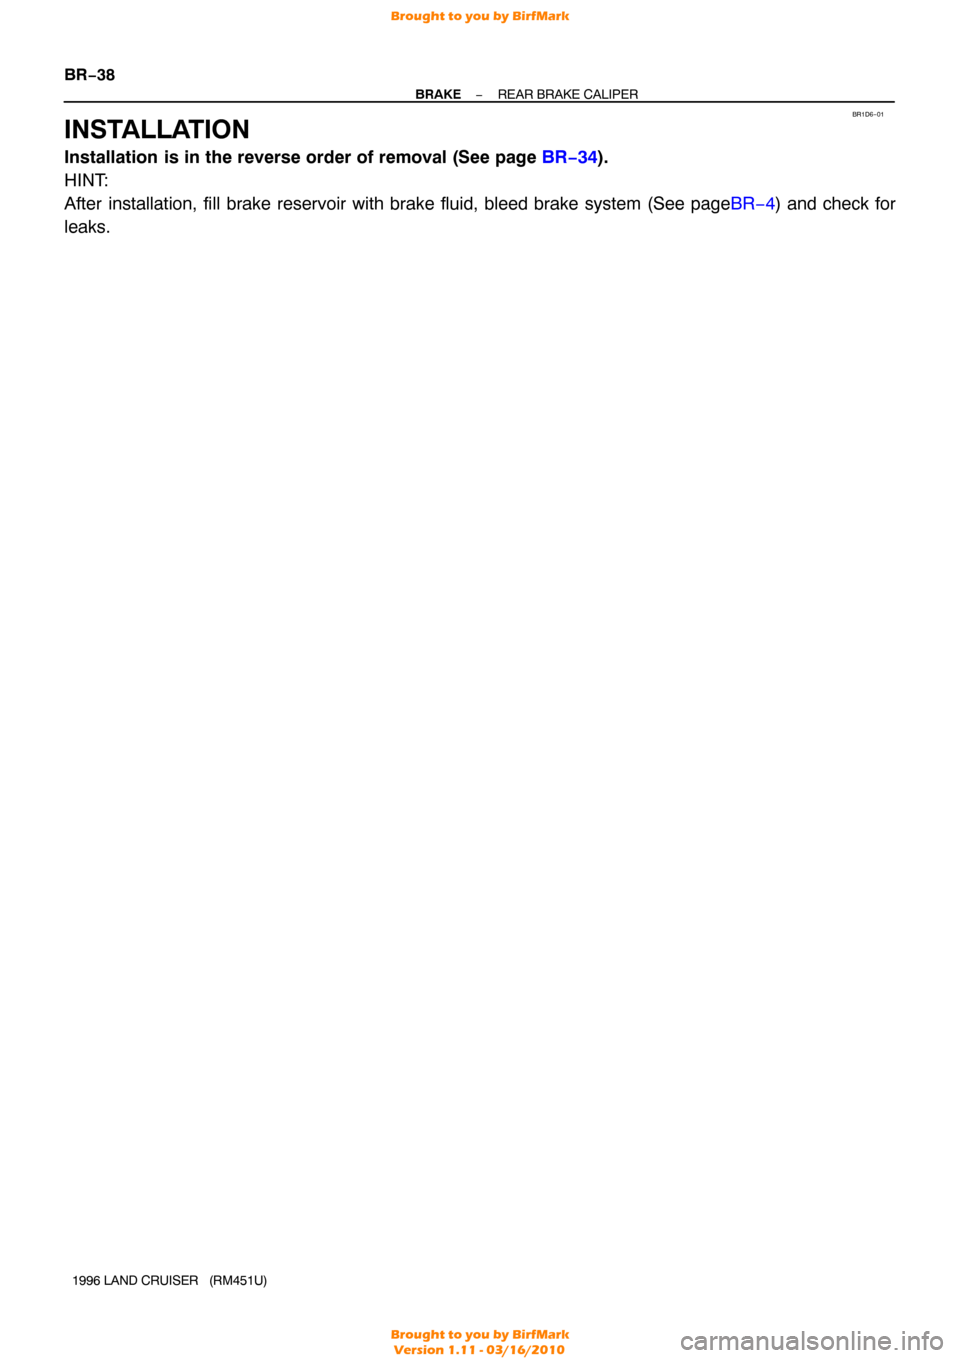
INSTALLATION
Installation is in the reverse order of removal (See page BR−34 ).
HINT:
After installation, fill brake reservoir with brake fluid, bleed brake system\
(See page BR−4) and check for
leaks.
Brought to you by BirfMark
Brought to you by BirfMark
Version 1.11 - 03/16/2010
Page 385 of 1399
BR1DH−01
R05477
A
BR−52−
BRAKE LOAD SENSING PROPORTIONING AND BY− PASS
VALVE (LSP & BV)
1996 LAND CRUISER (RM451U)
INSTALLATION
1. INSTALL LSP & BV ASSEMBLY
Install the LSP & BV assembly to the frame with the 4 bolts. Torque: 25 N·m (260 kgf·cm, 19 ft·lbf)
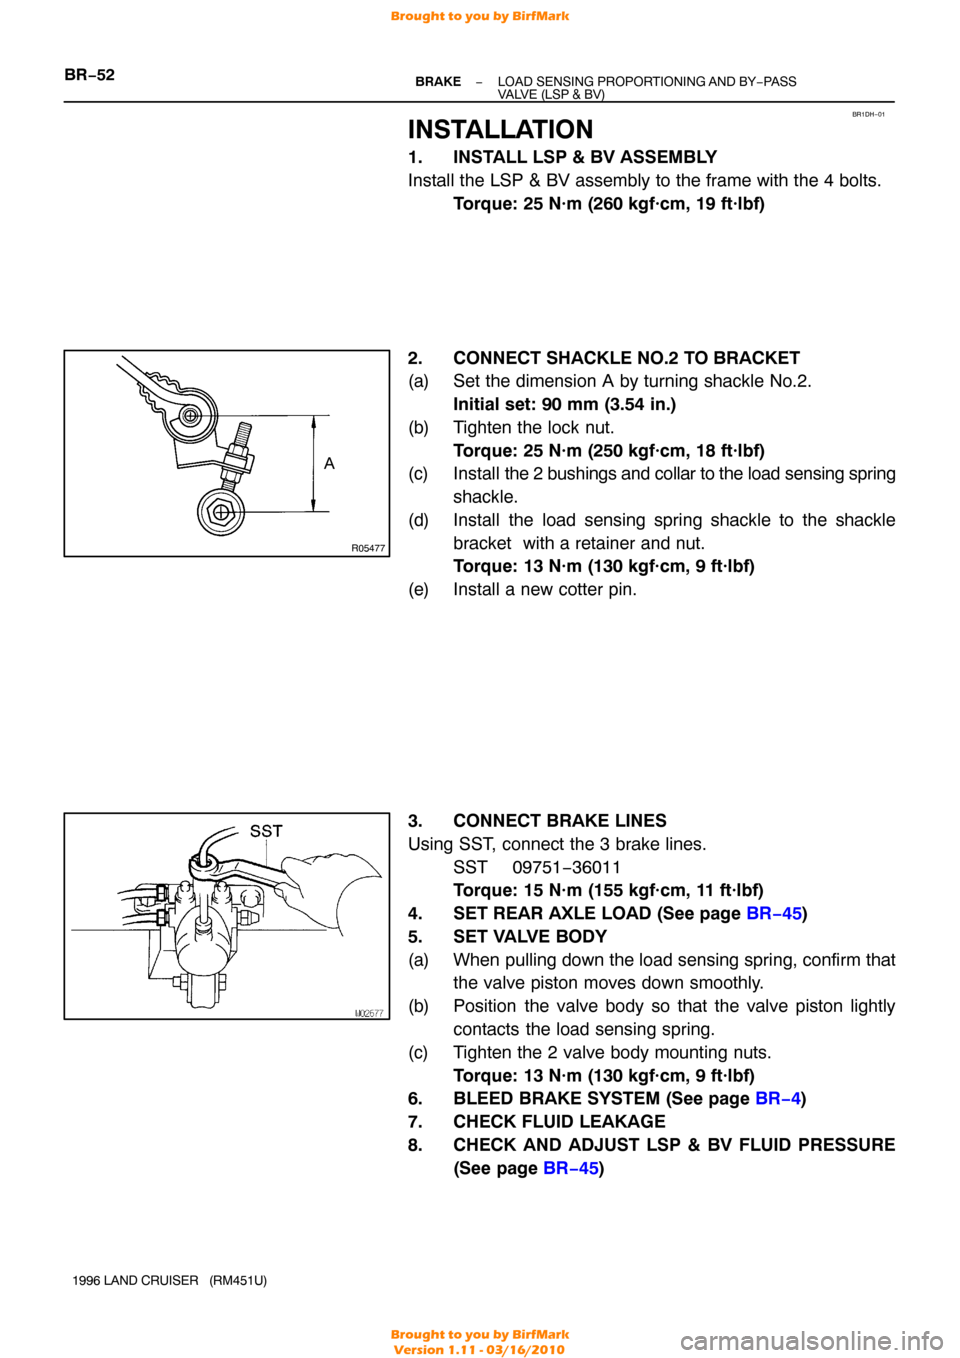
2. CONNECT SHACKLE NO.2 TO BRACKET
(a) Set the dimension A by turning shackle No.2. Initial set: 90 mm (3.54 in.)
(b) Tighten the lock nut. Torque: 25 N·m (250 kgf·cm, 18 ft·lbf)
(c) Install the 2 bushings and collar to the load sensing spring
shackle.
(d) Install the load sensing spring shackle to the shackle bracket with a retainer and nut.
Torque: 13 N·m (130 kgf·cm, 9 ft·lbf)
(e) Install a new cotter pin.
3. CONNECT BRAKE LINES
Using SST, connect the 3 brake lines. SST 09751−36011
Torque: 15 N·m (155 kgf·cm, 11 ft·lbf)
4. SET REAR AXLE LOAD (See page BR−45 )
5. SET VALVE BODY
(a) When pulling down the load sensing spring, confirm that the valve piston moves down smoothly.
(b) Position the valve body so that the valve piston lightly contacts the load sensing spring.
(c) Tighten the 2 valve body mounting nuts. Torque: 13 N·m (130 kgf·cm, 9 ft·lbf)
6. BLEED BRAKE SYSTEM (See page BR−4 )
7. CHECK FLUID LEAKAGE
8. CHECK AND ADJUST LSP & BV FLUID PRESSURE (See page BR−45 )
Brought to you by BirfMark
Brought to you by BirfMark
Version 1.11 - 03/16/2010
Page 392 of 1399
BR1DL−01
−
BRAKE ABS ACTUATOR
BR−59
1996 LAND CRUISER (RM451U)
INSTALLATION
Installation is in the reverse order of removal (See page BR−57 ).
HINT:
After installation, fill the brake reservoir with brake fluid, bleed bra\
ke system (see page BR−4) and check
for leaks.
Brought to you by BirfMark
Brought to you by BirfMark
Version 1.11 - 03/16/2010