Page 1293 of 1399
SR−40
−
STEERING POWER STEERING GEAR
1996 LAND CRUISER (RM451U)
6. IF NECESSARY, REPLACE UNION SEATS
(a) Using a screw extractor, remove the 2 union seats from
the worm gear valve body assembly.
(b) Using a hammer and extension bar, tap in 2 new union seats.
NOTICE:
Before installing the union seat, remove dust sticking to
the worm gear valve body assembly.
Brought to you by BirfMark
Brought to you by BirfMark
Version 1.11 - 03/16/2010
Page 1294 of 1399

SR16P−01
−
STEERING POWER STEERING GEAR
SR−41
1996 LAND CRUISER (RM451U)
REASSEMBLY
NOTICE:
When using a vise, do not overtighten it.
1. COAT WITH MOLYBDENUM DISULFIDE LITHIUM
BASE GREASE (See page SR−33 )
2. INSTALL WORM GEAR VALVE BODY ASSEMBLY
(a) Coat 2 new O−rings with power steering fluid and install them to the gear housing.
(b) Secure the gear housing on SST and clamp SST in vise. SST 09630−00014 (09631 −00142)
(c) Install the valve body assembly while supporting the worm gear with your fingers so that it does not rotate.
(d) Torque the 4 bolts. Torque: 61 N·m (620 kgf·cm, 45 ft·lbf)
NOTICE:
Be careful not to damage the teflon ring.
(e) Using SST and a torque wrench, check the valve body as-
sembly rotating torque.
SST 09616−00010
Rotating torque:
0.3 − 0.5 N·m (3 − 5.5 kgf·cm, 2.6 − 4.8 in.·lbf)
HINT:
Hold the worm gear to prevent it from turning.
If rotating torque is not correct, replace the worm gear valve
body assembly.
3. INSTALL POWER PISTON PLUNGER GUIDE, POWER
PISTON PLUNGER, COMPRESSION SPRING AND
POWER PISTON PLUNGER GUIDE NUT
(a) Coat a new O−ring with power steering fluid.
(b) Install the O−ring to the plunger guide nut and install the plunger guide nut with a hexagon wrench (10 mm).
Torque: 20 N·m (205 kgf·cm, 15 ft·lbf)
Brought to you by BirfMark
Brought to you by BirfMark
Version 1.11 - 03/16/2010
Page 1295 of 1399

SR−42
−
STEERING POWER STEERING GEAR
1996 LAND CRUISER (RM451U)
4. DETERMINE CENTER POSITION
(a) Using SST, turn the worm gear valve body shaft so full
lock in both directions and determine the exact center.
SST 09616−00010
(b) Place matchmarks on the worm gear valve body shaft and
worm gear valve body housing to show neutral position.
5. INSTALL CROSS SHAFT AND SIDE COVER
(a) Coat a new O −ring with power steering fluid and install it
on the side cover.
(b) Assemble the cross shaft to the side cover.
HINT:
Fully loosen the cross shaft adjusting screw.
(c) Install and push the cross shaft into the gear housing so that the center teeth mesh together.
(d) Torque the 4 bolts in a diagonal pattern. Torque: 61 N·m (620 kgf·cm, 45 ft·lbf)
6. ADJUST TOTAL PRELOAD
(a) Install SST with a torque wrench on the worm gear valve body shaft.
SST 09616−00010
(b) Turn the cross shaft adjusting screw until the preload is
within specification.
Preload (Turning):
0.74 − 10.8 N·m (7.5 − 11.0 kgf·cm, 6.5 − 9.6 in.·lbf)
7. INSTALL NEW SEAL WASHER
8. INSTALL ADJUSTING SCREW LOCK NUT
Torque the lock nut while holding the cross shaft adjusting
screw. Torque: 46 N·m (470 kgf·cm, 34 ft·lbf)
9. CHECK TOTAL PRELOAD
Using SST and a torque wrench, check total preload. SST 09616−00010
Total preload (Turning):
0.74 − 1.08 N·m (7.5 − 11.0 kgf·cm, 6.5 − 9.6 in.·lbf)
Brought to you by BirfMark
Brought to you by BirfMark
Version 1.11 - 03/16/2010
Page 1296 of 1399

SR16Q−01
SR2922
Alignment Marks
−
STEERING POWER STEERING GEAR
SR−43
1996 LAND CRUISER (RM451U)
INSTALLATION
1. INSTALL PS GEAR ASSEMBLY
Torque the 4 installation bolts and nuts.
Torque: 142 N·m (1,450 kgf·cm, 105 ft·lbf)
2. CONNECT SLIDING YOKE SUB−ASSEMBLY (See page SR−19 )
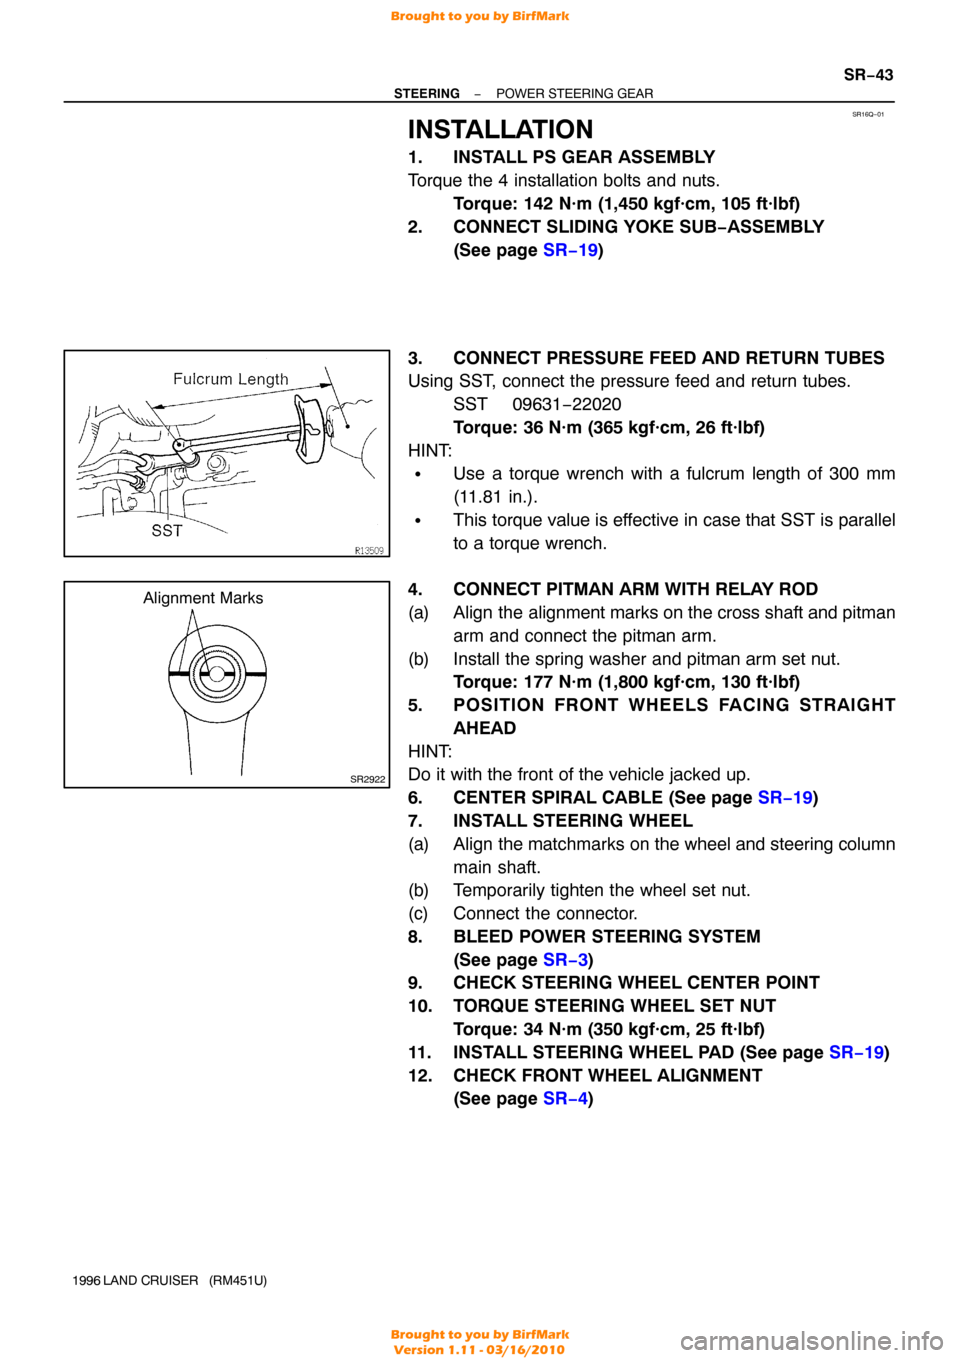
3. CONNECT PRESSURE FEED AND RETURN TUBES
Using SST, connect the pressure feed and return tubes. SST 09631−22020
Torque: 36 N·m (365 kgf·cm, 26 ft·lbf)
HINT:
�Use a torque wrench with a fulcrum length of 300 mm
(11.81 in.).
�This torque value is effective in case that SST is parallel
to a torque wrench.
4. CONNECT PITMAN ARM WITH RELAY ROD
(a) Align the alignment marks on the cross shaft and pitman arm and connect the pitman arm.
(b) Install the spring washer and pitman arm set nut. Torque: 177 N·m (1,800 kgf·cm, 130 ft·lbf)
5. POSITION FRONT WHEELS FACING STRAIGHT AHEAD
HINT:
Do it with the front of the vehicle jacked up.
6. CENTER SPIRAL CABLE (See page SR−19 )
7. INSTALL STEERING WHEEL
(a) Align the matchmarks on the wheel and steering column main shaft.
(b) Temporarily tighten the wheel set nut.
(c) Connect the connector.
8. BLEED POWER STEERING SYSTEM
(See page SR−3 )
9. CHECK STEERING WHEEL CENTER POINT
10. TORQUE STEERING WHEEL SET NUT
Torque: 34 N·m (350 kgf·cm, 25 ft·lbf)
11. INSTALL STEERING WHEEL PAD (See page SR−19)
12. CHECK FRONT WHEEL ALIGNMENT (See page SR−4 )
Brought to you by BirfMark
Brought to you by BirfMark
Version 1.11 - 03/16/2010