Page 22 of 235

slowly that your vehicle might be-
come a hazard to other traffic.
cSome state laws may prohibit the
use of the hazard warning flasher
switch while driving.
cTurn signals do not work when the
switch is operating.
The flashers can be actuated with the igni-
tion switch either OFF or ON.
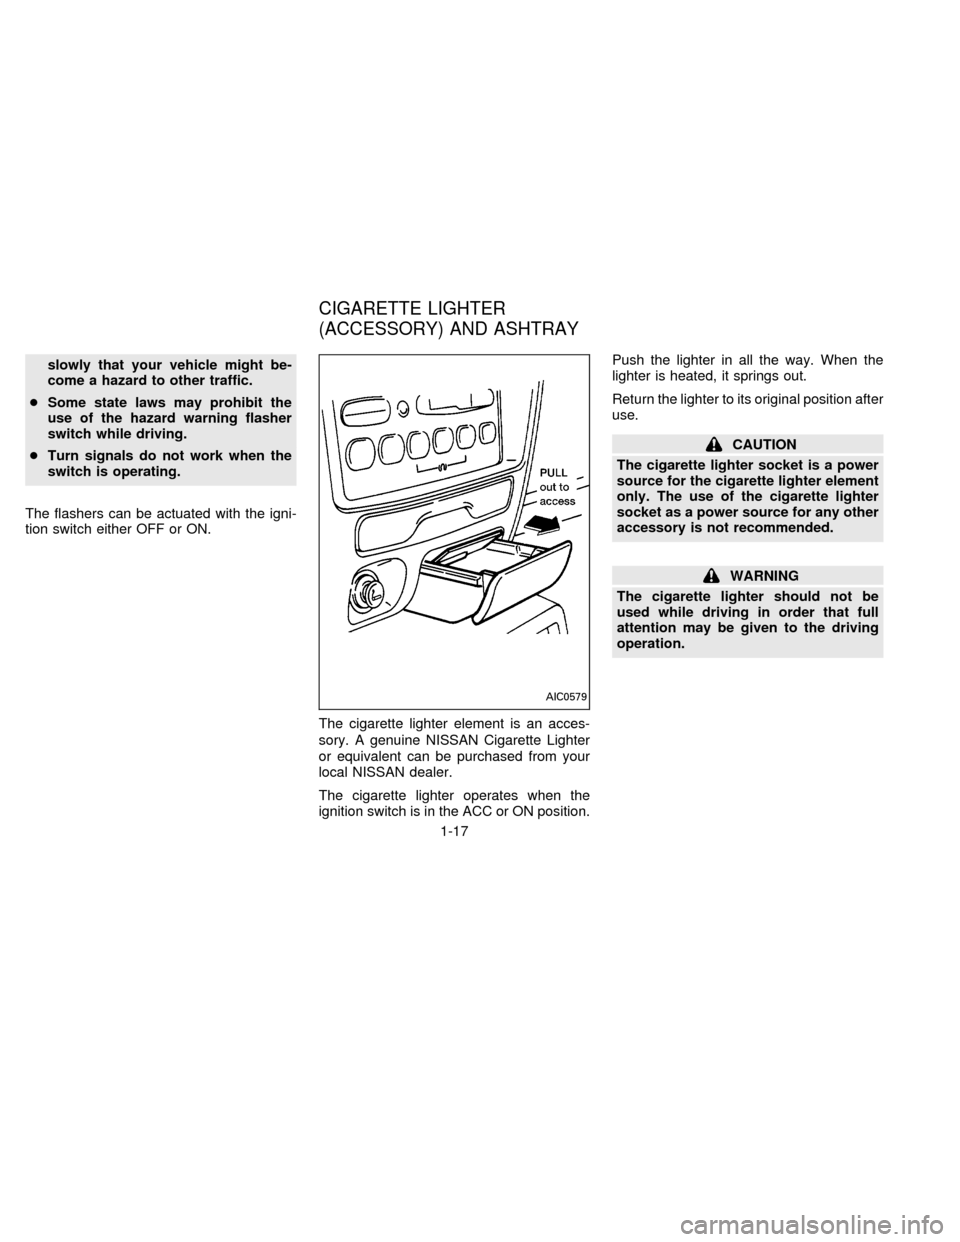
The cigarette lighter element is an acces-
sory. A genuine NISSAN Cigarette Lighter
or equivalent can be purchased from your
local NISSAN dealer.
The cigarette lighter operates when the
ignition switch is in the ACC or ON position.Push the lighter in all the way. When the
lighter is heated, it springs out.
Return the lighter to its original position after
use.
CAUTION
The cigarette lighter socket is a power
source for the cigarette lighter element
only. The use of the cigarette lighter
socket as a power source for any other
accessory is not recommended.
WARNING
The cigarette lighter should not be
used while driving in order that full
attention may be given to the driving
operation.
AIC0579
CIGARETTE LIGHTER
(ACCESSORY) AND ASHTRAY
1-17
ZX
Page 25 of 235
Locking passenger's window
When the power window lock-out button is
pushed in, the passenger side window can-
not be opened or closed. Push the power
window lock-out button again to cancel this
feature.
The passenger side switch opens or closes
the passenger window only. To open the
window, press the switch down. To close
the window, lift the switch up.
WARNING
cMake sure that all passengers have
their hands, etc. inside the vehicle
before closing the windows.
cDo not leave children unattended in-
side the vehicle. They could un-
knowingly activate switches.The sunroof operates when the ignition key
is in the ON position, or for 15 minutes after
the ignition key is turned to the OFF posi-
tion. If the driver's door is opened during this
15 minute period, delayed power to the
sunroof is cancelled.
Sliding the sunroof
To open the roof, push and hold the OPEN
side of the switch.
To close the roof, push and hold the CLOSE
side.
AIC0578AIC0018
SUNROOF (If so equipped)
1-20
ZX
Page 26 of 235

Tilting the sunroof
To tilt up, first close the sunroof, then push
the UP side of the tilt switch. To close the
sunroof, push the DOWN side of the tilt
switch.
Sun shade
Open and close the sun shade by sliding it
forward or backward. The shade opens
when the sunroof opens, but it must be
closed manually.
WARNING
cBe extremely careful not to have any
part of your body in the sunroof
opening while it is closing.
cDo not stand up or extend any por-
tion of your body out of the opening
while driving.
cRemove water drops, snow, ice or
sand from the sunroof before
opening.
cDo not place any heavy object on the
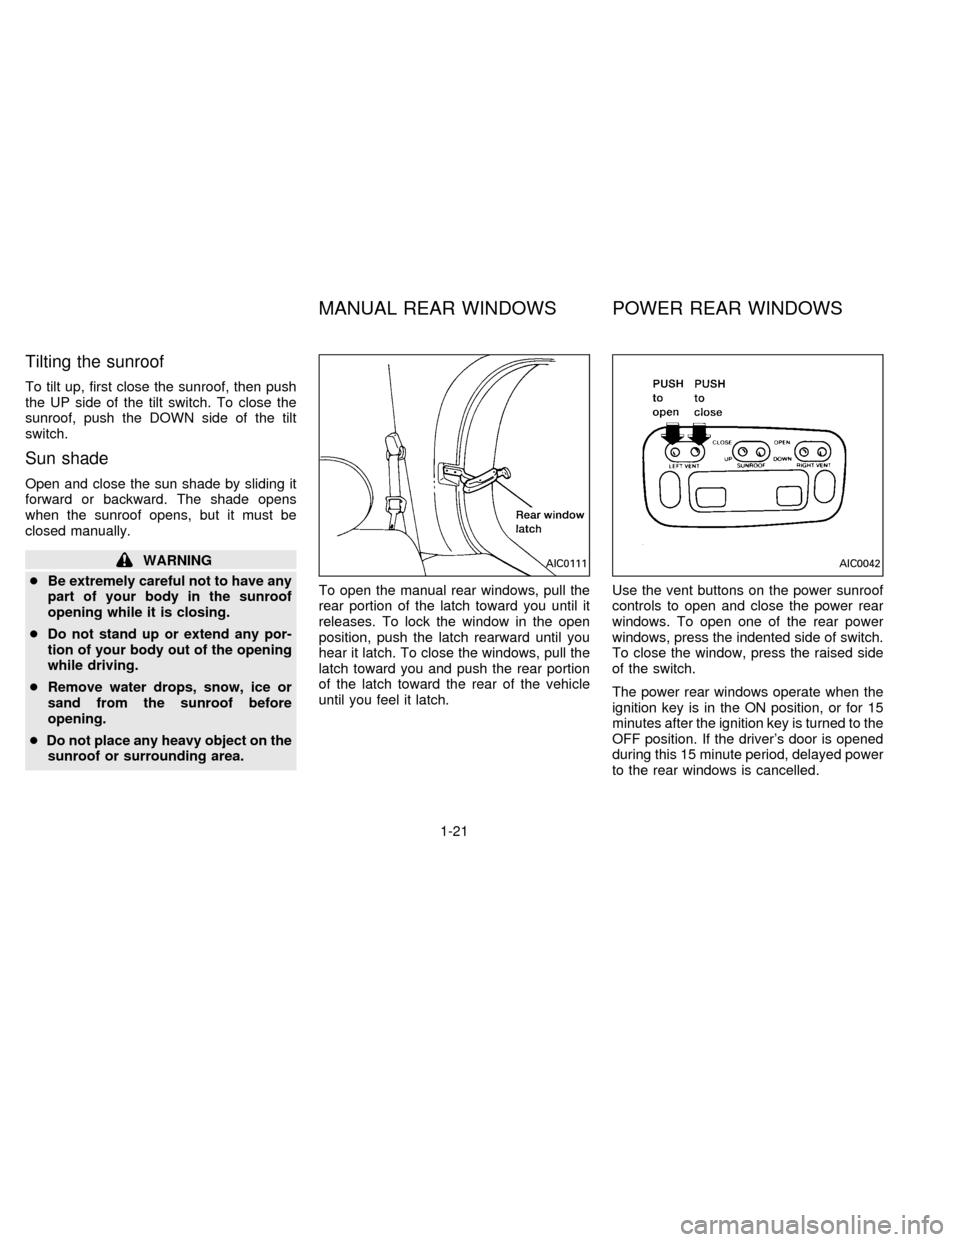
sunroof or surrounding area.To open the manual rear windows, pull the
rear portion of the latch toward you until it
releases. To lock the window in the open
position, push the latch rearward until you
hear it latch. To close the windows, pull the
latch toward you and push the rear portion
of the latch toward the rear of the vehicle
until you feel it latch.Use the vent buttons on the power sunroof
controls to open and close the power rear
windows. To open one of the rear power
windows, press the indented side of switch.
To close the window, press the raised side
of the switch.
The power rear windows operate when the
ignition key is in the ON position, or for 15
minutes after the ignition key is turned to the
OFF position. If the driver's door is opened
during this 15 minute period, delayed power
to the rear windows is cancelled.AIC0111AIC0042
MANUAL REAR WINDOWS POWER REAR WINDOWS
1-21
ZX
Page 30 of 235

2 Pre-driving checks and adjustments
Key ....................................................................... 2-2
Door locks ............................................................ 2-2
Multi-remote control system (If so equipped) ...... 2-7
Battery replacement ............................................. 2-8
Hood release ...................................................... 2-10
Rear door lock .................................................... 2-11
Cargo net............................................................ 2-13
Luggage rack...................................................... 2-14
Fuel filler lid and cap .......................................... 2-15
Seats/floor mats ................................................. 2-15
Floor mat positioning .......................................... 2-17
Seat positions ..................................................... 2-21
Cup holder .......................................................... 2-31
Flexible seating .................................................. 2-33
Removing and installing the second row
bench seat .......................................................... 2-33Removing second row bucket seats .................. 2-35
Sliding three-passenger seat ............................. 2-39
Supplemental restraint system
(air bag system) ................................................. 2-42
Warning labels.................................................... 2-45
Supplemental air bag warning light.................... 2-45
Seat belts ........................................................... 2-47
Child restraints for infants and small children .. 2-58
Child restraint with top tether strap .................... 2-62
Tilting steering wheel ......................................... 2-74
Outside mirror control......................................... 2-75
Outside mirrors ................................................... 2-76
Inside mirror ....................................................... 2-76
Vanity mirror ....................................................... 2-76
ZX
Page 35 of 235
cOperating the lock-unlock switch locks or
unlocks all doors.
cIf the power door lock switch is pressed
when the sliding door is open, the sliding
door automatically locks when it is
closed.WARNING
cBefore opening any door, always
look for and avoid oncoming traffic.
cDo not leave children unattended in
a locked vehicle. If an emergency
occurs it may be more difficult to
help them.
APD0842APD0843
2-6
ZX
Page 36 of 235

It is possible to lock/unlock all doors, turn
the interior lights on or off, and activate the
panic alarm by using the remote controller
from outside the vehicle.
Be sure to remove the key from the
vehicle before locking the doors and
leaving it.
The remote controller can operate at a
distance of approximately 49 ft (15 m) from
the vehicle. (The effective distance depends
on the conditions around the vehicle.)
As many as four remote controllers can be
used with one vehicle. For more information
concerning the purchase and use of addi-
tional remote controllers, contact your NIS-
SAN dealer.
CAUTION
Listed below are conditions or occur-
rences which will damage the remote
controller:
cDo not allow the remote controller to
become wet.
cDo not drop the remote controller.
cDo not strike the remote controller
sharply against another object.cDo not place the remote controller
for an extended period in an area
where temperatures exceed 140ÉF
(60ÉC).
Locking doors
1. Close all of the doors.
2. Push the
button on the multi-remote
controller.
3. All of the doors lock.
4. The parking lights flash twice and the
horn chirps to verify all the doors are
locked.
Unlocking doors
1. Push thebutton on the multi-remote
controller. Only the driver side door un-
locks.
2. The interior lights come on and stay on
for 30 seconds.
3. Push the
button on the multi-remote
controller again within five seconds. The
passenger doors and the rear door un-
lock.The interior lights can be turned off without
waiting 30 seconds by either turning the
ignition to ON or locking the doors with the
multi-remote controller.
Using the panic alarm
If you are near your vehicle and feel threat-
ened, you may activate the panic alarm to
call attention as follows:
1. Push the
button on the remote con-
troller for at least one full second.
2. The theft warning alarm (horn) sounds
and the headlights and tail lights flash for
30 seconds.
3. The panic alarm stops when:
cit has run for 30 seconds, or
cthe
or thebutton are pressed, or
c
thebutton is released and re-pushed.
MULTI-REMOTE CONTROL
SYSTEM (If so equipped)
2-7
ZX
Page 40 of 235
Key operation
To unlock the rear door, turn the key coun-
terclockwise. To open the rear door, lift up
on the opener handle near the license plate.
To close, lower and push the rear door
down securely.
To lock the rear door without the key, set the
lock lever to the lock position following the
``Push to Lock'' instructions near the latch,
then close the rear door securely.
WARNING
Do not drive with the rear door or glass
open. This could allow dangerous ex-
haust gases to be drawn into the ve-
hicle.
APD0824
REAR DOOR LOCK
2-11
ZX
Page 42 of 235
The cargo net keeps packages in the cargo
area from moving around while your vehicle
is driven.
To install the cargo net, attach the four
loops to the four retainers.
To remove the cargo net, detach the four
loops from the cargo net retainers.WARNING
To prevent luggage or packages from
sliding forward during braking, do not
stack anything in the cargo area higher
than the seatbacks.
Be sure to secure all four loops onto
the retainers. The cargo restrained in
the net must not exceed 50 lbs. (22.7
kg) or the net may not stay secured.
APD0037
CARGO NET
2-13
ZX