1996 NISSAN QUEST seat adjustment
[x] Cancel search: seat adjustmentPage 12 of 235
CAUTION
Do not continue driving if the belt is
loose, broken or missing.
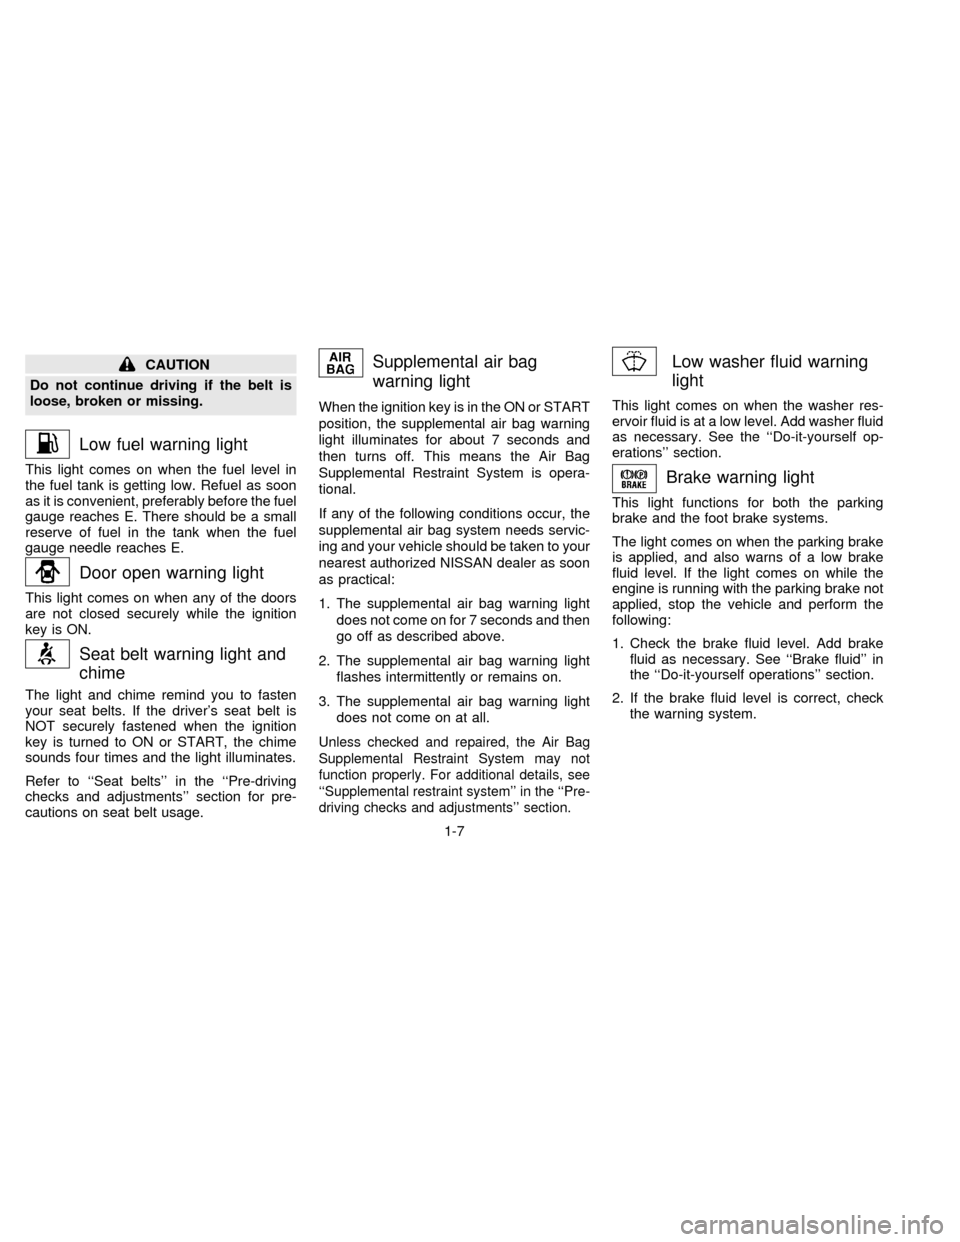
Low fuel warning light
This light comes on when the fuel level in
the fuel tank is getting low. Refuel as soon
as it is convenient, preferably before the fuel
gauge reaches E. There should be a small
reserve of fuel in the tank when the fuel
gauge needle reaches E.
Door open warning light
This light comes on when any of the doors
are not closed securely while the ignition
key is ON.
Seat belt warning light and
chime
The light and chime remind you to fasten
your seat belts. If the driver's seat belt is
NOT securely fastened when the ignition
key is turned to ON or START, the chime
sounds four times and the light illuminates.
Refer to ``Seat belts'' in the ``Pre-driving
checks and adjustments'' section for pre-
cautions on seat belt usage.
Supplemental air bag
warning light
When the ignition key is in the ON or START
position, the supplemental air bag warning
light illuminates for about 7 seconds and
then turns off. This means the Air Bag
Supplemental Restraint System is opera-
tional.
If any of the following conditions occur, the
supplemental air bag system needs servic-
ing and your vehicle should be taken to your
nearest authorized NISSAN dealer as soon
as practical:
1. The supplemental air bag warning light
does not come on for 7 seconds and then
go off as described above.
2. The supplemental air bag warning light
flashes intermittently or remains on.
3. The supplemental air bag warning light
does not come on at all.
Unless checked and repaired, the Air Bag
Supplemental Restraint System may not
function properly. For additional details, see
``Supplemental restraint system'' in the ``Pre-
driving checks and adjustments'' section.
Low washer fluid warning
light
This light comes on when the washer res-
ervoir fluid is at a low level. Add washer fluid
as necessary. See the ``Do-it-yourself op-
erations'' section.
Brake warning light
This light functions for both the parking
brake and the foot brake systems.
The light comes on when the parking brake
is applied, and also warns of a low brake
fluid level. If the light comes on while the
engine is running with the parking brake not
applied, stop the vehicle and perform the
following:
1. Check the brake fluid level. Add brake
fluid as necessary. See ``Brake fluid'' in
the ``Do-it-yourself operations'' section.
2. If the brake fluid level is correct, check
the warning system.
1-7
ZX
Page 30 of 235

2 Pre-driving checks and adjustments
Key ....................................................................... 2-2
Door locks ............................................................ 2-2
Multi-remote control system (If so equipped) ...... 2-7
Battery replacement ............................................. 2-8
Hood release ...................................................... 2-10
Rear door lock .................................................... 2-11
Cargo net............................................................ 2-13
Luggage rack...................................................... 2-14
Fuel filler lid and cap .......................................... 2-15
Seats/floor mats ................................................. 2-15
Floor mat positioning .......................................... 2-17
Seat positions ..................................................... 2-21
Cup holder .......................................................... 2-31
Flexible seating .................................................. 2-33
Removing and installing the second row
bench seat .......................................................... 2-33Removing second row bucket seats .................. 2-35
Sliding three-passenger seat ............................. 2-39
Supplemental restraint system
(air bag system) ................................................. 2-42
Warning labels.................................................... 2-45
Supplemental air bag warning light.................... 2-45
Seat belts ........................................................... 2-47
Child restraints for infants and small children .. 2-58
Child restraint with top tether strap .................... 2-62
Tilting steering wheel ......................................... 2-74
Outside mirror control......................................... 2-75
Outside mirrors ................................................... 2-76
Inside mirror ....................................................... 2-76
Vanity mirror ....................................................... 2-76
ZX
Page 55 of 235
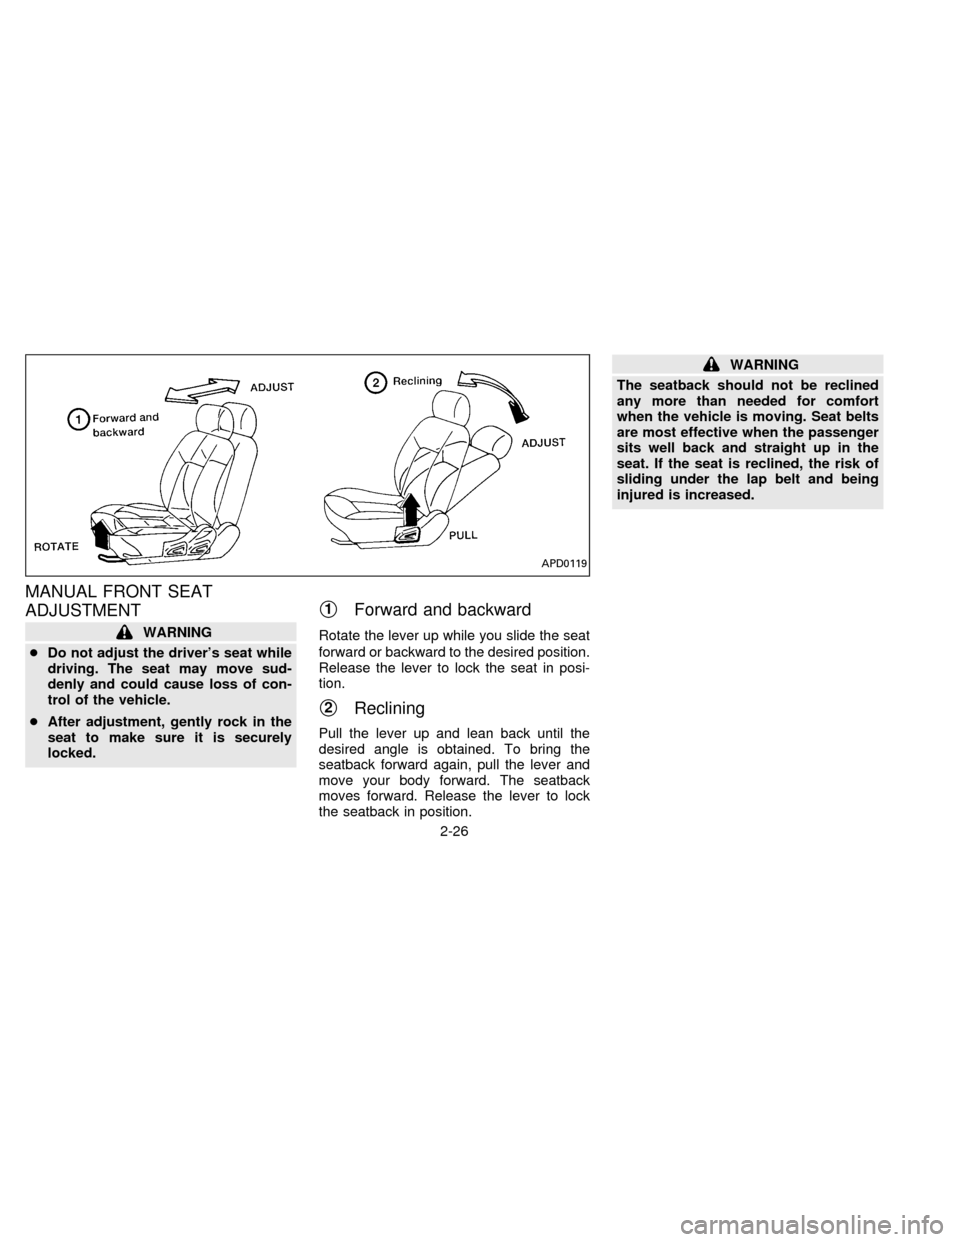
MANUAL FRONT SEAT
ADJUSTMENT
WARNING
cDo not adjust the driver's seat while
driving. The seat may move sud-
denly and could cause loss of con-
trol of the vehicle.
cAfter adjustment, gently rock in the
seat to make sure it is securely
locked.
s1Forward and backward
Rotate the lever up while you slide the seat
forward or backward to the desired position.
Release the lever to lock the seat in posi-
tion.
s2Reclining
Pull the lever up and lean back until the
desired angle is obtained. To bring the
seatback forward again, pull the lever and
move your body forward. The seatback
moves forward. Release the lever to lock
the seatback in position.
WARNING
The seatback should not be reclined
any more than needed for comfort
when the vehicle is moving. Seat belts
are most effective when the passenger
sits well back and straight up in the
seat. If the seat is reclined, the risk of
sliding under the lap belt and being
injured is increased.
APD0119
2-26
ZX
Page 56 of 235
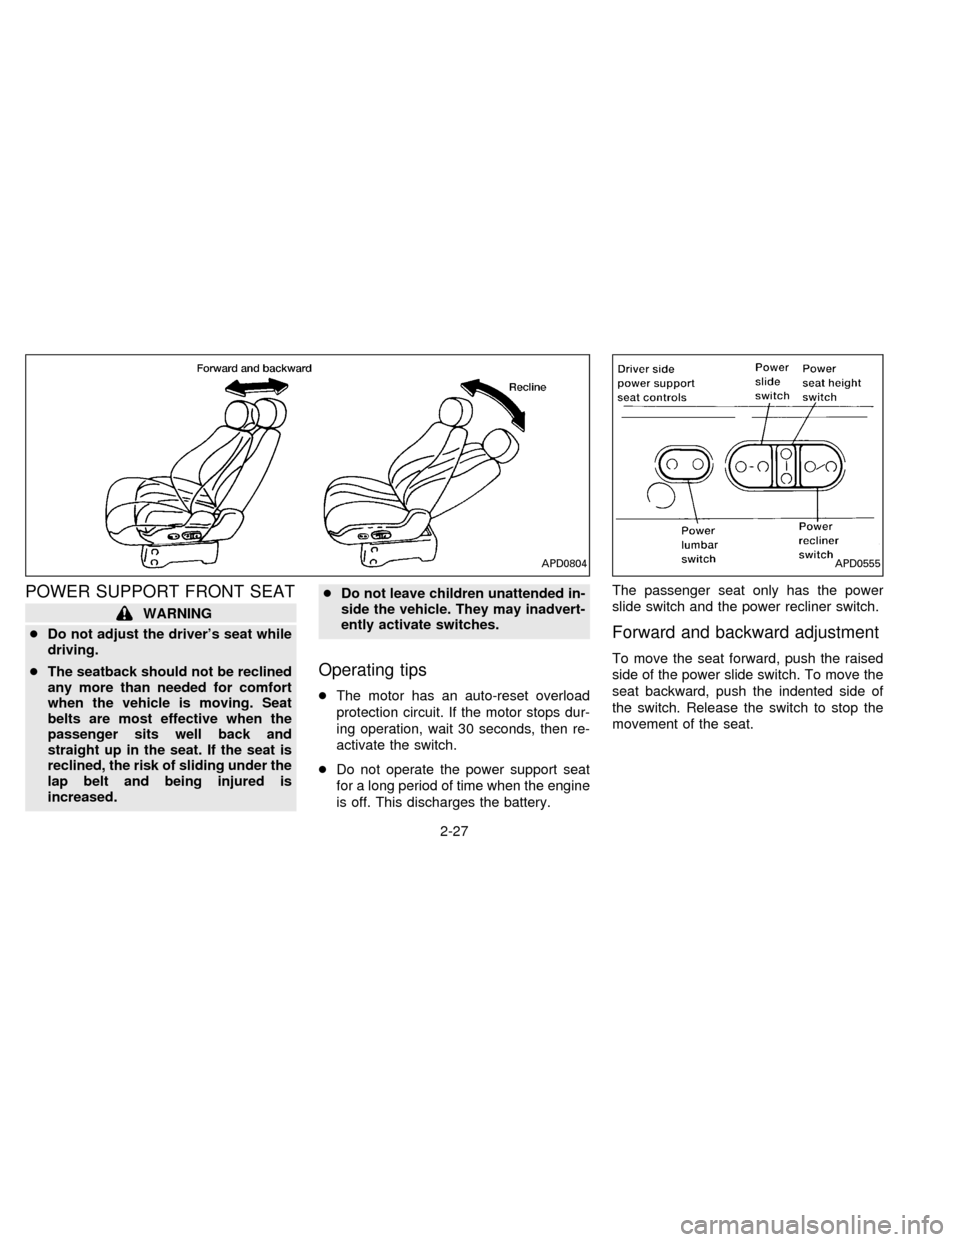
POWER SUPPORT FRONT SEAT
WARNING
cDo not adjust the driver's seat while
driving.
cThe seatback should not be reclined
any more than needed for comfort
when the vehicle is moving. Seat
belts are most effective when the
passenger sits well back and
straight up in the seat. If the seat is
reclined, the risk of sliding under the
lap belt and being injured is
increased.cDo not leave children unattended in-
side the vehicle. They may inadvert-
ently activate switches.
Operating tips
cThe motor has an auto-reset overload
protection circuit. If the motor stops dur-
ing operation, wait 30 seconds, then re-
activate the switch.
cDo not operate the power support seat
for a long period of time when the engine
is off. This discharges the battery.The passenger seat only has the power
slide switch and the power recliner switch.
Forward and backward adjustment
To move the seat forward, push the raised
side of the power slide switch. To move the
seat backward, push the indented side of
the switch. Release the switch to stop the
movement of the seat.
APD0804APD0555
2-27
ZX
Page 57 of 235

Reclining
To recline the seat, push the indented side
of the power recliner switch. To return to a
more upright position, push the raised side
of the switch. Release the switch to stop the
movement of the seatback.
Seat height adjustment
To raise the height of the seat, push the
raised side of the power seat height switch
and release it when the desired position has
been reached. To lower the height of the
seat, push the indented side of the switch
and release it when the desired position has
been reached.
Lumbar support
To inflate the lumbar support, push the
raised side of the power lumbar switch and
release it when the desired position has
been reached. To deflate the lumbar sup-
port, push the indented side of the switch.
The power lumbar pump motor continues to
operate after the lumbar support is fully
inflated. Release the switch when the lum-
bar stops inflating.
APD0805APD0806
2-28
ZX
Page 62 of 235
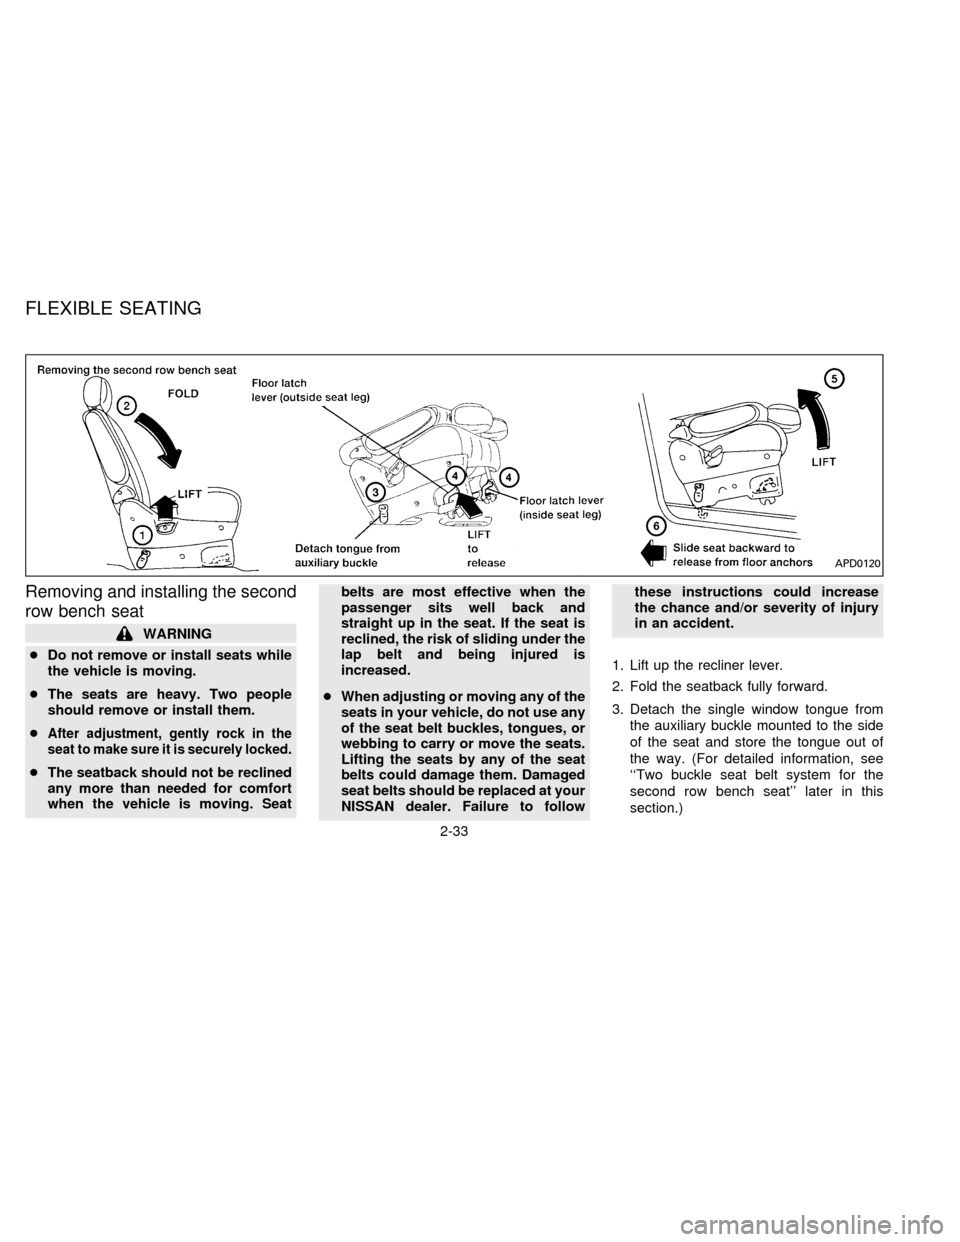
Removing and installing the second
row bench seat
WARNING
cDo not remove or install seats while
the vehicle is moving.
cThe seats are heavy. Two people
should remove or install them.
c
After adjustment, gently rock in the
seat to make sure it is securely locked.
cThe seatback should not be reclined
any more than needed for comfort
when the vehicle is moving. Seatbelts are most effective when the
passenger sits well back and
straight up in the seat. If the seat is
reclined, the risk of sliding under the
lap belt and being injured is
increased.
cWhen adjusting or moving any of the
seats in your vehicle, do not use any
of the seat belt buckles, tongues, or
webbing to carry or move the seats.
Lifting the seats by any of the seat
belts could damage them. Damaged
seat belts should be replaced at your
NISSAN dealer. Failure to followthese instructions could increase
the chance and/or severity of injury
in an accident.
1. Lift up the recliner lever.
2. Fold the seatback fully forward.
3. Detach the single window tongue from
the auxiliary buckle mounted to the side
of the seat and store the tongue out of
the way. (For detailed information, see
``Two buckle seat belt system for the
second row bench seat'' later in this
section.)
APD0120
FLEXIBLE SEATING
2-33
ZX
Page 64 of 235
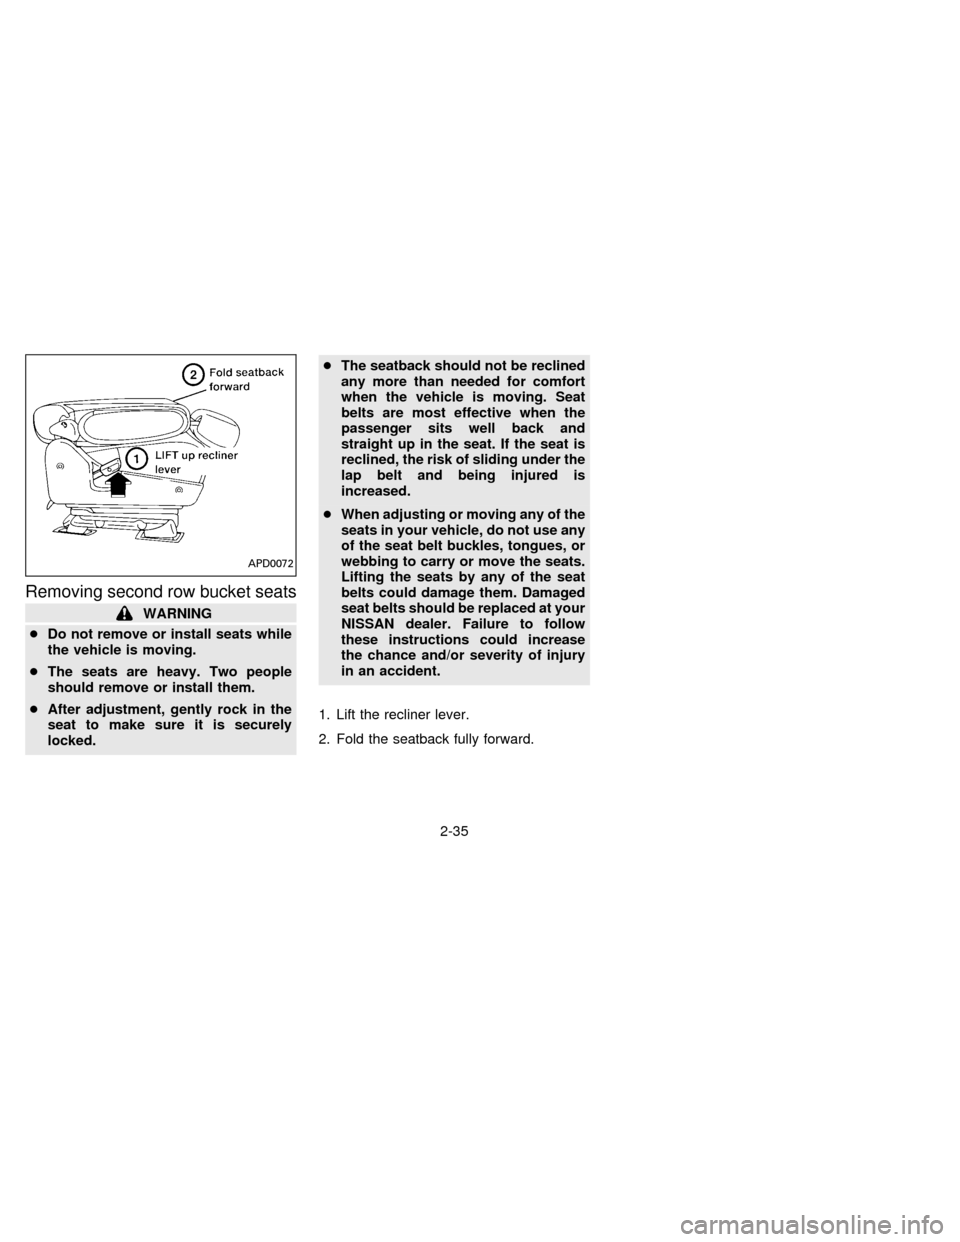
Removing second row bucket seats
WARNING
cDo not remove or install seats while
the vehicle is moving.
cThe seats are heavy. Two people
should remove or install them.
cAfter adjustment, gently rock in the
seat to make sure it is securely
locked.cThe seatback should not be reclined
any more than needed for comfort
when the vehicle is moving. Seat
belts are most effective when the
passenger sits well back and
straight up in the seat. If the seat is
reclined, the risk of sliding under the
lap belt and being injured is
increased.
cWhen adjusting or moving any of the
seats in your vehicle, do not use any
of the seat belt buckles, tongues, or
webbing to carry or move the seats.
Lifting the seats by any of the seat
belts could damage them. Damaged
seat belts should be replaced at your
NISSAN dealer. Failure to follow
these instructions could increase
the chance and/or severity of injury
in an accident.
1. Lift the recliner lever.
2. Fold the seatback fully forward.
APD0072
2-35
ZX
Page 68 of 235
SLIDING THREE-PASSENGER
SEAT
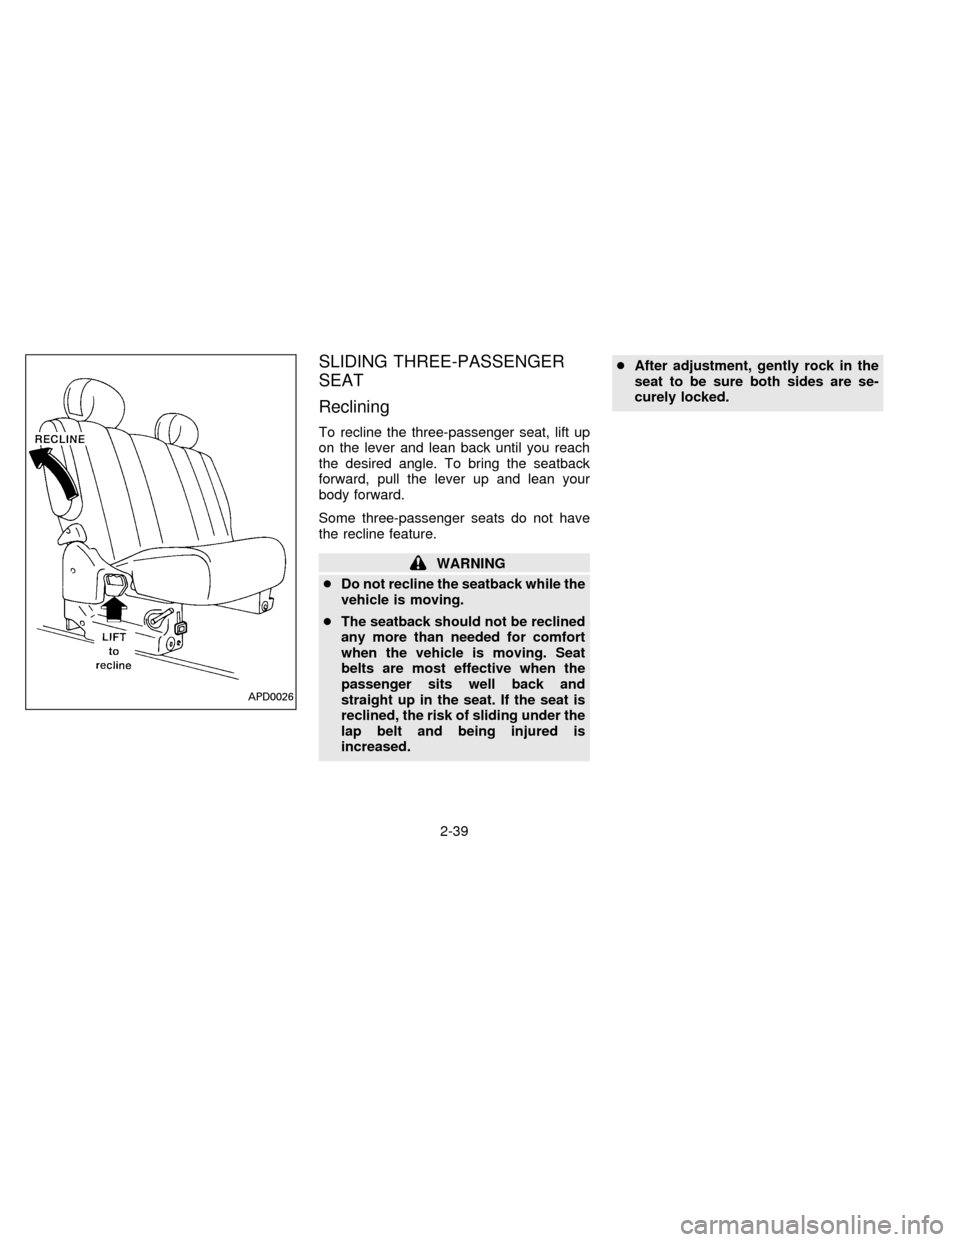
Reclining
To recline the three-passenger seat, lift up
on the lever and lean back until you reach
the desired angle. To bring the seatback
forward, pull the lever up and lean your
body forward.
Some three-passenger seats do not have
the recline feature.
WARNING
cDo not recline the seatback while the
vehicle is moving.
cThe seatback should not be reclined
any more than needed for comfort
when the vehicle is moving. Seat
belts are most effective when the
passenger sits well back and
straight up in the seat. If the seat is
reclined, the risk of sliding under the
lap belt and being injured is
increased.cAfter adjustment, gently rock in the
seat to be sure both sides are se-
curely locked.
APD0026
2-39
ZX