1996 NISSAN MAXIMA parking brake
[x] Cancel search: parking brakePage 134 of 197
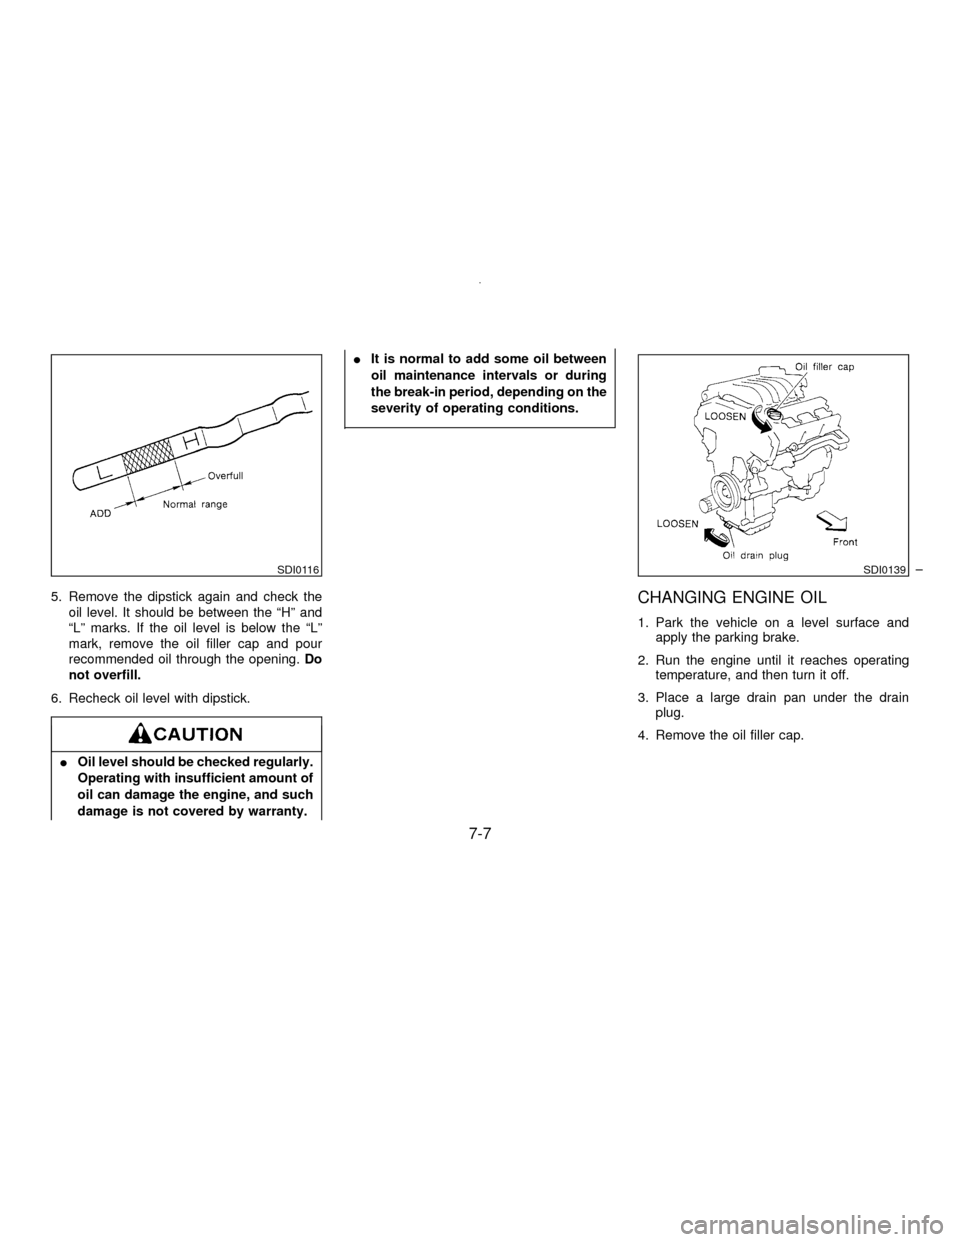
5. Remove the dipstick again and check the
oil level. It should be between the ªHº and
ªLº marks. If the oil level is below the ªLº
mark, remove the oil filler cap and pour
recommended oil through the opening.Do
not overfill.
6. Recheck oil level with dipstick.
IOil level should be checked regularly.
Operating with insufficient amount of
oil can damage the engine, and such
damage is not covered by warranty.IIt is normal to add some oil between
oil maintenance intervals or during
the break-in period, depending on the
severity of operating conditions.
CHANGING ENGINE OIL
1. Park the vehicle on a level surface and
apply the parking brake.
2. Run the engine until it reaches operating
temperature, and then turn it off.
3. Place a large drain pan under the drain
plug.
4. Remove the oil filler cap.
SDI0116SDI0139
7-7
Z01.2.1/A32-DX
Page 135 of 197
5. Remove the drain plug with a wrench and
completely drain the oil.
If oil filter is to be changed, remove and
replace it at this time. See ªChanging oil
filterº.
Be careful not to burn yourself, as the
engine oil is hot.
Waste oil must be disposed of properly.
Check your local regulations.
6. Clean and re-install the drain plug and new
washer. Securely tighten the drain plug with
a wrench.
Drain plug tightening torque:
22 to 29 ft-lb
(29 to 39 )
Do not use excessive force.
7. Refill engine with recommended oil and
install the cap securely.See the ªTechnical informationº section for
refill capacity.
8. Start the engine.
Check for leakage around the drain plug.
Correct as required.
9. Turn the engine off and wait several min-
utes. Check the oil level with the dipstick.
Add engine oil if necessary.
IProlonged and repeated contact with
used engine oil may cause skin can-
cer.
ITry to avoid direct skin contact with
used oil. If skin contact is made, wash
thoroughly with soap or hand cleaner
as soon as possible.
IKeep used engine oil out of reach of
children.
CHANGING OIL FILTER
1. Park the vehicle on a level surface and
apply the parking brake.
2. Turn the engine off.
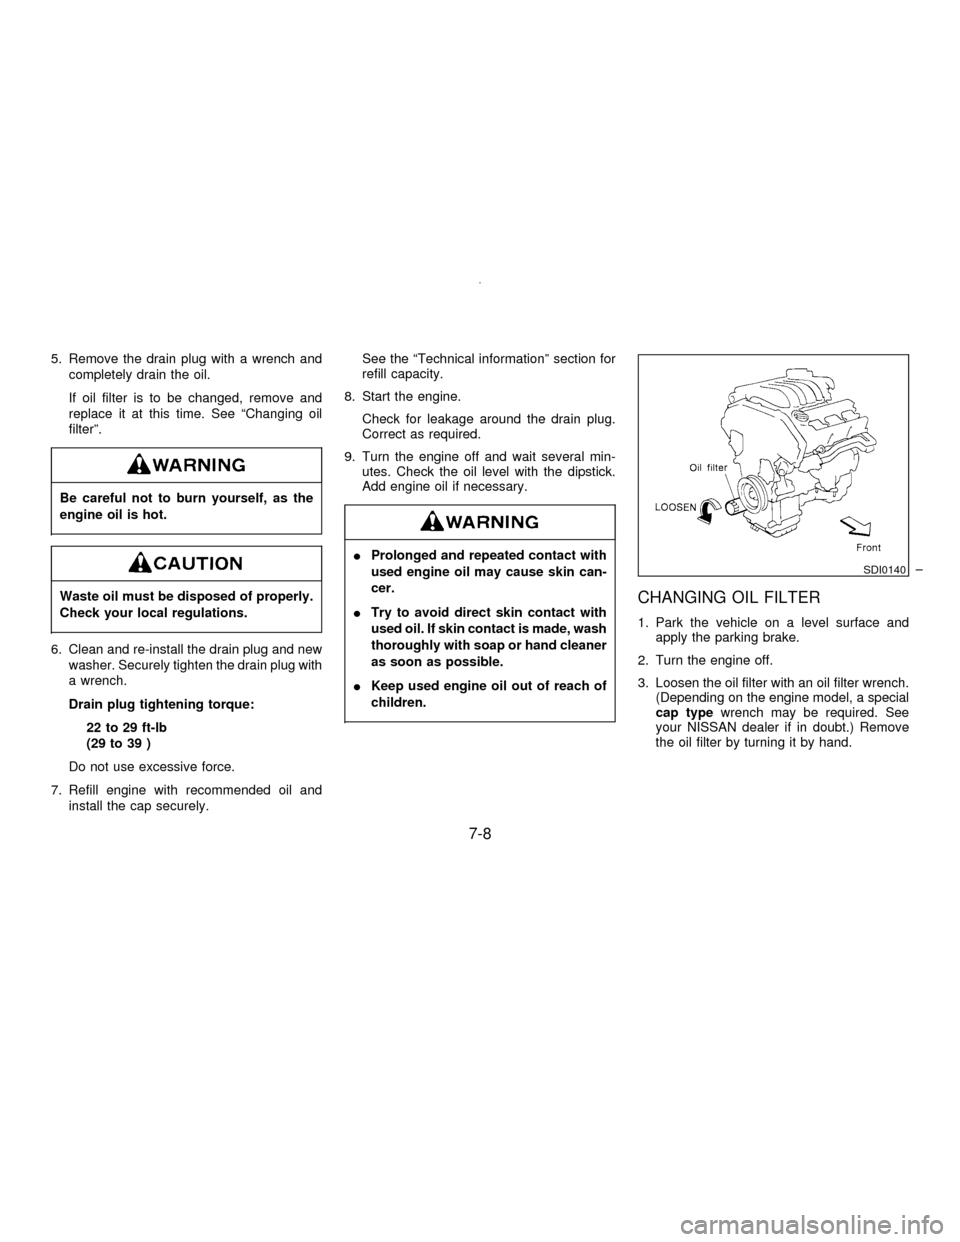
3. Loosen the oil filter with an oil filter wrench.
(Depending on the engine model, a special
cap typewrench may be required. See
your NISSAN dealer if in doubt.) Remove
the oil filter by turning it by hand.
SDI0140
7-8
Z01.2.1/A32-DX
Page 136 of 197
Be careful not to burn yourself, as the
engine oil may be hot.
4. Wipe the engine oil filter mounting surface
with a clean rag.
Be sure to remove any old rubber gasket
remaining on the mounting surface of the
engine.
5. Coat the rubber gasket on the new filter
with clean engine oil.
6. Screw in the oil filter until a slight resistance
is felt, then tighten additionally more than
2/3 turn.
Oil filter tightening torque:
10.85 to 15.19 ft-lb
(14.7 to 20.6 )
7. Start the engine and check for leakage
around the oil filter. Correct as required.
8. Turn the engine off and wait several min-
utes. Check the oil level. Add engine oil if
necessary.
When engine is running, keep hands
and clothing away from any moving
parts such as fan drive belt.
IAutomatic transmission fluid is poi-
sonous and should be stored care-
fully in marked containers out of the
reach of children.
TEMPERATURE CONDITIONS
FOR CHECKING
IThe fluid level should be checked using the
ªHOTº range on the dipstick after the follow-
ing conditions have been met:
Ð The engine should be warmed up to oper-
ating temperature.
Ð The vehicle should be driven at least 5
minutes.
Ð The automatic transmission fluid should be
warmed to between 122 and 176ÉF (50 and
80ÉC).
IThe fluid can be checked at fluid tempera-
tures of 86 to 122ÉF (30 to 50ÉC) using the
ªCOLDº range on the dipstick after the
engine is warmed up and before driving.
However, the fluid should be re-checked
using the ªHOTº range.
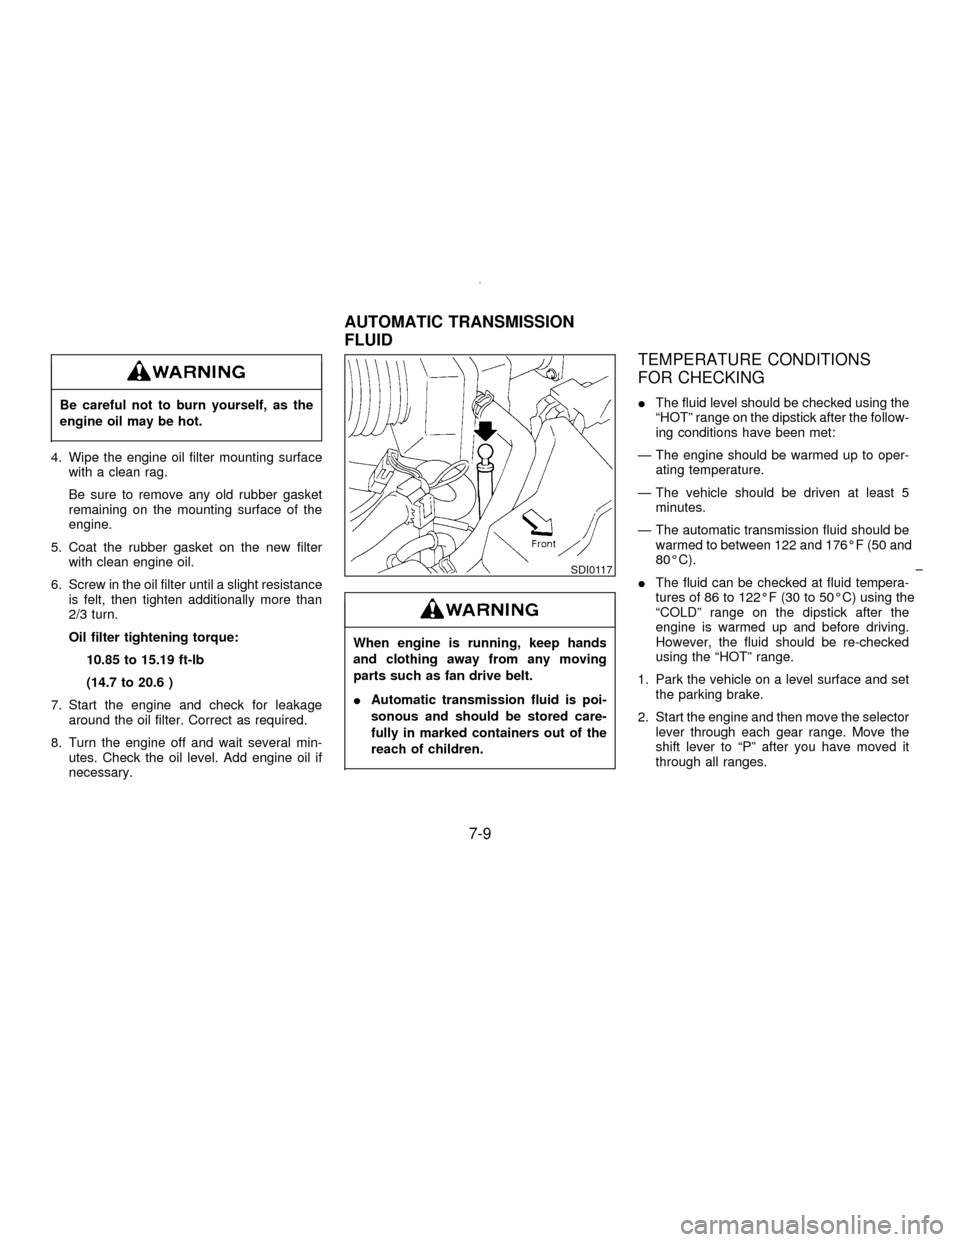
1. Park the vehicle on a level surface and set
the parking brake.
2. Start the engine and then move the selector
lever through each gear range. Move the
shift lever to ªPº after you have moved it
through all ranges.
SDI0117
AUTOMATIC TRANSMISSION
FLUID
7-9
Z01.2.1/A32-DX
Page 141 of 197
Be sure the engine and ignition switch
are off and that the parking brake is
engaged securely.
Be sure to use the correct wrench to
remove the plugs. An incorrect wrench
can cause damage.
SPARK PLUG REPLACEMENT
7-14
Z01.2.1/A32-DX
Page 145 of 197
After wiper blade replacement, return
the wiper arm to its original position.
Otherwise it may be damaged when the
engine hood is opened.
Make sure the wiper blade contacts the
glass, otherwise the arm may be dam-
aged from wind pressure.
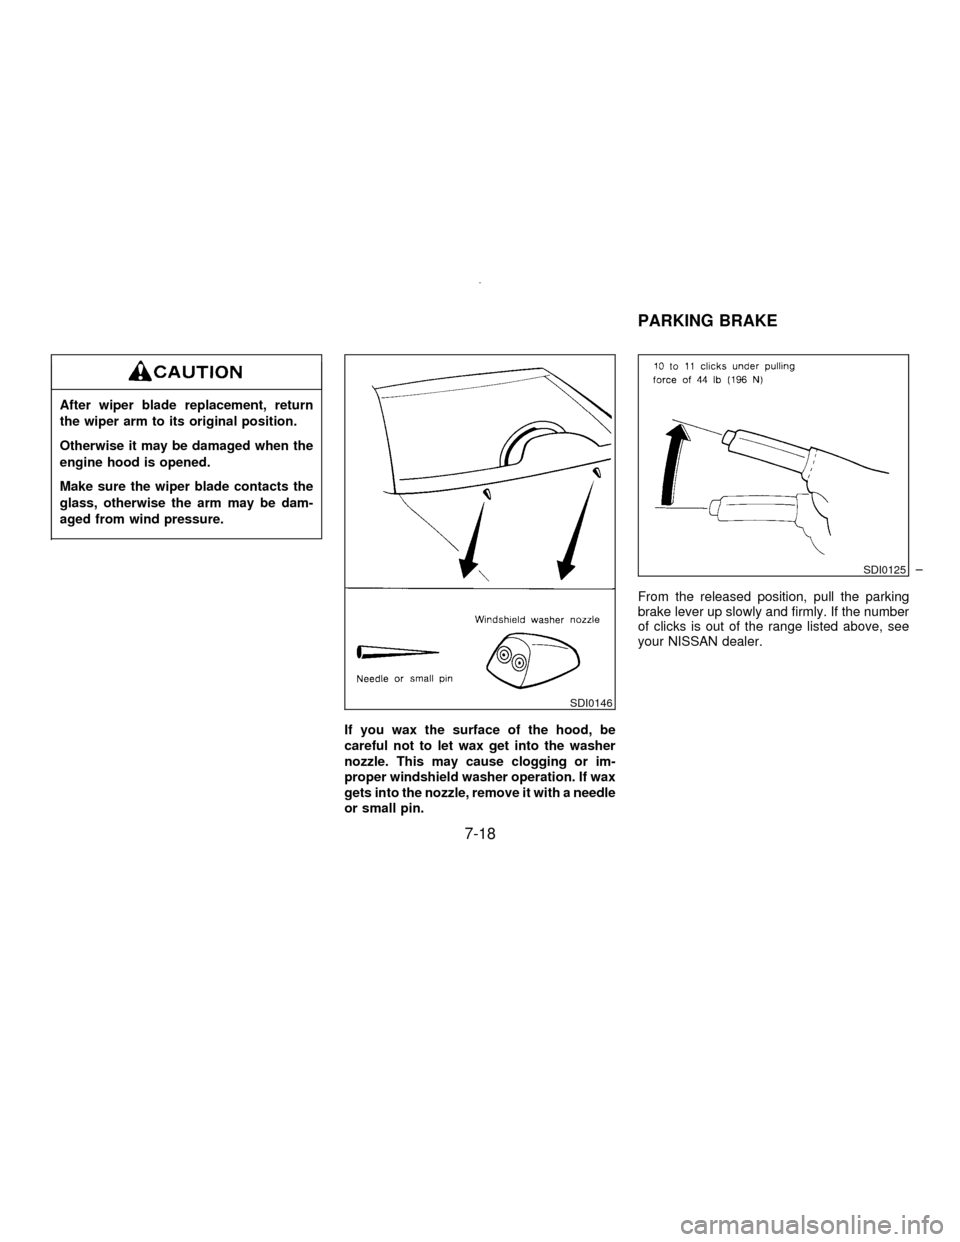
If you wax the surface of the hood, be
careful not to let wax get into the washer
nozzle. This may cause clogging or im-
proper windshield washer operation. If wax
gets into the nozzle, remove it with a needle
or small pin.From the released position, pull the parking
brake lever up slowly and firmly. If the number
of clicks is out of the range listed above, see
your NISSAN dealer.
SDI0146
SDI0125
PARKING BRAKE
7-18
Z01.2.1/A32-DX
Page 146 of 197
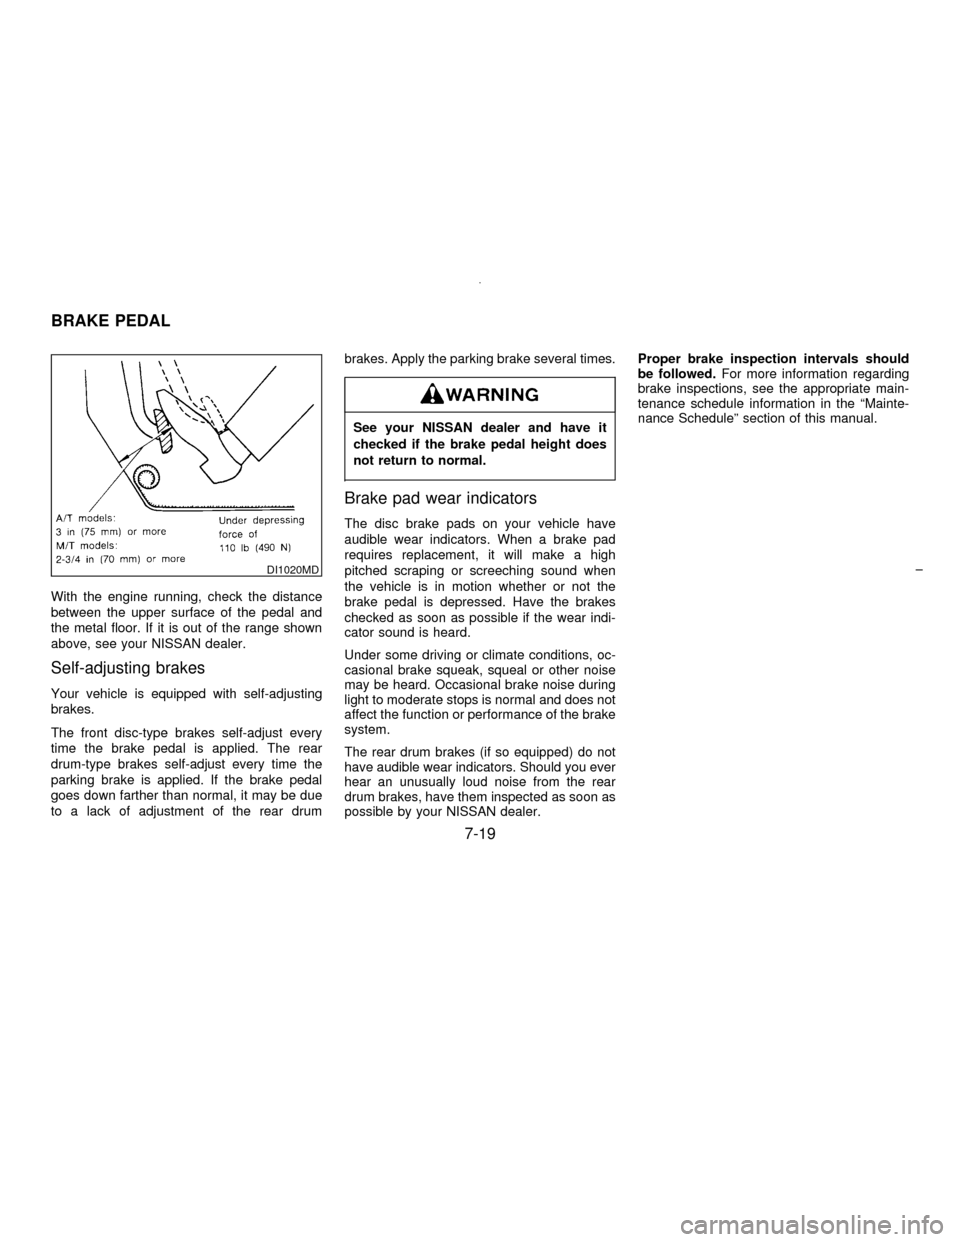
With the engine running, check the distance
between the upper surface of the pedal and
the metal floor. If it is out of the range shown
above, see your NISSAN dealer.
Self-adjusting brakes
Your vehicle is equipped with self-adjusting
brakes.
The front disc-type brakes self-adjust every
time the brake pedal is applied. The rear
drum-type brakes self-adjust every time the
parking brake is applied. If the brake pedal
goes down farther than normal, it may be due
to a lack of adjustment of the rear drumbrakes. Apply the parking brake several times.
See your NISSAN dealer and have it
checked if the brake pedal height does
not return to normal.
Brake pad wear indicators
The disc brake pads on your vehicle have
audible wear indicators. When a brake pad
requires replacement, it will make a high
pitched scraping or screeching sound when
the vehicle is in motion whether or not the
brake pedal is depressed. Have the brakes
checked as soon as possible if the wear indi-
cator sound is heard.
Under some driving or climate conditions, oc-
casional brake squeak, squeal or other noise
may be heard. Occasional brake noise during
light to moderate stops is normal and does not
affect the function or performance of the brake
system.
The rear drum brakes (if so equipped) do not
have audible wear indicators. Should you ever
hear an unusually loud noise from the rear
drum brakes, have them inspected as soon as
possible by your NISSAN dealer.Proper brake inspection intervals should
be followed.For more information regarding
brake inspections, see the appropriate main-
tenance schedule information in the ªMainte-
nance Scheduleº section of this manual.
DI1020MD
BRAKE PEDAL
7-19
Z01.2.1/A32-DX
Page 165 of 197
head restraints move up and down smoothly
and that the locks (if equipped) hold securely
in all latched positions.
Seat beltsCheck that all parts of the seat belt
system (e.g. buckles, anchors, adjusters and
retractors) operate properly and smoothly, and
are installed securely. Check the belt webbing
for cuts, fraying, wear or damage.
Accelerator pedalCheck the pedal for
smooth operation and make sure the pedal
does not catch or require uneven effort. Keep
the floor mats away from the pedal.
Clutch pedal*Make sure the pedal operates
smoothly and check that it has the proper free
play.
BrakesCheck that the brakes do not pull the
vehicle to one side when applied.
Brake pedal and booster*Check the pedal
for smooth operation and make sure it has the
proper distance under it when depressed fully.
Check the brake booster function. Be sure to
keep floor mats away from the pedal.
Parking brake*Check that the lever has the
proper travel and make sure that the vehicle is
held securely on a fairly steep hill when only
the parking brake is applied.
Automatic transaxle ªParkº mechanismCheck that the brake pedal must be depressed
for the selector lever to be moved from the ªPº
position. On a fairly steep hill check that the
vehicle is held securely with the selector lever
in the ªPº position without applying any brakes.
UNDER THE HOOD AND VEHICLE
The maintenance items listed here should be
checked periodically (e.g. each time you check
the engine oil or refuel).
Windshield washer fluid*Check that there is
adequate fluid in the tank.
Engine coolant level*Check the coolant level
when the engine is cold.
Radiator and hosesCheck the front of the
radiator and clean off any dirt, insects, leaves,
etc., that may have accumulated. Make sure
the hoses have no cracks, deformation, dete-
rioration or loose connections.
Brake and clutch fluid levels*Make sure that
the brake and clutch fluid levels are between
the ªMAXº and ªMINº lines on the reservoir.
Battery*Check the fluid level in each cell. It
should be between the ªMAXº and ªMINº lines.
Engine drive belts*Make sure that no belt is
frayed, worn, cracked or oily.
Engine oil level*Check the level on thedipstick after parking the vehicle on a level
spot and turning off the engine. Be sure to wait
a few minutes to allow the oil to drain back into
the sump.
Power steering fluid level* and linesCheck
the level in the reservoir tank with the engine
off. Check the lines for proper attachment,
leaks, cracks, etc.
Automatic transaxle fluid level*Check the
level on the dipstick after putting the selector
lever in ªPº with the engine idling.
Exhaust systemMake sure there are no
loose supports, cracks or holes. If the sound of
the exhaust seems unusual or there is a smell
of exhaust fumes, immediately locate the
trouble and correct it. (See the carbon monox-
ide warning in the ªStarting and drivingº sec-
tion)
UnderbodyThe underbody is frequently ex-
posed to corrosive substances such as those
used on icy roads or to control dust. It is very
important to remove these substances, other-
wise rust will form on the floor pan, frame, fuel
lines and around the exhaust system. At the
end of winter, the underbody should be thor-
oughly flushed with plain water, being careful
to clean those areas where mud and dirt may
accumulate. See the ªAppearance and interior
careº section for additional information.
8-4
Z01.2.1/A32-DX
Page 186 of 197
IRegularly check that all hitch mounting
bolts are securely mounted.
Tire pressures
IWhen towing a trailer, inflate the vehicle
tires to the recommended cold tire pressure
indicated on the tire placard (located on the
inside of the center console lid.)
ITrailer tire condition, size, load rating and
proper inflation pressure should be in ac-
cordance with the trailer and tire manufac-
turers' specifications.
Safety chain
Always use a suitable chain between your
vehicle and the trailer. The chain should be
crossed and should be attached to the hitch,
not to the vehicle bumper or axle. Be sure to
leave enough slack in the chain to permit
turning corners.
Trailer lights
Trailer lights should comply with Federal
and/or local regulations. When wiring the ve-
hicle for towing, connect the stop and tail light
pickup into the vehicle electrical circuit at a
point between the sensor and stop light or light
switch.
Trailer brakes
If your trailer is equipped with a braking sys-
tem, make sure it conforms to Federal and/or
local regulations and that it is properly in-
stalled.
Never connect a trailer brake system
directly to the vehicle brake system.
Pre-towing tips
IBe certain your vehicle maintains a level
position when a loaded and/or unloaded
trailer is hitched. Do not drive the vehicle if
it has an abnormal nose-up or nose-down
condition; check for improper tongue load,
overload, worn suspension or other pos-
sible causes of either condition.
IAlways secure items in the trailer to prevent
load shifts while driving.
IBe certain your rear view mirrors conform to
all federal, state or local regulations. If not,
install any mirrors required for towing be-
fore driving the vehicle.
Trailer towing tips
In order to gain skill and an understanding of
the vehicle's behavior, you should practice
turning, stopping and backing up in an area
which is free from traffic. Steering stability, and
braking performance will be somewhat differ-
ent than under normal driving conditions.
IAlways secure items in the trailer to prevent
load shift while driving.
IAvoid abrupt starts, acceleration or stops.
IAvoid sharp turns or lane changes.
IAlways drive your vehicle at a moderate
speed.
IAlways block the wheels on both vehicle
and trailer when parking. Parking on a
slope is not recommended; however, if you
must do so, and if your vehicle is equipped
with automatic transmission, first block the
wheels and apply the parking brake, and
then move the transmission shift lever into
the ªPº position. If you move the shift lever
to the ªPº position before blocking the
wheels and applying the parking brake,
transmission damage could occur.
IWhen going down a hill, shift into a lower
gear and use the engine braking effect.
When ascending a long grade, downshift
9-15
Z01.2.1/A32-DX