Page 163 of 394
Features
161
[FV10800(ALL)03/94]
One-Touch-Down Power Window (If equipped)
[FV10900(ALL)12/93]
The one-touch-down power window feature allows you to
completely open the driver's window without holding down the
window switch. To open the window completely, tap quickly on
the lower half of the switch and release it. If the top of the
button is pressed firmly while the window is going down, the
window will stop at that position.
*
[FV11000(ALL)07/93]
To open the window only partially, press the lower half of the
switch lightly and hold it until the window has opened to the
desired position and then release the switch.
*
[FV11100(ALL)01/93]
To close the window you must hold the upper half of the
button until the window closes.
[FV11120(ALL)03/94]
Cancelling and reactivating the one-touch-down feature
[FV11130(ALL)06/94]
The one-touch-down power window feature can be cancelled
and reactivated at any time using the following procedure:
[FV11140(ALL)12/93]1.
Make sure the two front doors are securely closed.
[FV11150(ALL)12/93]2.
Insert the key into the ignition and turn first to the ON
position and then back to the OFF position. Remove the key
and within 30 seconds:
[FV11160(ALL)12/93]3.
Press and hold the DOWN side of the driver's side window
rocker switch.
[FV11170(ALL)12/93]4.
Within two seconds, put the key in the ignition.
[FV11180(ALL)12/93]5.
Hold the switch down until a long (two second) tone is
heard. Release the switch while the tone is active.
[FV11190(ALL)12/93]6.
After the long tone, a confirmation sequence will be heard.
One beep indicates the feature is inactive. Two beeps
indicates the feature is active.
[FV11195(ALL)12/93]
Repeat this procedure any time you want to cancel or reactivate
the one-touch-down power window feature.
File:wnfvs.ex
Update:Tue Mar 19 08:21:54 1996
Page 165 of 394
Features
163
[FV11800(ALL)09/93]
10-1/2 pica
art:0050034-A
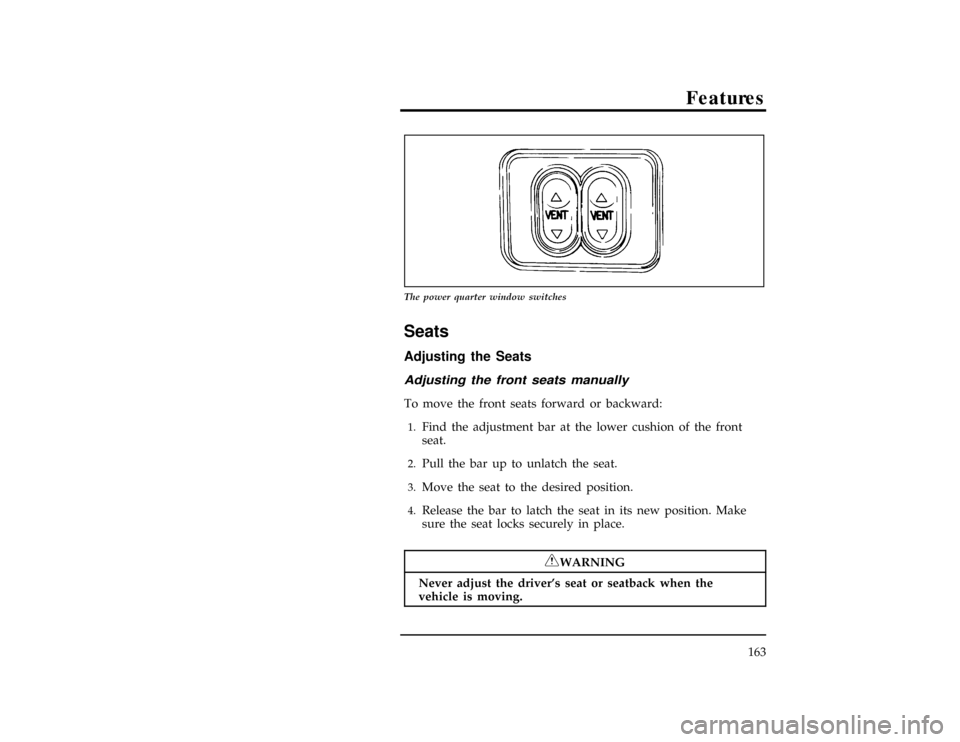
The power quarter window switches
%*
[FV13000(ALL)01/95]
Seats
*
[FV13100(ALL)01/95]
Adjusting the Seats
[FV13150(ALL)03/94]
Adjusting the front seats manually
*
[FV13200(ALL)04/95]
To move the front seats forward or backward:
[FV13300(ALL)09/93]1.
Find the adjustment bar at the lower cushion of the front
seat.
[FV13400(ALL)10/93]2.
Pull the bar up to unlatch the seat.
*
[FV13500(ALL)04/95]3.
Move the seat to the desired position.
[FV13600(ALL)10/93]4.
Release the bar to latch the seat in its new position. Make
sure the seat locks securely in place.
*
[FV13900(ALL)05/95]
RWARNING
Never adjust the driver's seat or seatback when the
vehicle is moving.
File:wnfvs.ex
Update:Tue Mar 19 08:21:54 1996
Page 166 of 394
164
*
[FV14000(ALL)05/95]
RWARNING
Do not pile cargo higher than the seatbacks to avoid
injuring people in a collision or sudden stop.
*
[FV14025(ALL)05/95]
RWARNING
To reduce the risk of serious injury in a collision, always
drive and ride with your seatback upright and the lap
belt snug and low across the hips.
*
[FV14050(ALL)05/95]
RWARNING
To reduce the risk of serious injury in a collision,
children should always ride with the seatback upright.
[FV14075(ALL)02/96]
Tip Slide Seat (If equipped)
[FV14085(ALL)02/96]
This feature allows convenient access into the second row seats
through the driver's door.
[FV14090(ALL)02/96]
To operate the tip slide seat:
[FV14095(ALL)02/96]1.
Lift the tip slide release lever located at the base of the
driver's seatback. The seatback tilts forward and the tip slide
seat latch mechanism is released.
File:wnfvs.ex
Update:Tue Mar 19 08:21:54 1996
Page 168 of 394
166
[FV14105(ALL)02/96]
17-1/2 pica
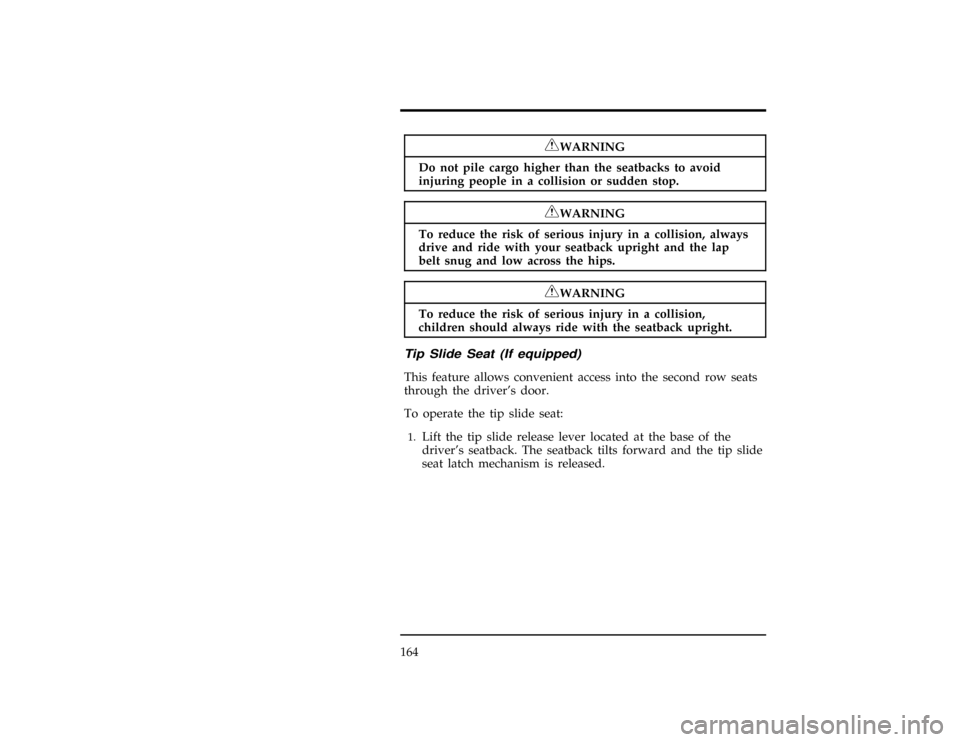
art:0050295-A[FV14110(ALL)02/96]2.
Push on the seatback to move the seat assembly forward.
This provides access to the second row for loading and
unloading groceries, briefcases, passengers, etc. through the
driver's door.
[FV14115(ALL)02/96]
To return the driver seat to its previous position and seat angle:
[FV14120(ALL)02/96]1.
Push the seatback to move the seat assembly rearward, until
the pedestal stops.
File:wnfvs.ex
Update:Tue Mar 19 08:21:54 1996
Page 170 of 394
168
[FV14165(ALL)02/96]
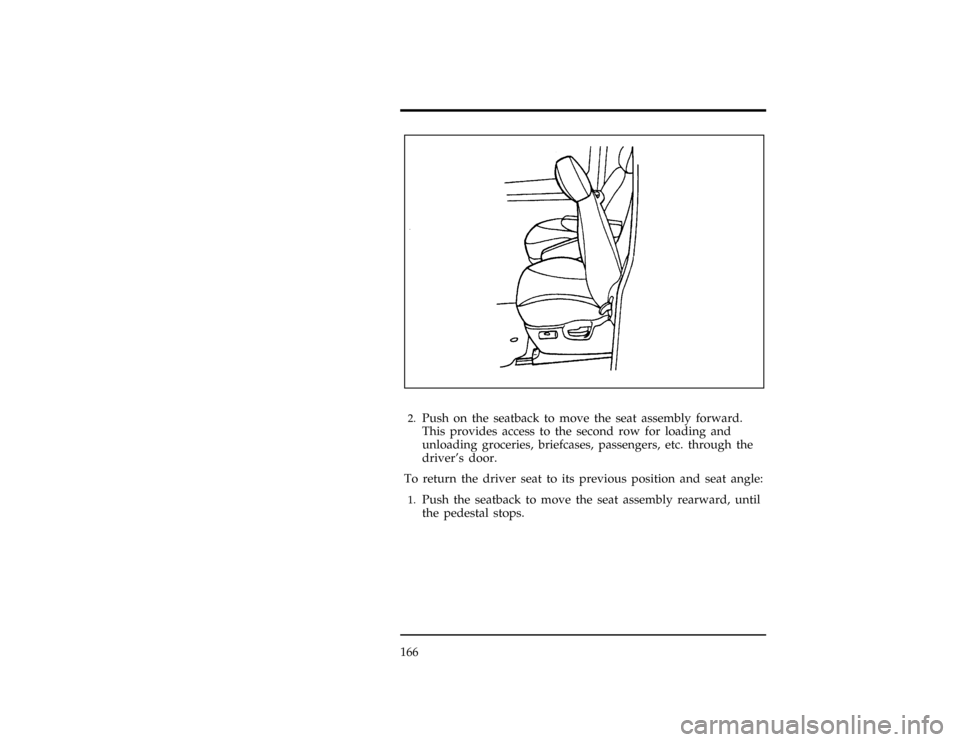
7-1/2 pica art:0050293-A[FV14170(ALL)02/96]3.
Move the seat to the desired position.
[FV14175(ALL)02/96]4.
Release the bar to latch the seat in its new position. Make
sure the seat locks securely in place.
[FV14180(ALL)02/96]
To recline the seat:
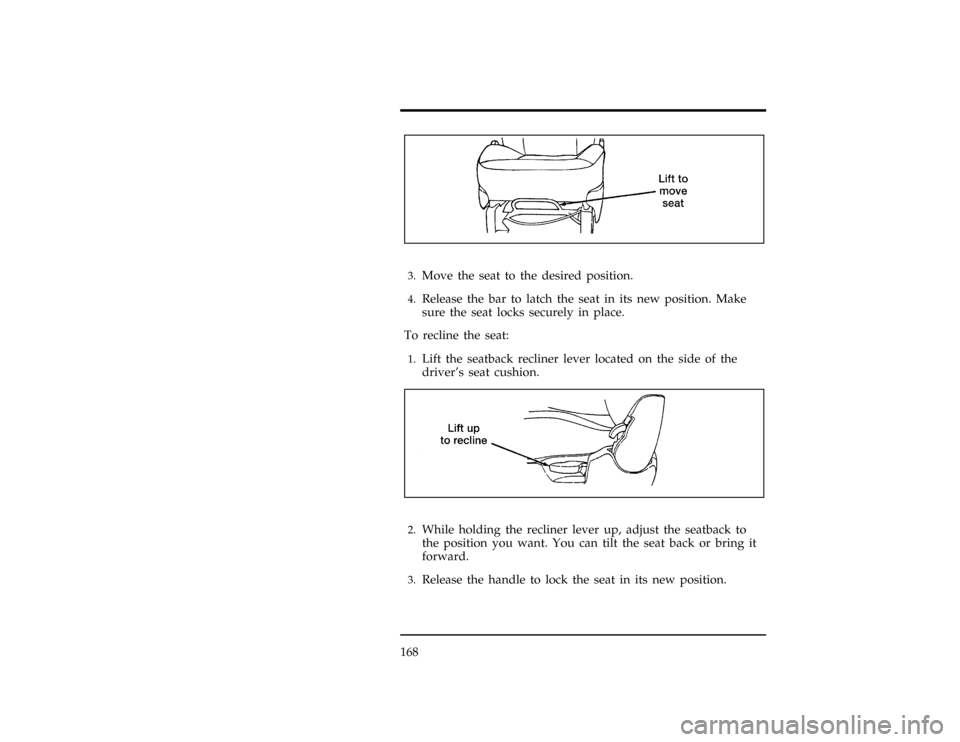
[FV14185(ALL)02/96]1.
Lift the seatback recliner lever located on the side of the
driver's seat cushion.
[FV14188(ALL)02/96]
7-1/2 pica art:0050294-A[FV14190(ALL)02/96]2.
While holding the recliner lever up, adjust the seatback to
the position you want. You can tilt the seat back or bring it
forward.
[FV14195(ALL)02/96]3.
Release the handle to lock the seat in its new position.
File:wnfvs.ex
Update:Tue Mar 19 08:21:54 1996
Page 171 of 394
Features
169
[FV14200(ALL)02/96]
RWARNING
Never adjust the driver's seat or seatback when the
vehicle is moving.
[FV14205(ALL)02/96]
RWARNING
To reduce the risk of serious injury in a collision, always
drive and ride with your seatback in an upright position
with the lap belt snug and low across the hips.
%[FV14220(ALL)04/94]
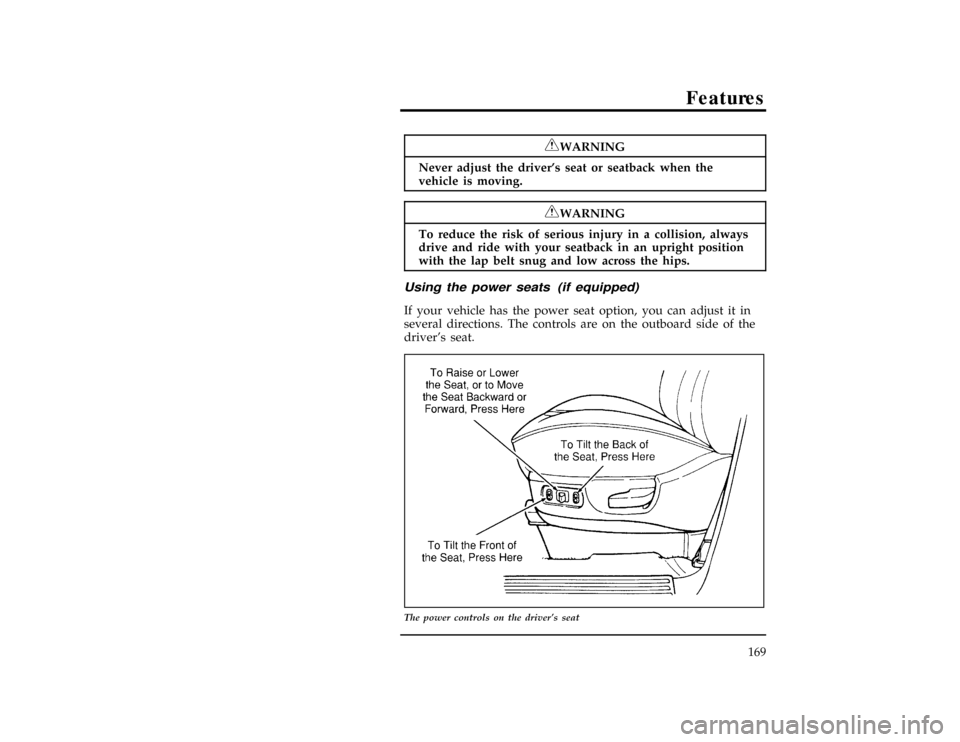
Using the power seats (if equipped)
[FV14240(ALL)11/93]
If your vehicle has the power seat option, you can adjust it in
several directions. The controls are on the outboard side of the
driver's seat.
[FV14260(ALL)11/93]
17-1/2 pica
art:0050103-A
The power controls on the driver's seat
File:wnfvs.ex
Update:Tue Mar 19 08:21:54 1996
Page 172 of 394
170
% [FV14270(ALL)03/94]
Power lumbar support, driver/passenger seat
(If equipped)
[FV14275(ALL)12/93]
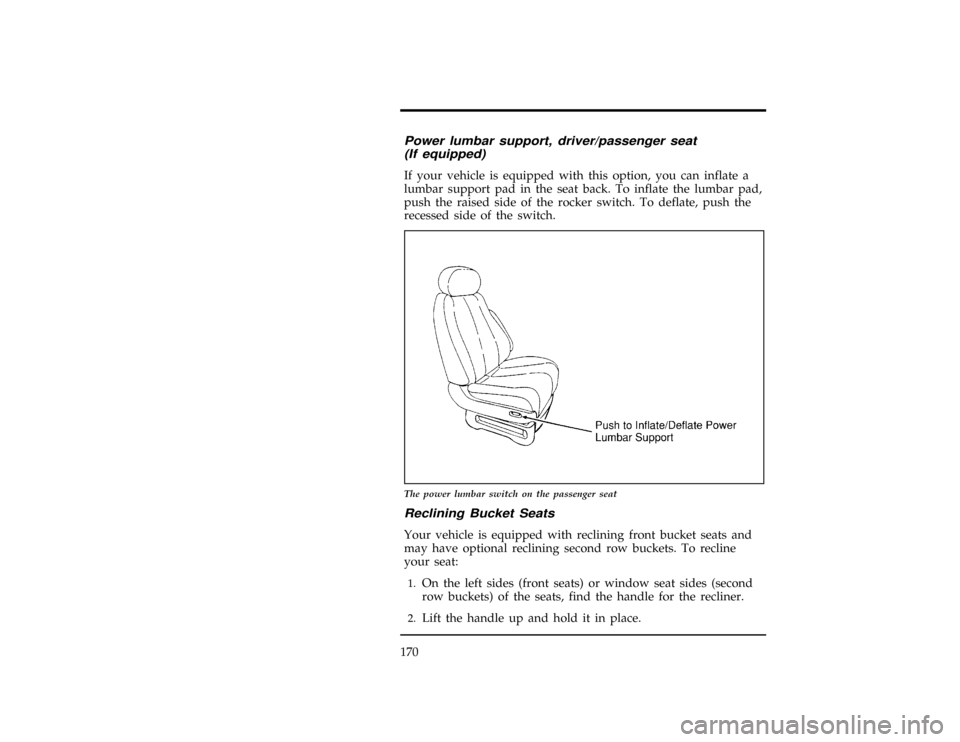
If your vehicle is equipped with this option, you can inflate a
lumbar support pad in the seat back. To inflate the lumbar pad,
push the raised side of the rocker switch. To deflate, push the
recessed side of the switch.
[FV14280(ALL)04/95]
17-1/2 pica
art:0050102-A
The power lumbar switch on the passenger seat
[FV14300(ALL)11/93]
Reclining Bucket Seats
[FV14400(ALL)03/94]
Your vehicle is equipped with reclining front bucket seats and
may have optional reclining second row buckets. To recline
your seat:
[FV14500(ALL)04/95]1.
On the left sides (front seats) or window seat sides (second
row buckets) of the seats, find the handle for the recliner.
*
[FV14600(ALL)04/95]2.
Lift the handle up and hold it in place.
File:wnfvs.ex
Update:Tue Mar 19 08:21:54 1996
Page 179 of 394
Features
177
[FV16300(ALL)03/94]
To install the second row bucket seats:
[FV16400(ALL)11/93]1.
Lift the seat assemblies into the vehicle.
[FV16500(ALL)11/93]2.
Locate front hooks on front pins and drop rear hooks over
rear pins with enough force to cause the hooks at the rear to
engage and hook on to the pins in the floor wells.
[FV16601(ALL)11/93]3.
Ensure that the latch handles are fully seated in the down
position.
*
[FV16800(ALL)05/95]
RWARNING
Check to see that the seat is latched securely in position.
Keep floor area free of objects that would prevent proper
seat engagement. Never attempt to adjust the seat latch
while the vehicle is in motion.
[FV16900(ALL)12/93]
Two and Three Passenger Bench Seat Assemblies
[FV17000(ALL)11/93]
NOTE: It is easiest to remove/reinstall both the second and
third row bench seats through the sliding door. Also,
remove any floor mats (if equipped) in the rear
seating compartments before seat removal.
*
[FV17100(ALL)03/91]
To remove seat assembly:
[FV17780(ALL)08/94]1.
(For second row bench seat only) Disengage the tongue
portion of the lap/shoulder belt from the detachable anchor
assembly by inserting a key or small screwdriver into the
slot provided on the detachable anchor (see Figure 1). When
this shoulder belt assembly is free of the seat, allow the
retractor to wind up the slack in the belt.
File:wnfvs.ex
Update:Tue Mar 19 08:21:54 1996