1996 CHEVROLET S10 high beam
[x] Cancel search: high beamPage 85 of 375

Downloaded from www.Manualslib.com manuals search engine Turn SignaVMultifunction Lever
The lever on the left side of the steering column
includes your:
0 Turn Signal and Lane Change Indicator
0 Headlamp HighLow Beam Changer
0 Windshield Wipers
Windshield Washer
0 Cruise Control (Option)
Turn and Lane Change Signals
The turn signal has two upward (for right) and two
downward (for left) positions. These positions allow
you
to signal a turn or a lane change.
To signal a turn, move the lever all the way up or
down. When the turn is finished, the lever will
return automatically.
An arrow on the instrument
panel will flash in the
direction of the turn or
lane change.
To signal a lane change, just raise or lower the lever
until the arrow starts to flash. Hold it there until you
complete your lane change. The lever will return by
itself when you release
it.
As you signal a turn or a lane change, if the arrows don’t
flash but just stay on, a signal bulb may be burned out
and other drivers won’t see your turn signal.
2-34
Page 86 of 375

Downloaded from www.Manualslib.com manuals search engine If a bulb is burned out, replace it to help avoid an
accident. If the arrows don’t go
on at all when you
signal a turn, check the fuse (see “Fuses and Circuit
Breakers” in the Index) and for burned-out bulbs.
If
you have a trailer towing option with added wiring for
the trailer lamps,
a different turn signal flasher is used.
With this flasher installed, the signal indicator will flash
even if a turn signal bulb is burned out. Check the front
and rear turn signal lamps regularly to make sure they
are working.
Headlamp High/Low Beam Changer
To change the headlamps from low-beam to high or
high to low, pull the multifunction lever all the way
toward you. Then release it.
When the high-beam
headlamps are
on, this
indicator light
on the
instrument panel also
will be
on.
Windshield Wipers
You control the windshield
wipers by turning the band
with the wiper symbol
on it.
For a single wiping cycle, turn the band
to MIST. Hold
it there until the wipers start, then let go. The wipers will
stop after one wipe. If you want more wipes, hold the
band
on MIST longer.
You can set the wiper speed for a long or short delay
between wipes. This can be very useful in light rain or
snow. Turn the band
to choose the delay time. The
closer
to LOW, the shorter the delay.
For steady wiping at
low speed, turn the band away
from
you to the LOW position. For high-speed wiping,
turn the band further,
to HIGH. To stop the wipers,
move the band
to the OFF position.
2-35
Page 93 of 375

Downloaded from www.Manualslib.com manuals search engine Press the side of the switch with the fog lamp symbol to
turn the fog lamps on. Press OFF to turn them off. A
light will glow in the switch when the fog lamps are on.
Remember,
fog lamps alone will not give off as much
light as your headlamps.
Never
use your fog lamps in the dark without turning on
your headlamps.
Fog lamps will
go off whenever your high-beam
headlamps come on. When the high-beam headlamps go
off, the fog lamps will come on again.
Interior Lamps
Brightness Control
Turn the switch next to the headlamp switch up to
make your instrument panel and transfer case lights
brighter. Turn the switch all the way up to turn on the
interior lamps.
Front Map Lamps (Option)
If your vehicle has optional front map lamps, they are
located
on the inside rearview mirror. They will
automatically come
on for approximately 20 seconds
when either front door is opened or unlocked with the
Keyless Entry System, if
so equipped, or until the
ignition key is turned to
RUN or ACCESSORY. The
lamps will also stay
on for approximately 15 seconds
after you exit
the vehicle.
They will also stay on for 15 seconds when the INT
LIGHTS switch
on the instrument panel is turned on
then
off, while the ignition is off.
You can also turn the lamps
on and off by pressing the
switch near each lamp.
Dome Lamp
Turn the INT LIGHTS dimmer switch up until it clicks
to turn
on the dome lamp.
2-42
Page 160 of 375

Downloaded from www.Manualslib.com manuals search engine driving, don’t wear sunglasses at night. They may cut
down
on glare from headlamps, but they also make a lot
of things invisible.
You can be temporarily blinded by approaching lights.
It can take
a second or two, or even several seconds, for
your eyes to readjust to the dark. When you are faced
with severe glare (as from a driver who doesn’t lower
the high beams, or a vehicle
with misaimed headlamps),
slow down a little. Avoid staring directly into the
approaching lights.
Keep your windshield and all the glass on your vehicle
clean
-- inside and out. Glare at night is made much
worse by dirt on the glass. Even the inside of the glass
can build up a
film caused by dust. Dirty glass makes
lights dazzle and flash more than clean glass would,
making the pupils of your eyes contract repeatedly.
Remember that your headlamps light up
far less of a
roadway when you are in a turn or curve. Keep your
eyes moving; that way, it’s easier to pick out dimly
lighted objects. Just as your headlamps should be
checked regularly for proper aim,
so should your eyes
be examined regularly. Some drivers suffer from night
blindness
-- the inability to see in dim light -- and
aren’t even aware of
it.
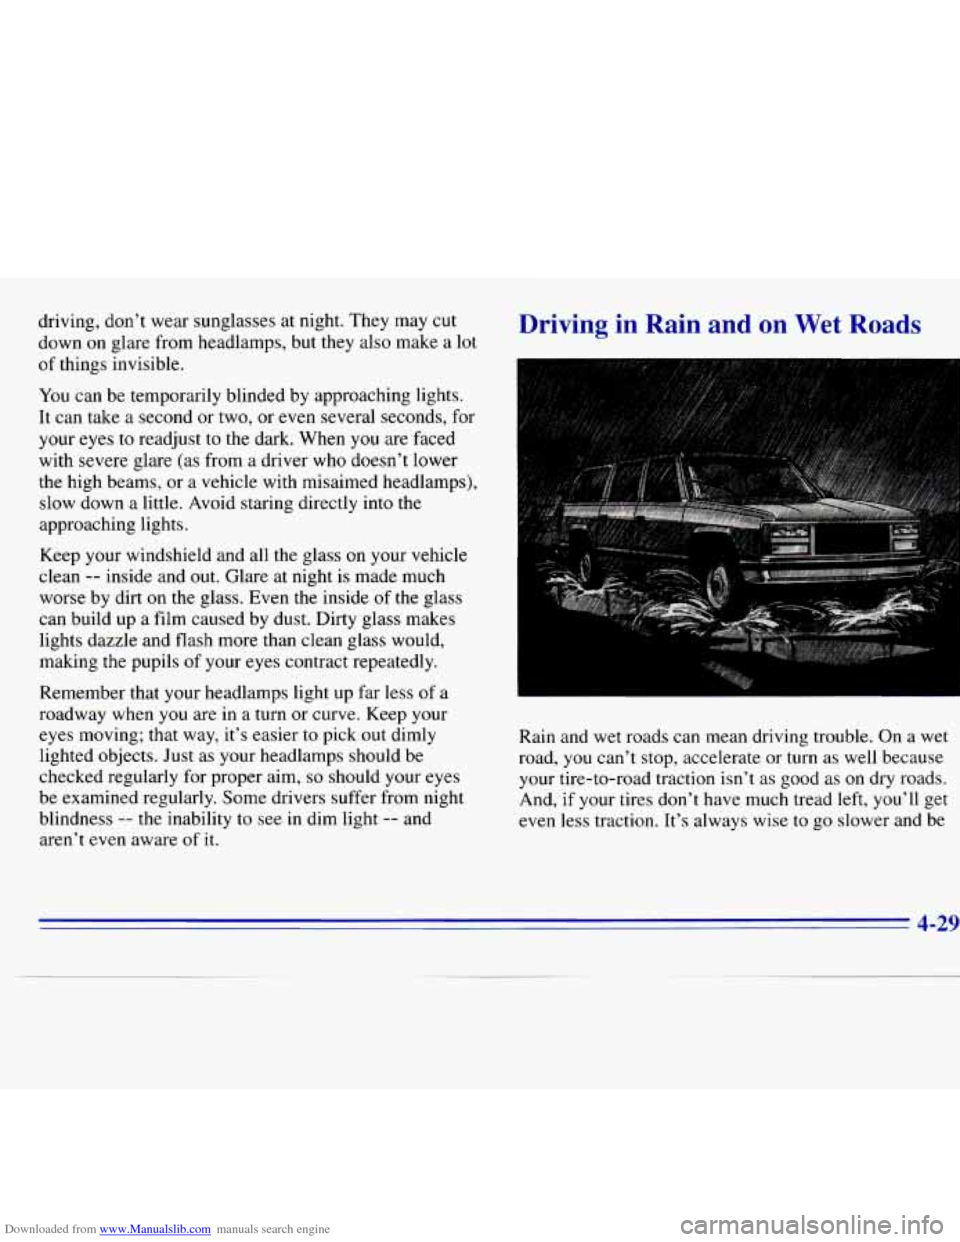
Driving in Rain and on Wet Roads
Rain and wet roads can mean driving trouble. On a wet
road, you can’t stop, accelerate or
turn as well because
your tire-to-road traction isn’t as good as on dry roads.
And,
if your tires don’t have much tread left, you’ll get
even less traction. It’s always wise to go slower and be
4-29
Page 292 of 375

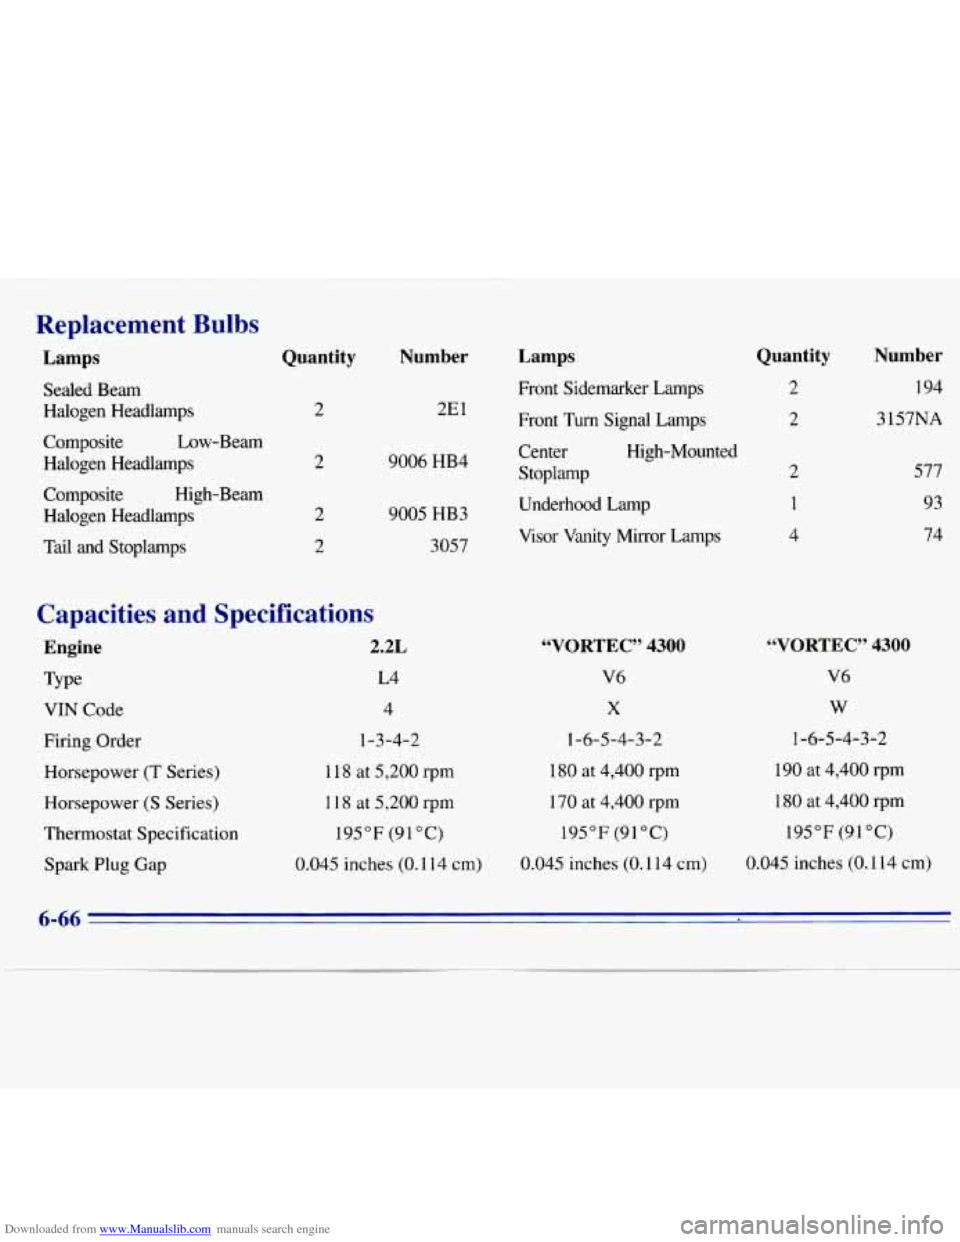
Downloaded from www.Manualslib.com manuals search engine Replacement Bulbs
Lamps
Sealed Beam Halogen Headlamps
Composite Low-Beam
Halogen Headlamps Composite High-Beam
Halogen Headlamps
Tail and Stoplamps
Quantity
2
2
2
2
Number
2El
9006 HB4
9005 HB3 3057
Capacities and Specifications
Type L4
Engine 2.2L
VIN Code 4
Firing Order 1-3-4-2
Horsepower
(T Series) 1 18 at 5,200 rpm
Horsepower
(S Series) 1 18 at 5,200 rpm
Thermostat Specification 195°F (91°C)
Spark
Plug Gap 0.045 inches
(0.1 14 cm)
Lamps
Front Sidemarker Lamps
Front Turn Signal Lamps
Center High-Mounted
Stoplamp
Underhood Lamp
Visor Vanity Mirror Lamps
“VORTEC” 4300
V6
X
1-6-5-4-3-2
180 at 4,400 rpm
170
at 4,400 rpm
195°F (91°C)
0.045 inches (0.114 cm)
Quantity
2
2
Number
194
3 157NA
577 93
74
“VORTEC” 4300
V6
W
1-6-5-4-3-2
190 at 4,400 rpm
180 at 4,400 rpm
195°F (91 “C)
0.045 inches (0.1 14 cm)
6-66
Page 369 of 375

Downloaded from www.Manualslib.com manuals search engine Halogen Bulbs ................................ 6-35
Hazard Warning Flashers
.......................... 5- I
Headlamps .................................... 2-39
Bulb Replacement
............................ 6-36
HighLow Beam Changer
...................... 2-35
Wiring
..................................... 6-62
Headlamps
On Reminder ......................... 2-40
Hearing Impaired. Customer Assistance
.............. 8-3
Heater Controls ................................. 3- I
Heater/Air Conditioning Controls ................... 3-2
Highway Hypnosis
.............................. 4-35
Hill and Mountain Roads
......................... 4-35
Hitches. Trailer
................................. 4-5 1
Hood .......................................... 6-7
Horn
......................................... 2-33
Horsepower
................................... 6-66
Hydraulic Clutch
............................... 6-20
HighLow
Beam Changer
........................ 2-35
Hydroplaning
.................................. 4-31
Ignition Positions
............................... 2-8
Inflation. Tire
.................................. 6-45
Inside Day/Night Rearview Mirror
................. 2-43
Inspections Brakesystem
................................ 7-52
Drive
Axle .................................. 7-52
Exhaust Systems
............................. 7-5 1
Radiator and Heater Hose ...................... 7-5 1
Steering .................................... 7-51 Suspension
.................................. 7-51
Throttle
Linkage ..............................
Instrument Panel ............................... 2-48
Cleaning
.................................... 6-55
Cluster ..................................... 2-50
Fuse Block .................................. 6-63
Interior Lamps
................................. 2-42
.................................... J ack. Tire 5-22
JumpSeat
...................................... 1-6
Jump Starting
................................... 5-2
Key
in the Ignition .............................. 2-7
Keyless Entry System
............................ 2-5
Key Lock Cylinders Service
...................... 7-48
Key Release Button
............................. 2-10
Keys
.......................................... 2-1
Labels CertificationRire
............................. 4-42
Fuse
....................................... 6-64
Safety Belt
.................................. 1-39
Service Parts Identification
..................... 6-61
Vehicle Identification Number
................... 6-61
Dome ...................................... 2-42
Front Map
................................... 2-42
Interior
..................................... 2-42
Lamps
........................................ 2-39
9-5