Page 254 of 354

Downloaded from www.Manualslib.com manuals search engine NOTICE:
Improperly tightened wheel nuts can lead to
brake pulsation and rotor damage.
To avoid
expensive brake repairs, evenly tighten the wheel
nuts in the proper sequence and to the proper
torque specification.
Don’t try to put a wheel cover on your compact spare
tire.
It won’t fit. Store the wheel cover in the trunk until
you have the flat tire repaired or replaced.
I NOTICE:
Wheel covers won’t fit on your compact spare. If
you try to put a wheel cover on your compact
spare, you could damage the cover or the
compact spare.
Storing the Fla’ Tire and Tools
A CAUTION:
Storing a jack, a tire or other equipment in the
passenger compartment
of the vehicle could
cause injury. In
a sudden stop or collision, loose
equipment could strike someone. Store all these
in the proper place.
After you’ve put the compact spare tire on your vehicle,
you’ll need to store the flat tire
in your trunk. Use the
following procedure to secure the flat tire in the
trunk.
Put the flat tire in the trunk so the side that faces out
when it is on the vehicle is facing down. The full-size
tire will not fit down into the well. Place it
so the front is
in the well and the rear is out of the well.
5-33
Page 256 of 354
Downloaded from www.Manualslib.com manuals search engine The compact spare is for temporary use only. Replace
the compact spare tire with a full-size tire as
soon as you
can. See the storage instructions label to replace your
compact spare into your trunk properly.
SPARE TIRE
&
Compact Spare Tire
Although the compact spare tire was fully inflated when
your vehicle was new, it can lose air after a time. Check
the inflation pressure regularly. It should be
60 psi
(420 Wa).
After installing the compact spare
on your vehicle, you
should stop as
soon as possible and make sure your
spare tire is correctly inflated. The compact spare is
made to perform well at posted speed limits for
distances up
to 3,000 miles (5 000 km), so you can
finish your trip and have your full-size tire repaired or
replaced where you want. Of course, it’s best
to replace
your spare with a full-size tire as
soon as you can. Your
spare will last longer and be in good shape in case you
need it again.
5-35
Page 264 of 354
Downloaded from www.Manualslib.com manuals search engine The fuel door release is located on the optional full
console and
on the Keyless
Entry transmitter. If your
vehicle
is not equipped with
the
full console, then you
must use the transmitter to
open the fuel door.
An alternate fuel door release is located
inside of the trunk
on the left hand side.
Pull
it to release the
fuel door. Hang
the cap inside the fuel door while refueling. To take off the cap, turn it slowly to the left
(counterclockwise).
Page 293 of 354
Downloaded from www.Manualslib.com manuals search engine Taillamp
1. Open the trunk to gain access to the taillamp
2. Remove the convenience net and pull the trim away
housing.
to access the wing nuts.
3. Remove the two wing nuts.
4. Gently remove the taillamp housing.
5. Press the bulb housing lever and rotate the housing
counterclockwise to remove it.
To remove the bulb,
push and rotate it counterclockwise.
Once you have replaced the burned out bulb, reverse the
steps to reassemble the taillamp.
6-34
Page 312 of 354

Downloaded from www.Manualslib.com manuals search engine Vehicle Identification Number (VIN)
- =I I1 11111111 1.11 111 111111 I11 11111111 111111111111111111111 11- 0
kd SAMPLE4UXTM072675 bd
ENGINEB96 7 ASSEMBLY
CODE
MODEL YEAR PLANT
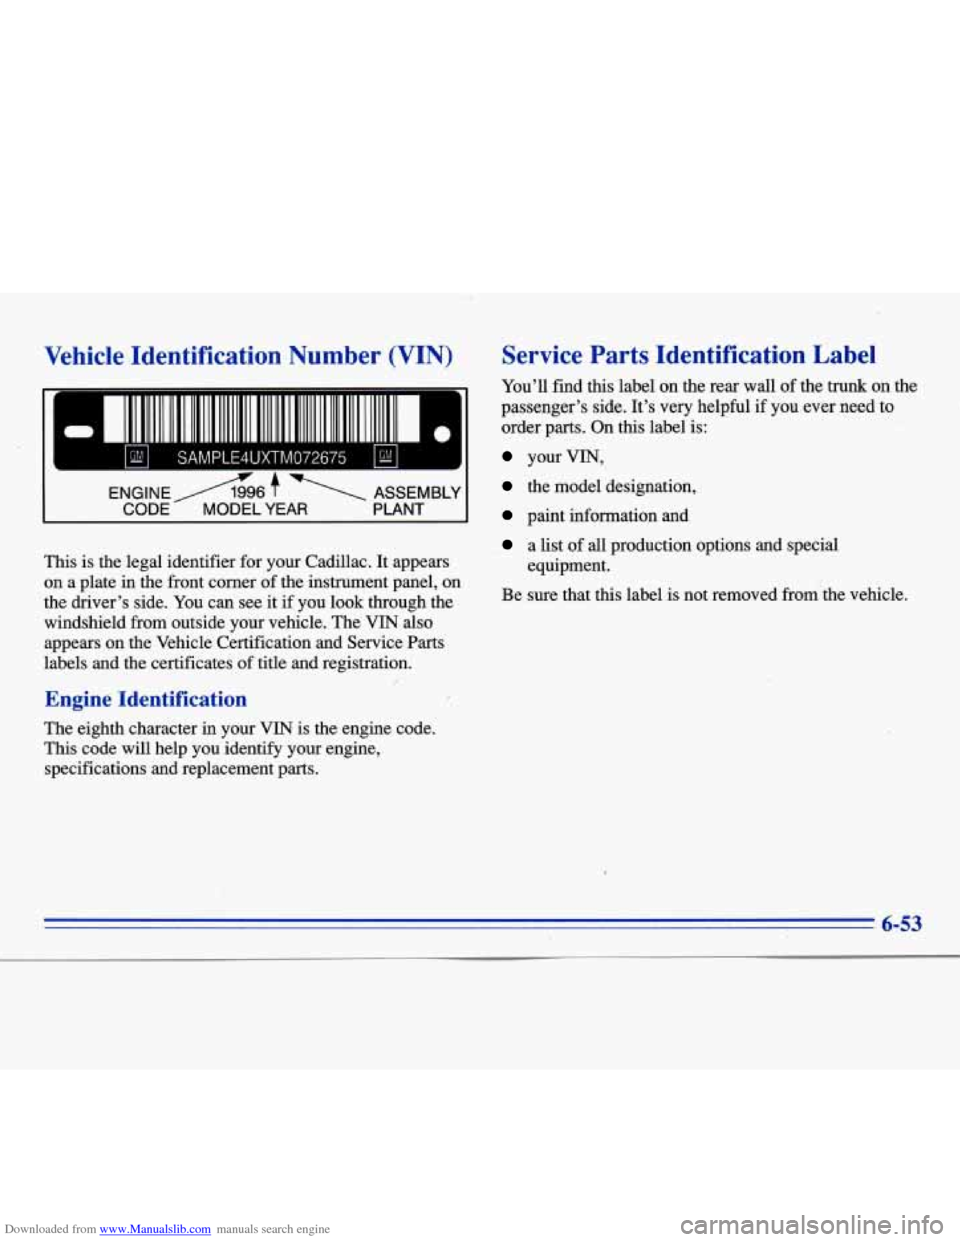
This is the legal identifier for your Cadillac. It appears
on a plate
in the front corner of the instrument panel, on
the driver’s side. You can see it
if you look through the
windshield from outside your vehicle. The’ VIN also
appears on the Vehicle Certification and Service Parts
labels and the certificates of title and registration.
Engine Identification
The eighth character in your VIN is the engine code.
This code will help you identify your engine,
specifications and replacement parts.
Service Parts Identification Label
You’ll find this label on the rear wall of the trunk on the
passenger’s side. It’s very helpful
if you ever need to
order parts. On this label is:
your VIN,
the model designation,
paint information and
a list .of all production options and special
Be sure that this label is not removed from’the vehicle.
equipment.
6-53
Page 315 of 354

Downloaded from www.Manualslib.com manuals search engine INT LPS CIG LTAl
LHDLP Lo R HDLPLO LHDLPHI RHDLP HI SENSE
, HDLPS , I HAZARD I , STOP I I MIRROR , I FOGIDRL ,
IGN O(ENG) CRANK WIPERS
FUSE CENTER IDENTIFICATION
- - -
OXY SEN2 OXY SEN1 FUEL PUMP
CRUISE RELAY
DISTR PCM(IGN ECS ndn - ---
PCM BAT AIC COMP n& n I
AiC COMP RE LAY
FRONT OF VEHICLE 3648830 / I
--- I '/
Fuse Usage
INT LPS Trunk Lamp, Courtesy Lamps,
Front Vanity Lamps, Glove
Box
Lamp, Garage Door Opener,
Courtesy Lamp Relay
CTG LTRl Front Cigarette Lighter (Full
Console Only), Rear Lighter
L HDLP LO Left Low-Beam Headlamp
Fuse
R HDLP LO
L HDLP HI
R HDLP HI
SENSE
-
HDLPS
HAZARD
STOP
Usage
Right Low-Beam Headlamp,
Light Emitting Diode (LED) on
Headlamp Switch
Left High-Beam Headlamp
Right High-Beam Headlamp Heated Windshield Control
(Optional)
Headlamp Switch and Relay,
High/Low Beam Control Relay,
Right and Left
Low Beam (I-Beam),
Right and Left High Beam
Electronic Flasher Module,
Turn/Hazard Module, Right and Left Turn Lamps, Back-up Lamps, Right
and Left Front Turn Lamps, Right
and Left Repeater Lamps (Export)
Stoplamp Switch, Centered
High-Mounted Stoplamp
(CHMSL), Turn Hazard Switch,
ABS Controller. Stepper Motor
Cruise Control, Right and Left
Rear Stoplamps
Page 319 of 354

Downloaded from www.Manualslib.com manuals search engine Fuse
BATT 2
IGN i*
BATT 1
BRAKES
COOL
FNS
Usage
Starter Enable Relay, Park-Neutral
Position Switch, Crank Fuse,
Injector
1 and 2 Fuse, Engine
Control System (ECS) Fuse, PCM
Fuse,
DIS Fuse, Ignition- 1 Fuse,
ACC Fuse
Front Ignition-
1 Relay, Oxygen
Sensor
1 and 2 Fuse, Fuel Fuse,
Cruise Fuse
Starter Relay,
PCM Fuse, AC
Compressor Fuse
ABS Brake Modulator
Cooling Fan Relays
1,2,3
* Do not alt.er OBD I1 related fuses or circuit
breakers.
Rear Compartment Fuse Block
The fuse block is located on the front wall of the trunk
(behind the rear seat)
on the driver’s side. Loosen the
four
trunk trim fasteners and pull the trim away from the
fuse block
to gain access.
RLY ICN 1 SIR RTD
TURN CONSOLE COMFORT
n-0
ANTENNA HDLP WASH CONVENC
noon
IGNO DODY
AMP
nono
PZM RADlOiPHONE CLUSTER
uno-
HTD SEAT R HTD SEAT L PULL DOWN ELC
BATT RTD
RT PARK LT PARK
onon
I Fuse I Usage
RLY IGN 1 * SDM, Cluster, Cruise in Stalk,
Brake Switch,
PZM, Fuel Level
Sensor, Catalytic Converter
Overtemp Amplifier (Export)
I SIR I SDM
I RTD I RTD I
6-60
Page 320 of 354

Downloaded from www.Manualslib.com manuals search engine Fuse
IGN 0- BODY
TURN CONSOLE
Usage
PRNDL, Heated Windshield (Optional), PZM, Cluster, Air
Control Module (ACM), Upper and Lower Zone Motor, HVAC
Solenoids, Climate Control Panel
(Optional), Rear Defog Relay,
ELC Relay
Cornering Lamp Switch, Right
and Left Cornering Lamps,
Electronic Flasher Module,
Turn/Hazard Switch, Right and Left Rear Turn Signal Lamps,
Right and Left Front
Turn Signal
Lamps, Repeater Lamps (Export)
Cellular Phone Portable Docking
Station, Washer Circuit Board,
Heated Seat Switch, Rear Zone
Blower, Right and Left Heated Seat Switches, Headlamp Wash Relay
Fuse
COMFORT
AMP
(Optional)
PZM
RADIO/ PHONE
CLUSTER
ACC
RR DEFOG
Usage
CD Player, Remote Function
Actuator (RFA), Controlled Power
Relay, Air Control Module (ACM), PZM
Right and Left Hand Bose Relay,
Right Front and Rear Speaker
(On Door), Left Front and Rear
Speaker (On Door)
PZM
Radio Receiver, Radio Interface Module (RIM)(Bose Only),
Phone, DAB Relay, Trunk Release
Relay, Fuel Door Release Relay,
High Beam Relay
Steering Wheel Controls, Cluster
PZM, Electrochromic Mirror, Rain
Sensor (Optional), Accessory Relay
Rear Defog
6-
-I