1995 PONTIAC PONTIAC change time
[x] Cancel search: change timePage 3 of 354

-
GM
GENERAL MOTORS, GM and the GM Emblem,
PONTIAC and the PONTIAC Emblem are registered
trademarks of General Motors Corporation.
This manual includes the latest information at the time it
was printed. We reserve the right to make changes in the
product after that time without further notice. For
vehicles first sold in Canada, substitute the name “General Motors
of Canada Limited” for Pontiac
Division whenever it appears in this manual.
Please keep this manual in your Pontiac,
so it will be
there
if you ever need it when you’re on the road. If you
sell the vehicle, please leave this manual in it
so the new
owner can use it.
Litho in U.S.A.
Part
No. 10280073 A Second Edition
WE SUPPORT VOLUNTARY TECHNICIAN CERTIFICATION THROUGH
AUTOMOTIVE National Institute for
EXCELLENCE SERVICE
we support voluntary
technician certification.
For Canadian Owners Who Prefer a
French Language Manual
Aux proprietaires canadiens: Vous pouvez vous procurer
un exemplaire de ce guide en fraqais chez votre
concessionaire ou au
DGN Marketing Services Ltd.,
1500 Bonhill Rd., Mississauga, Ontario L5T 1C7.
@Copyright General Motors Corporation 1994 All Rights Reserved
ii
ProCarManuals.com
Page 68 of 354
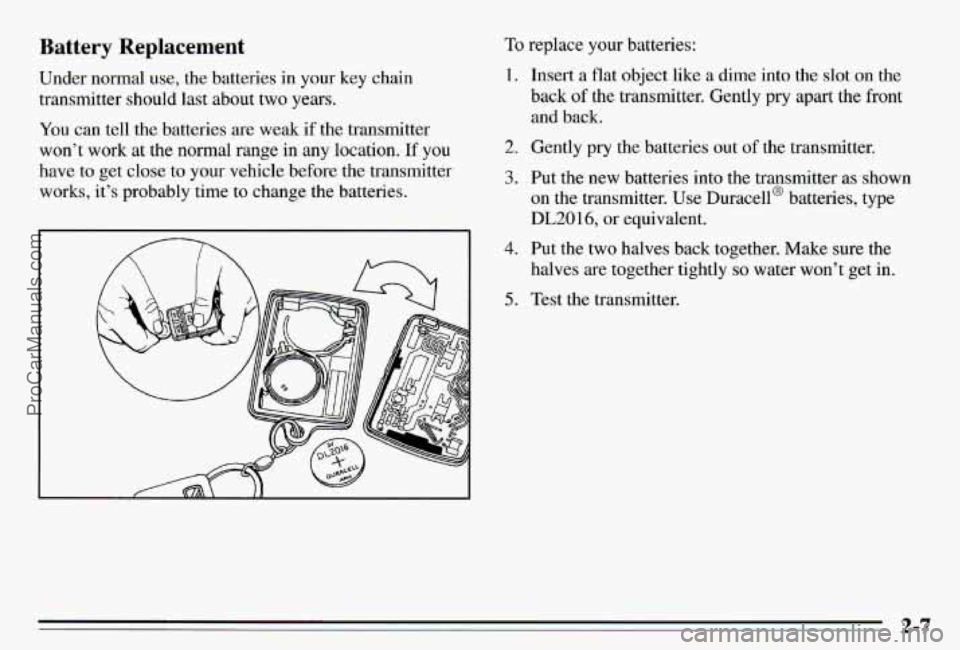
Battery Replacement
Under normal use, the batteries in your key chain
transmitter should last about two years.
You can tell the batteries are weak if the transmitter
won’t work at the normal range in any location.
If you
have to get close to
your vehicle before the transmitter
works, it’s probably time to change the batteries.
To replace your batteries:
1.
2.
3.
4.
5.
1nse.d a flat object like a dime into the slot on the
back of the transmitter. Gently pry apart the front
and back.
Gently
pry the batteries out of the transmitter.
Put
the new batteries into the transmitter as shown
on the transmitter. Use Duracell@ batteries, type
DL20 1 6, or equivalent.
Put the two halves back together. Make sure the
halves are together tightly
so water won’t get in.
Test
the transmitter.
2-7
ProCarManuals.com
Page 75 of 354

To start your engine:
1. Without pushing the accelerator pedal, turn your
ignition
key to START. When the engine starts, let
go of the key. The idle speed will
go down as your
engine gets warm.
NOTICE:
Holding your key in START for longer than
15 seconds at a time will cause your battery to
be drained much sooner. And the excessive heat
can damage your starter motor.
2. If your engine won’t start (or starts but then stops),
it could be flooded with too much gasoline. Try
pushing your accelerator pedal all the way to the
floor and holding it there as you hold the key in
START for about three seconds. If the vehicle starts
briefly but then stops again, do the same thing, but
this time keep the pedal down for five or six seconds.
This clears the extra gasoline from the engine. Your
engine
is designed to work with the
electronics
in your vehicle. If’ you add electrical
parts or accessories, you could change the way the
fuel injection system operates. Before adding
electrical equipment, check with your dealer.
If you
don’t, your engine might not perform properly.
If you ever have to have your vehicle towed, see
the part of this manual that tells how to do it
Driving Through Deep Standing
Water
NOTICE:
If you drive too quickly through deep puddles
or standing water, water can come
in through
your engine’s
air intake and badly damage your
engine. Never drive through water that is slightly
lower than the underbody
of your vehicle. If you
can’t avoid deep puddles or standing water, drive
through them very slowly.
2-14
ProCarManuals.com
Page 96 of 354

1 Fog Lamps
To turn the fog lamps on, press the top of the fog lamp
switch
(C). Press the bottom of the switch to turn the fog
lamps
off. Your parking lamps must be on, or your fog
lamps won't come
on.
The fog lamps will go off whenever you change to
high-beam headlamps. When you return
to low beams,
~ the fog lamps will come on again.
I Instrument Panel Lamps
You can brighten or dim the instrument panel lamps by
moving the PANEL dial. If you turn the dial all the way
up, your courtesy or interior lamps will come on.
Turn the knob to LAMPS
(B) to turn on the headlamps
and other operating lamps.
Turn the knob to PARK
(A) to turn on the parking and
other operating lamps without
the headlamps.
Turn the knob to
OFF to turn off the lamps.
A warning chime will sound when you turn the ignition switch to
OFF, LOCK or ACC with the lamps on.
Daytime Running Lamps (Canada Only)
Daytime Running Lamps (DRL) can make it easier for
others to see the front of
your vehicle during the day.
DRL can be helpful in many different driving conditions, but they can be especially helpful in the
short periods after dawn and before sunset.
A light sensor on top
of the instrument panel makes the
DRL work,
so be sure it isn't covered.
2-35
ProCarManuals.com
Page 97 of 354
The DlU system will make your low-beam headlamps
come on at a reduced brightness when:
0 The ignition is on,
The headlamp switch is off, and
The parking brake is released.
When the
DRL are on, only your low-beam headlamps
will be on. The taillamps, sidemarker and other lamps
won’t be on. Your instrument
I .-- won’t be lit up
either.
When it’s dark enough outside, your low-beam
headlamps will change to full brightness. The other
lamps that come on with your headlamps will also come
on.
When it’s bright enough outside, the regular lamps will go out, and your low-beam headlamps change to the
reduced brightness of DRL.
To idle your vehicle with the
DlU off, set the parking
brake while the ignition is in
OFF or LOCK. Then start
your vehicle. The
DRL will stay off until you release the
parking brake.
As with any vehicle, you should turn on the regular
headlamp system any time you need it.
Interior Lamps
When any door is opened, several lamps come on. These
lamps are courtesy lamps. They make it easy for you
to
enter and leave your vehicle. You can also turn these
larnps on by moving the PANEL dial all the way up.
Some of the lamps have switches
so you can turn them
on, even when the doors are closed. These lamps are
reading lamps. To avoid draining your battery, be sure to
turn
off all reading lamps when leaving your vehxle.
Battery Saver
Your vehicle has a feature to help prevent you from
draining the battery,
in case you accidentally leave the
courtesy lamps
on. If you leave the PANEL dial turned
all the way up, or
if you leave a door open, the lamps
will automatically turn
off after 10 minutes if the
ignition is
off.
This feature will not turn off the reading lamps, only the
lamps controlled by the
PANEL dial. Be sure to turn off
any reading lamps using the switch before you leave the
vehicle.
2-36
ProCarManuals.com
Page 122 of 354
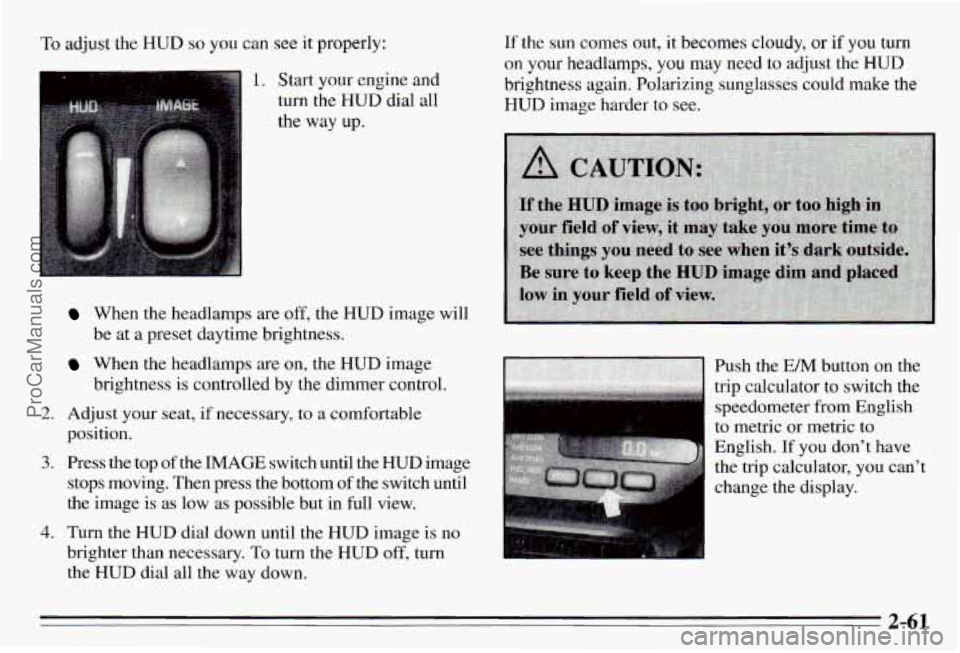
‘To adjust the HUD so you can see it properly:
1. Start your engine and
turn the HUD dial all
the way up.
2.
3.
4.
When the headlamps are off, the HUD image will
be at a preset daytime brightness.
brightness is controlled by the dimer control.
When the headlamps are on, the HUD image
Adjust your seat, if necessary, to
a comfortable
position.
Press the top of
the IMAGE switch until the HUD image
stops moving. Then press the bottom of the switch until
the image is as low as possible but in full view.
Turn the HUD dial down until the HUD image is
no
brighter than necessary. To turn the HUD off, turn
the HUD dial all
the way down.
If the sun comes out, it becomes cloudy, or if you turn
on
your headlamps, you may need to adjust the HUD
brightness again, Polarizing sunglasses could make the
HUD image harder to see.
speedometer from English
to metric or metric to
English. If you don’t have
the trip calculator, you can’t
1 change the display.
2-61
ProCarManuals.com
Page 136 of 354
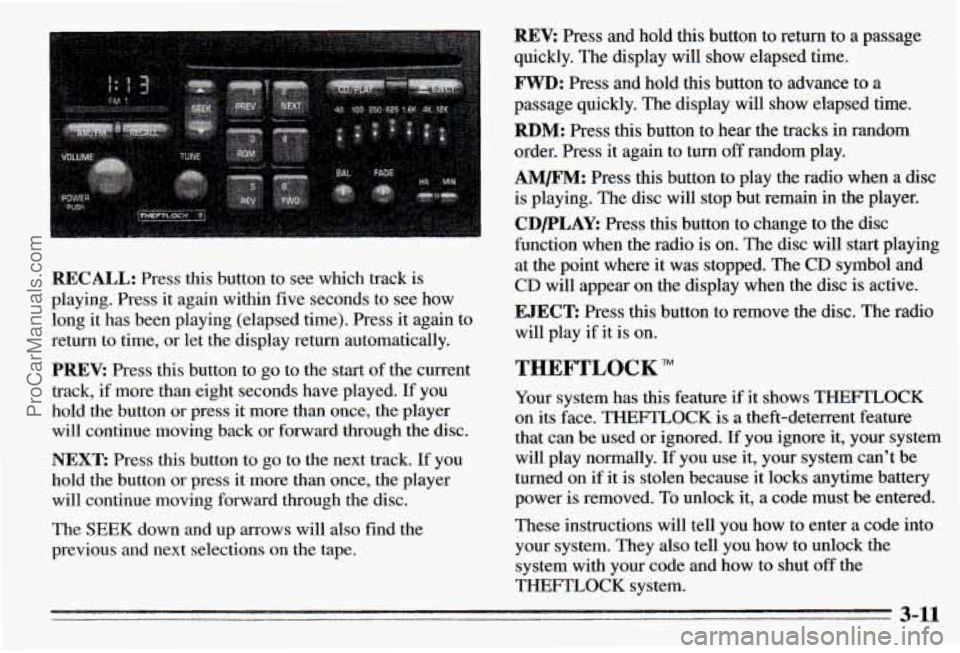
REV: Press and hold this button to return to a passage
quickly. The display will show elapsed time.
FWD: Press and hold this button to advance to a
passage quickly. The display will show elapsed time.
RBM: Press this button to hear the tracks in random
order. Press it again to turn
off random play.
AM/FM: Press this button to play the radio when a disc
is playing. The disc will stop but remain in the player.
CDPLAY: Press this button to change to the disc
function when the radio is on. The disc will start playing
at the point where it was stopped. The CD symbol and
CD will appear on the display when the disc is active.
RECALL: Press this button to see which track is
playing. Press it again within five seconds to see how
long
it has been playing (elapsed time). Press it again to
return to time, or let the display return automatically.
PREV: Press this button to go to the start of the current
track, if more than eight seconds ha.ve played. If you
hold the button or press it more than once, the player
will continue moving back or forward through the disc.
NEXT: Press this button to go to the next track. If you
hold the button
or press it more than once, the player
will continue moving forward through the disc.
The SEEK down and
up arrows will also find the
previous and next selections on the tape.
EJECT: Press this button to remove the disc. The radio
will play if it is on.
THEFTLOCK
Your system has this feature if it shows THEFTLOCK
on its face. THEFTLOCK is a theft-deterrent feature
that can be used or ignored. If you ignore it, your system
will play normally. If you use it, your system can’t be
turned on if
it is stolen because it locks anytime battery
power is removed. To unlock it,
a code must be entered.
These instructions will tell you how to enter a code into
your system. They also tell you how to unlock the
system with your code and how to shut
off the
THEFTLOCK system.
3-11
ProCarManuals.com
Page 151 of 354
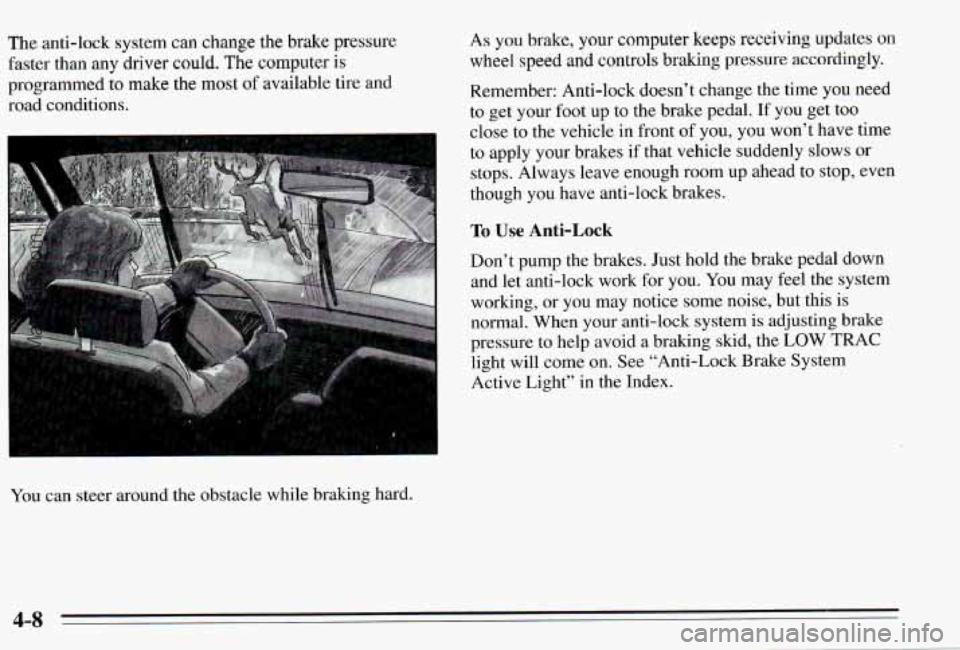
The anti-lock system can change the brake pressure
faster than any driver could.
The computer is
programmed to make the most of available tire and
road conditions.
You can steer around
the obstacle while braking hard.
As you brake, your computer keeps receiving updates on
wheel speed and controls
braking pressure accordingly.
Remember: Anti-lock doesn’t change the time
you need
to get your foot up to the brake pedal.
If you get too
close to the vehicle in front
of you, you won’t have time
to apply your brakes if that vehicle suddenly slows or stops. Always leave enough room up ahead to stop, even
though you have anti-lock brakes.
To Use Anti-Lock
Don’t pump the brakes. Just hold the brake pedal down and let anti-lock work for you. You may feel the system
working, or you may notice some noise, but this is
normal. When your anti-lock system is adjusting brake
pressure to help avoid a braking skid, the
LOW TRAC
light will come on. See “Anti-Lock Brake System
Active Light” in the Index.
4-8
ProCarManuals.com