Page 166 of 354
Winter Driving
Here are some tips for winter driving:
Have your Pontiac in good shape for winter. Be sure
your engine coolant mix is correct.
You may want to put winter emergency supplies in
your trunk. Include an
ice scraper,
a small brush or broom, a supply
of windshield washer fluid, a rag, some winter outer
clothing, a
small shovel, a flashlight, a red cloth, and a
couple
of reflective warning triangles. And, if you will
be driving under severe conditions, include a small bag of sand, a piece of old carpet or a couple of burlap bags
to help provide traction. Be sure you properly secure
these items in your vehicle.
4-23
ProCarManuals.com
Page 170 of 354

Then, shut the engine off and close the window almost
all the
way to preserve the heat, Start the engine again
and repeat this only when
you feel really uncomfortable
from the cold. But do
it as little as possible. Preserve the
he1 as long as you can. To help keep warm, you can get
out
of the vehicle and do sume fairly vigorous exercises
every half hour
or so until help comes.
Loading Your Vehicle
/bI OCCUPANTS
VEHICLE CAP. WT.
TIRE-LOADING INFORMATION
FRT.
CTR. RR. TOTAL LBS. KG
MAX. LOADING & GVWR SAME AS VEHICLE I
CAPACITY WEIGHT XXX COLD TIRE
TIRE
SIZE SPEED PRESSURE
RTG PSI/KPa
FRT.
RR.
SPA.
IF TIRES ARE HOT, ADD 4PS1/28KPa
SEE OWNER’S MANUAL
FOR ADDITIONAL
INFORMATiON
/
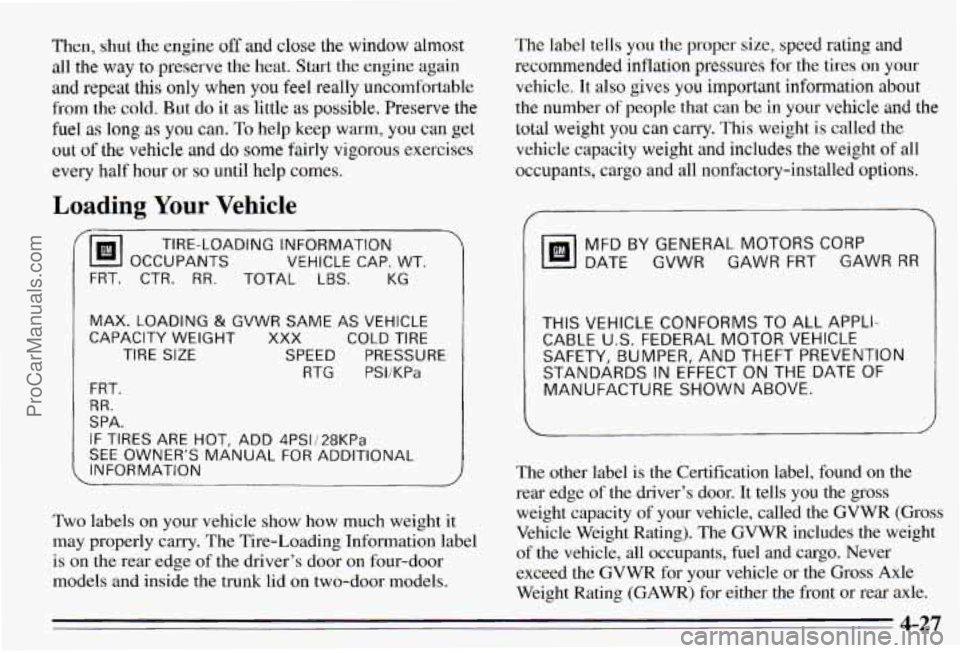
Two labels on your vehicle show how much weight it
may properly carry. The Tire-Loading Information label
is on
the rear edge of the driver’s door on four-door
models and inside the trunk lid on two-door models. The label tells you the proper
size, speed rating and
recommended inflation pressures
for the tires on your
vehicle.
It also gives you important information about
the number of people that can be in your vehicle and the
total weight
you can carry. This weight is called the
vehicle capacity weight and includes the weight
of all
occupants, cargo and all nonfactory-installed options.
MFD BY GENERAL MOTORS CORP
DATE GVWR GAWR FRT GAWR RR
THIS VEHICLE CONFORMS TO ALL APPLI-
CABLE
U.S. FEDERAL MOTOR VEHICLE
SAFETY, BUMPER, AND THEFT PREVENTION
STANDARDS IN EFFECT ON
THE DATE OF
MANUFACTURE SHOWN ABOVE.
The other label is the Certification label, found on the
rear edge of the driver’s door. It tells you the
gross
weight capacity of your vehicle, called the GVWR (Gross
Vehicle Weight Rating). The GVWR includes the weight of
the vehicle, all occupants, fuel and cargo. Never
exceed the GVWR for your vehicle or the Gross
Axle
Weight Rating (GAWR) for either the front or rear axle.
4-27
ProCarManuals.com
Page 171 of 354
If you do have a heavy load, spread it out. Don’t carry
more than 167 pounds (75 kg) in your trunk.
~ ~~ ~ ~~
NOTICE: 1
Your warranty does not cover parts or
components that fail because of overloading.
If you put things inside your vehicle -- like suitcases,
tools, packages or anything else
-- they will go as fast as
the vehicle goes. If you have to stop or turn quickly, or
if there is a crash, they’ll keep going.
4-28
ProCarManuals.com
Page 174 of 354

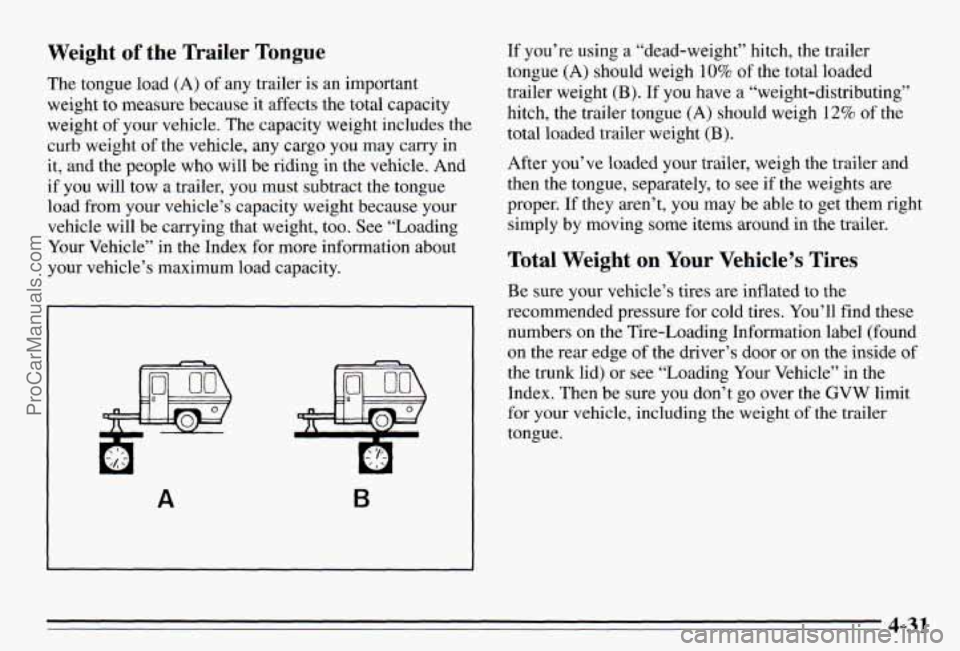
Weight of the Trailer Tongue
The tongue load (A) of any trailer is an important
weight to measure because it affects the total capacity
weight of your vehicle. The capacity weight includes the
curb weight of the velucle, any cargo you
may carry in
it, and the people who will be riding in the vehicle. And
if you will tow a trailer, you must subtract the tongue
load from your vehicle’s capacity weight because your
vehicle will be carrying that weight, too. See “Loading
Your Vehicle” in the Index for more information about
your vehicle’s maximum load capacity.
A B
If you’re using a “dead-weight” hitch, the trailer
tongue
(A) should weigh 10% of the total loaded
trailer weight
(B). If you have a “weight-distributing”
hitch, the trailer tongue
(A) should weigh 12% of the
total loaded trailer weight
(B).
After you’ve loaded your trailer, weigh the trailer and
then the tongue, separately, to see if the weights
are
proper. If they aren’t, you may be able to get them right \
simply
by moving some items around in the trailer.
Total Weight on Your Vehicle’s Tires
Be sure your vehicle’s tires are inflated to the
recommended pressure for cold tires. You’ll find these
numbers on the Tire-Loading Information label (found
on the rear edge of the driver’s door or on the inside
of
the trunk lid) or see “Loading Your Vehicle” in the
Index. Then be sure you don’t go over the
GVW limit
for your vehicle, including the weight of the trailer
tongue.
4-31
ProCarManuals.com
Page 209 of 354
Don’t try to put the wheel cover on your compact spare
tire. It won‘t fit. Store the wheel cover in the trunk until
you have the flat tire repaired or replaced.
I NOTICE:
Wheel covers won’t fit on your compact spare. If
you try to put a wheel cover on your compact
spare, you could damage the cover or the spare.
After you’ve put the compact spare tire on your vehicle,
you’ll need
to store the flat tire in your trunk. Use the
following procedure to secure the flat tire in the trunk.
Put the flat tire in the trunk
so the side that faces out
Put the bolt through one of the wheel nut holes, install
when it
is on the vehicle is facing down. The full-size
the retainer over the bolt, then install the wing nut. Put
tire will not
fit down into the well. Place it SO the front is the spacer and nut next to the tire in the well. Store the
in the well and the rear is out of the well.
cover as far forward as possible.
ProCarManuals.com
Page 210 of 354
The compact spare is for temporary use only. Replace
the compact spare tire with a full-size tire as
soon as you
can. See “Compact Spare Tire” in the Index. See the
storage instructions label to replace your compact spare
into your trunk properly.
1. Nut
2. Cover
3. Wing Nut
4. Spacer
5. Tire
6. Wrench
7. Nut
8. Retainer
9. Jack
1.0. Bolt
5-31
ProCarManuals.com
Page 258 of 354
Rear Lamp Bar
1. Remove the plastic retainers and pull the carpet
2. Remove the wing nuts.
away
from the rear of the
trunk.
3. Pull the housing away from the body of the vehicle.
4. Tm the socket
counterclockwise until
it pops loose from the
housing.
5. Pull out the socket.
6. Full the bulb out of the socket.
7. Push in a new .bulb.
8. Replace the socket into the housing and turn
9. Replace the housing to the body of the vehicle,
clockwise.
10. Install
the wing nuts.
11. Reposition the carpet and install the plastic
retainers.
6-45 ProCarManuals.com
Page 260 of 354
Mation - Tire Pressure
The Tire-Loading Information label which is on the rear
edge of the driver’s door if you have a two-door or on
the inside of the trunk lid if you have a four-door shows
the correct inflation pressures for your tires, when
they’re cold. “Cold” means your vehicle has been
sitting
for at least three hours or driven no more than a mile.
NOTICE:
Don’t let anyone tell you that underinflation or
overinflation is all right. It’s not. If your tires
don’t have enough air (underinflation) you can
get:
Too much flexing
Too much heat
Tire overloading
Bad wear
Bad handling
0 Bad fuel economy.
NOTICE: (Continued)
6-47 ProCarManuals.com