1995 PONTIAC GRAND-AM power steering
[x] Cancel search: power steeringPage 67 of 354

LOCK (B): This is the only only position in which you
can remove the key. This locks your steering wheel,
ignition and transaxle (on automatic models).
OFF (C): This unlocks the steering wheel, ignition, and
transaxle (on automatic models), but does not send
electrical power to any accessories. Use this position
if
your vehicle must be pushed or towed, but never try to
push-start your vehicle.
A warning chime will sound if
you open the driver’s door when the ignition is
off and
the key is in the ignition.
RUN (D): This is an “on” position to which the switch
returns after you start your engine and release the
switch. The switch stays in the RUN position when the
engine
is running. But even when the engine is not
running, you can use RUN to operate your electrical
power accessories, and to display some instrument panel
warning lights.
START (E): Use this for starting the engine. When the
engine starts, release the key. The ignition switch will
return to RUN for normal driving.
Note that even if the engine is not running, the positions
ACCESSORY and RUN are ON positions that allow
you to operate your electrical accessories, such as the
radio.
Key Release Button (Manual Transaxle)
The key cannot be removed from the ignition unless the
key release button is used.
To remove the key turn the key to the OFF position.
Press the key release button while turning the key from
OFF to LOCK. Keeping your finger on the button, pull
the key straight out.
2-12
ProCarManuals.com
Page 86 of 354

Windows
On a vehicle with manual windows, use the window
crank located on the inside of each door to open and
close each window.
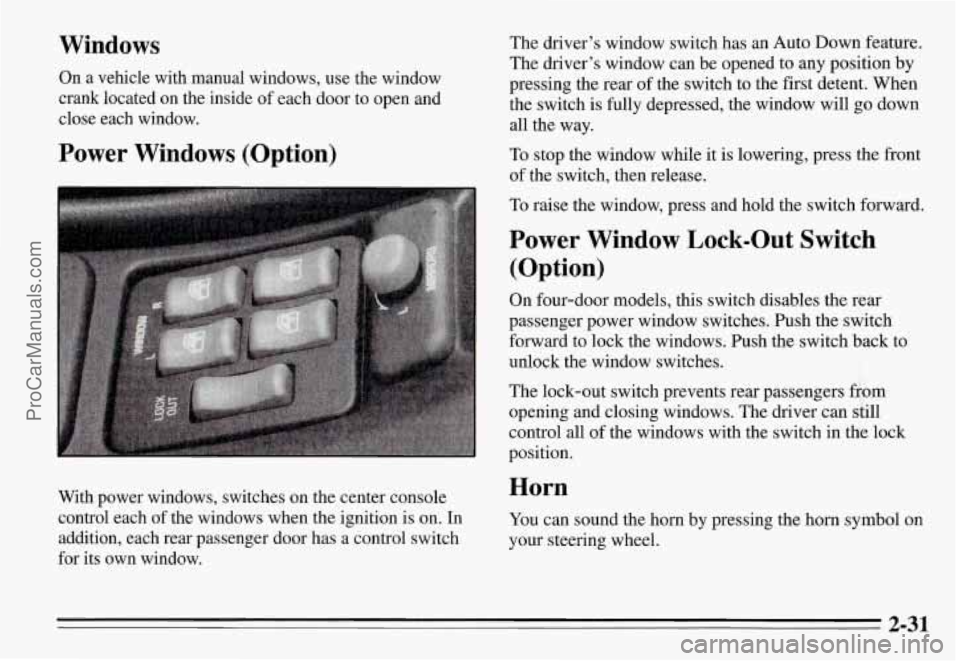
Power Windows (Option)
With power windows, switches on the center console
control each of the windows when the ignition
is on. In
addition, each rear passenger door has a control switch
for its own window.
The driver’s window switch has an Auto Down feature.
The driver’s window can be opened to any position by
pressing the rear
of the switch to the first detent. When
the switch is fully depressed, the window will go down
all the way.
To stop the window while it is lowering, press the front
of the switch, then release.
To raise the window, press and hold the switch forward.
Power Window Lock-Out Switch
(Option)
On four-door models, this switch disables the rear
passenger power window switches. Push the switch
forward to lock the windows. Push the switch back to
unlock the window switches.
The lock-out switch prevents rear passengers from
opening and closing windows. The driver can
dill
control all of the windows with the switch in the lock
position.
Horn
You can sound the horn by pressing the horn symbol on
your steering wheel.
2-31
ProCarManuals.com
Page 151 of 354

close to the vehicle in front of you, you won’t have time
to apply your brakes
if that vehicle suddenly slows or
stops. Always leave enough room up ahead to stop, even
though
you have anti-lock brakes.
To Use Anti-Lock
Don’t pump the brakes. Just hold the brake pedal down
and let anti-lock work for you. You may feel the system
working, or
you may notice some noise, but this is normal.
Braking in Emergencies
Use your anti-lock braking system when you need to.
With anti-lock, you can steer and brake at the same
time.
In many emergencies, steering can help you more
than even the very best braking.
Steering
Power Steering
If you lose power steering assist because the engine
stops or the system is not functioning, you can steer but
it will take much more effort.
Variable Effort Steering (Option)
This steering system provides lighter steering effort for
parking and at low vehicle speeds. Steering effort will
increase at higher speeds for improved road feel.
Steering Tips
Driving on Curves
It’s important to take curves at a reasonable speed.
A lot of the “driver lost control” accidents mentioned on
the news happen on curves. Here’s why:
Experienced driver or beginner, each of us is subject to
the same laws of physics when driving on curves. The
traction of the tires against the road surface makes it
possible for the vehicle to change its path when you turn
the front wheels. If there’s no traction, inertia will keep
the vehicle going in the same direction.
If you’ve ever
tried to steer a vehicle on wet ice, you’ll understand this.
The traction you can get in a curve depends on the
condition
of your tires and the road surface, the angle at
which the curve is banked, and your speed. While you’re
in a curve, speed is the
one factor you can control.
Suppose you’re steering through a sharp curve. Then you
suddenly accelerate. Both control systems
-- steering and
acceleration
-- have to do their work where the tires meet
the road. Adding the sudden acceleration can demand too
much
of those places. You can lose control.
What should you do if this ever happens? Ease up on the
accelerator pedal, steer the vehicle the way you want it
to go, and slow down.
4-8
ProCarManuals.com
Page 220 of 354

2.3L Quad 4 Engine (CODE D)
PO ??
When you open the hood, you'll see:
1.
2.
3.
4.
5.
6.
7.
8.
9.
Engine Oil Dipstick
Automatic Transaxle Dipstick (if equipped)
Brake Fluid Reservoir
Air Cleaner
,? I, 4
Hydraulic Clutch Fluid Reservoir (if so equipped)
Battery
Windshield Washer Huid Reservoir
Power Steering Fluid Reservoir
Engine Oil
Fill Cap
'il.
10. Engine Coolant Surge Tank
6-9
ProCarManuals.com
Page 221 of 354

3.1L V6 Engine (CODE M)
P 9p P
When you open the hood, you’ll see:
1.
2.
3.
4.
5.
6.
7.
8.
9.
Power Steering Fluid Reservoir
Automatic Transaxle Fluid Dipstick
Brake Fluid Reservoir
Air Cleaner
Battery
Windshield Washer Fluid Reservoir
Engine Oil Dipstick
Engine Oil
Fill Cap
Engine Coolant Surge Tank
6-10
ProCarManuals.com
Page 237 of 354

Power Steering Fluid
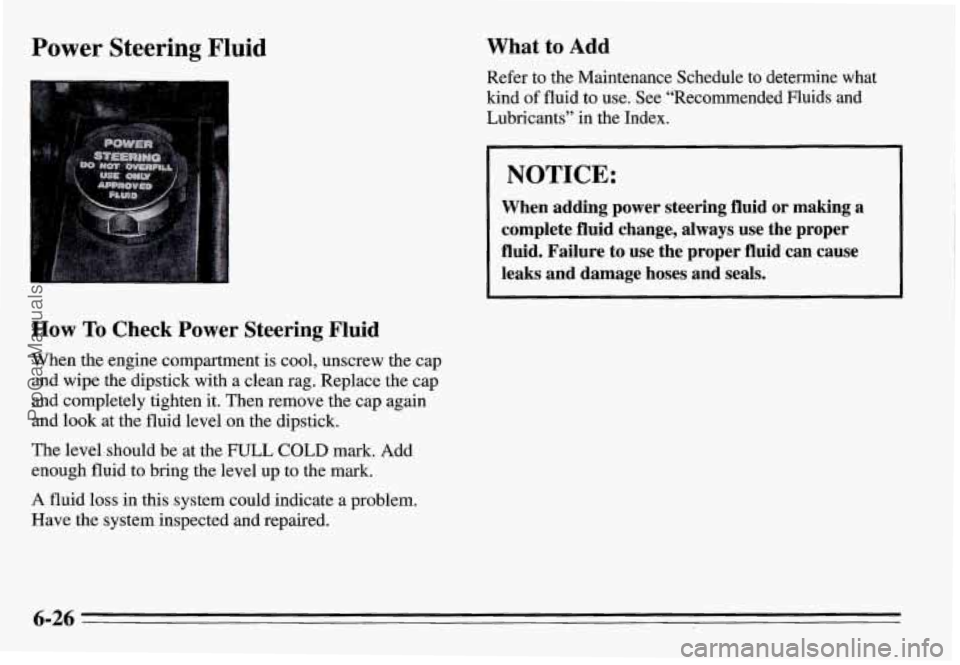
How To Check Power Steering Fluid
When the engine compartment is cool, unscrew the cap
and wipe the dipstick with a clean rag. Replace the cap
and completely tighten it. Then remove the cap again
and look at the fluid level on the dipstick.
The level should be at the FULL COLD mark. Add
enough fluid to bring the level up to the mark.
A fluid loss in this system could indicate a problem.
Have the system inspected and repaired.
What to Add
Refer to the Maintenance Schedule to determine what
kind of fluid to use. See “Recommended Fluids and
Lubricants” in
the Index.
I I
NOTICE:
When adding power steering fluid or making a
complete fluid change, always use the proper
fluid. Failure to use the proper fluid can cause
leaks and damage hoses and seals.
6-26
ProCarManuals.com
Page 266 of 354

Capacities and Specifications
Engine Crankcase (All Models) ..................................
Automatic Transaxle, 3-Speed
Pan Removal and Replacement ...................................
When draining or replacing torque convertel; more fluid may be needed.
Pan Removal and Replacement ...................................
When draining or replacing torque convertel; more fluid may be needed.
After Complete Overhaul .......................................
Automatic Transaxle, 4-Speed
After Complete Overhaul .......................................
Manual Transaxle, 5-Speed
Cooling System
Complete Drain and Refill ......................................
2.3LQuad4 ..................................................
3.1LV6 .....................................................
4.5 quarts
4 quarts
7 quarts
6.0 quarts
8.0 quarts
2.0 quarts
4.3 L
3.8 L
6.6 L
5.7 L
7.6 L
1.9 L
10.4 quarts 9.8 L
13.1 quarts 12.4 L
Refrigerant, Air Conditioning .................................... See refrigerant charge label under hood.
Not all air conditioning refrigerants are the same. If the air conditioning system in your vehicle needs refrigerant, be sure
the proper refi-igerant is used.
If you’re not sure, ask your Pontiac dealel: For additional information, see your “Warranty
and Owner Assistance Information
” booklet.
FuelTank .................................................... 15.2gallons 57.5 L
Power Steering
Pumponly ................................................... 1.00 pint 0.50 L
Complete System .............................................. 2.25 pints 1.25 L
Tire Pressures, Sizes ............................................ See Tire-Loading Information label on
driver’s door.
WheelNutTorque ............................................. 100pound-feet (140 N-m)
NOTE: All capacities are approximate. When adding, be sure to fill to the appropriate level or as recommended in this manual.
6-55
ProCarManuals.com
Page 310 of 354

Park on a fairly steep hill, with the vehicle facing
downhill. Keeping your foot on the regular brake, set the
parking brake.
To check the parking brake: With the engine running
and transaxle in
NEUTRAL (N), slowly remove foot
pressure from the regular brake pedal.
Do this until
the vehicle is held by the parking brake only.
0 To check the PARK (P) mechanism’s holding ability:
Shift to PARK (P). Then release all brakes.
Underbody Flushing
At least every spring, use plain water to flush any
corrosive materials from the underbody. Take care to
clean thoroughly any areas where mud and other debris
can collect.
Part C: Periodic Maintenance
Inspections
Listed below are inspections and services which should
be performed at least twice a year (for instance, each
spring and fall). You should let your
GM dealer’s
service department or other qualified service center do
these jobs. Make sure any necessary repairs are
completed at once.
Restraint Systems
Now and then, make sure all your belts, buckles, latch
plates, retractors, anchorages and reminder systems are
working properly.
Look for any loose parts or damage.
If you see anything that might keep a restraint system
from doing its job, have it repaired.
Steering, Suspension and Front-Wheel-
Drive Axle Boot and Seal Inspection
Inspect the front and rear suspension and steering
system for damaged, loose or missing parts, signs of
wear, or lack of lubrication. Inspect the power steering
lines and hoses for proper hookup, binding, leaks,
cracks, chafing, etc. Clean and then inspect the drive
axle boot seals for damage, tears or leakage. Replace
seals if necessary.
7-41
ProCarManuals.com