1995 OLDSMOBILE SILHOUETTE change time
[x] Cancel search: change timePage 6 of 390
, --
GENERAL MOTORS, GM and the GM Emblem,
OLDSMOBILE and the OLDSMOBILE Rocket
Emblem are registered trademarks
of General Motors
Corporation.
This manual includes the latest information at the time it
was printed. We reserve the right to make changes in the
product after that time without further notice.
Please keep this manual in your Oldsmobile,
so it will
be there if you ever need it when you're on the road. If
you sell the vehicle, please leave this manual in it
so the
new owner can use it.
Litho in
U.S.A.
Part No. 22595328 A First Edition
WE SUPPORT VOLUNTARY TECHNICIAN
CERTIFICATION THROUGH
National Institute for
AUTOMOTIVE SERVICE
EXCELLENCE
k
We support voluntary
technician certificatiol
n.
'Copyright General Motors Corporation 1994
All Rights Reserved
ii
ProCarManuals.com
Page 80 of 390
Matching Transmitter(s) To Your Vehicle
Each key chain transmitter is coded to prevent another
transmitter from unlocking your vehicle. If a transmitter
is lost
or stolen, a replacement can be purchased through
your retailer. Remember to bring any remaining
transmitters with you when you go to your retailer.
When the retailer matches the replacement transmitter to
your vehicle, the remaining transmitters must also be
matched. Once the new transmitter is coded, the lost
transmitter will not unlock your vehicle.
You can match a transmitter to as many different
vehicles as you own, provided they
are equipped with
exactly the same model system. (General Motors offers
several different models
of these systems on their
vehicles.) Each vehicle can have only four transmitters
matched to it.
See your retailer to match transmitters to another
vehicle.
Battery Replacement
Under normal use, the battery in your key chain
transmitter should last about two years.
You can tell the battery is weak if the transmitter won’t
work at the normal range in any location.
If you have to
get close to your vehicle
before the transmitter works,
it’s probably time to change the battery.
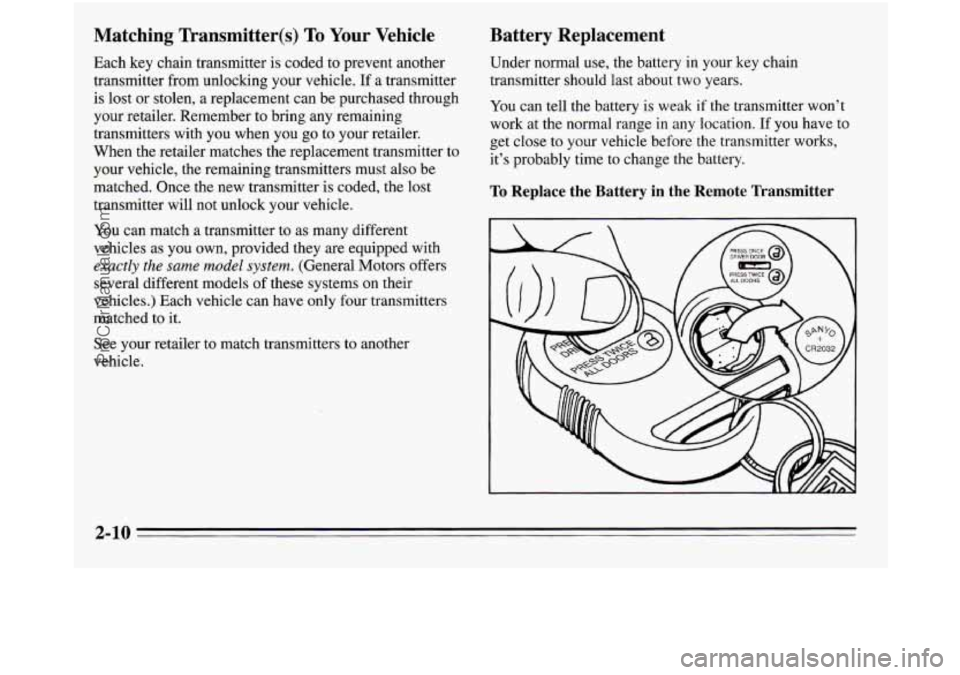
To Replace the Battery in the Remote Transmitter
2-10
ProCarManuals.com
Page 95 of 390
NOTICE:
Holding your key in START for longer than
15 seconds at a time will cause your battery to
be drained much sooner. And the excessive heat
can damage your starter motor.
2. If it doesn’t start right away, hold your key in
START.
If it doesn’t start in three seconds (or starts
but then stops), push the accelerator pedal about
one-quarter of the way down for
12 more seconds, or
until it starts.
3. If your engine still won’t start (or starts but then
stops), it could
be flooded with too much gasoline.
Try this:
Wait
15 seconds to let the starter motor cool down.
Then push your accelerator pedal all the way to the
floor. Hold it there. Then hold the key in START.
This clears the extra gasoline from the engine. When
the engine starts, let
go of the key and the accelerator
pedal.
If the engine still doesn’t start, wait another
15 seconds and repeat this step.
NOTICE:
Your engine is designed to work with the
electronics in your vehicle.
If you add electrical
parts or accessories, you could change the way
the fuel injection system operates. Before adding
electrical equipment, check with your retailer.
If
you don’t, your engine might not perform
properly.
If you ever have to have your vehicle towed, see
the part of this manual that
tells how to do it
without damaging your vehicle. See “Towing
Your Vehicle” in the Index.
To Start Your 3800 V6 Engine
1. Without pushing the accelerator pedal, turn your
ignition
key to START. When the engine starts, let
go of the key. The idle speed will go down as your
engine gets
warm.
2-25
ProCarManuals.com
Page 96 of 390
NOTICE:
Holding your key in START for longer than
15 seconds at a time will cause your battery to be
drained much sooner. And the excessive heat can
damage your starter motor.
2. If it doesn’t start right away, hold your key in
START
for about three to five seconds at a time until
your engine starts. Wait about
15 seconds between
each try to help avoid draining your battery.
3. If your engine still won’t start (or starts but then
stops), it could be flooded with too much gasoline.
Try pushing your accelerator pedal all the way
to the
floor and holding it there as you hold the key in
START for about three seconds. If the vehicle starts
briefly but then stops again, do the same thing, but
this time keep the pedal down for five or six seconds.
This clears the extra gasoline from the engine. After
waiting about
15 seconds, repeat the normal starting
procedure.
NOTICE:
Your engine is designed to work with the
electronics in your vehicle.
If you add electrical
parts or accessories, you could change the
way
the fuel injection system operates. Before adding
electrical equipment, check with your retailer.
If
you don’t, your engine might not perform
If you ever have to have your vehicle towed, see
the part of this manual that tells how to do
it
~ without damaging your vehicle. See “Towing
Your Vehicle” in the Index.
, properly.
2-26
ProCarManuals.com
Page 138 of 390

Electronic Level Control (Option)
With this option, the rear of the vehicle automatically
adjusts to changes in load weight. (See “Loading Your
Vehicle” in the Index.)
You may hear the compressor operating when you load
or unload your vehicle, and periodically as the system
self-adjusts. This is normal.
The compressor should operate for brief periods
of time.
If the sound continues for an extended period
of time,
your vehicle needs service.
To keep your battery from
being drained, you may want to pull the
ELC fuse in the
fuse control panel until you can get your vehicle
serviced (see “Fuses and Circuit Breakers’’ in the Index).
To replace the bin, set the hinge pins (one on each side
of the bin, at the bottom) into the hinge guides (one at
each side
of the console opening, at the base), then close
the bin.
If the hinge pins are placed properly in the
guides, the bin will close easily.
2-68
ProCarManuals.com
Page 160 of 390
Air Conditioner
When the temperature outside is above freezing, the air
conditioner compressor will automatically condition the air when you press RECIRC (the A/C indicator light will glow),
DEFOG or DEF (the A/C indicator light will not glow).
Press A/C (the
A/C indicator light will glow) to condition
the air when you press UPPER, BI-LEV or
LOWER. To
turn off the air conditioner compressor
in these settings,
press A/C again (the indicator light will go off).
Each time
you turn on the ignition, the air conditioner
will default
to the setting you had selected before last
turning off the ignition.
When the air conditioner compressor is
on, you may
sometimes notice slight changes in your vehicle’s engine
performance and power. This
is normal. The system is
designed to help fuel economy while
it maintains the
desired cooling level.
The air conditioner removes moisture from the air,
so
you may sometimes notice water dripping from under
your vehicle when it is idling or after it has been turned
off. This is normal.
On very hot days,
your vehicle will cool down more
quickly and economically if you open the windows long
enough
to let hot, inside air escape. For all settings, adjust
the temperature control lever and fan speed as desired.
Directional Controls
RECIRC: Press to get maximum cooling or quick
cool-down
on very hot days. This setting recirculates
much of the air inside your vehicle. It should not be
used for long periods
of time because the air may
become too cold and dry.
Slide the temperature control lever down to the coolest
setting and adjust the fan speed as desired.
UPPER: For normal cooling on hot days, press A/C
along with UPPER. This setting cools outside air and
directs it through the instrument panel outlets. Adjust
the temperature of the air with the temperature control
lever.
BI-LEV: This setting is designed for use on sunny days
when the air is only moderately warm or cool. On days
like these, the sun may adequately warm your upper
body, but your lower body may
not be warm enough.
The BI-LEV setting directs outside air into your vehicle
in two ways. Cooler air is directed toward your upper
body through the front instrument panel outlets, while
warmed air is directed through the heater ducts at your
feet. At times this temperature difference may be more
apparent than others. For best results, slide the
temperature control lever to the middle position, and
then adjust for comfort.
3-2
ProCarManuals.com
Page 167 of 390
AM%FM Stereo Radio
I
XJ f AMFM Q
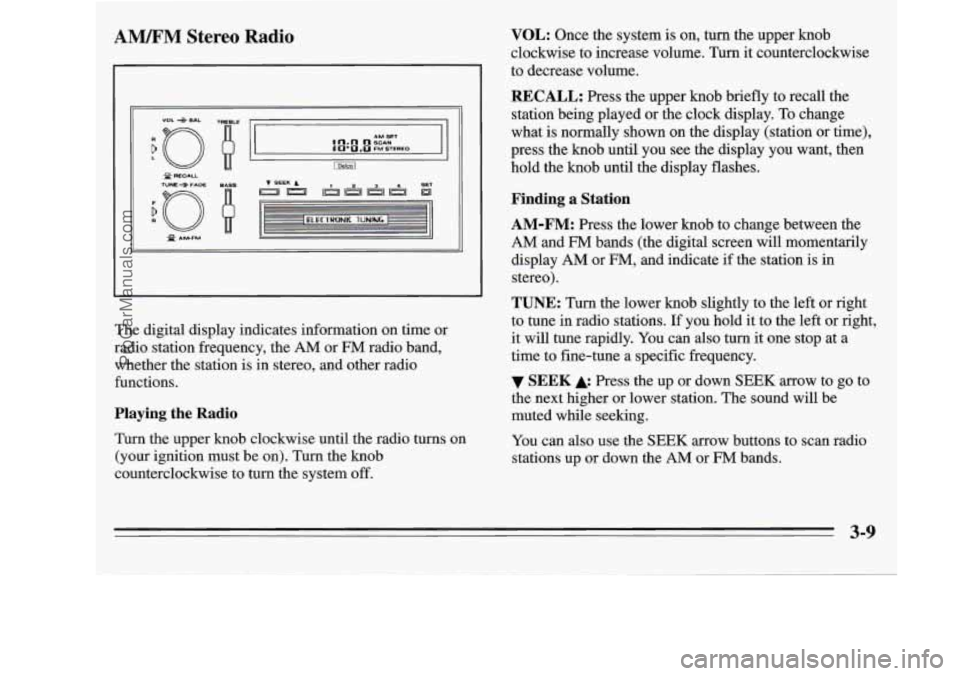
The digital display indicates information on time or
radio station frequency, the
AM or FM radio band,
whether the station is in stereo, and other radio
functions.
Playing the Radio
Turn the upper knob clockwise until the radio turns on
(your ignition must be
on). Turn the knob
counterclockwise to turn the system off.
VOL: Once the system is on, turn the upper knob
clockwise to increase volume. Turn it counterclockwise
to decrease volume.
RECALL: Press the upper knob briefly to recall the
station being played or the clock display. To change
what
is normally shown on the display (station or time),
press the knob until you see the display you want, then
hold the knob until the display flashes.
Finding a Station
AM-FM:
Press the lower knob to change between the
AM and FM bands (the digital screen will momentarily
display
AM or FM, and indicate if the station is in
stereo).
TUNE: Turn the lower knob slightly to the left or right
to tune in radio stations. If you hold it to the left or right,
it will tune rapidly. You can also turn it one stop at a
time to fine-tune a specific frequency.
the next higher or lower station. The sound will be
muted while seeking.
You can also use the
SEEK arrow buttons to scan radio
stations up or down the
AM or FM bands.
SEEK Press the up or down SEEK arrow to go to
3-9
ProCarManuals.com
Page 170 of 390
![OLDSMOBILE SILHOUETTE 1995 Owners Manual AMEM Stereo with Cassette Player with
Dolby@ (Option)
9
n AM 1 u - FM TUNE
r 1
(IJ (2) [T) [TI [y) [L] [=]
PROG Cr02 REV FWD PREV NEXT
L /
Playing the Radio
Push the PWR button to turn OLDSMOBILE SILHOUETTE 1995 Owners Manual AMEM Stereo with Cassette Player with
Dolby@ (Option)
9
n AM 1 u - FM TUNE
r 1
(IJ (2) [T) [TI [y) [L] [=]
PROG Cr02 REV FWD PREV NEXT
L /
Playing the Radio
Push the PWR button to turn](/manual-img/31/58210/w960_58210-169.png)
AMEM Stereo with Cassette Player with
Dolby@ (Option)
9
n AM 1 u - FM TUNE
r 1
(IJ (2) [T) [TI [y) [L] [=]
PROG Cr02 REV FWD PREV NEXT
L /
Playing the Radio
Push the PWR button to turn the system on or off.
VOL: Turn the upper knob clockwise to increase
volume. Turn it counterclockwise to decrease volume.
MUTE: Press the upper knob to mute the radio or tape
player. Press it again to listen.
RCL: When the ignition is off, press this button to
display the clock. When the radio is on, press it to
change between the clock and radio station frequency
shown on the digital display.
Finding a Station
AM-FM:
Press the lower knob to change between the
AM and
FM bands. The band you select will appear
momentarily on the digital display.
TUNE: Turn the lower knob slightly to the left or right
to tune in radio stations. If you hold it to the left or right,
it will tune rapidly. You can also turn it one stop at a
time to fine-tune a specific frequency.
4 SEEK b: Press to seek and stop on the next station
higher or lower on the radio band.
SCAN: When you press SCAN, the radio will go to the
next station and pause there for a few seconds. SCAN
will be shown on the digital display. Press SCAN again
to stop on a station.
3-12
5
ProCarManuals.com