Page 93 of 390
Ignition Switch
ACCE
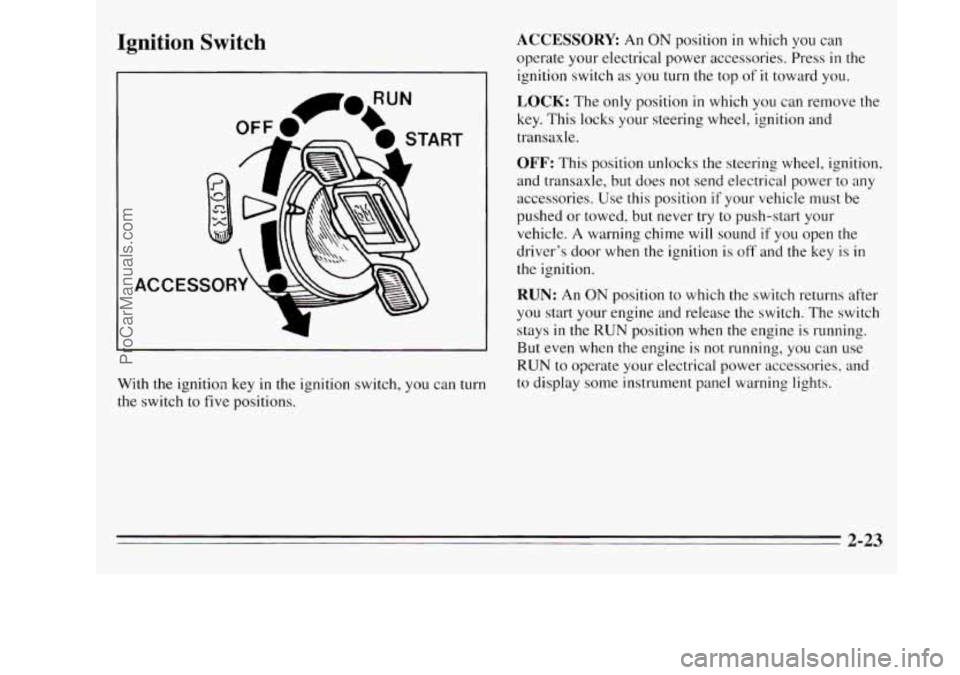
With the ignition key in the ignition switch, you can turn
the switch to five positions.
ACCESSORY An ON position in which you can
operate your electrical power accessories. Press
in the
ignition switch
as you turn the top of it toward you.
LOCK: The only position in which you can remove the
key. This locks your steering wheel, ignition and
transaxle.
OFF: This position unlocks the steering wheel, ignition,
and transaxle, but does not send electrical power to any
accessories. Use this position
if your vehicle must be
pushed or towed, but never try
to push-start your
vehicle. A warning chime will sound if
you open the
driver’s door when the ignition is off and the key is in
the ignition.
RUN: An ON position to which the switch returns after
you start your engine and release the switch. The switch
stays in
the RUN position when the engine is running.
But even when the engine is not running, you can use
RUN to operate your electrical power accessories, and
to display some instrument panel warning lights.
2-23
ProCarManuals.com
Page 109 of 390
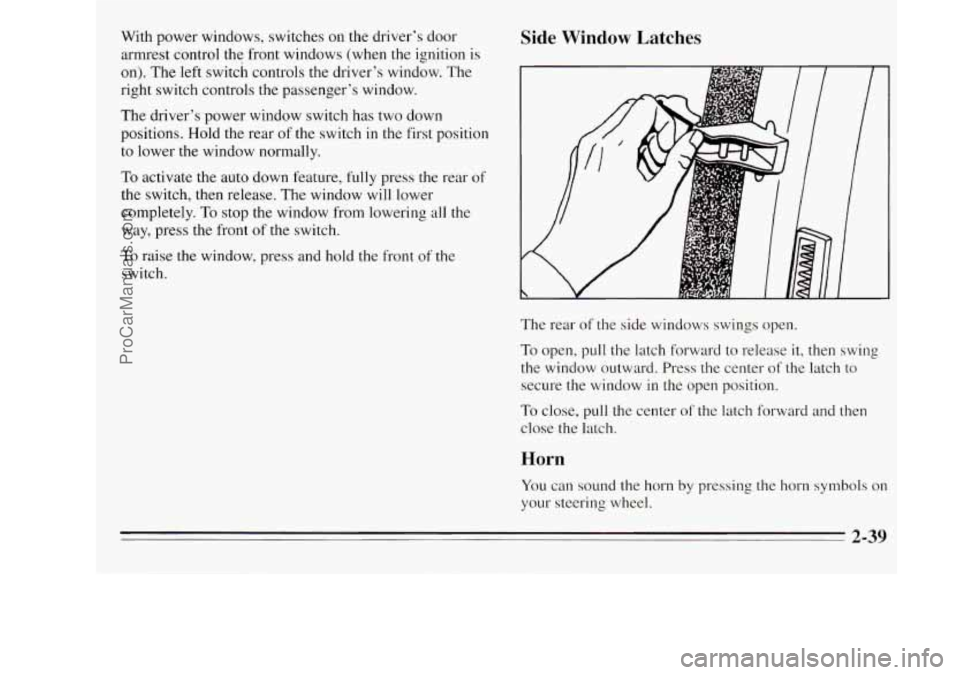
With power windows, switches on the driver’s door
armrest control the front windows (when
the ignition is
on). The left switch controls the driver’s window. The
right switch controls the passenger’s window.
The driver’s power window switch
has two down
positions. Hold the rear
of the switch in the first position
to lower the window normally.
To activate the auto down feature, fully press the rear of
the switch, then release. The window will lower
completely.
To stop the window from lowering all the
way, press the front
of the switch.
Side Window Latches
To raise the window, press and hold the front of the
switch.
The rear
of the side windows swings open.
To open, pull the latch forward to release
it, then swing
the window outward. Press the center
of the latch to
secure the window in the open position.
To close, pull the center of the latch forward and then
close the latch.
Horn
You can sound the horn by pressing the horn symbols on
your steering wheel.
2-39
ProCarManuals.com
Page 178 of 390
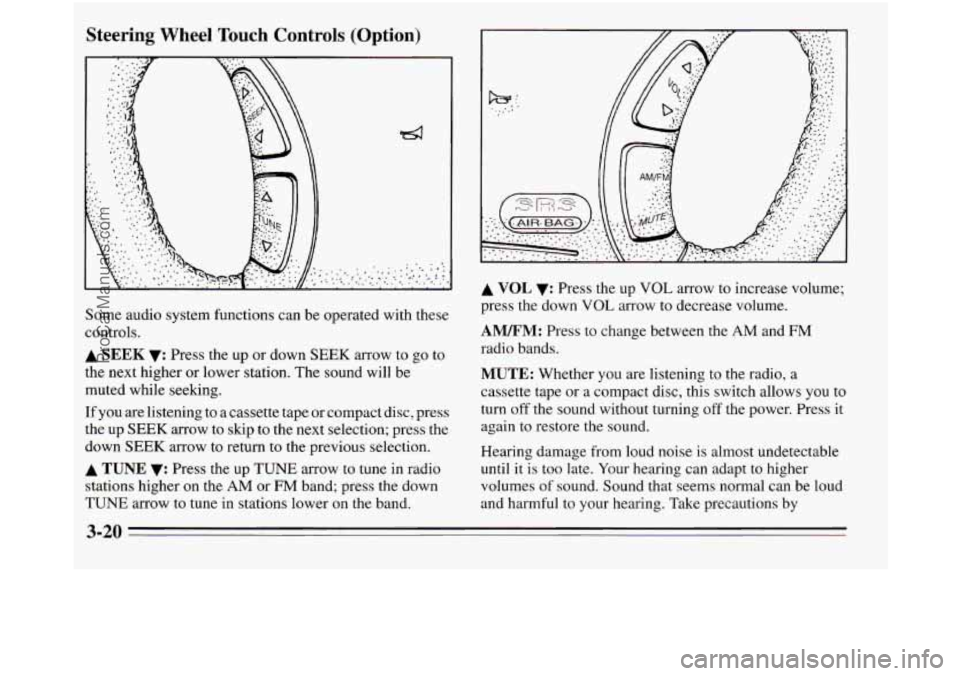
Steering Wheel Touch Controls (Option)
Some audio system functions can be operated with these
controls.
A SEEK v: Press the up or down SEEK arrow to go to
the next higher or lower station. The sound will be
muted while seeking.
If you are listening to a cassette tape or compact disc, press
the up
SEEK arrow to skip to the next selection; press the
down
SEEK arrow to return to the previous selection.
A TUNE v: Press the up TUNE arrow to tune in radio
stations higher on the
AM or FM band; press the down
TUNE arrow to tune in stations lower on the band.
A VOL v: Press the up VOL arrow to increase volume;
press the down
VOL arrow to decrease volume.
AM/FM: Press to change between the AM and FM
radio bands.
MUTE: Whether you are listening to the radio, a
cassette tape
or a compact disc, this switch allows you to
turn
off the sound without turning off the power. Press it
again to restore the sound.
Hearing damage from loud noise is almost undetectable
until it is too late. Your hearing can adapt to higher
volumes
of sound. Sound that seems normal can be loud
and harmful to your hearing. Take precautions
by
3-20
ProCarManuals.com
Page 193 of 390
Steering
Power Steering
If you lose power steering assist because the engine
stops or the system
is not functioning, you can steer but
it will take much more effort.
Steering Tips
Drividg tML Curves
It’s important to take curves at a reasonable speed.
A lot of the “driver lost control” accidents mentioned on
the news happen on curves. Here’s why:
Experienced driver or beginner, each
of us is subject to
the same laws
of physics when driving on curves. The
traction of the tires against the road surface makes
it
possible for the vehicle to change its path when you turn
the front wheels.
If there’s no traction, inertia will keep
the vehicle going in the same direction.
If you’ve ever
tried to steer a vehicle on wet ice, you’ll understand this. Suppose you’re
steering through a sharp curve. Then
you suddenly accelerate. Both control systems
--
steering and acceleration -- have to do their work where
the tires meet the road. Unless you have traction control
and the system
is on, adding the sudden acceleration can
demand too much of those places. You can lose control.
What should you do if this ever happens? Ease up
on the
accelerator pedal, steer the vehicle the way you want
it
to go, and slow down.
Speed limit signs near curves warn that you should
adjust your speed. Of course, the posted speeds are
based on
good weather and road conditions. Under less
favorable conditions you’ll want to go slower.
If you need to reduce your speed as you approach a
curve, do it before you enter the curve, while your front
wheels are straight ahead.
Try to adjust your speed
so you can “drive” through the
curve. Maintain a reasonable, steady speed. Wait to
accelerate
until you are out of the curve, and then
accelerate gently into the straightaway.
The traction you can get in a curve depends on
the
condition of your tires and the road surface, the angle
at which the curve
is banked, and your speed. While
you’re in a curve, speed is the one factor you can
control.
4-11
ProCarManuals.com
Page 269 of 390
3.1L V6 Engine
1. Engine Coolant Reservoir
2. Power Steering Fluid Reservoir
3. Air Cleaner
4. Brake Fluid Reservoir
5. Windshield Washer Fluid Reservoir
6. Battery
7. Automatic Transaxle Fluid Dipstick
8. Engine Oil Dipstick
9. Engine Oil Fill Cap
IO. Radiator Cap
6-9
ProCarManuals.com
Page 270 of 390
P
3800 V6 Engine
1. Engine Coolant Reservoir 6. Battery
2. Power Steering Fluid Reservoir 7. Air Cleaner
3. Automatic Transaxle Fluid Dipstick 8. Engine Oil Dipstick
4. Brake Fluid Reservoir 9. Engine Oil Fill Cap
5. Windshield Washer Fluid Reservoir 10. Radiator Cap
6-10
ProCarManuals.com
Page 285 of 390
Power Steering Fluid
3.1L V6: Checking the Power Steering Fluid
The power steering fluid reservoir for the 3.1L V6
engine is located toward the back of the engine
compartment, to the
left of the circular air cleaner.
~~~ ~~~
3800 V6: Checking the Power Steering Fluid
The power steering fluid reservoir for the 3800 V6
engine is located to the right of the engine coolant
reservoir, at the very back
of the engine compartment.
~ 6-25
ProCarManuals.com
Page 286 of 390
How To Check Power Steering Fluid
When the engine compartment is cool, unscrew the cap
and wipe the dipstick with
a clean rag. Replace the cap
and completely tighten
it. Then remove the cap again
and look at the fluid level
on the dipstick.
The level should be at the
FULL COLD mark. Add
enough fluid to bring the level up to the mark.
A fluid loss in this system could indicate a problem.
Have the system inspected and repaired.
What to Add
Refer to the Maintenance Schedule to determine what
kind
of fluid to use. See ‘‘Recommended Fluids and
Lubricants”
in the Index.
Windshield Washer Fluid
To Add
NOTICE:
When adding power steering fluid or making a
complete fluid change, always use the proper
fluid. Failure to use the proper fluid can cause
leaks and damage hoses and seals.
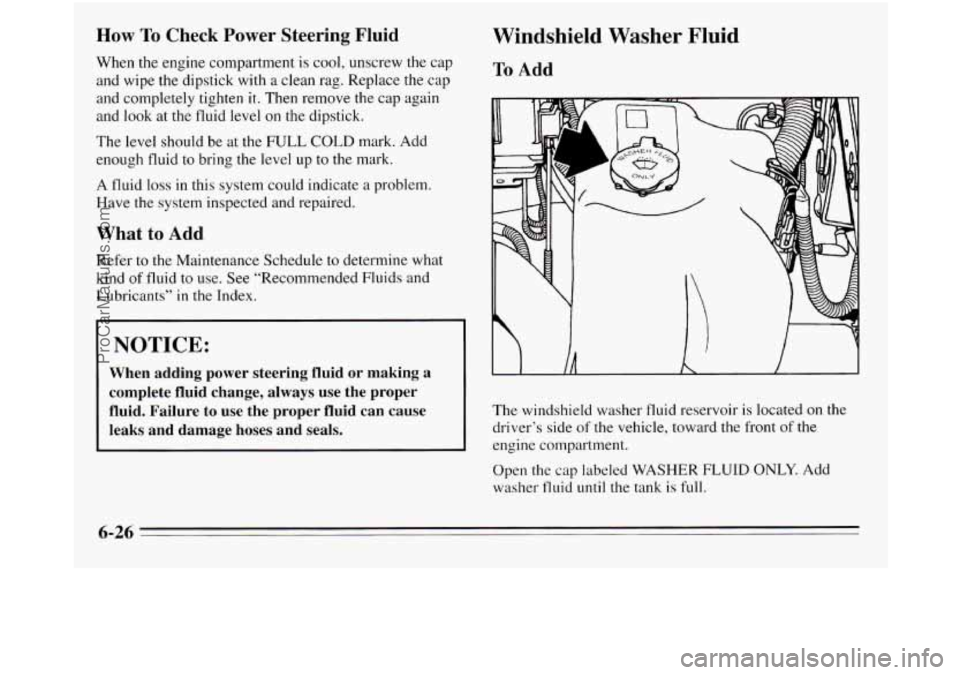
The windshield washer fluid reservoir is located on the
driver’s side of the vehicle, toward the front
of the
engine compartment.
Open the cap labeled
WASHER FLUID ONLY. Add
washer fluid
until the tank is full.
6-26
ProCarManuals.com