1995 Oldsmobile Cutlass Supreme fuses
[x] Cancel search: fusesPage 62 of 340
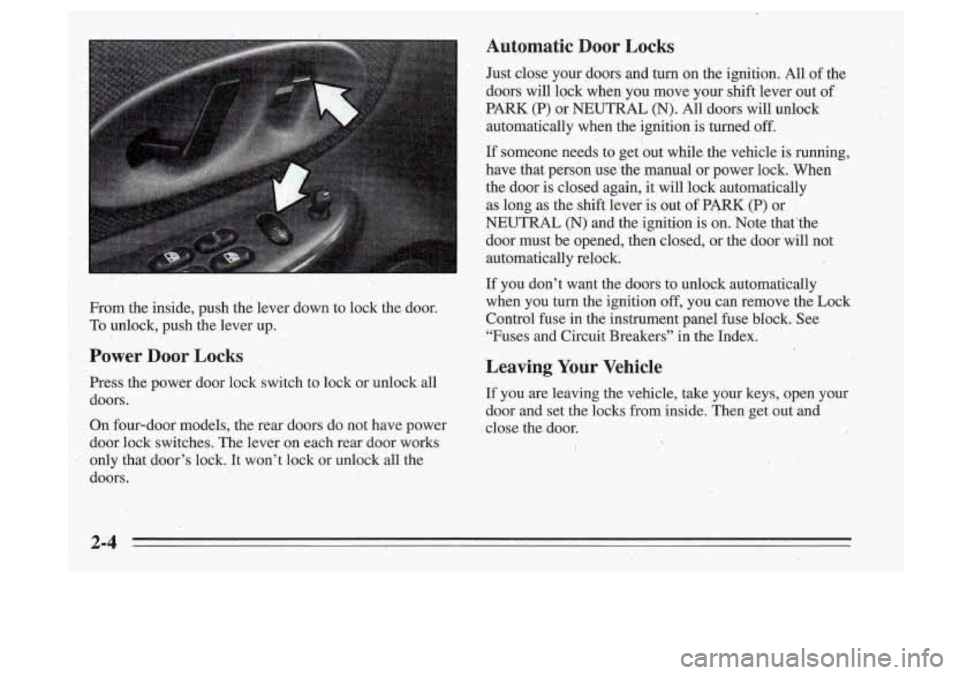
From the inside, push the lever down to lock the door.
,To unlock, push the iever up.
Power Door Locks
Press the power door lock switch to lock or unlock all
doors.
On four-door models, the rear dQors do not have power
door lock switches. The lever on each rear door works
only that door’s lock. It won’t lock or unlock all the
doors.
I ..
Automatic Door Locks
Just close’ your doors and turn on the ignition. All. of the
doors will .lack when
you move your shift 1,ever out of’
PARK (P) or NEUTRAL (N). All doors will unlock
automatically when the ignition is turned off.
. .
If someone needs to get out while the vehicle is running,
have that person use the manual or power lock. When
the door
is closed again, it will lock automatically
as long
as the shift lever is out of PARK (P) or
NEUTRilL (N) and the ignition is on. Note that’the
door must be opened, then closed, or the door ‘will not
automatically relock.
If you don’t want the doors
to unlock automatically
when you turn the ignition
off,, you can remove the Lock
Contro€’fuse
in the instrument.pane1 fuse block. See
“Fuses and Circuit Breakers” in the Index.
Leaving Your Vehicle
If you are leaving the vehicle, take your keys, open your
door and set the locks from inside. Then get out
and
close the door.
I
Page 68 of 340
PASS-Key@II
r
J
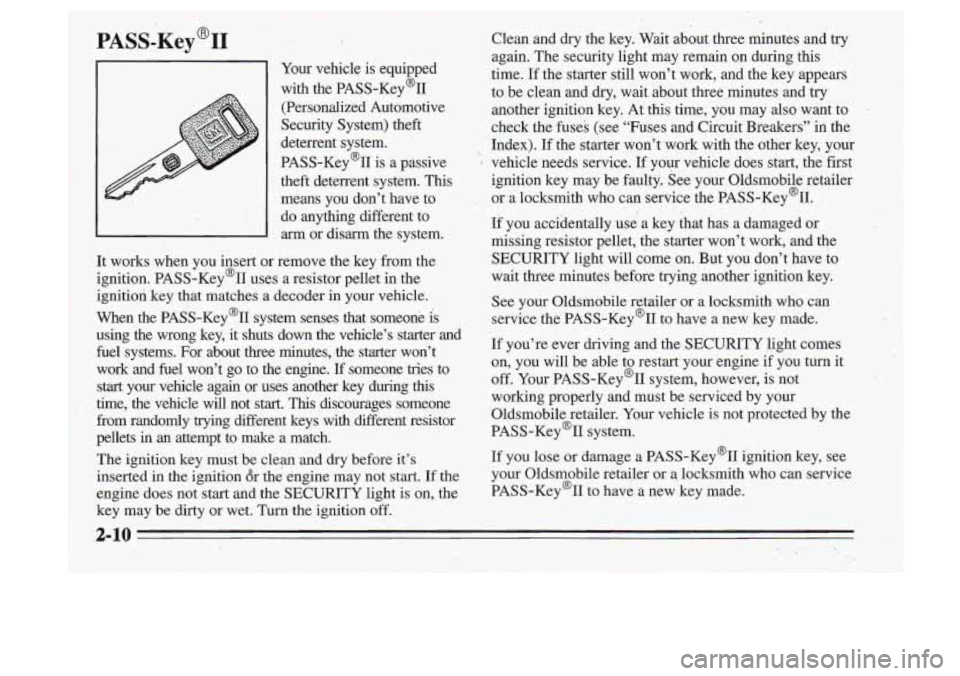
Your vehicle is equipped
with the PASS-Key’II (Personalized Automotive
Security System) -theft
deterrent system.
PASS-Key’II is a passive
theft deterrent system. This
means you don’t have to
do anything different to
arm or disarm the system.
It works when you insert or remove the key from the
ignition. PASS-Key’II uses a resistor pellet in the
ignition key that matches a decoder in your vehicle.
When the PASS-Key@II system senses that someone
is
using the wrong key, it shuts down the vehicle’s starter an\
d
fuel systems. For about three minutes,
.the starter won’t
work and fuel won’t go to the engine. If someone tries
to
start your vehicle again Or uses another key during this
time, the vehicle will not
start. This discourages someone
from randomly trying different keys with different resistor
pellets in
an attempt to make a match.
The ignition key must be clean and dry before it’s
inserted in the ignition dr the- engine may not start. If the
engine does not start and the SECURITY light is on, the
key may be dirty or wet. Turn the ignition off. Clean and dry the key. Wait about three minutes and try
again. The security light may remain on during this
time. If the starter still won’t work, and the key appears
to be clean and dry, wait about three minutes and try
another ignition key. At this time, you may also want to
check the fuses (see “Fuses and Circuit Breakers” in the\
Index). If the starter won’t work with the other key, your
q vehicle needs service. If your vehicle does start, the first
ignition key may be faulty. See your Oldsmobile retailer
or a locksmith who can service the PASS-Key’II.
If you accidentally use a key that has a damaged or
missing resistor pellet, the starter‘won’t work, and the SECURITY light will come on. But you don’t have to
wait three minutes before trying another ignition key.
See your Oldsmobile retailer or a locksmith who can
service the PASS-Key@II
to have a new key made.
If you’re ever driving and the SECURITY light comes
on, you will be able to restart your engine if you turn it
off. Your PASS-Key’II system, however, is not
working properly and must be serviced by your
Oldsmobile retailer. Your vehicle is not protected by the
PASS-Key@II system.
If you lose or damage a PASS-Key@II ignition key, see
your Oldsmobile retailer or a, locksmith who can service
PASS-Key@II to have a new key made.
2-10
.. .
Page 84 of 340
.,’
I
nrn Signal and Lane Change Indicator
The turn signal has two upward (for,Right) and two
downward (for Left) positions. These positions allow
you to signal a turn or a lane, ch&ge.
To signal a turn, move the lever all the way up or down.
When the turn
is finished, the lever will return
automatically.
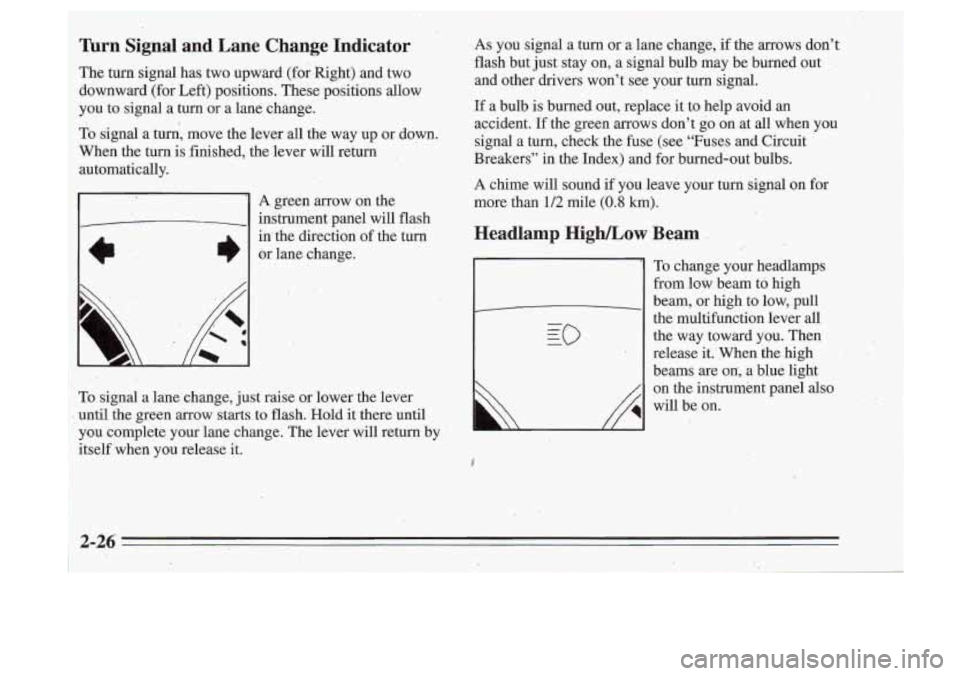
’ A green arrow on the
- instrument panel will flash
in’the direction
of the turn
e br lane change.
,* I I. ..
To signal a lane change, just raise or lower the lever
until the green
arrow starts. to flash. Hold it there until
you complete your lane change. The lever will return
by
itself when you release it.
..
As you signal a turn or a lane change, if the arrows don’t
flash but Just stay on, a signal bulbmay be burned out
and other drivers won’t see your turn signal.
If a bulb is burned out, replace it to help avoid an
accident. If the green arrows don’t go on at all when you
signal
a turn, check the fuse (see “Fuses and Circuit
Breakers” in the Index) and for burned-out bulbs.
A chime will sound if you leave your turn signal on for
more than,
1/2 mile (0.8 km):
Headlamp HighLow Beam
I
I
To change your headlamps
from low beam to high
beam, or high
to low, pull
the multifunction lever all
the way toward you. Then
release it.’When the high
beams are
oni, a blue light
on the instrument panel also
will be on.
2-26
..
’. . .-. -..
Page 262 of 340
I
Fuses -and Circuit Breakers
The wiring circuits in your vehicle are protected from
shdrkircuits by a combination of fuses, circuit'breakers,
and fusible thekal links in the wiring itself. This
greatly reduces the chance
of fires caused by electrical
problems.
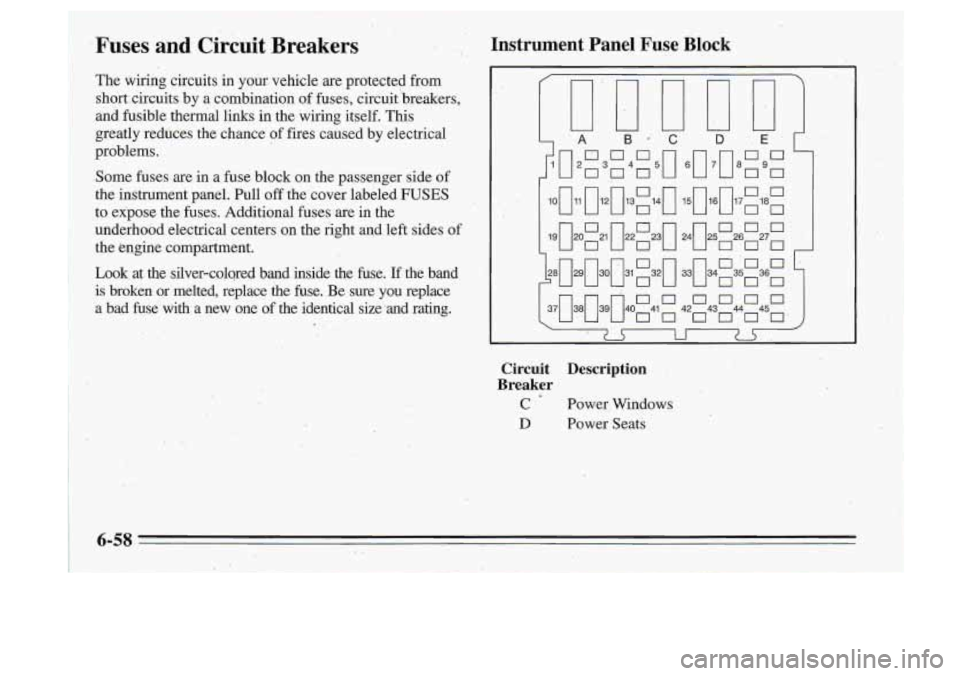
Some fuses are in
a fuse block on the passenger side of
the instrument panel. Pull off the cover labeled
FUSES
to expose the fuses. Additional fuses are in the
underhood electrical centers on the right and left sides of
the kngine compartment.
Look at
the silver-colqred band inside the fuse. If the band
is broken or melted, replace the fuse. Be sure you replace
a bad fuse with a new one of the identical size 'and rating.\
I : ,.
-Instrument Panel Fuse Block
1
Circuit Description
Breaker
C Power, Windows
D Power Seats
D
Page 265 of 340
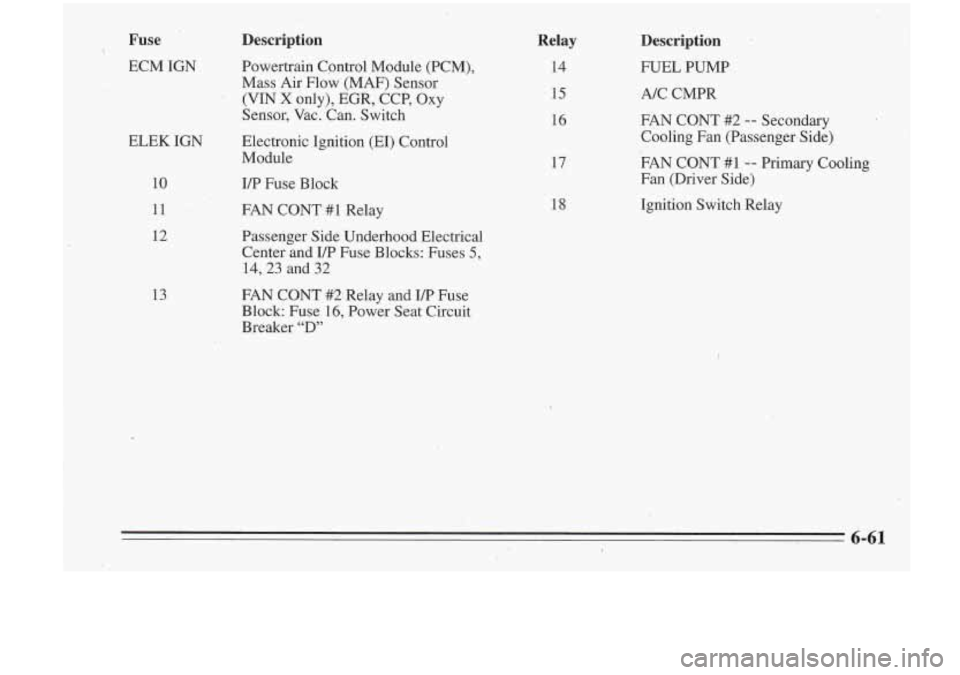
Fuse Description
ECM IGN Powertrain Cpntrol Module (PCM), Mass Air Flow (MAF) Sensor
(VIN X only), EGR, CCP, Oxy
Sensor, Vac. Can. Switch
ELEK IGN Electronic Ignition
(m) Control
Module
10
11
12
13
I/P Fuse Block
FAN CONT
#1 Relay
Passenger Side Underhood Electrical Center and
UP Fuse Blocks: Fuses 5,
14,23 and 32
FAN CONT #2:Relay and ITP Fuse
Block Fuse 16, Power Seat Circuit
Breaker
“D”
Relay
14
15
16
17
18
Description
FUEL PUMP
A/C CMPR
FAN CONT #2 --- Secondary
Cooling Fan (Passenger Side)
FAN CONT #1
-- Primary Cooling
Fan (Driver Side)
Ignition Switch Relay
Page 266 of 340
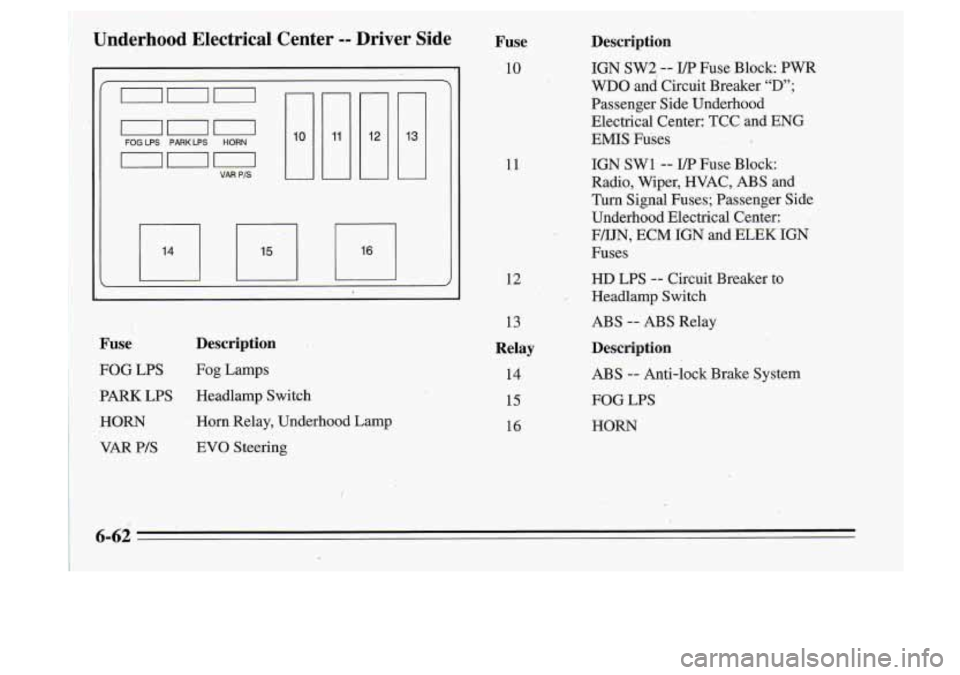
L
Fuse Description
FOG LPS Fog Lamps
PARK LPS Headlamp Switch
HORN Horn Relay, Underhood Lamp
VAR PIS EVO Steering
11
,.n
13
Relay
14
15
16
me ' Description
10 IGN SW2 -- I/P Fuse Block: PWR
WDO and Circuit Breaker "D";
Passenger Side Underhood
Electrical Center: TCC and ENG
EMIS Fuses
IGN
SW1 -- I/P Fuse Block:
Radio, Wiper, WAC, ABS and
Turn Signal Fuses; Passenger Side
Underhood Electrical Center:
- FPIJN, ECM IGN and ELEK IGN
Fuses
HD LPS -- Circuit Breaker to
Headlamp Switch-
ABS
-- ABS Relay
Description
ABS -- Anti-lock Brake System
FOG LPS
HORN
6-62
Page 331 of 340
Fib& Cleaning ............................... 6-49
FanKnob
.................................. 3.1. 3.4
Fiberglass Springs
............................... 6-55
Filling Your Tank
... ............................ 6-5
Filter. Air Cleaner
.............................. 6- 15
Finishcare
.................................... 6-53
Finish Damage
................................. 6-54
First Gear. Automatic Transaxle
................... 2-18
FixedMastAntenna
............................. 3-19
Flashers. Hazard Warning
......................... 5-1
Flat Tire. Changing
............................. 5-23
Fluid Capacities
................................ 6-65
Fluid Levels. Maintenance
........................ 7-36
Fluids
and Lubricants ............................ 7-41
Fog Lamp Bulb Replacement
....................... 6-37
Fog -Lamps. Operation
........................... 2-3 1
Foreign Countries. Fuel ....... ................... 6-4
Freeway Driving
............................... 4- 18
French Language Manual
11
Front Seatback Latches ........................... 1-5
Fuel
.......................................... 6-3
Filling Your Tank
............. : ............... 6-5
Gage
...................................... 2-45
In Foreign Countries ........................... 6-4
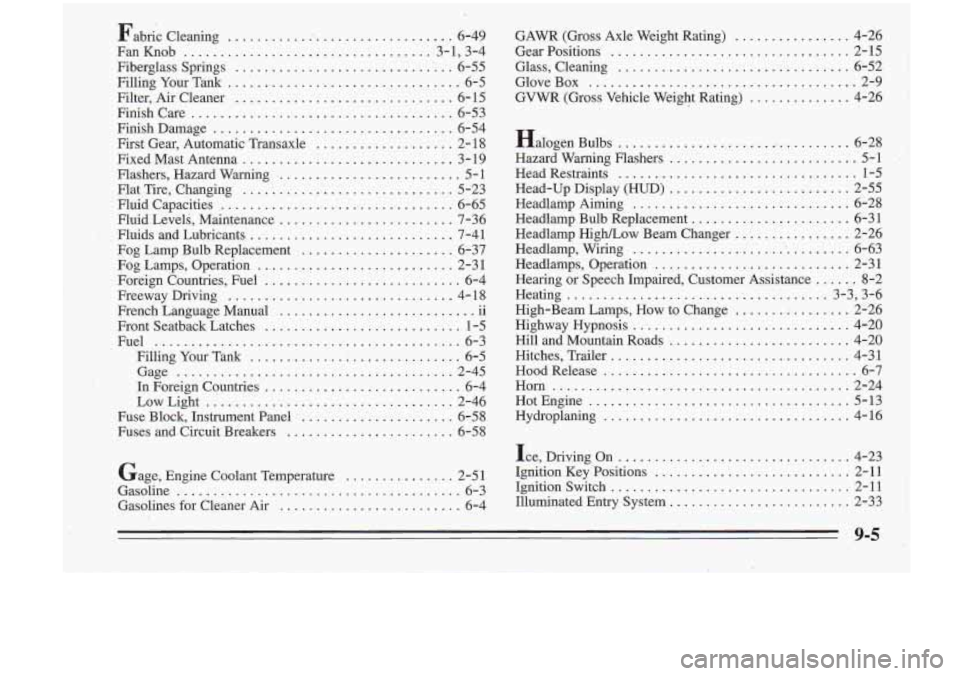
Fuse Block, Instrument Panel
..................... 6-58
Fuses and-Circuit Breakers
................. ....... 6-58
.. ...........................
LowLight ................................... 2-46 GAWR
(Gross Axle Weight Rating)
................. 4-26
Gear Positions
................................. 2-15
Glass. Cleaning
................................ 6-52
Glove Box
...................................... 2-9
GVWR
(Gross Vehicle Weight Rating) .............. 4-26
Halogen Bulbs
................................. 6-28
Hazard Warning Flashers
.......................... 5-1 .
Head Restraints ................................. 1-3
Head-Up Display
(HUD) ......................... 2-55
Headlamp Aiming
.............................. 6-28
Headlamp Bulb Replacement
...................... 6-31
Headlamp HighLow Beam Changer
................ 2-26
Headlamp. Wiring
............................... 6-63
Headlamps. Operation
........................... 2-31
Hearing or Speech Impaired. Customer Assistance
...... 8-2
Heating
....................................... 3-3., 3-6
High-Beam Lamps. How to Change
....... .. ........ 2-26
Highway Hypnosis
............................... 4-20
Hill and Mountain Roads
......................... 4-20
Hitches, Trailer
................................. 4-31
Hood Release
................................... 6-7
Horn ......................................... 2-24
HotEngine
.................................... 5-13
Hydroplaning
.................................. 4-16
Ice. Driving On
................................ 4-23
Gasoline
....................................... 6-3 Ignition Switch 2-11
Gasolines for Cleaner
Air ......................... 6-4 Illuminated Entry System 2-33
Gage.
Engine Coolant Temperature
............... 2-51 Ignition Key Positions ........................... 2-11
.................................
.........................
9-5
'I