Page 1599 of 2158

(6) Install and tighten clutch housing-to-engine
bolts to 38 Nzm (28 ft. lbs.) torque.Be sure housing
is properly seated on engine before tightening
bolts.
(7) Lower transmission no more than 7.6 cm (3 in.)
for access to the shift tower.
(8) Reach up and around the transmission and in-
sert shift lever in shift tower. Press lever retainer
downward and turn it clockwise to lock it in place.
Then install lever dust boot on shift tower.
(9) Install and connect crankshaft position sensor.
(10) Align and install transfer case on transmis-
sion. Tighten transfer case attaching nuts to 35 Nzm
(26 ft. lbs.) torque.
(11) Connect transfer case vacuum and vent hoses.
(12) Install and connect transfer case shift linkage.
Check and adjust linkage if necessary.
(13) Secure wire harnesses to clips/tie straps on
transmission and transfer case.
(14) Connect backup light switch wires.
(15) Install clutch slave cylinder.
(16) Connect vehicle speed sensor wires.
(17) On XJ, install rear crossmember and attach
cushion and bracket. Tighten crossmember-to-frame
bolts to 41 Nzm (30 ft. lbs.) torque. Tighten transmis-
sion-to-rear cushion and bracket bolts/nuts to 45 Nzm
(33 ft. lbs.) torque.
(18) On YJ, install rear cushion and bracket and
skid plate. Tighten attaching bolts/nuts to indicated
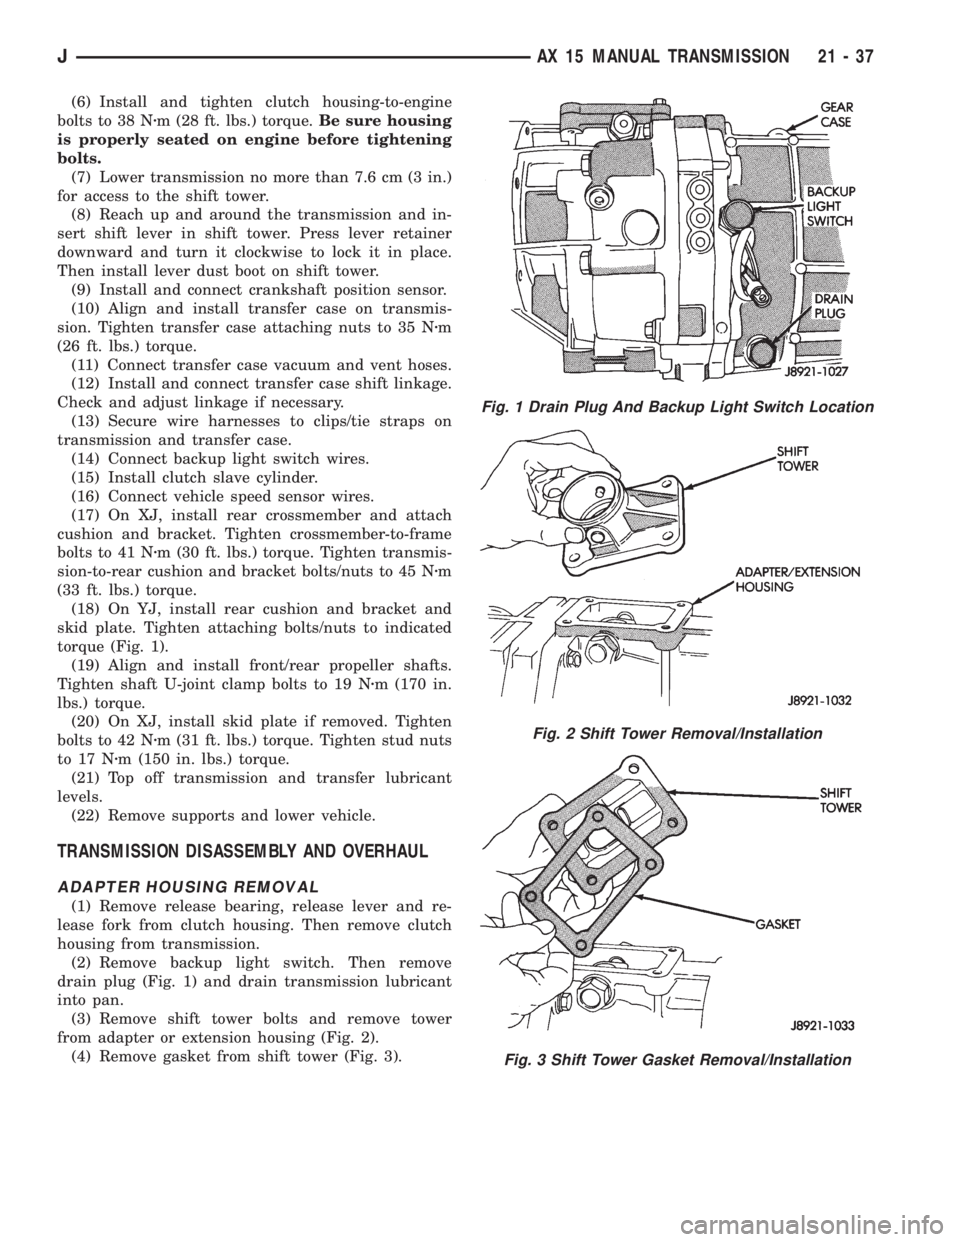
torque (Fig. 1).
(19) Align and install front/rear propeller shafts.
Tighten shaft U-joint clamp bolts to 19 Nzm (170 in.
lbs.) torque.
(20) On XJ, install skid plate if removed. Tighten
bolts to 42 Nzm (31 ft. lbs.) torque. Tighten stud nuts
to 17 Nzm (150 in. lbs.) torque.
(21) Top off transmission and transfer lubricant
levels.
(22) Remove supports and lower vehicle.
TRANSMISSION DISASSEMBLY AND OVERHAUL
ADAPTER HOUSING REMOVAL
(1) Remove release bearing, release lever and re-
lease fork from clutch housing. Then remove clutch
housing from transmission.
(2) Remove backup light switch. Then remove
drain plug (Fig. 1) and drain transmission lubricant
into pan.
(3) Remove shift tower bolts and remove tower
from adapter or extension housing (Fig. 2).
(4) Remove gasket from shift tower (Fig. 3).
Fig. 1 Drain Plug And Backup Light Switch Location
Fig. 2 Shift Tower Removal/Installation
Fig. 3 Shift Tower Gasket Removal/Installation
JAX 15 MANUAL TRANSMISSION 21 - 37
Page 1600 of 2158
(5) Remove shift arm retainer bolt (Fig. 4).
(6) Loosen and remove restrictor pins (Fig. 5).
(7) Remove shift arm shaft plug (Fig. 6).(8) Remove shift arm shaft with large magnet (Fig. 7).
(9) Remove shift arm (Fig. 8).
(10) Remove plug for reverse shift head lock ball.
Plug is at right side of adapter housing near backup
light switch (Fig. 9).Fig. 4 Shift Arm Retainer Bolt Removal/Installation
Fig. 5 Removing/Installing Restrictor Pins
Fig. 6 Removing/Installing Shift Lever Shaft Plug
Fig. 7 Removing/Installing Shift Lever Shaft
Fig. 8 Shift Arm Removal/Installation
Fig. 9 Removing/Installing Lock Ball Plug
21 - 38 AX 15 MANUAL TRANSMISSIONJ
Page 1601 of 2158
(11) Remove lock ball spring with pencil magnet
(Fig. 10).
(12) Remove shift head lock ball with pencil mag-
net (Fig. 11).
(13) Remove adapter housing bolts (Fig. 12).
Fig. 10 Removing/Installing Lock Ball Spring
Fig. 11 Removing/Installing Shift Head Lock Ball
Fig. 12 Adapter Housing Bolt Locations
JAX 15 MANUAL TRANSMISSION 21 - 39
Page 1602 of 2158
(14) Loosen adapter/extension housing with rubber
mallet (Fig. 13).
(15) Remove housing after loosening it (Fig. 14)
(16) Remove adapter housing oil seal with a pry
tool (Fig. 15).GEAR CASE REMOVAL
(1) Remove bearing retainer bolts and remove re-
tainer (Fig. 16).
(2) Remove retainer oil seal with pry tool (Fig. 17).
(3) Remove input shaft bearing snap ring (Fig. 18).
Fig. 15 Removing Adapter Housing Seal
Fig. 13 Loosening Adapter Housing
Fig. 14 Adapter Housing Removal
Fig. 16 Front Bearing Retainer Removal
Fig. 17 Front Bearing Retainer Seal Location
Fig. 18 Removing Input Shaft Bearing Snap Ring
21 - 40 AX 15 MANUAL TRANSMISSIONJ
Page 1603 of 2158

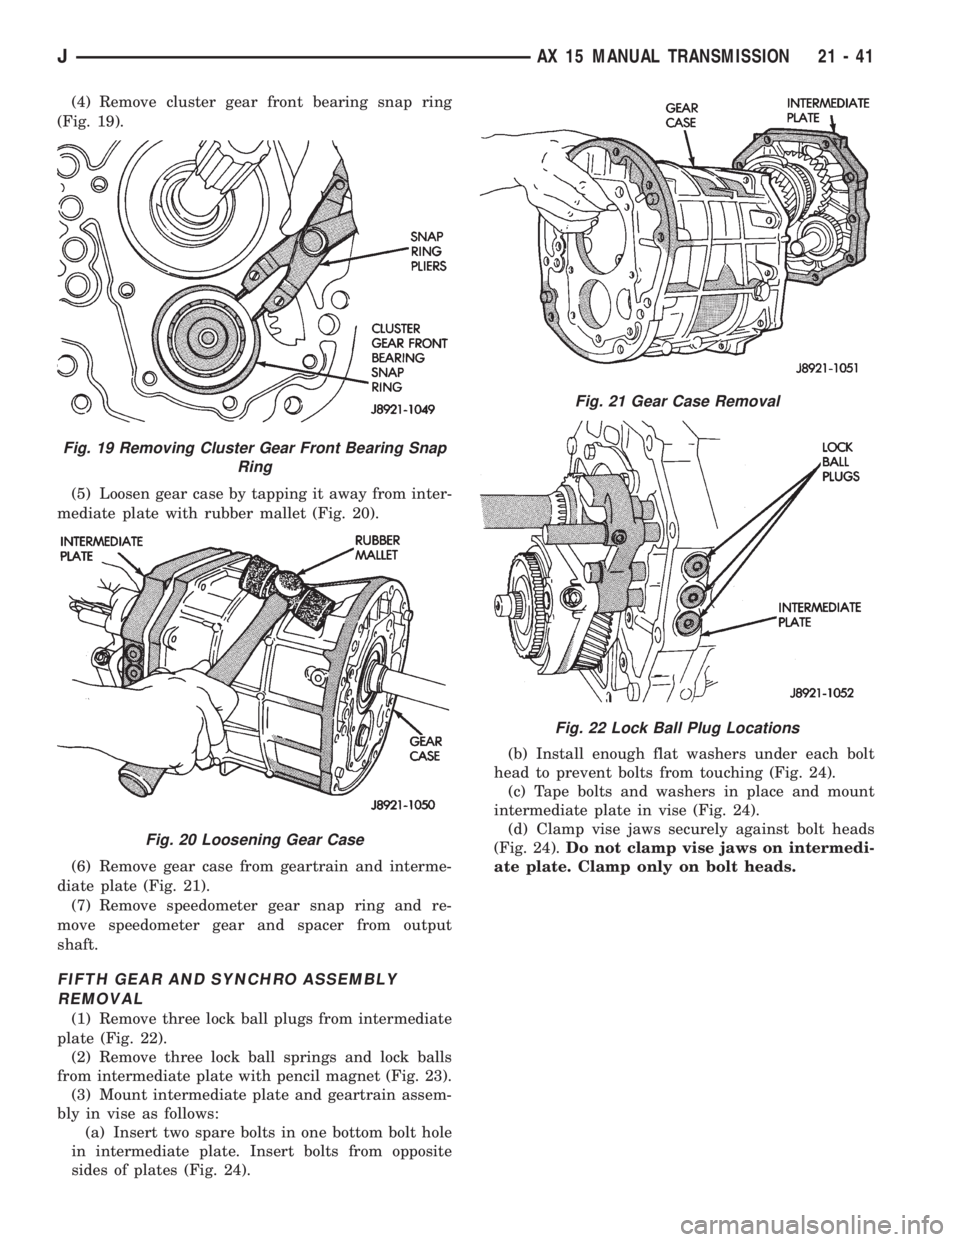
(4) Remove cluster gear front bearing snap ring
(Fig. 19).
(5) Loosen gear case by tapping it away from inter-
mediate plate with rubber mallet (Fig. 20).
(6) Remove gear case from geartrain and interme-
diate plate (Fig. 21).
(7) Remove speedometer gear snap ring and re-
move speedometer gear and spacer from output
shaft.
FIFTH GEAR AND SYNCHRO ASSEMBLY
REMOVAL
(1) Remove three lock ball plugs from intermediate
plate (Fig. 22).
(2) Remove three lock ball springs and lock balls
from intermediate plate with pencil magnet (Fig. 23).
(3) Mount intermediate plate and geartrain assem-
bly in vise as follows:
(a) Insert two spare bolts in one bottom bolt hole
in intermediate plate. Insert bolts from opposite
sides of plates (Fig. 24).(b) Install enough flat washers under each bolt
head to prevent bolts from touching (Fig. 24).
(c) Tape bolts and washers in place and mount
intermediate plate in vise (Fig. 24).
(d) Clamp vise jaws securely against bolt heads
(Fig. 24).Do not clamp vise jaws on intermedi-
ate plate. Clamp only on bolt heads.
Fig. 19 Removing Cluster Gear Front Bearing Snap
Ring
Fig. 20 Loosening Gear Case
Fig. 21 Gear Case Removal
Fig. 22 Lock Ball Plug Locations
JAX 15 MANUAL TRANSMISSION 21 - 41
Page 1604 of 2158
(4) Remove fifth gear snap ring (Fig. 25). Retain
snap ring for assembly reference. It is a select fit
component.
(5) Remove E-ring that secures reverse shift arm
to fork (Fig. 26).
Fig. 24 Mounting Intermediate Plate And Geartrain In Vise
Fig. 23 Removing/Installing Lock Ball And Spring
Fig. 25 Fifth Gear Snap Ring Removal
Fig. 26 Reverse Shift Arm E-Ring Removal
21 - 42 AX 15 MANUAL TRANSMISSIONJ
Page 1605 of 2158

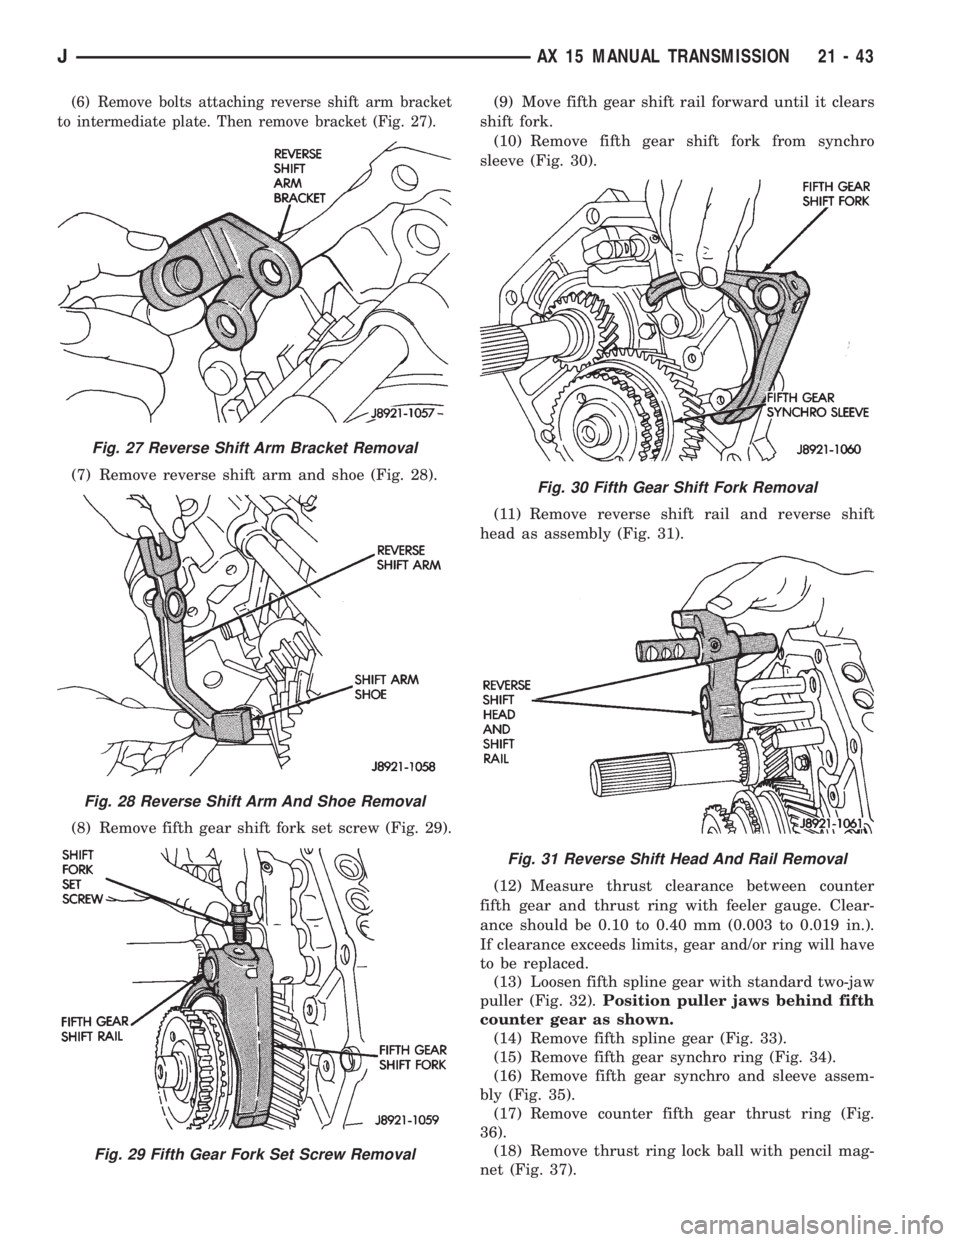
(6) Remove bolts attaching reverse shift arm bracket
to intermediate plate. Then remove bracket (Fig. 27).
(7) Remove reverse shift arm and shoe (Fig. 28).
(8) Remove fifth gear shift fork set screw (Fig. 29).(9) Move fifth gear shift rail forward until it clears
shift fork.
(10) Remove fifth gear shift fork from synchro
sleeve (Fig. 30).
(11) Remove reverse shift rail and reverse shift
head as assembly (Fig. 31).
(12) Measure thrust clearance between counter
fifth gear and thrust ring with feeler gauge. Clear-
ance should be 0.10 to 0.40 mm (0.003 to 0.019 in.).
If clearance exceeds limits, gear and/or ring will have
to be replaced.
(13) Loosen fifth spline gear with standard two-jaw
puller (Fig. 32).Position puller jaws behind fifth
counter gear as shown.
(14) Remove fifth spline gear (Fig. 33).
(15) Remove fifth gear synchro ring (Fig. 34).
(16) Remove fifth gear synchro and sleeve assem-
bly (Fig. 35).
(17) Remove counter fifth gear thrust ring (Fig.
36).
(18) Remove thrust ring lock ball with pencil mag-
net (Fig. 37).
Fig. 27 Reverse Shift Arm Bracket Removal
Fig. 28 Reverse Shift Arm And Shoe Removal
Fig. 29 Fifth Gear Fork Set Screw Removal
Fig. 30 Fifth Gear Shift Fork Removal
Fig. 31 Reverse Shift Head And Rail Removal
JAX 15 MANUAL TRANSMISSION 21 - 43
Page 1606 of 2158
Fig. 32 Loosening Fifth Spline Gear
Fig. 33 Fifth Spline Gear Removal
Fig. 34 Fifth Gear Synchro Ring Removal
Fig. 35 Counter Fifth Gear And Synchro Assembly
Removal
Fig. 36 Fifth Gear Thrust Ring Removal
Fig. 37 Thrust Ring Lock Ball Removal
21 - 44 AX 15 MANUAL TRANSMISSIONJ