1995 GMC SIERRA brake
[x] Cancel search: brakePage 228 of 488
You could be injured if the vehicles roll. Set the parking brake firmly
on each vehicle. Put an automatic transmission in PARK (P) or a
manual transmission in NEUTRAL (N). If you have a
four-wheel-drive vehicle, be sure the transfer case is not in NEUTRAL
(N).
3. Turn off the ignition on both vehicles. Turn off all lights that aren’t
needed, and radios. This
will avoid sparks and help save both batteries.
And it could save your radio!
NOTICE:
If you leave your radio on, it could be badly damaged. The
repairs wouldn’t be covered by your warranty.
4. Open the hoods and locate the batteries. Find the positive (+) and
negative
(-) terminals on each battery.
A CAUTION:
Using a match near a battery can cause battery gas to explode.
People have been hurt doing this, and some have been blinded.
Use
a flashlight if you need more light.
Be sure the batteries have enough
water. You don’t need to add
water to the Delco Freedom@ battery (or batteries) installed in
every new
GM vehicle. But if a battery has filler caps, be sure
the right amount of fluid is there.
If it is low, add water to take
care
of that first. If you don’t, explosive gas could be present.
Battery fluid contains acid that can burn you. Don’t get
it on
you.
ff you accidentally get it in your eyes or on your skin, flush
the place with water and get medical help immediately.
5. Check that the jumper cables don’t have loose or missing insulation. If
they do,
you could get a shock. The vehicles could be damaged, too.
Before you connect the cables, here are some basic things you should
know. Positive
(+) will go to positive (+) and negative (-) will go to
negative
(-) or a metal engine part. Don’t connect (+) to (-) or you’ll
get
a short that would damage the battery and maybe other parts, too.
5-4
ProCarManuals.com
Page 231 of 488
To wing Your Vehicle
Try to have your GM dealer or a professional towing service tow your
vehicle. They can provide the right equipment and know how to tow
it
without damage.
If your vehicle has been changed since
it was factory-new. by adding such
things like fog lamps, aero skirting,
or special tires and wheels, these things
could be damaged during towing.
Before you do anything,
turn on the hazard warning flashers.
When you call, tell the towing service:
0 That your vehicle has rear-wheel drive, or that it has the four-wheel
drive option.
The make, model, and year of your vehicle.
0 Whether you can move the shift lever for the transmission and transfer
case,
if you have one.
If there was an accident. what was damaged.
A CAUTION:
To help avoid injury to you or others:
Never let passengers ride in a vehicle that is being towed.
0 Never tow faster than safe or posted speeds.
0 Never tow with damaged parts not fuIly secured.
0 Never get under your vehicle after it has been lifted by the
tow truck.
0 Always use separate safety chains on each side when towing a
vehicle.
0 For pickups (except cab chassis models), use T-hooks on front
. of vehicle, J-hooks on rear.
For cab chassis models, use J-hooks on front and rear of
vehicle.
When your vehicle is being towed, have the ignition key off. The steering
wheel should be clamped
in a straight-ahead position, with a clamping
device designed for towing, service.
Do not use the vehicle’s steering
column lock for this. The transmission and transfer case, if
you have one,
should be
in NEUTRAL (N) and the parking brake released.
5-7
ProCarManuals.com
Page 249 of 488
Engine Fan Noise
Your vehicle has a clutched engine cooling fan. When the clutch is engaged,
the fan spins faster
to provide more air to cool the engine. In most every day
driving conditions the fan is spinning slower and the clutch is
not fully
engaged. This improves fuel economy and reduces fan noise. Under heavy
vehicle loading, trailer towing and/or high outside temperatures, the fan
speed increases as the clutch more fully engages.
So you may hear an
increase
in fan noise. This is normal and should not be mistaken as the
transmission slipping or making extra shifts.
It is merely the cooling system
functioning properly. The fan will slow down when additional cooling is not
required and the clutch partially disengages.
You may also hear this fan noise when you start the engine. It will go away
as the
fan clutch partially disengages.
If a Tire Goes Flat
It’s unusual for a tire to “blow out” while you’re driving, especially if you
maintain your tires properly. If air goes out
of a tire, it’s much more likely to
leak out slowly. But if you should ever have a “blowout,” here are a few tips
about what to expect and what to do:
If a front tire fails, the flat tire will create a drag that pulls the vehicle
toward that side. Take your foot
off the accelerator pedal and grip the
steering wheel firmly, Steer
to maintain lane position, then gently brake to a
stop well out of
the traffic lane.
A rear blowout, particularly on a curve, acts much like a skid and may
require the same correction you’d use in a skid. In any rear blowout, remove
your
foot from the accelerator pedal. Get the vehicle under control by
steering the way
you want the vehicle to go. It may be very bumpy and
noisy, but you can still steer. Gently brake to a stop, well
off the road if
possible.
If a tire goes flat, the next part shows how to use your jacking equipment to
change a flat tire safely.
5-25
ProCarManuals.com
Page 273 of 488
Hesitation or “flat” performance at high speed or during \
hard acceleration
may be an indication of premature fuel filter plugging due to dirty or
contaminated fuel. The fidter element may need to be changed
if this
happens. See your dealer for assistance.
To drain water:
1. Stop and park the vehicle in a safe place. Turn off the engine and apply
2. Remove the fuel tank cap.
the parking brake.
3. Place a
fuel-resistant container under the filter drain hose.
5.
6.
7.
8.
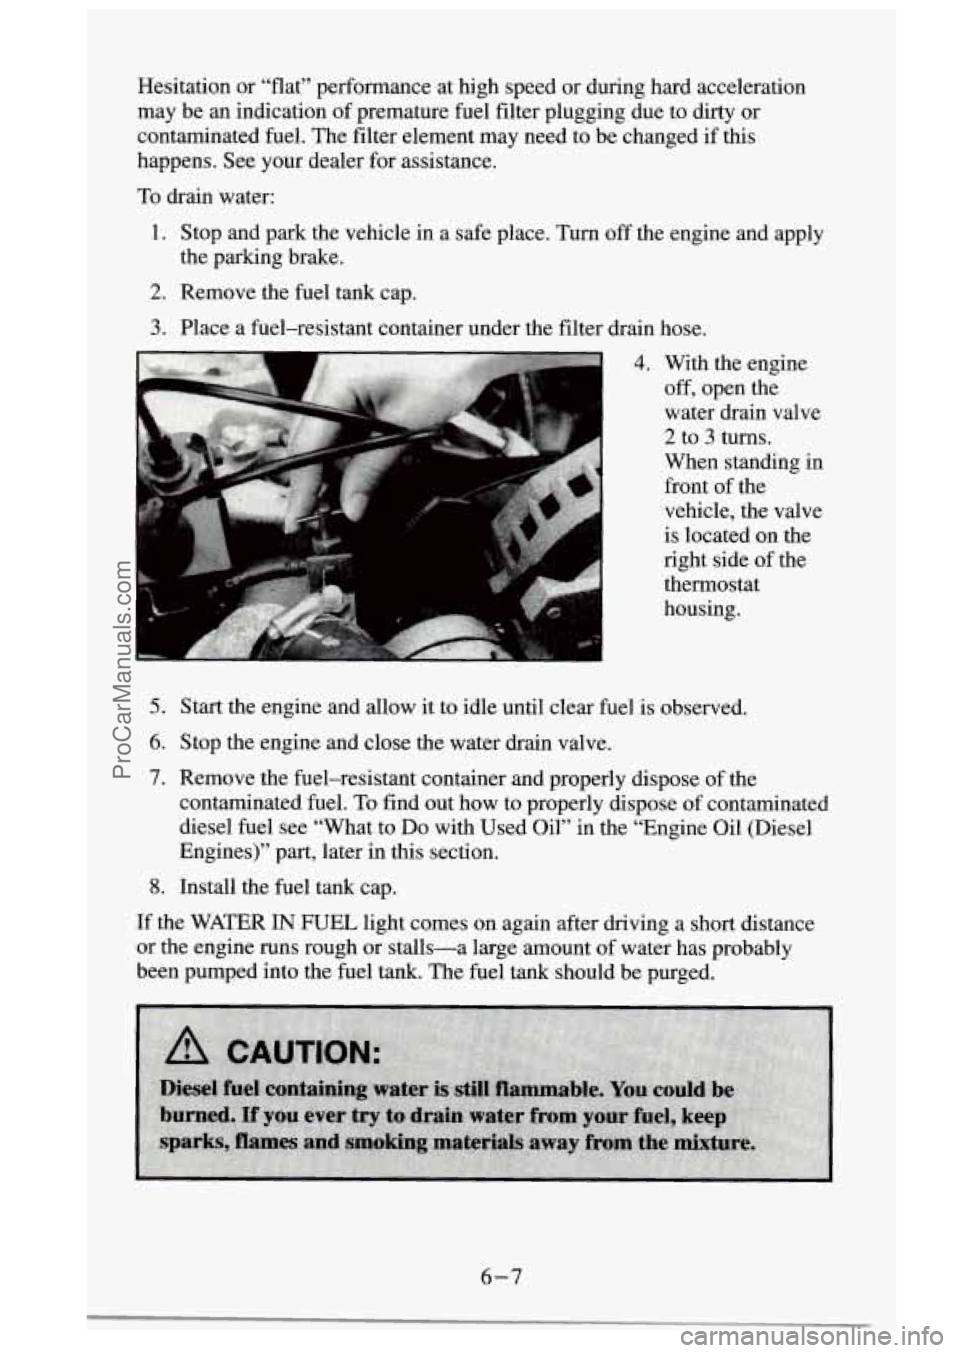
4. With the engine
off, open the
water drain valve
2 to 3 turns.
When standing in
front of the
vehicle, the valve
is located on the
right side of the
thermostat
housing.
Start the engine and allow it to idle until clear fuel is ob\
served.
Stop the engine and close the water drain valve.
Remove the fuel-resistant container and properly dispose of the
contaminated fuel.
To find out how to properly dispose of contaminated
diesel fuel see “What to Do with Used Oil” in the “E\
ngine Oil (Diesel
Engines)” part, later in this section.
Install the fuel tank cap.
If the WATER IN FUEL light comes on again after driving a short distance
or the engine runs rough or stalls-a large amount of water has probably
been pumped into the
fuel tank. The fuel tank should be purged.
6-7
ProCarManuals.com
Page 275 of 488
A CAUTION:
Diesel fuel is flammable. It could start a fire if it gets on hot
engine parts. You could be burned. Don't let too much fuel flow
from the air bleed
valve, and wipe up any spilled fuel with a
cloth.
3. Close the air bleed valve.
4. Turn the ignition key to START for 10 to 15 seconds at a time until
your engine starts.
Fuel Filter Replacement (Diesel Engines)
If you want to change the fuel filter yourself, here's how to do it:
A CAUTION:
Diesel fuel is flammable. It could start a fire if something ignites
it, and you could be burned. Don't let it get on hot engine parts,
and keep matches or other ignition sources away.
First. drain any water from the filter following the procedure for draining
water listed previously.
Your vehicle's engine should be off until the end
of the following procedure.
1. Apply the parking brake.
2. Take off the fuel tank cap. This releases vacuum in the tank.
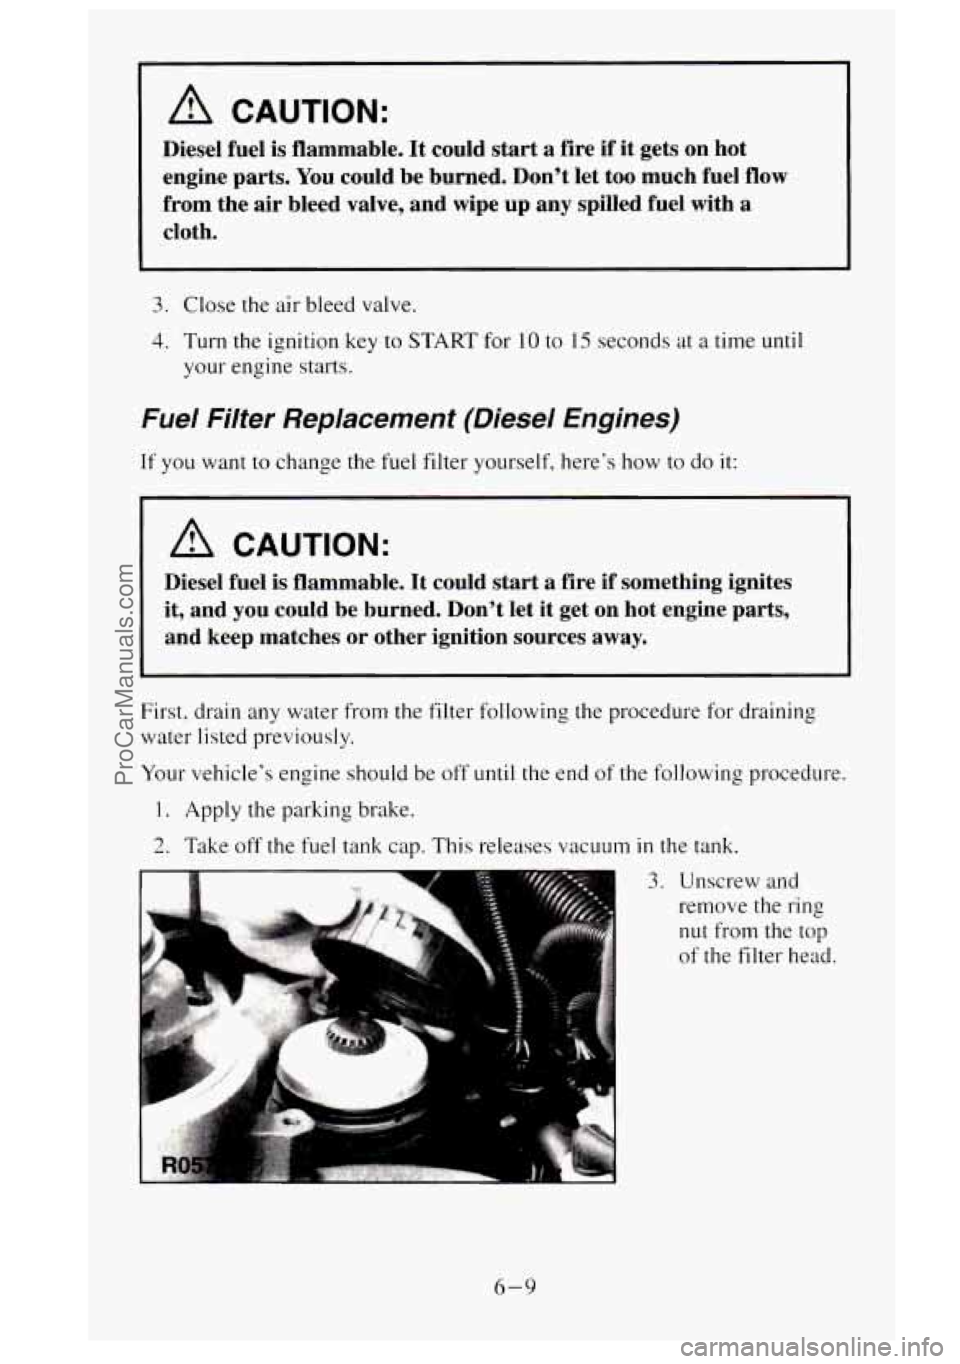
3. Unscrew and
remove the ring
nut from the top
of the
filter head.
6-9
ProCarManuals.com
Page 280 of 488
A CAUTION:
If your vehicle has air conditioning, the auxiliary engine fan
under the hood can start up and injure you even when the
engine is not running. Keep hands, clothing and tools
away from
any underhood electric fan.
A CAUTION:
Things that burn can get on hot engine parts and start a fire.
These include liquids like gasoline or diesel fuel, oil, coolant,
brake fluid, windshield washer and other fluids, and plastic
or
rubber. You or others could be burned. Be careful not to drop or
spill things that
will burn onto a hot engine.
Before closing the hood, be sure
all filler caps are on properly. Pull down
the
hood and close it firmly.
Cleaning Your Diesel Engine
I NOTICE:
If you spray or pour water or any other liquid on your engine
when it is warm or hot, or when it
is running, you could cause
serious damage to it.
If you ever clean the engine, clean it only
when it is cold.
Noise Control System
The following information relates to compliance with Federal noise
emission standards for vehicles with a Gross Vehicle Weight Rating
(GVWR)
of more than 10,000 pounds (4 536 kilograms). The Maintenance
Schedule booklet provides information on maintaining
the noise control
system to minimize degradation of the noise emission control system during
the life of your vehicle. The noise control system warranty is given in your
Warranty booklet.
These standards apply only
to vehicles sold in the United States.
6-14
ProCarManuals.com
Page 294 of 488
Wait at least 30 minutes before checking the transmission fluid level if you
have been driving:
When outside temperatures are above 90°F (32°C).
At high speed for quite a while.
In heavy traffic - especially in hot weather.
While pulling a trailer.
To get the right reading. the fluid should be at normal operating
temperature, which is 180°F to 200°F
(82°C to 93°C).
To check transmission fluid hot: Get the vehicle warmed up by driving
about
15 miles (24 km) when outside temperatures are above 50°F (10°C).
If it's colder than 50°F (lO"C), drive the vehicle in DRIVE (3) until the
engine temperature gage moves and then remains steady for ten minutes.
Then follow the hot check procedures.
To check transmission fluid cold: A cold check is made after the vehicle
has been sitting for eight hours or more
with the engine off and is used only
as a reference. Let the engine run at idle for five minutes if outside
temperatures are 50°F
(10°C) or more. If it's colder than 50°F (IOOC), you
may have to idle the engine longer. Should the fluid level be low during a
cold check, you
must perform a hot check before adding fluid. This will
give you a more accurate reading of the fluid level.
To check the fluid hot or cold
Park your vehicle on a level place. Keep the engine running.
With the parking brake applied, place the shift lever in PARK (P).
With your foot on the brake pedal, move the shift lever through each
gear range, pausing for about three seconds
in each range. Then,
position the shift lever
in PARK (P).
Let the engine run at idle for three minutes or more.
6-28
ProCarManuals.com
Page 307 of 488
What to Add
Refer to the Maintenance Schedule to determine what kind of' tluid to use
See "Recommended Fluids and Lubricants"
in the Index.
NOTICE:
When adding power steering fluid or making a complete fluid
change, always use the proper fluid. Failure to use
the proper
fluid can cause leaks and damage hoses and seals.
Hydro-Boost Brake System (Hydraulic Pump)
The power steering pump is also used as the Hydro-boost pump. Refer to
"Power Steering System''
in this section when checking fluid level or
adding fluid.
Windshield Washer Fluid
What to Use
When you need windshield washer fluid, be sure to read the manuhcturer's
instructions before use.
If you will be operating your vehicle in an area
where the temperature
may fall below freezing, use a fluid that has
sufficient protection against freezing.
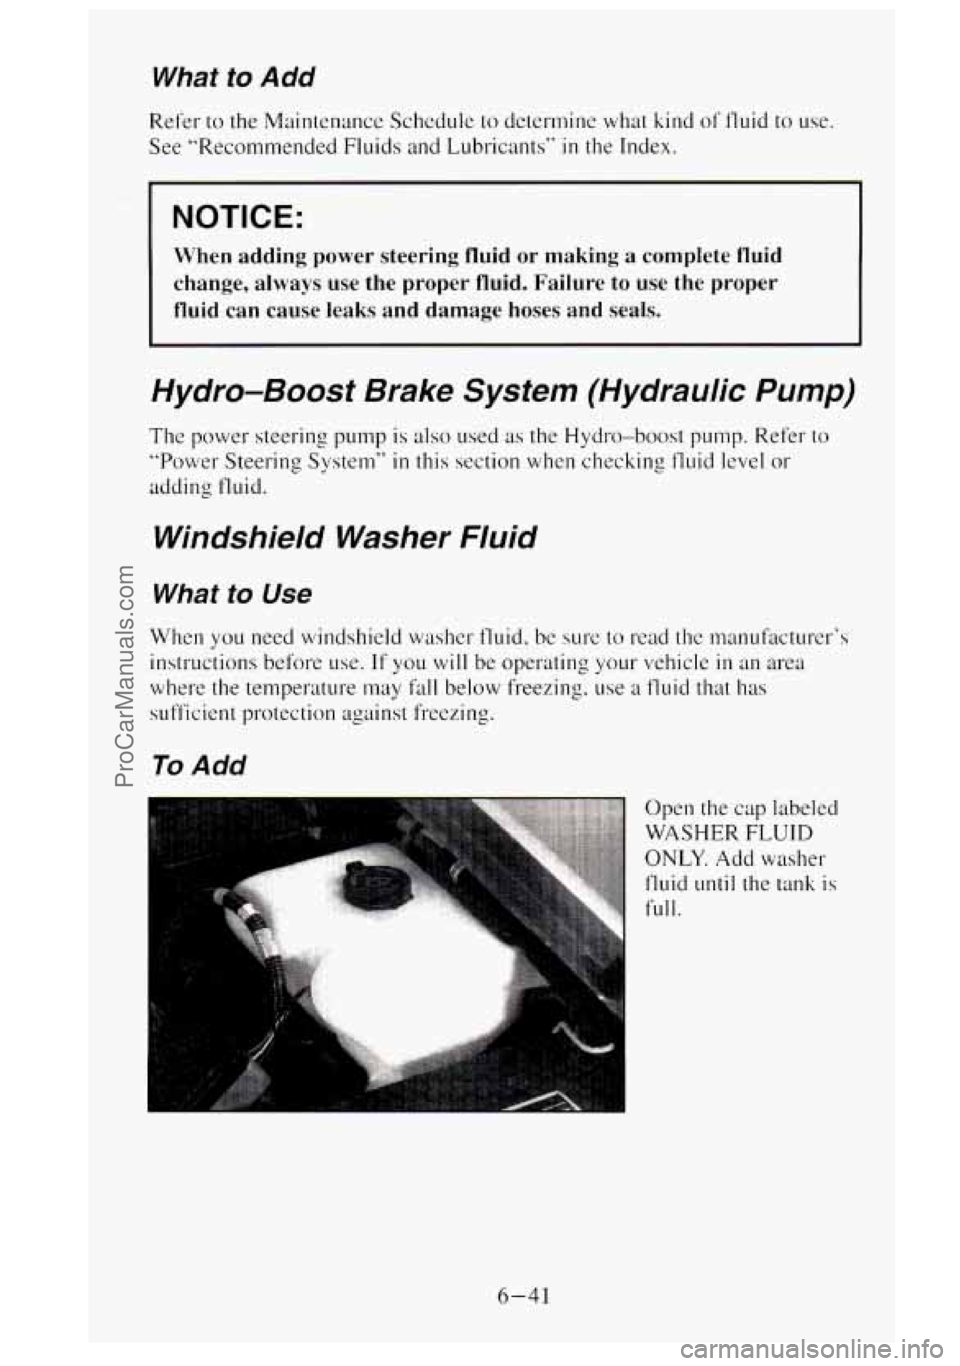
To Add
Open the cap labeled
WASHER FLUID
ONLY. Add washer
fluid
until the tank is
full.
6-41
ProCarManuals.com