Page 234 of 354
NOTICE:
Too much or too little fluid can damage your
transmission.
Too much can mean that some of
the fluid could come out and
fall on hot engine
parts or exhaust system parts, starting
a fire. Be
sure to get an accurate reading if you check your
transmission fluid.
Check the fluid level only when your engine is off, the
vehicle is parked on a level place and the transmission
is
cool enough for you to rest your fingers on the
transmission case.
Then, follow these steps:
1.
2.
3.
Remove the filler plug.
Check that the lubricant level is up to
the bottom of
the filler plug hole.
If the fluid level
is good, install the plug and be sure
it is fully seated.
If the fluid level is low, add more
fluid as described
in the next steps.
How to Add Fluid
Here’s how to add fluid. Refer to the Maintenance
Schedule to determine what kind
of fluid to use. See
“Recommended Fluids and Lubricants” in the Index.
I. Remove the filler plug.
2. Add fluid at the filler plug hole. Add only enough
fluid to bring the fluid level up to the bottom
of the
filler plug hole.
3. Install the filler plug. Be sure the plug is fully seated.
Clutch Adjustment
The clutch linkage in your vehicle should be checked as
recommended in your Maintenance Schedule.
To check,
push the clutch pedal down with your hand until you
feel some resistance to movement
of the pedal. If the
pedal moves freely up
to an inch (25 mm) or so before
you feel resistance to the travel, adjustment isn’t needed.
If there is
no free travel or very little (less than 5/23 of an
inch
(16 mm)), see your dealer for adjustment.
ProCarManuals.com
Page 235 of 354
Rear Axle Four- Wheel Drive
When to Check and Change Lubricant
Refer to the
Maintenance Schedule to determine how
often to check the lubricant and when to change it. See
“Periodic Maintenance Inspections” and “Scheduled
Maintenance Services” in the Index.
How to Check Lubricant
If the level is below the bottom of the filler plug hole,
you’ll need to add some lubricant. Add enough lubricant
to raise the level to the bottom
of the filler plug hole.
What to Use
Refer to the Maintenance Schedule to determine what
kind
of lubricant to use. See “Recommended Fluids and
Lubricants” in the Index. Most
lubricant checks in this section also apply to
four-wheel-drive vehicles. However, they have
two
additional systems that need lubrication.
Transfer Case
When to Check and Change Lubricant
Refer to the Maintenance Schedule to determine how
often to check the lubricant and when
to change it. See
“Scheduled Maintenance Services” in the Index.
How to Check Lubricant
If the level is below the bottom of the filler plug hole,
you’ll need to add some lubricant. Add enough lubricant
to raise the level
to the bottom of the filler plug hole.
What to Use
Refer to the Maintenance Schedule to determine what
kind
of lubricant to use. See “Recommended Fluids and
Lubricants” in the Index.
ProCarManuals.com
Page 236 of 354

Front Axle Engine Coolant
When to Check and Change Lubricant
Refer to the Maintenance Schedule to determine how
often to check the lubricant and when to change it. See
“Periodic Maintenance Inspections” and “Scheduled
Maintenance Services” in the Index.
How to Check Lubricant
If the level is below the bottom of the filler plug hole,
you’ll need to add some lubricant.
If the differential is at operating temperature (warm),
add enough lubricant to raise the level to the bottom of
the filler plug hole.
If the differential is cold, add enough lubricant to raise
the level to 1/2 inch (12 mm) below the filler plug hole.
What to Use
Refer to the Maintenance Schedule to determine what
kind of lubricant to use. See “Recommended Fluids and
Lubricants” in the Index. The following explains
your cooling
system and how to
add coolant when it is low. If you have a problem with
engine overheating, see “Engine Overheating’’ in the
Index.
The proper coolant for your Geo will:
0 Give freezing protection down to -33°F (-36°C).
Give boiling protection up to 258°F (125°C).
Protect against rust and corrosion.
Help keep the proper engine temperature.
Let the warning lights work as they should.
What to Use
Use a mixture of one-half clean water (preferably
distilled) and one-half antifreeze that meets
“GM
Specification 1825M,” which won’t damage aluminum
parts. You can also use a recycled coolant conforming to
GM Specification 1825M with a complete coolant flush
and refill. If you use this mixture, you don’t need to add
anything else.
ProCarManuals.com
Page 240 of 354
When the engine compartment is hot, the level
should
be at the MAX mark.
When the engine compartment is cool, the level
should be at the MIN mark.
A fluid loss in this system could indicate a problem.
Have the system inspected and repaired.
What to Add
Refer to the Maintenance Schedule to determine what
kind
of fluid to use. See “Recommended Fluids and
Lubricants” in the Index.
NOTICE:
When adding power steering fluid or making a
complete fluid change, always use the proper
fluid. Failure to use the proper fluid can cause
leaks and damage hoses and seals.
ProCarManuals.com
Page 242 of 354
Brakes
Brake Master Cylinder
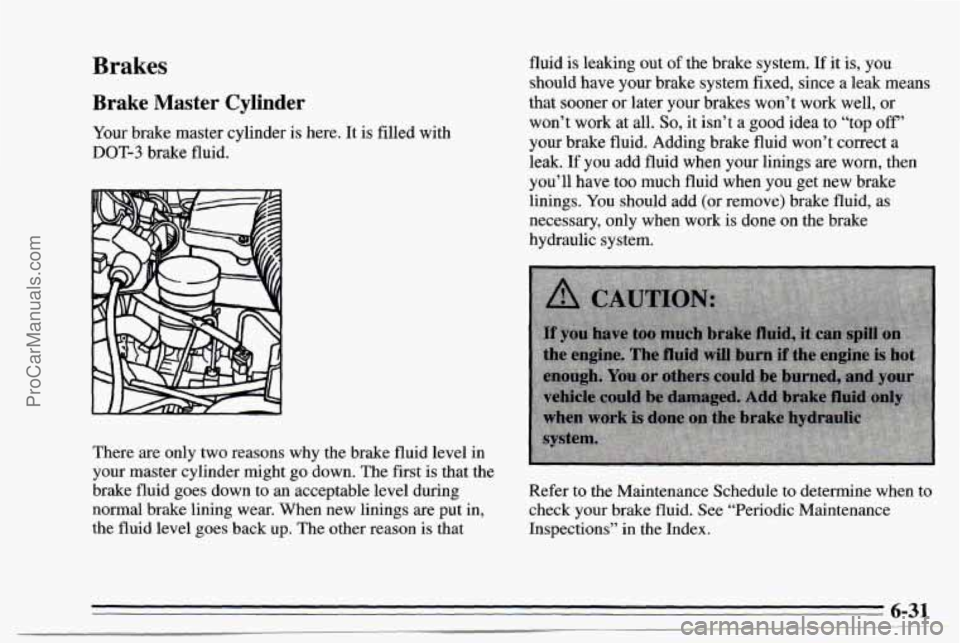
YOLK brake master cylinder is here. It is filled with
DOT-3 brake fluid.
There are only two reasons why the brake fluid level in
your master cylinder might go down. The first is that the
brake fluid goes down to an acceptable level during
normal brake lining wear. When new linings are put in,
the fluid level goes back up. The other reason is that fluid
is leaking out
of the brake system. If it is, you
should have your brake system fixed, since
a leak means
that sooner or later your brakes won’t work well, or
won’t work at
all. So, it isn’t a good idea to “top off”
your brake fluid. Adding brake fluid won’t correct a
leak. If you add fluid when your linings are worn, then
you’ll have too much fluid when you get new brake
linings. You should add (or remove) brake fluid, as
necessary, only when work is done on the brake
hydraulic system.
Refer to the Maintenance Schedule to determine when to
check your brake fluid. See “Periodic Maintenance
Inspections” in the Index.
6-31
ProCarManuals.com
Page 253 of 354
Inflation - Tire Pressure
The Tire-Loading Information label which is on the
driver’s door shows the correct inflation pressures for
your tires, when they’re cold.
“Cold” means your
vehicle has been sitting for at least three hours or driven
no more than
a mile.
I
’ NOTICE:
Don’t let anyone tell you that underidation or
~ overinflation is all right. It’s not. If your tires don’t
~ have enough air (underinflation) you can get:
Too much flexing
Too much heat
Tire overloading
Bad wear
Bad handling
Bad fuel economy.
If your tires have too much air (overinflation),
you can get:
Unusual wear
0 Bad handling
Rough ride
Needless damage from road hazards. When to Check
Check your
tires once a month or more. Also, check the
tire pressure of
the spare tire.
How to Check
Use a good quality pocket-type gage to check tire
pressure. Simply looking at the tires will
not tell you the
pressure, especially if you have radial tires
-- which
may look properly inflated even
if they’re underinflated.
If your tires have valve caps, be sure to put them back on.
They help prevent leaks by keeping out dirt and moisture.
Tire Inspection and Rotation
Tires should be inspected every 6,000 to 8,000 miles
(10 000 to 13 000 km) for any signs of unusual wear. If
unusual wear is present, rotate your tires as
soon as
possible and check wheel alignment. Also check for
damaged tires or wheels. See “When It’s Time for New
Tires” and “Wheel Replacement” later in this section for
more information.
The purpose
of regular rotation is to achieve more
uniform wear for all tires on the vehicle. The first
rotation is the most important. See “Scheduled
Maintenance Services” in
the Index for scheduled
rotation intervals.
ProCarManuals.com
Page 268 of 354
Underbody Maintenance
Chemicals used for ice and snow removal and dust
control can collect on the underbody. If these are not
removed, accelerated corrosion (rust) can occur on the
underbody parts such as fuel lines, frame, floor pan, and
exhaust system even though they have corrosion
protection.
At least every spring, flush these materials from
the
underbody with plain water. Clean any areas where mud
and other debris can collect. Dirt packed in closed areas
of the frame should be loosened before being flushed.
Your dealer or an underbody vehicle washing system
can do this for you.
Chemical Paint Spotting
Some weather and atmospheric conditions can create a
chemical fallout. Airborne pollutants can fall upon and
attack painted surfaces on your vehicle. This damage
can take two forms: blotchy, ringlet-shaped
discolorations, and small irregular dark spots etched into
the paint surface.
Although no defect
in the paint job causes this, Geo will
repair, at no charge to the owner, the surfaces
of new
vehicles damaged by this fallout condition within
12 months or 12,000 miles (20 000 km) of purchase,
whichever comes first.
ProCarManuals.com
Page 269 of 354
Appearance Care and Maintenance Materials
You can get these from your GM Parts Department.
PART
NUMBER USAGE DESCRIPTION SIZE
Spray-A-Squeak Silicone Grease Weatherstrips, Stops squeaks
* Not recommended for pigskin suede leather.
See your General Motors
Parts Departments for these products.
See your Maintenance Schedule
for other products.
ProCarManuals.com