Page 58 of 354

You can shift into F'IRST (1) when you're going less
than
20 mph (32 km/h). If you've come to a complete
stop and it's hard to shift into FIRST
(1) put the shift
lever in NEUTRAL
(N) and let up on the clutch. Press
the clutch pedal back down. Then shift into FIRST
(1).
SECOND (2): Press the clutch pedal as you let up on
the accelerator pedal and shift into SECOND
(2). Then.
slowly let up on the clutch pedal as you press the
accelerator pedal.
THIRD, FOURTH, FIFTH (3,4 and 5): Shift into
THIRD
(3), FOURTH (4) and FIFTH (5) the same way
you do for SECOND
(2). Slowly let up on the clutch
pedal as you press the accelerator pedal.
TO STOP: Let up on the accelerator pedal and press the
brake pedal. Just before the vehicle stops, press the
clutch pedal and the brake pedal, and shift to
NEUTRAL (N).
NEUTRAL (N): Use this position when you start or
idle your engine.
REVERSE (R): To back up, press down the clutch
pedal and shift into REVERSE (R). Let up on the clutch
pedal slowly while pressing the accelerator pedal.
You cannot
go from FIFTH (5) into REVERSE (R). If
you
try, you will be locked out. You must first shift into
NEUTRAL
(N), move the lever to the left, back to the
right, and then shift into REVERSE
(R). This is a safetv
feature.
NOTICE:
Shift to REVERSE (R) only after your vehicle is
stopped. Shifting to REVERSE (R) while your
vehicle is moving could damage your
transmission.
Also, use REVERSE (R) along with the parking brake
for parking your vehicle.
ProCarManuals.com
Page 59 of 354
Shift Speeds (Manual Transmission)
This chart shows when to shift to the next higher gear
for best fuel economy.
Acceleration Shift Speed Cruise Shift Speed
1t02 I2to3 I3to4 f4to5 2to3 I 3to4 I 4to5 1 1.6L L4 15 26 35 45
&valve (24) (42) (56) (72) 20 to 26 30 to 35 39 to 45
16-valve (24)
(40) (64) (72)
1.6L L4 15 25
40 45 (32 to 42) (48 to 56) (63 to 72)
If your speed drops below 20 mph (30 km/h), or if the
engine is not running smoothly,
you should downshift to
the next lower gear. You may have to downshift two or
more gears to keep the engine running smoothly or for
good performance.
I NOTICE:
If you skip more than one gear when you
downshift, or if you race the engine when you
downshift,
you can damage the clutch or
transmission.
ProCarManuals.com
Page 60 of 354
Four-wheel Drive (Option)
If your vehicle has four-wheel drive, you can send your
engine’s driving power to all four wheels for extra
traction.
To shift out of two-wheel drive and into
four-wheel drive, lock the freewheeling hubs (manual
hubs only) and move the transfer
case shift lever to
FOUR-WHEEL
HIGH (4H) or FOUR-WHEEL LOW
(4L) (see the following). You should use TWO-WHEEL
HIGH
(2H) for most normal driving.
Rear wheel anti-lock brakes
do not work when you shift
into four-wheel drive. Your regular brakes will still
work. When you shift back into two-wheel drive,
you
will then have regular and rear wheel anti-lock brakes.
NOTICE:
Driving in FOUR-WHEEL HIGH (4H) or
FOUR-WHEEL LOW (4L) positions for a long
time on dry or wet pavement could shorten the
life of your vehicle’s drivetrain.
Freewheeling Hubs
Your vehicle may have either manual or automatic
freewheeling hubs. You must
lock the hubs before you
use FOUR-WHEEL HIGH (4H) or FOUR-WHEEL
LOW (4L).
ProCarManuals.com
Page 65 of 354

1.
2.
3.
4.
5.
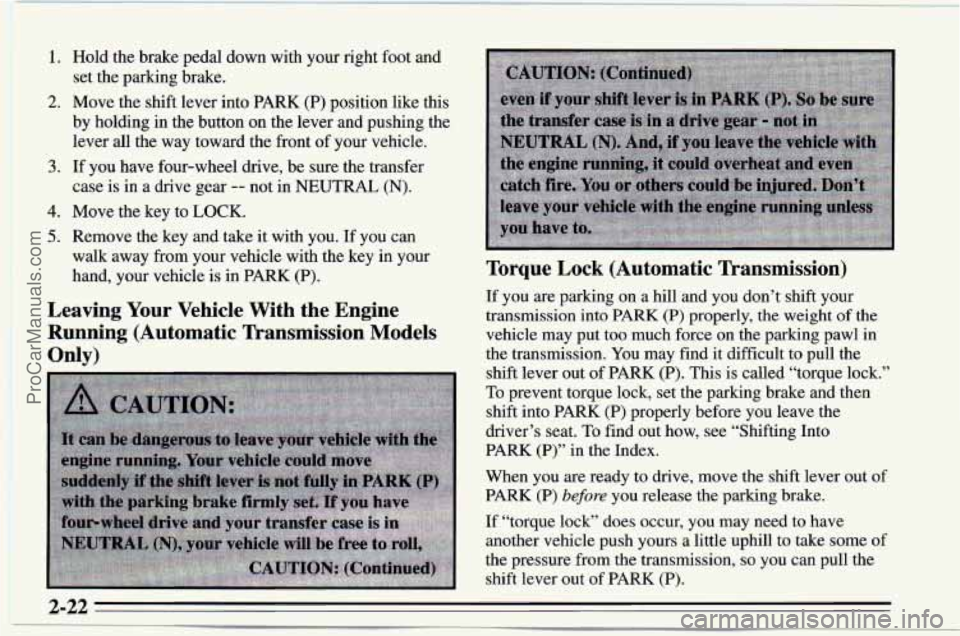
Hold the brake pedal down with your right foot and
set the parking brake.
Move the shift lever into PARK
(P) position like this
by holding
in the button on the lever and pushing the
lever all the way toward the front of your vehicle.
If you have four-wheel drive, be sure the transfer
case is in a drive gear
-- not in NEUTRAL (N).
Move the key to LOCK.
Remove the key and take it with you. If you can
walk away
from your vehicle with the key in your
hand, your vehicle is in PARK (P).
Leaving Your Vehicle With the Engine
Running (Automatic Transmission Models
Only) Torque Lock (Automatic Transmission)
If you
are parking on a hill and you don’t shift your
transmission
into PARK (P) properly, the weight of the
vehicle may put too much force
on the parking pawl in
the transmission. You may find it difficult to pull the
shift lever out
of PARK (P). This is called “torque lock.”
To prevent torque lock, set the parking brake and then
shift into PARK (P) properly before you leave the
driver’s seat. To find out how, see “Shifting Into
PARK (P)” in the Index.
When you are ready to drive, move the shift lever out of
PARK (P)
before you release the parking brake.
If “torque lock” does occur, you may need to have
another vehicle push yours a little uphill to take some of
the pressure from the transmission,
so you can pull the
shift lever out of PARK
(P).
2-22
ProCarManuals.com
Page 66 of 354

Shifting Out of PARK (P)
(Automatic Transmission)
Your Geo has a brake-transmission shift interlock. You
have to fully
apply your regular brakes before you can
shift from PARK
(P) when the ignition is in the ON
position. See “Automatic Transmission” in the Index.
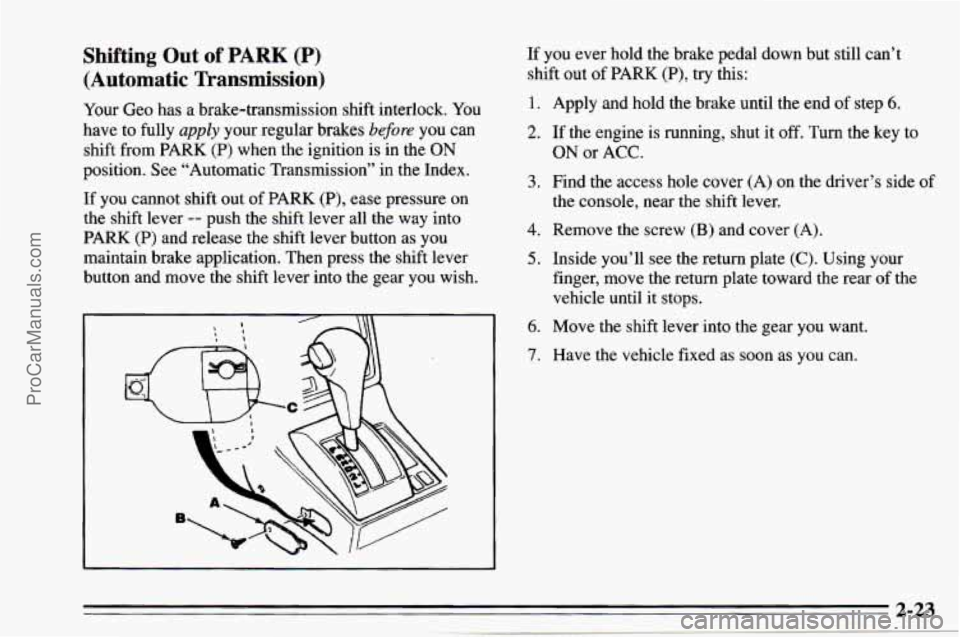
If you cannot shift out of
PARK (P), ease pressure on
the shift lever -- push the shift lever all the way into
PARK
(P) and release the shift lever button as you
maintain brake application. Then press the shift lever
button and move the shift lever into the gear you wish. If
you ever hold the brake pedal down but still can’t
shift out of
PARK (P), try this:
1. Apply and hold the brake until the end of step 6.
2. If the engine is running, shut it off. Turn the key to
3. Find the access hole cover (A) on the driver’s side of
4. Remove the screw (B) and cover (A).
5. Inside you’ll see the return plate (C). Using your
ON or ACC.
the console, near the shift lever.
finger, move the return plate toward the rear of the
vehicle until it stops.
6. Move the shift lever into the gear you want.
7. Have the vehicle fixed as soon as you can.
2-23
ProCarManuals.com
Page 68 of 354
Engine Exhaust Running Your Engine While You’re
Parked (Automatic Transmission)
It’s better not to park with the engine running. But if vou
ever have to, here are some things to know.
2-25
ProCarManuals.com
Page 85 of 354

Speedometer and Odometer
Your speedometer lets you see your speed in both miles
per hour (mph) and kilometers per hour
(km/h). Your
odometer shows how
far your vehicle has been driven,
in either miles (used in the
U.S.) or kilometers (used in
Canada).
Your Geo’s odometer is tamper-resistant.
If you can see
silver lines between the numbers, someone probably has
tried to turn it back. The numbers may not be true.
You may wonder what happens if your vehicle needs a
new odometer installed. If possible, the new one is to be
set to the same reading
as the old one. If it can’t be, then
it’s set at zero. Then
a label is attached on the driver’s
door to show the old reading and when the new one was
installed.
Trip Odometer
The trip odometer can tell you how far your vehicle has
been driven since you last set the trip odometer to zero.
To set the trip odometer to zero, press the knob.
Tachometer (Option)
RPM
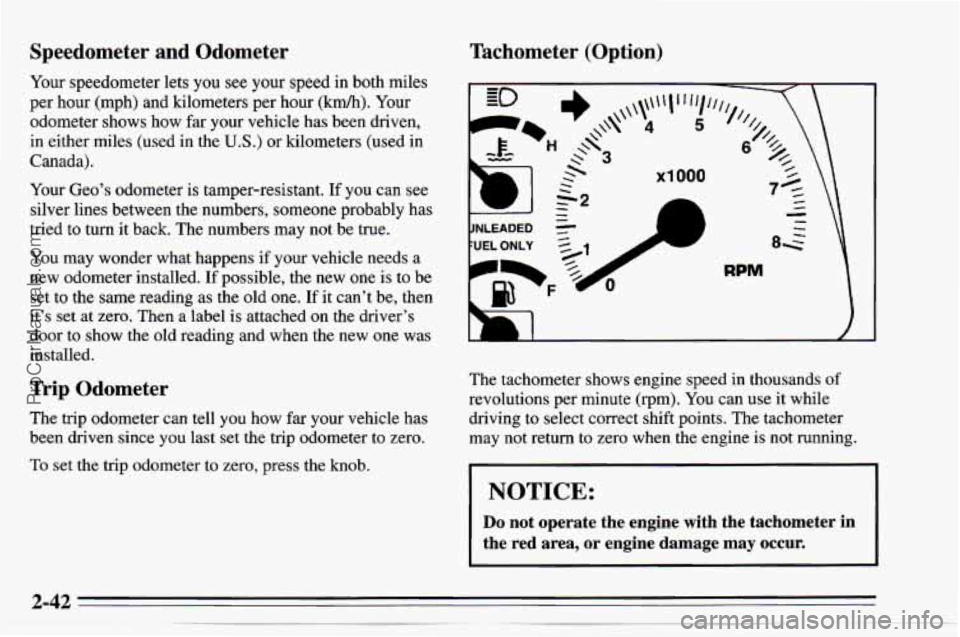
The tachometer shows engine speed in thousands of
revolutions per minute (rpm). You can use it while
driving to select correct shift points. The tachometer
may not return to zero when the engine is not running.
NOTICE:
Do not operate the engine with the tachometer in
the red area, or engine damage
may occur.
ProCarManuals.com
Page 86 of 354

Warning Lights, Gages and Indicators
This part describes the warning lights and gages that
may be on your vehicle. The pictures will help you
locate them.
Warning lights and gages can signal that something is
wrong before it becomes serious enough to cause an
expensive repair or replacement. Paying attention to
your warning lights and gages could also save you or
others from injury.
Warning lights come on when there may be or is
a
problem with one of your vehicle’s functions. As you
will see in the details on the next few pages, some
warning lights come on briefly when you start the
engine just to let you know they’re working. If you are
familiar with this
section, you should not be alarmed
when this happens. Gages
can indicate when there may be or is a problem
with one of your vehicle’s functions. Often gages and
warning lights work together to let you
know when
there’s a problem with your vehicle.
When one of the warning lights comes on and stays on
when you are driving, or
when one of the gages shows
there may be a problem, check the section that tells you
what to do about it. Please follow this manual’s advice.
Waiting to do repairs can be costly
-- and even
dangerous.
So please get to know your warning lights
and gages. They’re a big help.
ProCarManuals.com