1995 CHEVROLET S10 check engine light
[x] Cancel search: check engine lightPage 162 of 354
Downloaded from www.Manualslib.com manuals search engine The exit ramp can be curved, sometimes quite sharply.
The
exit speed is usually posted.
Reduce your speed according to your speedometer, not
to your sense of
motion. After driving for any distance at higher speeds, you may tend to
think you are going slower than you actually are.
Before Leaving on a Long Trip
Make sure you’re ready. Try to be well rested. If you must start when you’re
not fresh
- such as after a day’s work - don’t plan to make too many
miles that first part of the journey. Wear comfortable clothing and shoes you
can easily drive
in.
Is your vehicle ready for a long trip? If you keep it serviced and maintained,
it’s ready to
go. If it needs service, have it done before starting out. Of
course, you’ll find experienced and able service experts in GM dealerships
all across North America. They’ll be ready and willing to help if you need
it.
Here are some things you can check before a trip:
Windshield Washer Fluid: Is the reservoir full? Are all windows clean
inside and outside?
Wiper Blades: Are they in good shape?
Fuel, Engine Oil, Other Fluids: Have you checked all levels?
Lights: Are they all working? Are the lenses clean?
0 Tires: They are vitally important to a safe, trouble-free trip. Is the tread
good enough for long-distance driving? Are the tires all inflated to the
recommended pressure?
Weather Forecasts: What’s the weather outlook along your route?
Maps: Do you have up-to-date maps?
Should
you delay your trip a short time to avoid a major storm system?
Highway Hypnosis
Is there actually such a condition as “highway hypnosis”? Or is it just plain
falling asleep at the wheel? Call it highway hypnosis, lack of awareness, or
whatever.
There
is something about an easy stretch of road with the same scenery,
along with the hum of the tires on the road,
the drone of the engine, and the
rush of the wind against the vehicle that can make you sleepy. Don’t let it
happen to you! If it does, your vehicle can leave the road in
less than a
second,
and you could crash and be injured.
What can you
do about highway hypnosis? First, be aware that it can
happen.
4-29
Page 179 of 354
Downloaded from www.Manualslib.com manuals search engine Safety Chains
You should always attach chains between your vehicle and your trailer.
Cross the safety chains under the tongue of the trailer
so that the tongue will
not drop to the road if it becomes separated from the hitch. Instructions
about safety chains may be provided by the hitch manufacturer or by the
trailer manufacturer. Follow the manufacturer’s recommendation for
attaching safety chains and do not attach them to the bumper. Always leave
just enough slack
so you can turn with your rig. And, never allow safety
chains to drag on the ground.
Trailer Brakes
If your trailer weighs more than 1,000 pounds (450 kg) loaded, then it needs
its own brakes
- and they must be adequate. Be sure to read and follow the
instructions for the trailer brakes
so you’ll be able to install, adjust and
maintain them properly.
Your trailer brakes system can tap into vehicle’s hydraulic brake system
except:
Don’t tap into your vehicle’s brake system if the trailer’s brake system will
use more than 0.02 cubic inch (0.3~~) of fluid from your vehicle’s master
cylinder. If it does, both braking systems won’t work well. You could even
lose your brakes.
Will the trailer parts take 3,000 psi (20 650 kPa)
of pressure? If not, the
trailer brake system must not be used with your vehicle.
If everything checks out this far, then make the brake fluid tap at
the port on
the master cylinder that sends fluid to the rear brakes. But don’t use copper
tubing for this. If you do, it will bend and finally break off. Use steel brake
tubing.
Driving with a Trailer
Towing a trailer requires a certain amount of experience. Before setting out
for the open road, you’ll want to get
to know your rig. Acquaint yourself
with the feel
of handling and braking with the added weight of the trailer.
And always keep
in mind that the vehicle you are driving is now a good
deal longer and not nearly as responsive as your vehicle
is by itself.
Before
you start, check the trailer hitch and platform (and attachments),
safety chains, electrical connector, lights, tires and mirror adjustment. If the
trailer has electric brakes, start your vehicle and trailer moving and then
apply the trailer brake controller by hand to be sure
the brakes are working.
This lets you check your electrical connection at
the same time.
During your trip, check occasionally
to be sure that the load is secure, and
that the lights and any trailer brakes are still working.
4-46
Page 182 of 354
Downloaded from www.Manualslib.com manuals search engine When You Are Ready to Leave After Parking on a Hill
1. Apply your regular brakes and hold the pedal down while you:
Start your engine;
Shift into a gear; and
Release the parking brake.
2. Let up on the brake pedal.
3. Drive slowly until the trailer is clear of the chocks.
4. Stop and have someone pick up and store the chocks.
Maintenance When Trailer Towing
Your vehicle will need service more often when you’re pulling a trailer. See
the Maintenance Schedule for more on this. Things that are especially
important in trailer operation are automatic transmission fluid (don’t
overfill), engine oil, axle lubricant, belt, cooling system, and brake
adjustment. Each of these is covered in this manual, and the Index will help
you find them quickly. If you’re trailering, it’s a
good idea to review these
sections before you start your trip.
Check periodically to
see that all hitch nuts and bolts are tight.
Trailer Lighting Systems Wiring
See “Trailer Wiring Harness” in the Index.
4-49
Page 186 of 354
Downloaded from www.Manualslib.com manuals search engine NOTICE:
Ignoring these steps could result in costly damage to your
vehicle that wouldn’t be covered by your warranty.
Trying to start your vehicle by pushing or pulling
it could
damage your vehicle, even if you have a manual transmission.
And if you have an automatic transmission, it won’t
start that
way.
To Jump Start Your Vehicle;
1. Check the other vehicle. It must have a 12-volt battery with a negative
ground system.
NOTICE:
If the other system isn’t a 12-volt system with a negative
ground, both vehicles can be damaged.
2. Get the vehicles close enough so the jumper cables can reach, but be
sure the vehicles aren’t touching each other. If they are, it could cause
a
ground connection you don’t want. You wouldn’t be able to start your
vehicle, and the bad grounding could damage the electrical systems.
You could be injured if the vehicles roll. Set the parking brake firmly
on each vehicle. Put an automatic transmission in
PARK (P) or a
manual transmission in NEUTRAL (N). If you have
a
four-wheel-drive vehicle with a manual transfer case shift lever, be
sure the transfer case is not in NEUTRAL
(N).
3. Turn off the ignition on both vehicles. Turn off all lights that aren’t
needed, and radios. This will avoid sparks and help save both batteries.
And it could save your radio!
NOTICE:
If you leave your radio on, it could be badly damaged. The
repair wouldn’t be covered by your warranty.
4. Open the hoods and locate the batteries. Find the positive (+) and
negative
(-) terminals on each battery.
5-3
Page 223 of 354
Downloaded from www.Manualslib.com manuals search engine Checking Things Under the Hood
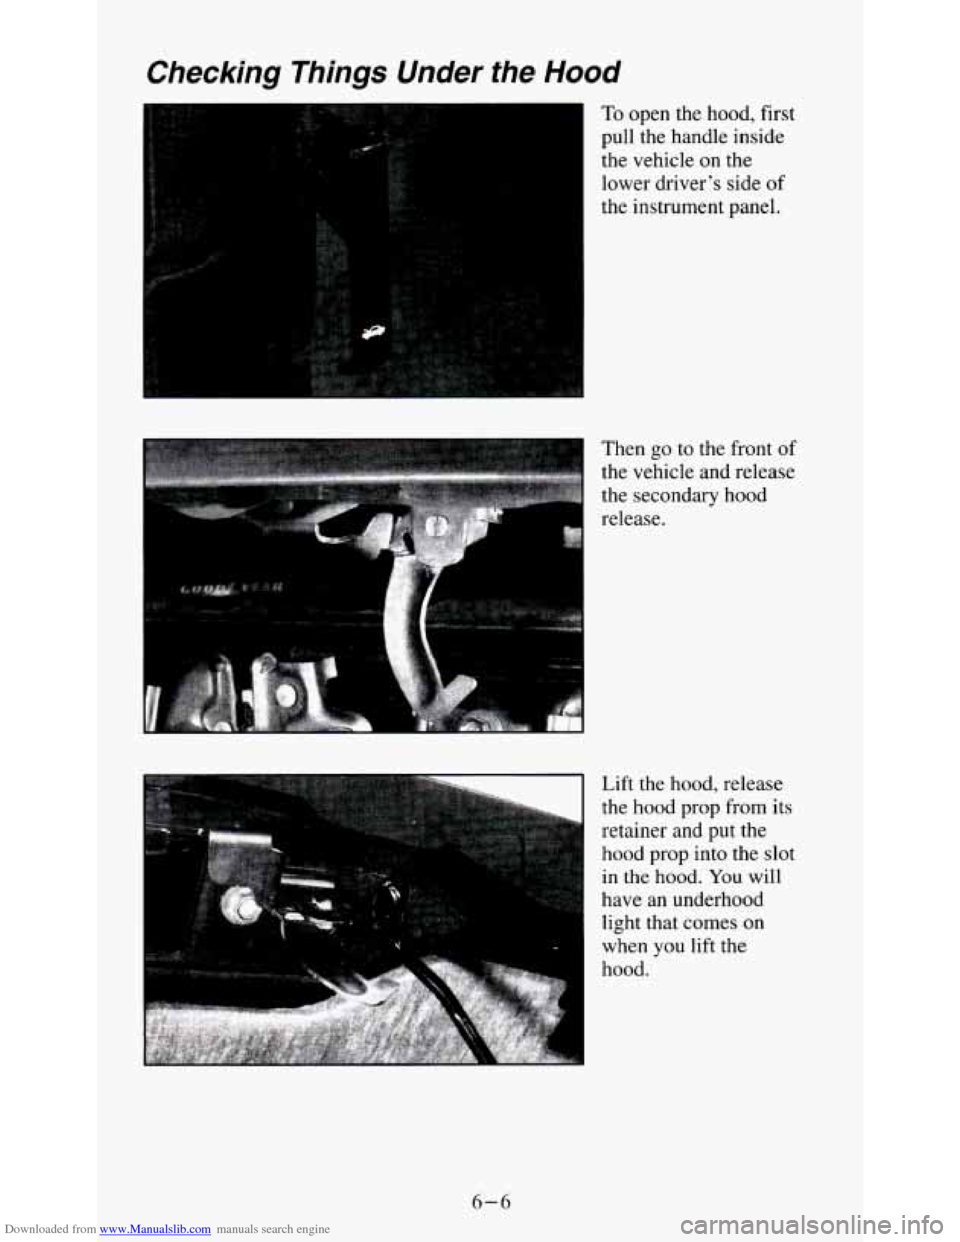
To open the hood, first
pull the handle inside
the vehicle on the
lower driver’s side
of
the instrument panel.
Then
go to the front of
the vehicle and release
the secondary hood
release.
Lift the hood, release
the hood prop from its
retainer and put the
hood prop into the slot
in the hood. You will
have
an underhood
light that comes
on
when you lift the
hood.
6-6
Page 235 of 354
Downloaded from www.Manualslib.com manuals search engine How to Add Fluid
Here’s how to add fluid. Refer to the Maintenance Schedule to determine
what kind of fluid to
use. See “Recommended Fluids and Lubricants” in the
Index.
1. Remove the filler plug.
2. Add fluid at the filler plug hole. Add only enough fluid to bring the
fluid level up to the bottom of the filler plug hole.
3. Install the filler plug. Be sure the plug is fully seated.
Hydraulic Clutch
The hydraulic clutch linkage in your vehicle is self-adjusting. A slight
amount of play
(1/4 inch to 1/2 inch) in the pedal is normal.
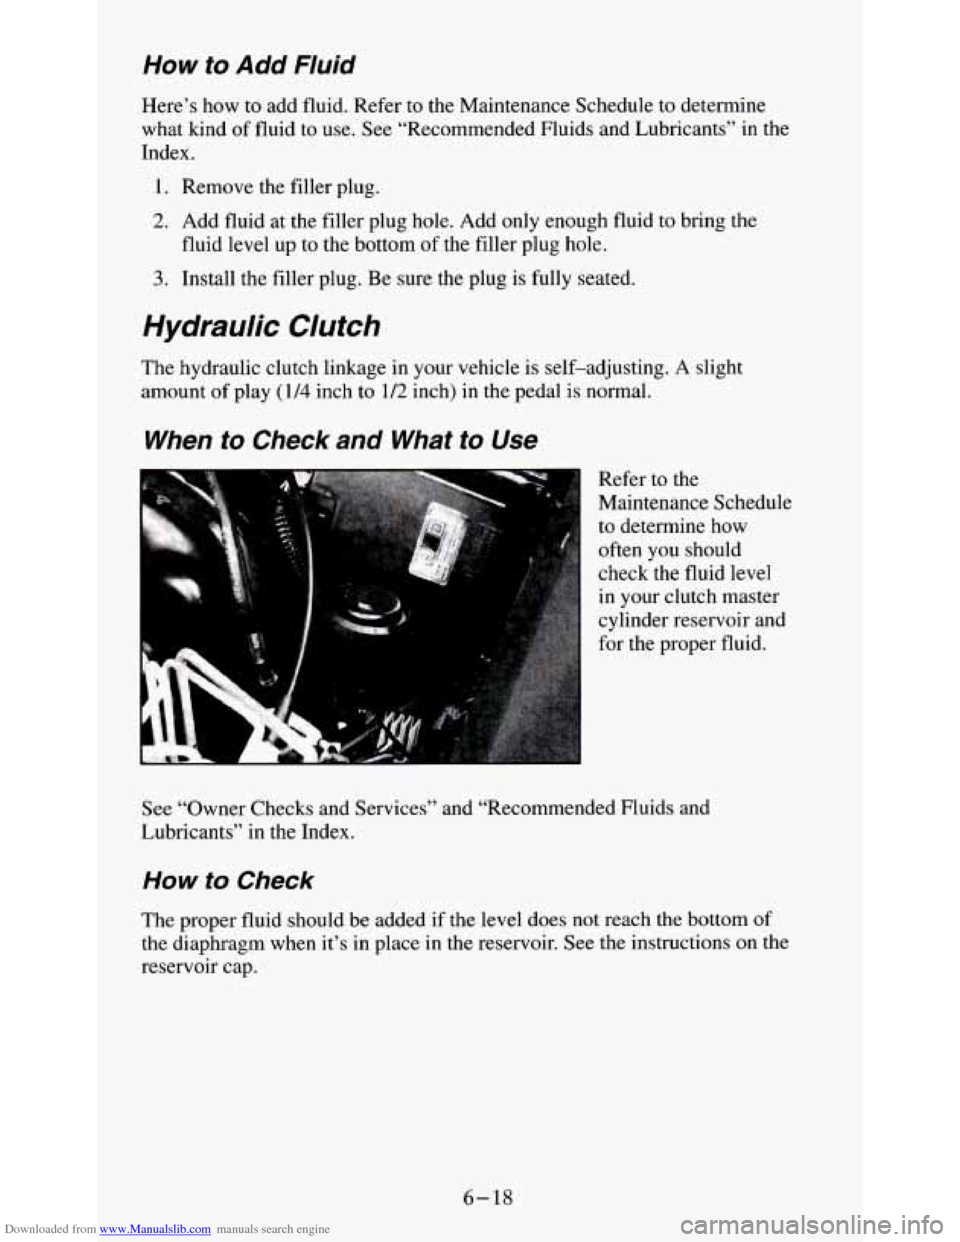
When to Check and What to Use
Refer to the
Maintenance Schedule
to determine how
often
you should
check the fluid level
in your clutch master
cylinder reservoir and
for the proper fluid.
See “Owner Checks and Services” and “Recommended Fluids and
Lubricants” in the Index.
How to Check
The proper fluid should be added if the level does not reach the bottom of
the diaphragm when it’s in place in the reservoir. See the instructions on the
reservoir cap.
6-18
Page 277 of 354
Downloaded from www.Manualslib.com manuals search engine Headlamps
The headlamp wiring is protected by a circuit breaker in the light switch. An
electrical overload will cause the lights to go on and
off, or in some cases to
remain off. If this happens, have your headlamp wiring checked right away.
Windshield Wipers
The windshield wiper motor is protected by a circuit breaker and a fuse. If
the motor overheats due to heavy snow, etc., the wiper will stop until the
motor cools. If the overload is caused by some electrical problem and not
snow, etc., be sure to get it fixed.
Power Windows and Other Power Options
Circuit breakers in the fuse panel protect the power windows and other
power accessories. When the current load is too heavy, the circuit breaker
opens and closes, protecting the circuit until the problem is fixed.
Trailer Wiring Harness
The optional seven-wire trailer wiring harness is protected by an in-line
fuse in the battery feed wire. This fuse is near the junction block in the
front, driver’s side fender. See “Trailer Wiring Harness”
in the Features &
Controls section.
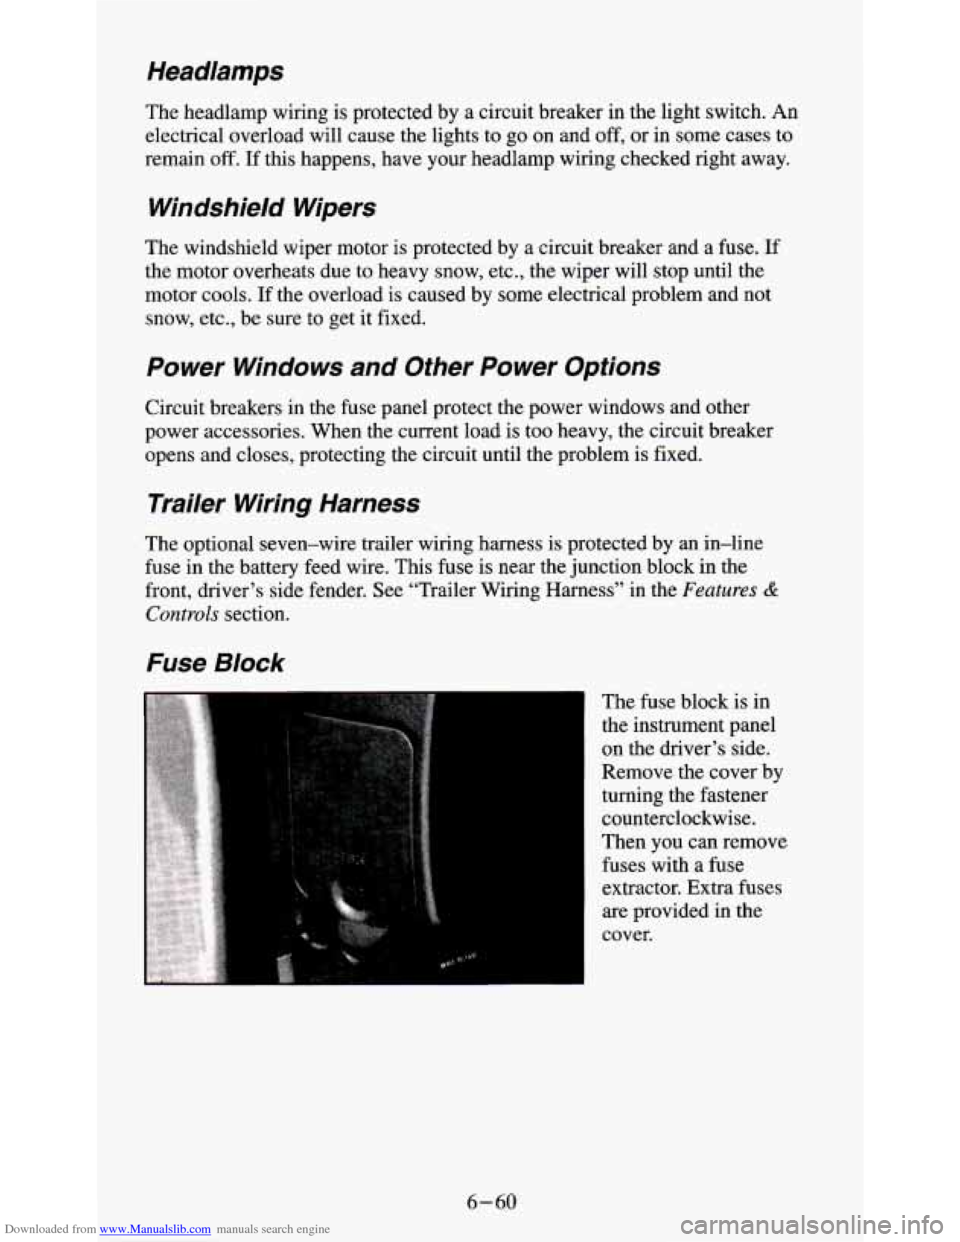
Fuse Block
. .. . .,
The fuse block is in
the instrument panel
on the driver’s side.
Remove the cover by
turning the fastener
counterclockwise.
Then you can remove
fuses with a fuse
extractor. Extra fuses
are provided in the
cover.
6-60
Page 344 of 354
Downloaded from www.Manualslib.com manuals search engine Index
A
Air Bag (See “Supplemental Inflatable Restraint System (SIR)”)
Accessory Power Outlets
.......................................... 249
Adding Equipment to Your Air Bag-Equipped Vehicle (See “Supplemental
Inflatable Restraint System (SIR)”)
Air Cleaner (See “Engine-Air Cleaner”
Air Conditioning
(See “Heater/Air Conditioning Controls”)
Antennacare
................................................... 3-19
Anti-Lock Brakes (See “Brakes”)
Appearance Care
................................................ 6-47
Materials Chart
............................................... 6-56
Arbitration Program (See “Better Business Bureau Mediation”)
Audiosystems
................................................... 3-5
AM-FM Stereo Audio Compact Disc (CD) System
................... 3-13
AM-FM Stereo Audio System
.................................... 3-6
AM-FM Stereo Audio Cassette System
............................. 3-7
AM-FM Stereo Audio Cassette System
with Equalizer ................ 3-10
Care
of Your Cassette Player and Tape ............................. 3-18
Care of Compact Discs
......................................... 3-19
Delco LOC II@ Anti-Theft Feature
............................... 3-15
Understanding Radio Reception
.................................. 3-17
Readiness Light (See “Lights”)
Automatic Transmission
( See “Transmission”)
Axle Front
....................................................... 6-20
LockingRear
................................................. 2-22
Rear
........................................................ 6-19
B
Battery ........................................................ 6-29
Belts (See “Safety Belts”)
Better Business Bureau Mediation
.................................... 8-3
Blizzard (See “Driving-If You’re Caught in a Blizzard”)
Brakes
Adjustment
.................................................. 6-29
Anti-Lock
.................................................... 4-5
Anti-Lock Warning Light (See “Lights”)
To Check Brake Fluid .......................................... 6-27
Master Cylinder
.............................................. 6-26
Parking
..................................................... 2-22
PedalTravel
................................................. 6-29
Replacingparts
............................................... 6-29
System Warning Light (See “Lights”)
Trailer (See “Trailer Brakes”)
Wear
....................................................... 6-28
Braking
......................................................... 4-5
In Emergencies
................................................ 4-7
1