1995 CADILLAC ELDORADO tire pressure
[x] Cancel search: tire pressurePage 194 of 395
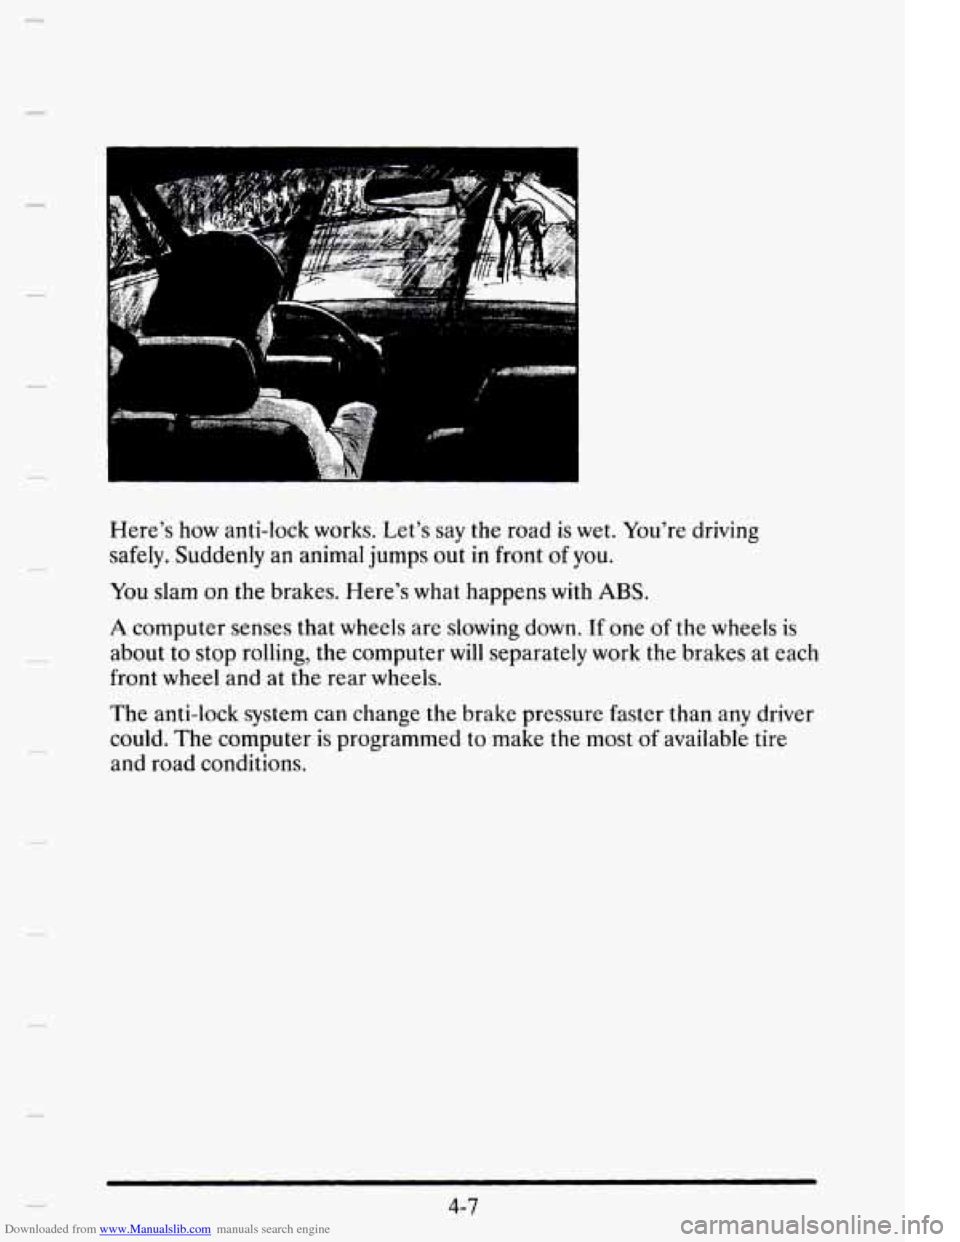
Downloaded from www.Manualslib.com manuals search engine Here’s how anti-lock works. Let’s say the road is wet. You’re driving
safely. Suddenly an animal jumps out
in front of you.
You slam on the brakes. Here’s what happens with ABS.
A computer senses that wheels are slowing down. If one of the wheels is
about to stop rolling, the computer will separately work the brakes at each
front wheel and at the rear wheels.
The anti-lock system can change the brake pressure faster than any driver
could. The computer
is programmed to make the most of available tire
and road conditions.
4-7
Page 206 of 395
Downloaded from www.Manualslib.com manuals search engine Hydroplaning
Hydroplaning is dangerous. So much water can build up under your tires
that they can actually ride
on the water. This can happen if the road is wet
enough and you’re going fast enough. When your vehicle
is hydroplaning,
it has little or no contact with the road.
Hydroplaning doesn’t happen often. But it can
if your tires haven’t much
tread or
if the pressure in one or more is low. It can happen if a lot of
water is standing
on the road. If you can see reflections from trees,
telephone poles, or other vehicles, and raindrops “dimple’’ the water’s
surface, there could
be hydroplaning.
Hydroplaning usually happens at higher speeds. There just isn’t a hard
and fast rule about hydroplaning.
The best advice is to slow down when it
is raining.
Some Other Rainy Weather Tips
Turn on your low-beam headlamps -- not just your parking lamps -- to
help make you more visible to others.
0 Besides slowing down, allow some extra following distance. And be
especially careful when you pass another vehicle. Allow yourself more
clear room ahead, and be prepared
to have your view restricted by
road spray.
0 Have good tires with proper tread depth. (See “Tires” in the Index.)
4- 19
Page 209 of 395
Downloaded from www.Manualslib.com manuals search engine Just before you leave the lane, glance quickly over your shoulder to make
sure there
isn’t anothcr vehicle in your “blind” spot.
Once you are moving on the freeway, make certain
you allow a reasonable
following distance. Expect
to move slightly slower at night.
When you want to leave the freeway, move to the proper lane well in
advance. If you miss your exit do not, under any circumstances, stop and
back up. Drive on to the next exit.
The exit ramp can be curved, sometimes quite sharply.
The
exit speed is usually posted.
Reduce your speed according
to your speedometer, not to your sense of
motion. After driving for any distance at higher speeds, you may tend to
think you are going slower than you actually are.
BEFORE LEAVTNG ONA LONG TRlP
Make sure you’re ready. Try to be well rested. If you must start when
you’re not fresh
-- such as after a day’s work -- don’t plan to make too
many
miles that first part of the journey. Wear comfortable clothing and
shoes
you can easily drive in.
Is your vehicle ready for a long trip? If you keep it serviced and
maintained, it’s ready
to go. If it needs service, have it done before
starting out.
Of course, you’ll find experienced and able service experts in
Cadillac dealerships all across North America. They’ll be ready and
willing
to help if you need it.
Here are some things you can check before a trip:
a
0
a
0
a
WindshieEd Wusher Fluid: Is the reservoir full? Are all windows clean
inside and outside?
Wiper. Blades: Are they in good shape‘?
Fzd, Engine Oil, Other Fluids: Have you checked all levels?
Lnmnps: Are they all working? Are the lenses clean?
Tires: They are vitally important to a safe, trouble-free trip. Is the tread
good enough for long-distance driving? Are the tires all inflated to the
recommended pressure?
4-22
Page 217 of 395
Downloaded from www.Manualslib.com manuals search engine Preserve the fuel as long as you can. To help keep warm, you can get out
of the vehicle and do some fairly vigorous exercises every half hour or
SO
until help comes.
LOmING YOUR VEHICLE
~~
( TIRE-LOADING INFORMATION
OCCUPANTS VEHICLE CAP.
WT.
FRT. CTR. RR. TOTAL LBS. KG
MAX. LOADING
& GVWR SAME AS VEHICLE
CAPACITY WEIGHT XXX
COLD TIRE
TIRE SIZE SPEED PRESSURE
RTG PSVKPa
F
RT.
RR.
SPA.
IF TIRES ARE HOT. ADD 4PSV28KPa SEE
OWNER’S MANUAL FOR ADDITIONAL
INFORMATION
-_ - - - GEN GME,
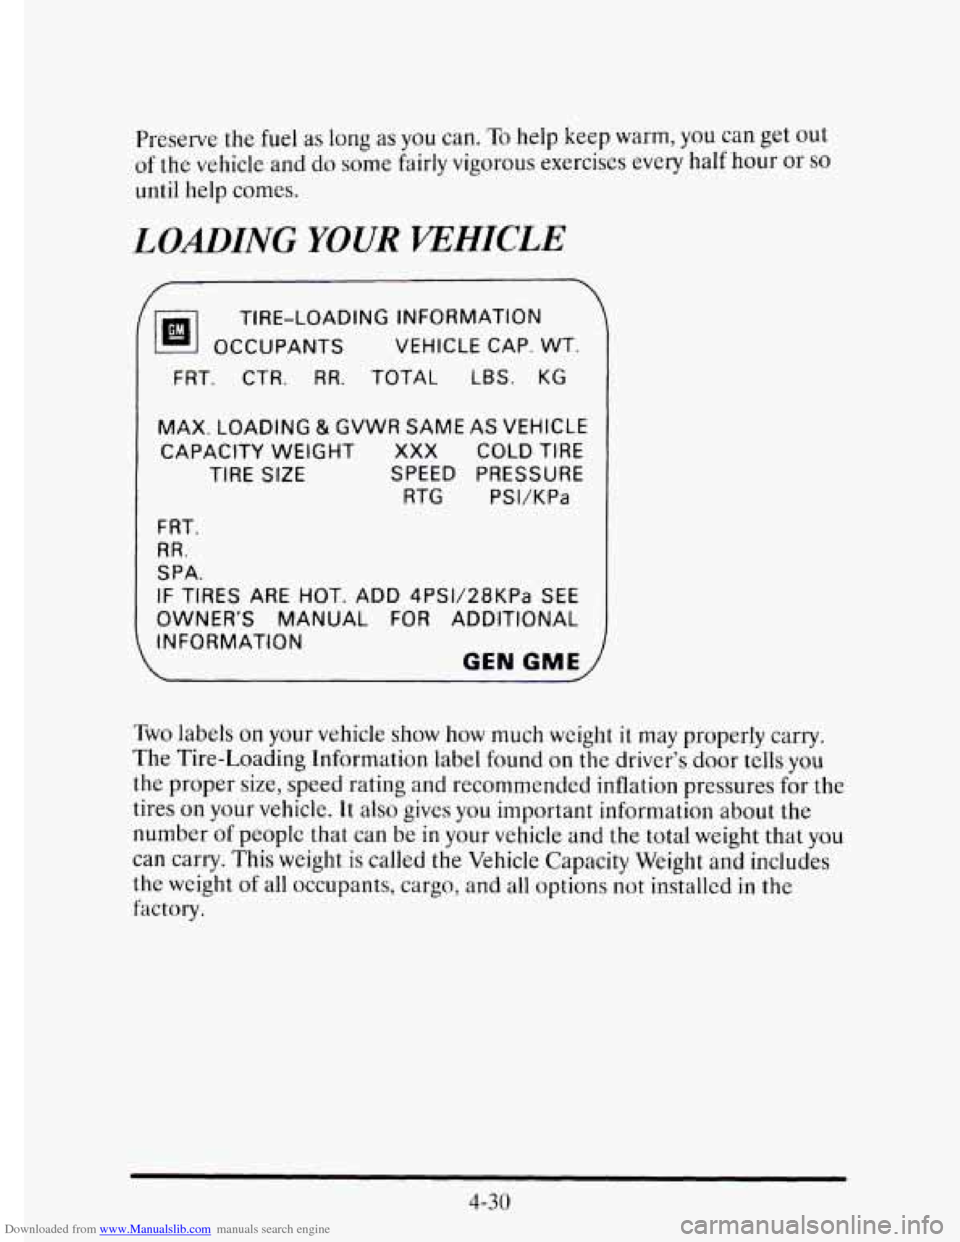
Two labels on your vehicle show how much weight it may properly carry.
The Tire-Loading Information label found
on the driver’s door tells you
the proper size, speed rating and recommended inflation pressures for the
tires
on your vehicle. It also gives you important information about the
number
of peoplc that can be in your vehicle and the total weight that you
can carry. This weight
is called the Vehicle Capacity Weight and includes
the weight
of all occupants, cargo, and all options not installed in the
factory.
4-30
Page 223 of 395
Downloaded from www.Manualslib.com manuals search engine Total Weight on Your khicle’s Tires
Be sure your vehicle’s tires are inflated to the recommended pressure for
cold tires. You’ll find these numbers on the Certification label
at the rear
edge
of the driver’s door or see “Loading Your Vehicle” in the Index.
Then be sure
you don’t go over the GVW limit for your vehicle, including
the weight of the trailer tongue.
Hitches
It’s important to have the correct hitch equipment. Crosswinds, large
trucks going by, and rough roads are a
few reasons why you’ll need the
right hitch. Here are some rules
to follow:
0 Will you have to makc any holes in the body of your vehicle when you
install a trailer hitch?
if you do, then be sure to seal the holes later
whcn
you remove the hitch. If you don’t seal them, deadly carbon
monoxide
(CO) from your exhaust can get into your vehicle (see
“Carbon Monoxide”
in the Index). Dirt and water can, too.
Safety Chains
You should always attach chains between your vehicle and your trailer.
Cross the safety chains under
the tongue of the trailer so that the tongue
will not drop to thc road if it becomes separated from the hitch.
Instructions about safety chains may be provided by the hitch
manufacturer or by the trailer manufacturer. Follow the manufacturcr’s
recommendation for attaching safety chains and do not attach them to the
bumper. Always leave
just enough slack so you can turn with your rig.
And, never allow safety chains to drag on the ground.
Trailer Brakes
Because you have anti-lock brakes, don’t try to tap into your vehicle’s
hydraulic brake system.
If you do, both brake systems won’t work well, or
at all.
Be sure to read and follow thc instructions for the trailer brakes so you’ll
be able to install, adjust and maintain them properly.
4-36
Page 248 of 395
Downloaded from www.Manualslib.com manuals search engine .. i
k
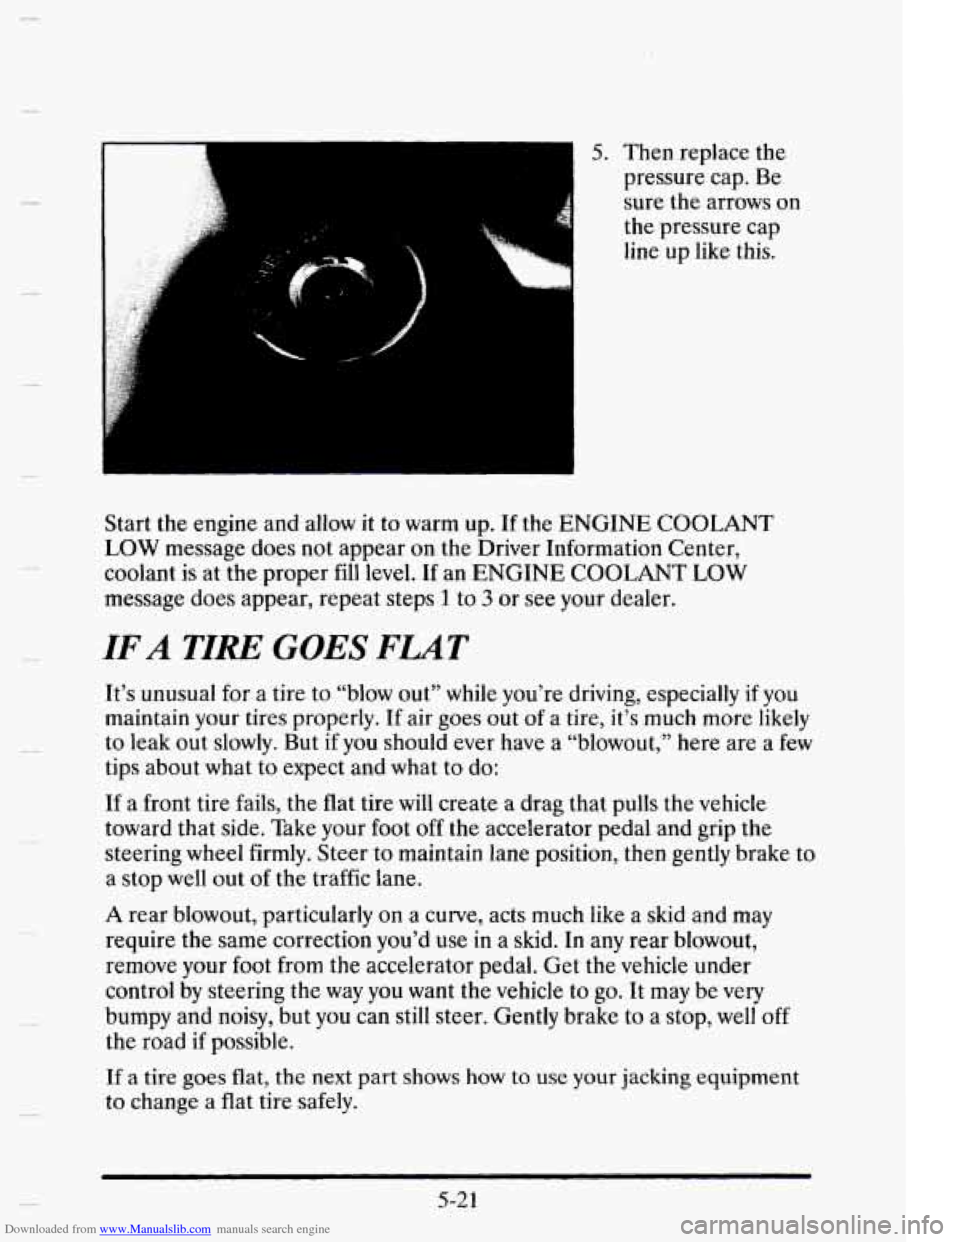
5. Then replace the
pressure cap. Be
sure
the arrows on
the pressure cap
line up
like this.
Start the engine and allow
it to warm up. If the ENGINE COOLANT
LOW message does not appear on the Driver Information Center,
coolant
is at the proper fill level. If an ENGINE COOLANT LOW
message does appear, repeat steps 1 to 3 or see your dealer.
IF A TIRE GOES FLAT
It’s unusual for a tire to “blow out” while you’re driving, especially if you
maintain your tires properly.
If air goes out of a tire, it’s much more likely
to leak out slowly. But
if you should ever have a “blowout,” here are a few
tips about what to expect and what to do:
If a front tire fails, the flat tire will create a drag that pulls the vehicle
toward that side. Take your foot
off the accelerator pedal and grip the
steering
wheel firmly. Steer to maintain lane position, then gently brake to
a stop well out of
the traffic lane.
A rear blowout, particularly on a curve, acts much like a skid and may
require the same correction you’d use
in a skid. In any rear blowout,
remove your foot from the accelerator pedal. Get the vehicle under
control by steering
the way you want the vehicle to go. It may be very
bumpy and noisy, but you can still steer. Gently brake to a stop, well off
the road if possible.
If a tire goes flat, the next part shows how to use your jacking equipment
to change a flat tire safely.
5-2 1
Page 257 of 395
Downloaded from www.Manualslib.com manuals search engine I A CAUTION:
Storing a jack, a tire or other equipment in the passenger
compartment
of the vehicle could cause injury. In a sudden stop
or collision, loose equipment
could strike someone. Store all
these in the proper place.
COMPACT SPARE TIRE
Although the compact spare was fully inflated when your vehicle was new,
it can lose air after a time. Check the inflation pressure regularly. It
should be 60
psi (420 kPa). After installing the compact spare on your
vehicle,
you should stop as soon as possible and make sure your spare tire
is correctly inflated.
The compact spare is made to perform well at posted
speed limits for distances up
to 3,000 miles (5 000 km), so you can finish
your trip and have your full-size
tire repaired or replaced where you want.
Of course, it’s best to replace your spare with a full-size tire as soon as you
can. Your spare
will last longer and be in good shape in case you need it
again.
NOTICE:
Don’t take your compact spare through an automatic car wash
with guide rails. The compact spare can get caught
on the rails.
That can damage the tire and wheel, and maybe other parts
of
your vehicle.
A
5-30
Page 300 of 395
Downloaded from www.Manualslib.com manuals search engine WIPER BLADE REPLACEMENT
To replace the entire wiper blade, follow these steps:
1. Position the windshield wipers on the windshield in the “mid” wipe
position.
To do this, turn the ignition key to ACCESSORY and turn
the wipers
on. Then with the door open, turn the ignition key to OFE
“I I
1
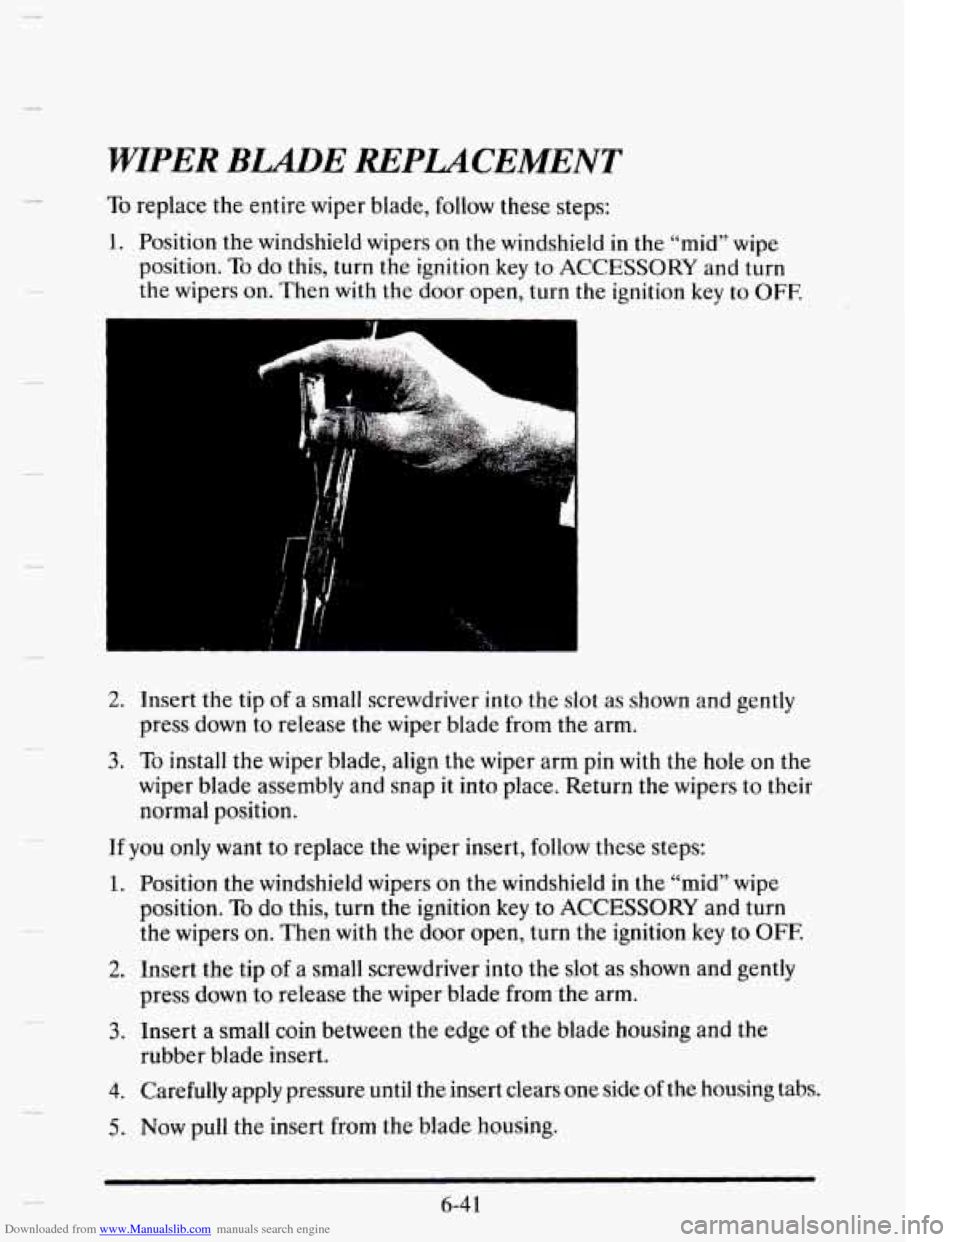
2. Insert the tip of a small screwdriver into the slot as shown and gently
press down
to release the wiper blade from the arm.
3. To install the wiper blade, align the wiper arm pin with the hole on the
wiper blade assembly and snap
it into place. Return the wipers to their
normal position.
If you only want to replace the wiper insert, follow these steps:
1. Position the windshield wipers on the windshield in the “mid” wipe
position.
To do this, turn the ignition key to ACCESSORY and turn
the wipers on. Then with the door open, turn the ignition key to OFF.
2. Insert the tip of a small screwdriver into the slot as shown and gently
3. Insert a small coin between the edge of the blade housing and the
press down
to release the wiper blade from the arm.
rubber blade insert.
4. Carefully apply pressure until the insert clears one side of the housing tabs.
5. Now pull the insert from the blade housing.
6-4 1