1994 PONTIAC GRAND-AM fog light
[x] Cancel search: fog lightPage 6 of 274

Vehicle Symbols
These are some of the symbols you may find on your vehicle.
For example,
these symbols
are used on an
original battery:
PROTECT
EYES BY
SHIELDING
CAUSTIC
BURNS
AVOID
SPARKS
OR
FLAMES
SPARK OR ,\I/,
COULD FLAME
EXPLODE BATTERY
These symbols
are important
for you and
your passengers
whenever your
vehicle is
driven:
DOOR LOCK
UNLOCK
FASTEN SEAT 4
BELTS
POWER
WINDOW
These symbols
have
to do with
your lights:
SIGNALS e
TURN
HIGH BEAM OR = =o
FOG LAMPS $0
These symbols
are
on some of
your controls:
WIPER Q
WINDSHIELD
WASHER
wlNDSHIELDw DEFROSTER
WINDOW REAR
DEFOGGER.
VENTILATING ca
FAN c.
These symbols
are used
on
warning and
indicator lights:
COOLANT F-
TEMP --
ENGINE
CHARGING BATTERY
SYSTEM
BRAKE (0)
RADIATOR a
COOLANT
FUEL
ENGINE OIL
PRESSURE
-4
TEMP OIL &
ANTILOCK (e)
BRAKE
Here are some
other symbols
you may
see:
FUSE *
RADIO
VOLUME
AIR
CONDITIONING
RELEASE TRUNK
LIGHTER
SPEAKER
b
ProCarManuals.com
Page 78 of 274

rn Light Controls
Parking Lights:
Rotate the switch up to PC to turn on:
Parking Lights
0 Side Marker Lights
Taillights
Instrument Panel Lights
Headlights:
Rotate the switch to ’ , to turn on:
0 Headlights
0 Parking Lights
0 Side Marker Lights
0 Taillights
0 Instrument Panel Lights
Rotate the switch
to OFF to turn all the
lights off.
-‘a-
Operation of Lights
Although your vehicle’s lighting system
(headlights, parking lights, fog lamps,
side marker lights and taillights)
meet all
applicable federal lighting requirements,
certain states and provinces may apply
their own lighting regulations that may
require special attention before you
operate these lights.
For example, some jurisdictions may
require that you operate your lower beam
lights with fog lamps at all times, or that
headlights be turned
on whenever you
must use your windshield wipers.
In
addition, most jurisdictions prohibit
driving solely with parking lights,
especially at dawn or dusk.
It is
recommended that you check with your
own state or provincial highway authority
for applicable lighting regulations.
Lights On Reminder
If you open the driver’s door while
leaving the lights
on, you will hear a
warning chime.
Daytime Running Lights
(CANADA ONLY)
Your DRL work with a light sensor on top
of the instrument panel. Don’t cover
it up.
The high beam headlights will come
on at
reduced brightness in daylight when:
0 The ignition is on
0 The headlight switch is off, and
0 The parking brake is released on a
manual transaxle; or
77 a I
ProCarManuals.com
Page 80 of 274

Instrument Panel Intensity Control
You can brighten or dim your instrument
cluster lights by rotating the instrument
panel intensity control switch. Rotate the switch all the way to the right to turn on
the interior courtesy lights. Rotate the
switch to the left to turn
off the instrument
cluster lights and displays.
Fog Lights
The switch for your fog lights is next to
the instrument panel intensity control.
Push the top of the switch to turn the fog
lights on.
When using fog lights, the parking lights
or low beam headlights must be on.
Fog lights will go off whenever the high
beam headlights come on. When the high
beams go off, the fog lights will come on
again.
Front Reading Lights
(OPTION)
These lights and the interior courtesy
lights will come on when
you open the
doors.
To turn on a reading light when the doors
are closed, press the button. Press it again
to turn the light off.
79.8.
ProCarManuals.com
Page 90 of 274

The Instrument
Panel-Your Information System
Your instrument panel is designed to let
you know at a glance how
your vehicle is
running. You’ll know how fast you’re
going, how much fuel you’re using, and
many other things you’ll need to drive
safely and economically.
The main components of your instrument
panel are:
1. Fog Light Switch
2. Instrument Panel Intensity Control,’
Interior Lights Switch
3. Side Vent
4. Turn Signal/Multifunction Lever
5. Hazard Warning Flashers Switch
6. Instrument Cluster
7. Windshield Wipersmasher Stalk
8. Center Vent
9. Audio System
10. Side Vent
11. Side Window Defogger Vent
12. Glove Box
13. Climate Control System
14. Ashtraybighter
15. Gear Shift Lever
16. Rear Window Defogger (Option)
17. Ignition Switch
18. SRS - Supplemental Restraint
System (Air Bag)
19. Horns
20. Tilt Steering Wheel Lever (Option)
21. Parking Brake Release Lever
22. Hood Release Handle
23. Fuse Panel
ProCarManuals.com
Page 103 of 274

I’
Comfort Controls & Audio Systems
w Climate Control System
With this system, you can control the
ventilation and heating
in your vehicle.
Your vehicle also has the flow-through
ventilation system described later
in this
section.
. . . 102
# : The left control knob sets the fan
speed. To select the force of air you want,
turn the knob. The fan is always running
unless the mode control is moved to
OFF.
Temperature Control: The center
control regulates the temperature of the
air coming through the system.
Mode Control: The right control knob
:hanges the functions of your system.
’(rr (Bi-Level): Use on cool, but sunny
days. This setting brings
in the outside ai
but directs it
in two ways. The cool air is
directed to the upper portion
of your bod
through the instrument panel outlets, but
slightly warmer air is directed through th
heater ducts and defroster vents. At time:
this temperature difference may be more
apparent than others.
(rr (Vent): Use when outside
temperatures are mild, and little heating
or cooling
is needed. Air flow is through
the instrument panel outlets. Set the
center control knob to the temperature
desired.
A.
A.
p(rr (Heater): This setting directs air
ihrough the heater ducts toward your feet
and the floor, and some through the
windshield defroster vents.
[f you have the optional engine coolant
heater (engine block heater) and use it
during cold weather,
0°F (- 18 “C) or
lower, your heating system
will more
quickly provide heat because the engine
coolant is already warm.ed. See “Engine
Coolant Heater (Engine
Block Heater)’’
in the Index.
%?a FrJ (Blend): This setting divides air flow
equally between the heater ducts and the
windshield defroster vents.
(Defrost): This setting directs most
air through the windshield defroster vents,
and some through the heater ducts.
Defogging Windows
To defog the windshield, turn all three
control knobs to the far right.
ProCarManuals.com
Page 106 of 274

1
1
tl
a
f
U
0
Y
('
C
0
tl
'OPTION)
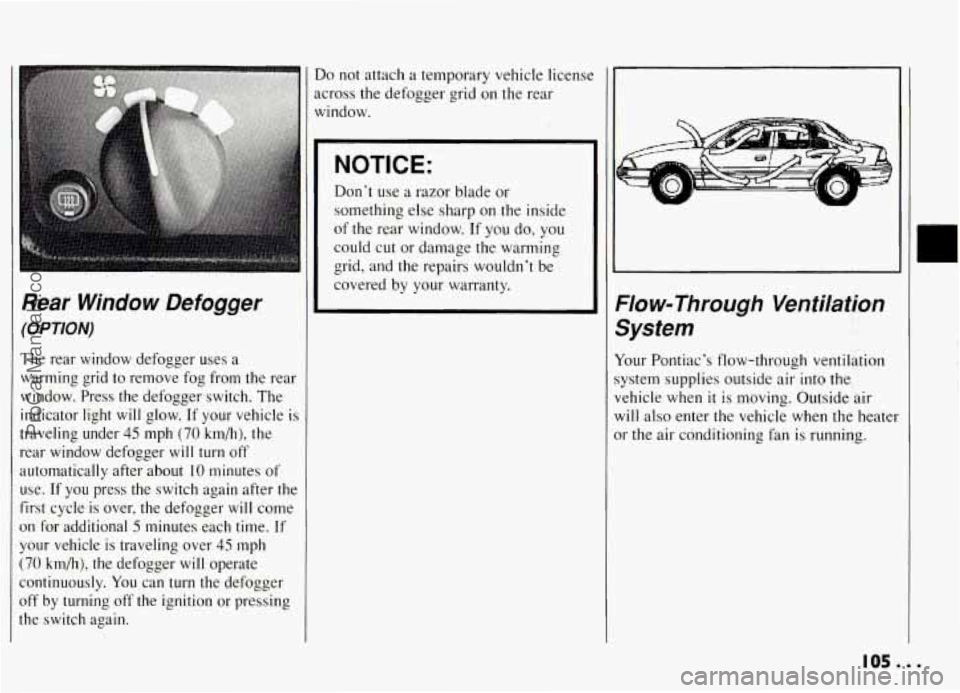
The rear window defogger uses a
varming grid to remove fog from the rear
vindow. Press the defogger switch. The
ndicator light
will glow. If your vehicle is
raveling under
45 mph (70 km/h), the
ear window defogger will turn off
utomatically after about
10 minutes of
lse. If
you press the switch again after the
irst cycle is over, the defogger
will come
In for additional 5 minutes each time. If
'our vehicle is traveling over
45 mph
70 km/h), the defogger will operate
ontinuously.
You can turn the defogger
iff by turning off the ignition or pressing
?e switch again.
Do not attach a temporary vehicle licenst
across the defogger grid on the rear
window.
NOTICE:
Don't use a razor blade or
something else sharp on the inside
of the rear window. If
you do, you
could cut or damage the warming
grid, and the repairs wouldn't be
covered by your warranty.
Flow-Through Ventilation
System
Your Pontiac's flow-through ventilation
system supplies outside air into the
vehicle when
it is moving. Outside air
will also enter the vehicle when the heater
or the air conditioning fan is running.
105...
ProCarManuals.com
Page 154 of 274

When your vehicle is being towed, have
the ignition key off. The steering wheel
should be clamped
in a straight-ahead
position,
with a clamping device designed
for towing service.
Do not use the
vehicle’s steering column lock for this.
The transaxle should be
in NEUTRAL
(N) and the parking brake released.
The ignition key must be in the OFF
position to prevent the automatic door
locks from locking during towing.
Don’t have your vehicle towed on the
front wheels, unless you must. If the
vehicle must be towed on the front
wheels, don’t go more than
35 mph
‘56 i. km/h) or farther than 50 miles
:SO km) or your transaxle will be
ilamaged. If these limits must be
:xceeded, then the front wheels have to
,e supported on a dolly.
,I 7
F
B
tc
Y
I
1
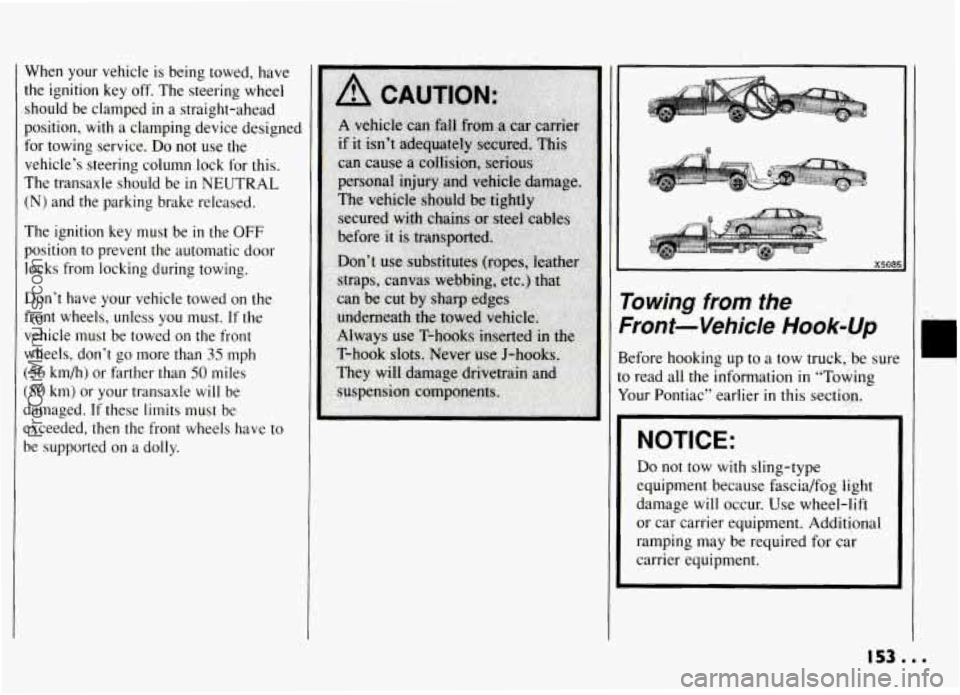
‘owing from the
?ont-Vehicle Hook-Up
efore hooking up to a tow truck, be sur(
1 read all the information in “Towing
our Pontiac” earlier
in this section.
NOTICE:
Do not tow with sling-type
equipment because fascia/fog light
damage will occur. Use wheel-lift
or car carrier equipment. Additional
ramping may be required for car
carrier equipment.
153...
ProCarManuals.com
Page 197 of 274

Service & Appearance Care
Taillight Bulb
Replacement
For the type of bulb, see “Replacement
Bulbs” in the Index.
1. Pull back the trunk trim.
2. Carefully push one end of the plastic
taillight brace in while pulling the
brace toward the front of the vehicle.
3. Gently wiggle the bulb out of the
socket.
4. Replace the bulb.
5. Reverse the steps to reassemble the
taillight.
Fog Light Bulb
Replacement
Don’t change your fog light bulbs unless
you have the proper aiming equipment.
See your Pontiac dealer
if you have any
further questions.
Windshield Wiper Blade
Replacement
Replacement blades come in different
types and are removed in different ways.
Here’s how to remove the type with a
release clip:
1. Pull the windshield wiper arm away
from the windshield.
2. Lift the release clip with a screwdriver
and pull the blade assembly off the
wiper arm.
3. Push the new wiper blade securely on
the wiper arm.
. . . 196
ProCarManuals.com