1994 PONTIAC GRAND-AM change time
[x] Cancel search: change timePage 112 of 274
AM/FM Stereo Radio with
Cassette Tape Player and
Graphic Equalizer
(OPTION)
The digital display indicates information
on time or radio station frequency, the
AM
or FM radio band, whether the station is in
stereo, and other radio functions.
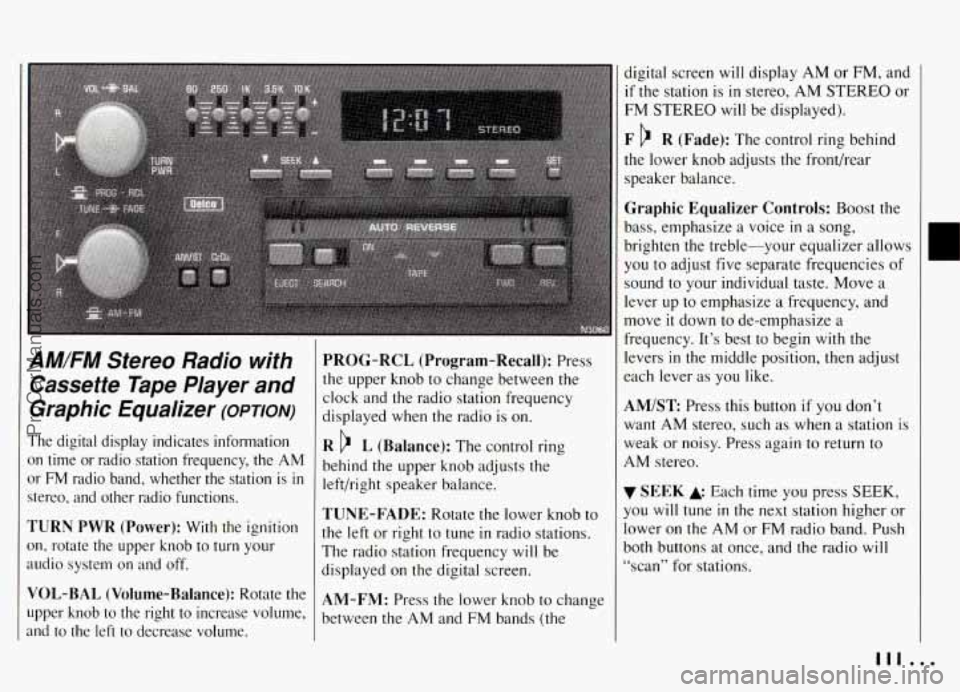
TURN PWR (Power): With the ignition
on, rotate the upper knob to turn your
audio system on
and off.
VOL-BAL (Volume-Balance): Rotate the
upper knob to the
right to increase volume,
and to the left to decrease volume.
PROG-RCL (Program-Recall): Press
the upper knob to change between the
clock and the radio station frequency
displayed when the radio is on.
R L (Balance): The control ring
behind the upper knob adjusts the
left/right speaker balance.
TUNE-FADE: Rotate the lower knob to
the left or right to tune
in radio stations.
The radio station frequency will be
displayed on the digital screen.
AM-FM: Press the lower knob to change
between the
AM and FM bands (the
digital screen will display AM or FM, and
if the station is in stereo, AM STEREO or
FM STEREO will be displayed).
F R (Fade): The control ring behind
the lower knob adjusts the front/rear
speaker balance.
Graphic Equalizer Controls: Boost the
bass, emphasize a voice
in a song,
brighten the treble-your equalizer allows
you to adjust five separate frequencies
of
sound to your individual taste. Move a
lever up to emphasize a frequency, and
move
it down to de-emphasize a
frequency. It’s best to begin with the
levers
in the middle position, then adjust
each lever as you like.
AM/ST Press this button if you don’t
want
AM stereo, such as when a station is
weak or noisy. Press again to return to
AM stereo.
SEEK Each time you press SEEK,
you will tune in the next station higher or
lower on the
AM or FM radio band. Push
both buttons at once, and the radio will
“scan” for stations.
111 ...
ProCarManuals.com
Page 113 of 274
Comfort Controls & Audio Systems
AM/FM Stereo Radio with
Cassette Tape Player and
Graphic Equalizer
(OPTION)
(CONI)
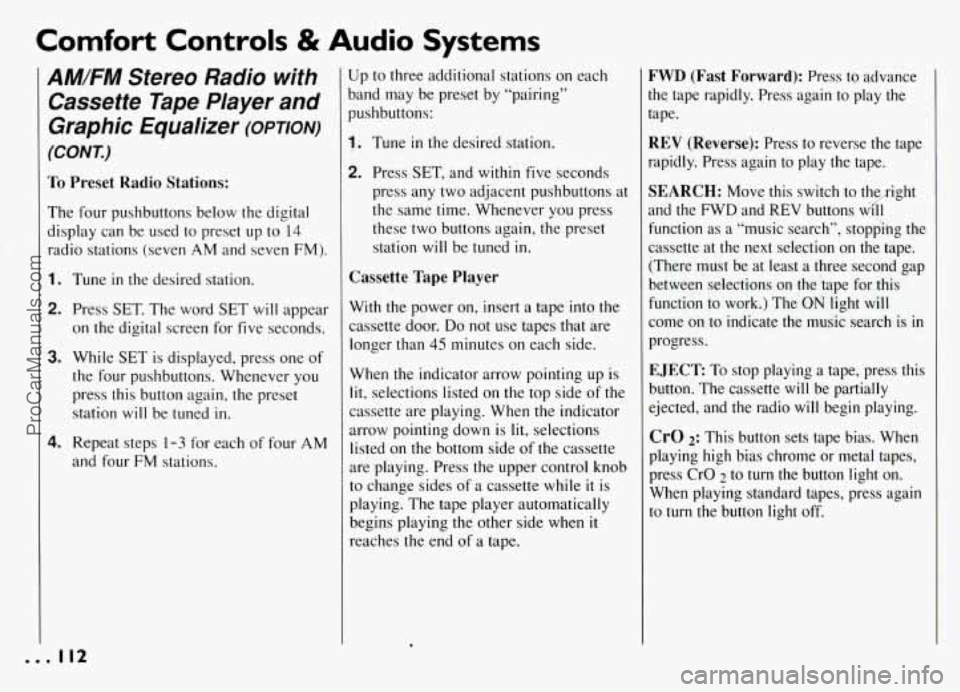
To Preset Radio Stations:
The four pushbuttons below the digital
display can be used to preset up to 14
radio stations (seven AM and seven FM).
1. Tune in the desired station.
2. Press SET. The word SET will appear
on the digital screen for five seconds.
3. While SET is displayed, press one of
the four pushbuttons. Whenever you
press this button again, the preset
station will be tuned
in.
4. Repeat steps 1-3 for each of four AM
and four FM stations.
Up to three additional stations on each
band may be preset by “pairing”
pushbuttons:
1. Tune in the desired station.
2. Press SET, and within five seconds
press any two adjacent pushbuttons at
the same time. Whenever you press
these two buttons again, the preset
station will be tuned in.
Cassette Tape Player
With the power on, insert a tape into the
cassette door.
Do not use tapes that are
longer than
45 minutes on each side.
When the indicator arrow pointing up is
lit, selections listed on the top side of the
cassette are playing. When the indicator
arrow pointing down is
lit, selections
listed on the bottom side of the cassette
are playing. Press the upper control knob
to change sides of a cassette while it is
playing; The tape player automatically
begins playing the other side when
it
reaches the end of a tape.
FWD (Fast Forward): Press to advance
the tape rapidly. Press again to play the
tape.
REV (Reverse): Press to reverse the tape
rapidly. Press again
to play the tape.
SEARCH: Move this switch to the ight
and the FWD and
REV buttons w ir I1
function as a “music search”, stopping the
cassette at the next selection on the tape.
(There must be at least a three second gap
between selections on the tape for this
function to work.) The
ON light will
come on to indicate the music search is
in
progress.
EJECT To stop playing a tape, press this
button. The cassette
will be partially
ejected, and the radio will begin playing.
CrO 2: This button sets tape bias. When
playing high bias chrome or metal tapes,
press CrO
2 to turn the button light on.
When playing standard tapes, press again
to turn the button light off.
ProCarManuals.com
Page 114 of 274
AMFM Stereo with
Compact Disc Player
(OPTION)
The digital display indicates information
on time or radio station frequency, the
AM or FM radio band, whether the
station is
in stereo, and other radio
functions.
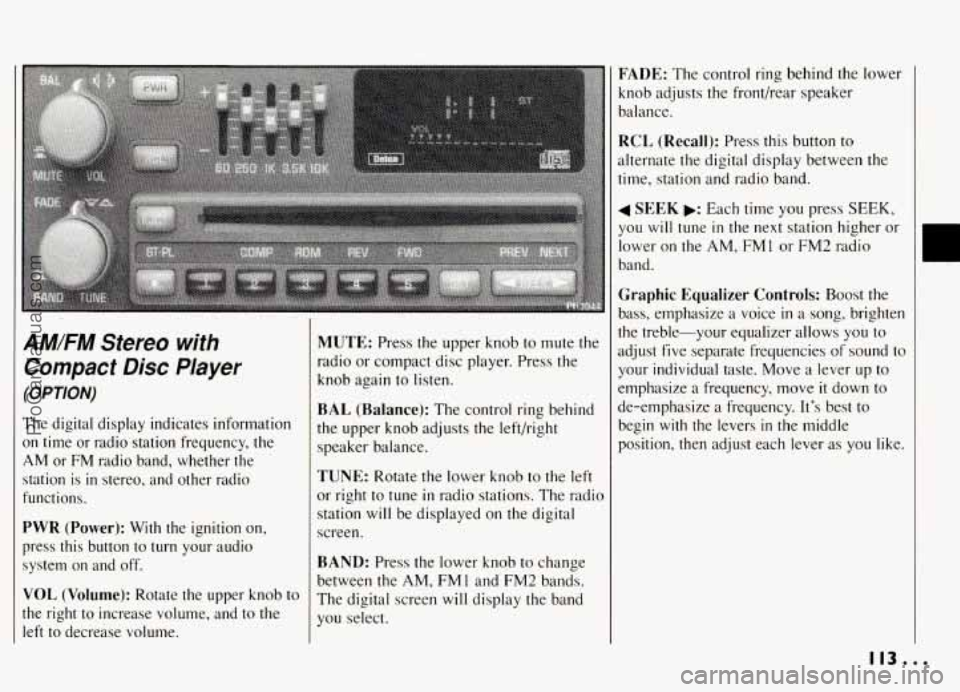
PWR (Power): With the ignition on,
press this button
to turn your audio
system on and off.
VOL (Volume): Rotate the upper knob to
the right to increase volume, and to the
left to decrease volume.
I
MUTE: Press the upper knob to mute the
radio or compact disc player. Press the
knob again to listen.
BAL (Balance): The control ring behind
the upper knob adjusts the left/right
speaker balance.
TUNE: Rotate the lower knob to the left
or right to tune
in radio stations. The radio
station will be displayed on the digital
screen.
BAND: Press the lower knob to change
between the
AM, FMl and'FM2 bands.
The digital screen will display the band
you select.
FADE: The control ring behind the lower
knob adjusts the front/rear speaker
balance.
RCL (Recall): Press this button to
alternate the digital display between the
time, station and radio band.
4 SEEK b: Each time you press SEEK,
you will tune in the next station higher or
lower on the
AM, FMI or FM2 radio
band.
Graphic Equalizer Controls: Boost the
bass, emphasize a voice
in a song, brighten
the treble-your equalizer allows you to
adjust five separate frequencies
of sound to
your individual taste. Move a lever up to
emphasize a frequency, move
it down to
de-emphasize a frequency. It's best to
begin
with the levers in the middle
position, then adjust each lever
as you like.
E
113...
ProCarManuals.com
Page 116 of 274
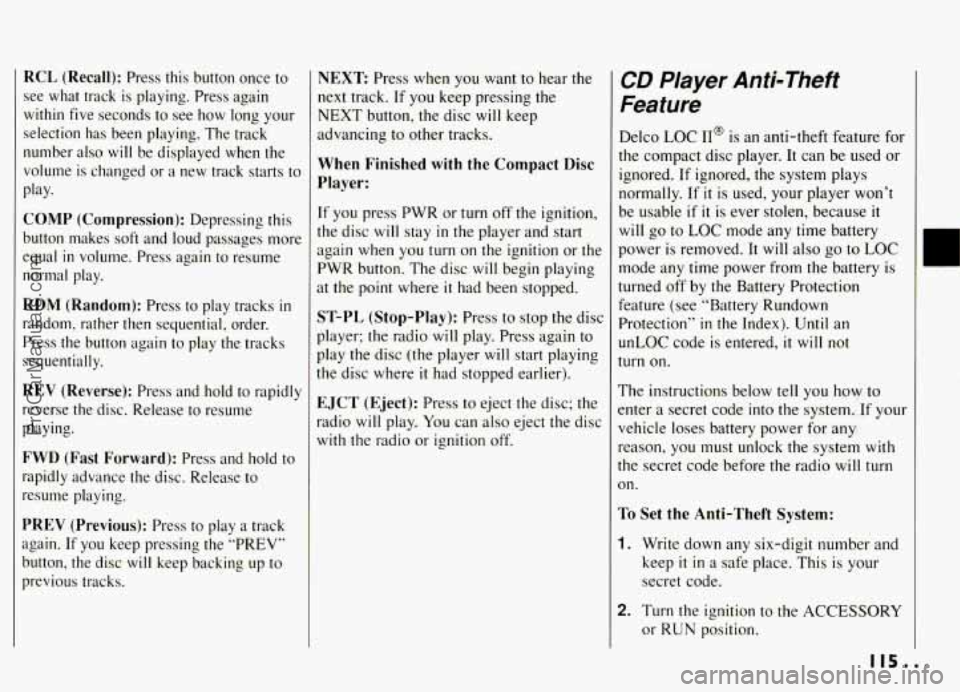
RCL (Recall): Press this button once to
see
what track is playing. Press again
within five seconds to see how long your
selection has been playing. The track
number also
will be displayed when the
volume
is changed or a new track starts to
play.
COMP (Compression): Depressing this
button makes soft and loud passages more
equal
in volume. Press again to resume
normal
play.
RDM (Random): Press to play tracks in
random, rather then sequential, order.
Press the button again to play the tracks
sequentially.
REV (Reverse): Press and hold to rapidly
reverse the disc. Release to resume
playing.
FWD (Fast Forward): Press and hold to
rapidly advance the disc. Release to
resume playing.
PREV (Previous): Press to play a track
again.
If you keep pressing the “PREV”
button, the disc
will keep backing up to
previous tracks.
NEXT Press when you want to hear the
next track. If you keep pressing the
NEXT button, the disc
will keep
advancing to other tracks.
When Finished with the Compact Disc
Player:
[f you press PWR or turn off the ignition,
the disc
will stay in the player and start
again when you
turn on the ignition or the
PWR button. The disc
will begin playing
3t the point where it had been stopped.
ST-PL (Stop-Play): Press to stop the disc
player; the radio will play. Press again to
play the disc (the player
will start playing
:he disc where
it had stopped earlier).
EJCT (Eject): Press to eject the disc; the
radio
will play. You can also eject the disc
with the radio or ignition off.
CD Player Anti-Theft
Feature
Delco LOC II@ is an anti-theft feature for
the compact disc player. It can be used or
ignored. If ignored, the system plays
normally. If
it is used, your player won’t
be usable
if it is ever stolen, because it
will go to LOC mode any time battery
power is removed. It will also
go to LOC
mode any time power from the battery
is
turned off by the Battery Protection
Feature (see “Battery Rundown
Protection”
in the Index). Until an
unLOC code
is entered, it will not
turn on.
The instructions below tell you how to
mter a secret code into the system. If your
vehicle loses battery power for any
reason, you must unlock the system with
the secret code before the radio will
turn
on.
To Set the Anti-Theft System:
1. Write down any six-digit number and
keep
it in a safe place. This is your
secret code.
2. Turn the ignition to the ACCESSORY
or RUN position.
ProCarManuals.com
Page 125 of 274
Your Driving and the Road
anti-Lock Brakes (ABS)
‘CONT.)
’his light on the instrument panel will go
In when you start your vehicle.
Nhen you start your vehicle, or when yo^
begin to drive away, you may hear a
nomentary motor or clicking noise. And
‘ou may even notice that your brake
edal moves a little while this
is going on
rhis is the ABS system testing itself.
If
here’s a problem with the anti-lock brakc
ystem, the anti-lock brake system
Yarning light will stay on or flash.
iee “Anti-lock Brake System Warning
ight” in the Index.
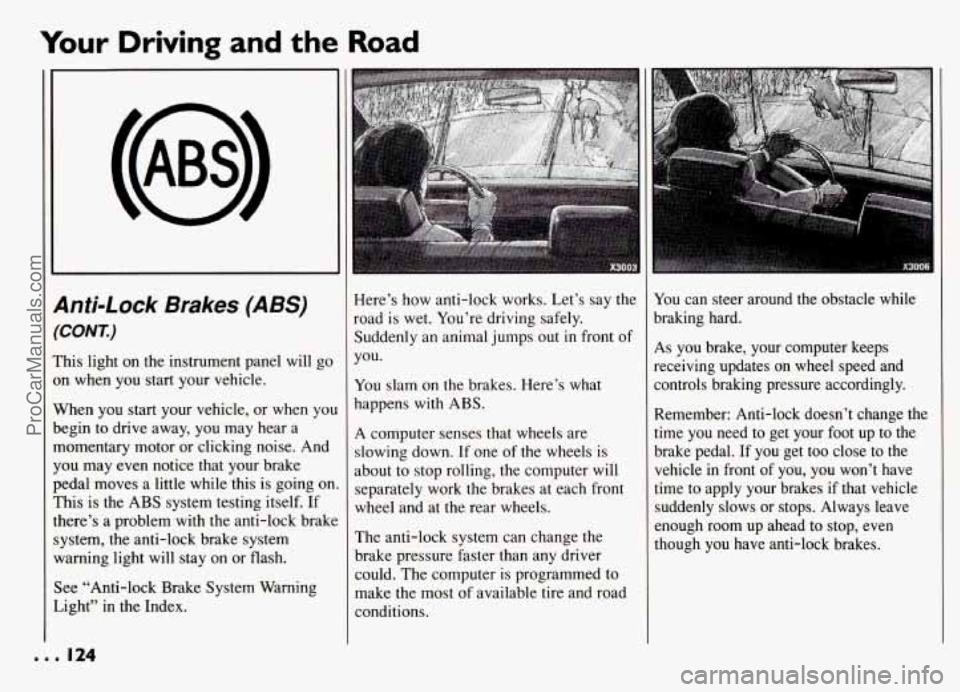
Here’s how anti-lock works. Let’s say the
road is wet. You’re driving safely.
Suddenly an animal jumps out in front of
you.
You slam on the brakes. Here’s what
happens with ABS.
A computer senses that wheels are
slowing down. If one of the wheels is
about to stop rolling, the computer will
separately work the brakes at each front
wheel and at the rear wheels.
The anti-lock system can change the
brake pressure faster than any driver
could. The computer is programmed to
make the most of available tire and road
conditions.
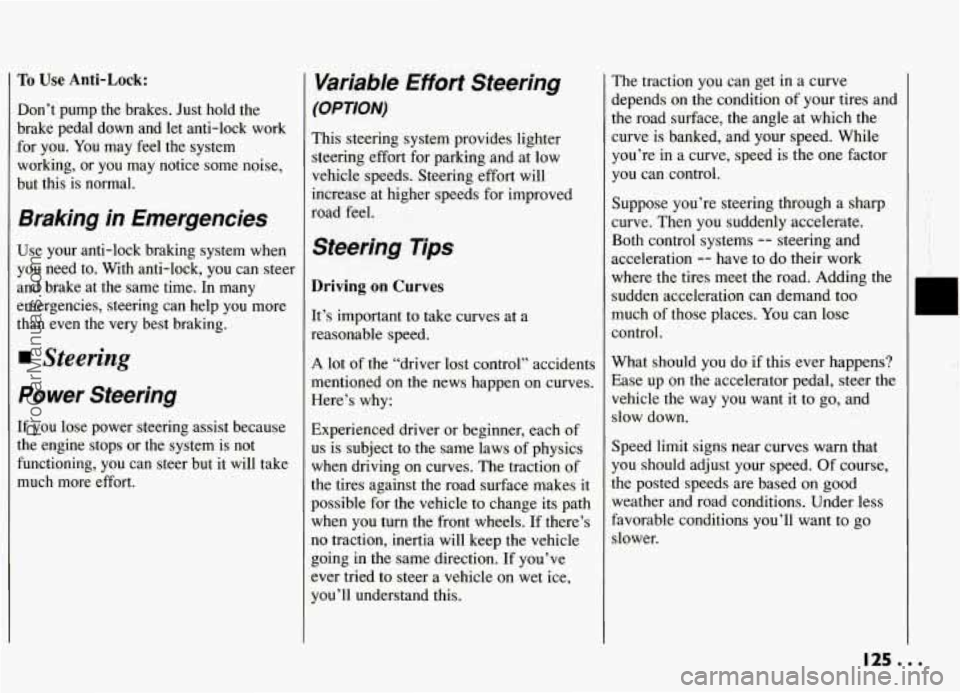
You can steer around the obstacle while
braking hard.
As you brake, your computer keeps
receiving updates
on wheel speed and
controls braking pressure accordingly.
Remember: Anti-lock doesn’t change the
time you need to get your foot up to the
brake pedal.
If you get too close to the
vehicle in front of you, you won’t have
time to apply your brakes
if that vehicle
suddenly slows
or stops. Always leave
enough room
up ahead to stop, even
though you have anti-lock brakes.
... 124
ProCarManuals.com
Page 126 of 274
To Use Anti-Lock:
Don’t pump the brakes. Just hold the
brake pedal down and let anti-lock work
.for you. You may feel the system
working, or you may notice some noise,
but this is normal.
Braking in Emergencies
Use your anti-lock braking system when
you need to. With anti-lock, you can steer
and brake at the same time. In many
emergencies, steering can help you more
than even the very best braking.
Steering
Power Steering
If you lose power steering assist because
the engine stops or the system is not
functioning, you can steer but it will take
much more effort.
Variable Effort Steering
(OPTION)
This steering system provides lighter
steering effort for parking and at low
vehicle speeds. Steering effort will
increase at higher speeds for improved
road feel.
Steering Tips
Driving on Curves
It’s important to take curves at a
reasonable speed.
A lot of the “driver lost control” accidents
mentioned on the news happen on curves.
Here’s why:
Experienced driver or beginner, each of
us is subject to the same laws of physics
when driving on curves. The traction of
the tires against the road surface makes it
possible
for the vehicle to change its path
when you
turn the front wheels. If there’s
no traction, inertia will keep the vehicle
going in the same direction. If you’ve
ever tried to steer a vehicle on wet ice,
you’ll understand this.
The traction you can get in a curve
depends on the condition of your tires and
the road ,surface, the angle at which the
curve is banked, and your speed. While
you’re in a curve, speed isthe one factor
you can control.
Suppose you’re steering through a sharp
curve. Then you suddenly accelerate.
Both control systems
-- steering and
acceleration
-- have to do their work
where the tires meet the road. Adding the
sudden acceleration can demand too
much of those places. You can lose
control.
What should you do if this ever happens?
Ease up on the accelerator pedal, steer the
vehicle the way you want it to go, and
slow down.
Speed limit signs near curves warn that
you should adjust your speed. Of course,
the posted speeds are based on good
weather and road conditions. Under less
favorable conditions you’ll want
to go
slower.
I
125...
ProCarManuals.com
Page 129 of 274
Your Driving and the Road
I
0
Passing (CONT.)
distance you would lose by dropping
back. And if something happens to
cause you to cancel your pass, you
need only slow down and drop back
again and wait for another opportunity.
If other cars are lined up to pass a
slow vehicle, wait your turn. But take
care that someone isn’t trying to pass
you as you pull out to pass the slow
vehicle. Remember to glance over
your shoulder and check the blind
spot.
Check your mirrors, glance over your
shoulder, and start your left lane
change signal before moving out of
the right lane to pass. When you are
far enough ahead of the passed vehicle
to see its front
in your inside mirror,
activate your right lane change signal
and move back into the right lane.
(Remember that your right outside
mirror is convex. The vehicle you just
passed may seem to be farther away
from you than
it really is.)
B Try not to pass more than one vehicle
at a time on two-lane roads.
Reconsider before passing the next
vehicle.
B Don’t overtake a slowly moving
vehicle too rapidly. Even though the
brake lights are not flashing, it may be
slowing down or starting to
turn.
If you’re being passed, make it easy
for the following driver to get ahead
of you. Perhaps you can ease a
little to
the right.
Loss of Control
Let’s review what driving experts say
about what happens when the three
control systems (brakes, steering and
acceleration) don’t have enough friction
where the tires meet
the road to do what
the driver has asked.
In any emergency, don’t give up. Keep
trying to steer and constantly seek an
escape route or area of less danger.
Skidding
[n a skid, a driver can lose control of the
vehicle. Defensive drivers avoid most
skids by taking reasonable care suited to
:xisting conditions, and by not
,‘overdriving” those conditions. But skids
we always possible.
The three types of skids correspond to
your Pontiac’s three control systems. In
the braking skid your wheels aren’t
rolling. In the steering or cornering skid,
too much speed or steering in a curve
causes’tires to slip and lose cornering
force. And in the acceleration skid too
much throttle causes the driving wheels to
spin.
A cornering skid and an acceleration skid
are best handled by easing your foot off
the accelerator pedal.
If your vehicle starts to slide, ease your
foot off the accelerator pedal and quickly
steer the way you want the vehicle to go.
If you start steering quickly enough, your
vehicle may straighten out. Always be
ready for a second skid if
it occurs.
... 128
ProCarManuals.com
Page 130 of 274

Of course, traction is reduced when water, I
snow, ice, gravel, or other material is on
the road. For safety, you’ll want to slow
down and adjust your driving to these conditions. It is important to slow down
on slippery surfaces because stopping
distance will be longer and vehicle
control more limited.
While driving on a surface with reduced traction, try your best to avoid sudden
steering, acceleration, or braking
(including engine braking by shifting to a
lower gear). Any sudden changes could cause the tires to slide.
You may not?
realize the surface is slippery until your
vehicle is skidding. Learn to recognize
warning clues
-- such as enough water;
ice or packed snow on the road to make a
“mirrored surface”
-- and slow down
when you have any doubt.
Remember: Any anti-lock braking system (ABS) helps avoid only the braking skid.
I
Driving at Night
Night driving is more dangerous than day
driving. One reason is that some drivers
are likely to be impaired
-- by alcohol or
drugs, with night vision problems, or by
fatigue.
Here are some tips on night driving.
Drive defensively.
0 Don’t drink and drive.
Adjust your inside rearview mirror to
reduce the glare from headlights
behind you.
0 Since you can’t see as well, you may
need to slow down and keep more
space between you and other vehicles.
0 Slow down, especially on higher
speed roads. Your headlights can light
up only
so much road ahead.
In remote areas, watch for animals.
If you’re tired, pull off the mad in a
safe place and rest.
Night Wsion
No one can see as well at night as in the
daytime. But as we get older these
differences increase. A 50-year-old driver
may require at least twice as much. light to
see the same thing at night as a
20-year-old.
What you do in the daytime can also
affect your night vision. For example, if
you spend the day
in bright sunshine you
are wise to wear sunglasses. Your eyes
will have less trouble adjusting to night.
But
if you’re driving, don’t wear
sunglasses at night. They may cut down
on glare from headlights, but they also
make a lot of things invisible.
129...
ProCarManuals.com