1994 PONTIAC BONNEVILLE horn
[x] Cancel search: hornPage 50 of 290
does start, the first ignition key may be
faulty. See your Pontiac dealer or a
locksmith who can service the
PASS-Key’II.
If you accidentally use
a key that has a
damaged
or missing resistor pellet, the
starter won’t work and the “SECURITY”
light
will flash. But you don’t have to
wait three minutes before trying another
ignition key.
See your Pontiac dealer or a locksmith
who can service the PASS-Key@II to
have
a new key made.
If you’re ever driving and the
“SECURITY” light comes on and
remains on, you
will be able to restart
your engine
if you turn it off. Your
PASS-Key@II system, however, is not working properly and must be serviced by
your Pontiac dealer. Your vehicle is not
protected by the PASS-Key@II system.
If you lose or damage
a PASS-Key@II
ignition key, see your Pontiac dealer or a
locksmith who can service PASS-Key@II
to have a new key made.
In an emergency, call the Pontiac
Roadside Assistance Program at
1-800-ROADSIDE, or
1-800-762-3743.
Universal Theft
Deterrent
-(OPTION)
If your Pontiac has this option, it has a
theft deterrent alarm system. With this
system, the “SECURITY”
light will flash
as you open the door
(if your ignition is
off).
This light reminds you to arm
the theft
deterrent system when leaving your
vehicle.
To Arm the System:
1. Open the door.
2. Lock the door with the power door
lock switch or Keyless Entry
transmitter. The “SECURITY” light
should come on and stay on.
3. Close all doors. The “SECURITY”
light should go off after about
30 seconds and the system will then
be armed.
If the “SECURITY” light comes on for
one
minute and then shuts off while the
ignition is on, the security system has
detected a problem with itself. See your
dealer for service.
If a door or the trunk is opened without
the key or Keyless Entry transmitter, the
alarm
will go off. It will also go off if a
door lock or the trunk lock is damaged.
Your vehicle’s lights
will flash and the
horn
will sound for three minutes, then
will go off to save battery power.
Remember, the theft deterrent system
won’t arm
if you lock the doors with a
key or manual door lock. It arms only if
you use a power door lock switch or
Keyless Entry transmitter.
To Avoid Setting Off the Alarm by
Accident:
If you don’t want to arm the theft
deterrent system, the vehicle should be
locked “after”
the doors are closed.
Always unlock
a door with a ke,y; or use
the Keyless Entry System transmitter.
Unlocking a door any other way will set
off the alarm.
ProCarManuals.com
Page 51 of 290
Features & Controls
Universal Theft
Deterrent
(omoN) (CONI)
To Stop the Alarm:
If you set off the alarm by accident,
unlock any door with your key.
You can
also
turn off the alarm by pressing the
“UNLOCK” button on the Keyless Entry
System transmitter. The alarm won’t stop
if you try to unlock a door any other way.
How to Test the Alarm:
Roll your window down, then follow the
directions under
“To Arm the System”
earlier. Once the alarm is set, reach
through the window and manually unlock
the door from the inside or
turn on the
ignition. The alarm should sound.
If the alarm does not sound when it
should, check to see
if the horn works.
The horn fuse may be blown. To replace
the fuse, see “Fuses
& Circuit Breakers”
in the Index.
To reduce the possibility
of theft, always
arm the theft deterrent system
when
leaving your vehicle.
H Illuminated Entry
System
(omoN)
When you lift the lever of either front
door, a light will glow around the door
lock. This will help you insert the door
key at night.
The lights inside your vehicle will also
go
on. These lights will go off after about 20
seconds, or when you start your engine.
These lights will also
go on when you
press any button on the optional Remote
Keyless Entry transmitter.
If a door is left ajar, your interior lights
will turn
off after ten minutes to save your
battery.
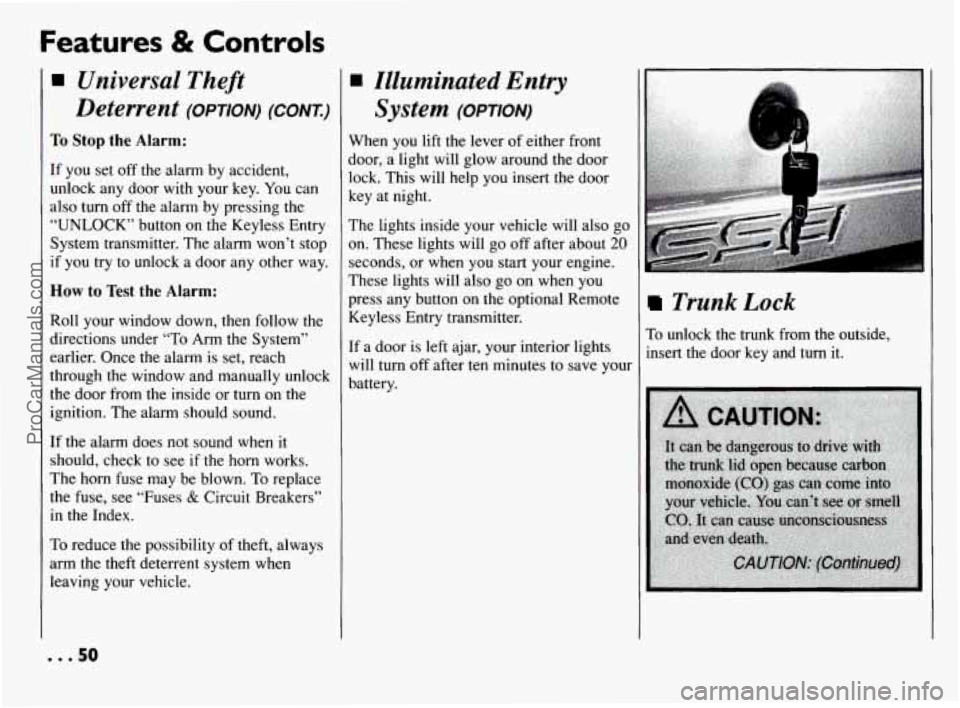
Trunk Lock
To unlock the trunk from the outside, insert the door key and
turn it.
... 50
ProCarManuals.com
Page 68 of 290
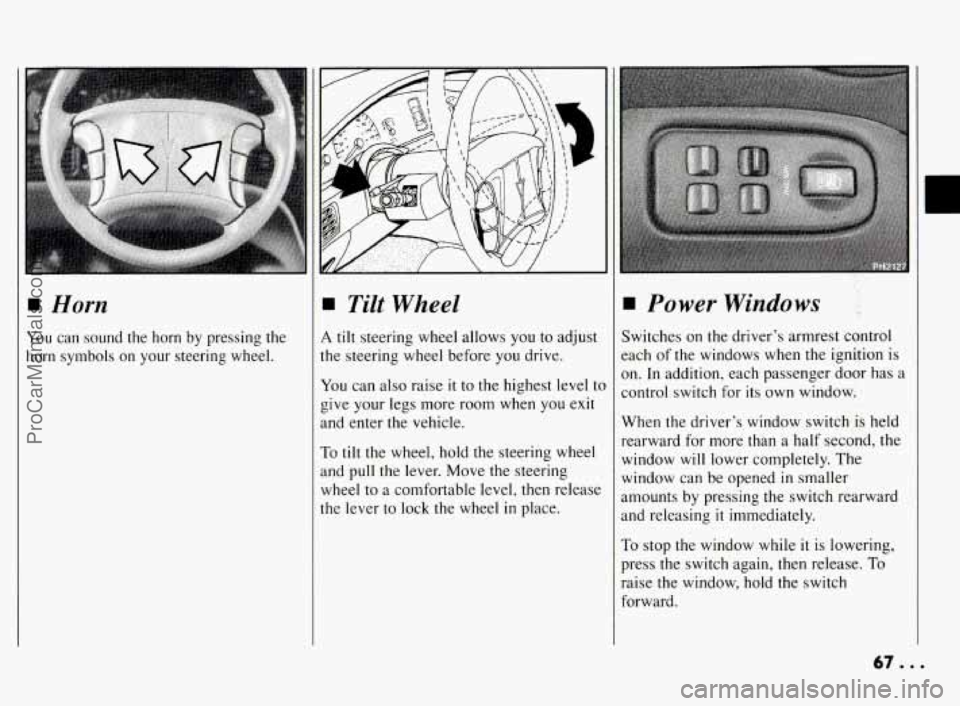
1 Horn
You can sound the horn by pressing the
horn symbols on your steering wheel.
Tilt Wheel
4 tilt steering wheel allows you to adjust
he steering wheel before
you drive.
Ir'ou can also raise it to the highest level tc
give your legs more room when you exit
tnd enter the vehicle.
To tilt the wheel, hold the steering wheel
tnd
pull the lever. Move the steering
Nheel to a comfortable level, then release
he lever to lock the wheel
in place.
Power Windows ,I
Switches on the driver's armrest control
each of the windows when the ignition is
on. In addition, each passenger door has
a
control switch for its own window:
When the driver's window switch
is held
rearward for more
than a half second, the
window
will lower completely. The
window can be opened
in smaller
amounts by pressing the switch rearward
and releasing
it immediately.
To stop the window while
it is lowering,
press the switch again, then release.
To
raise the window, hold the switch
forward.
67 ...
ProCarManuals.com
Page 88 of 290
The Instrument
Panel-Your
Information System
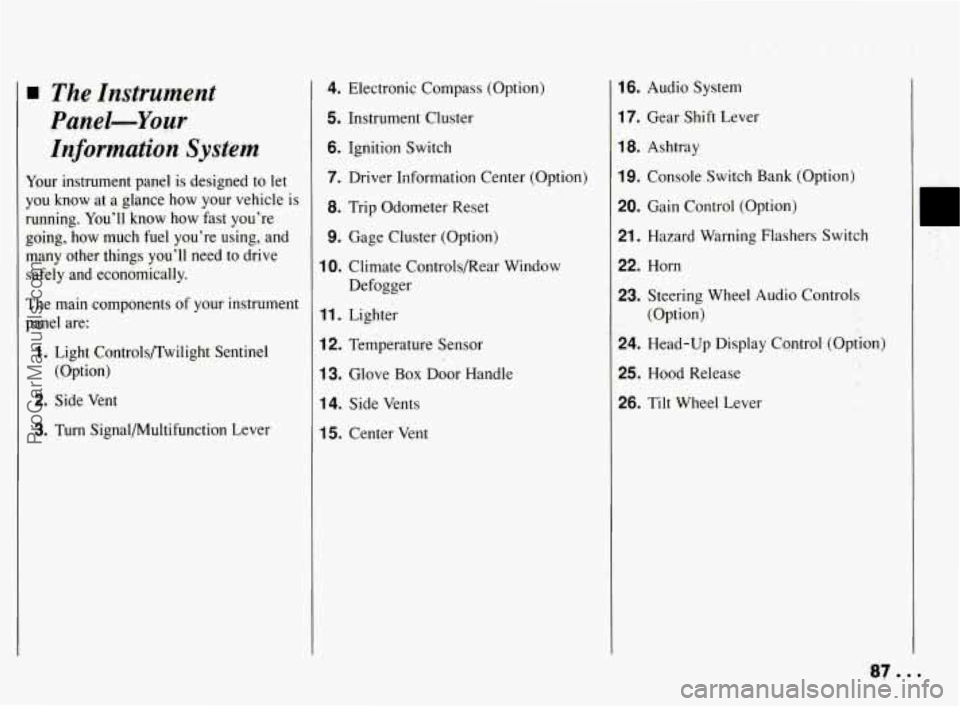
Your instrument panel is designed to let
you
know at a glance how your vehicle is
running.
You’ll know how fast you’re
going, how much fuel you’re using, and
many other things you’ll need to drive
safely and economically;
.. .L .
The main components of your instrument
panel are:
1. Light Controls/Twilight Sentinel
(Option)
2. Side Vent
3. Turn Signal/Multifunction Lever
4. Electronic Compass (Option)
5. Instrument Cluster
6. Ignition Switch
7. Driver Information Center (Option)
8. Trip Odometer Reset
9. Gage Cluster (Option)
10. Climate Controls/Rear Window
Defogger
11. Lighter
12. Temperature Sensor
13. Glove Box Door Handle
14. Side Vents
15. Center Vent
16. Audio System
17. Gear Shift Lever
18. Ashtray
19. Console Switch Bank (Option)
20. Gain Control (Option)
21. Hazard Warning Flashers Switch
22. Horn
23. Steering Wheel Audio Controls
(Option)
24. Head-Up Display Cqntrol. (Option)
25. Hood Release
26. Tilt Wheel Lever
I
ProCarManuals.com
Page 241 of 290
Service & Appearance Care
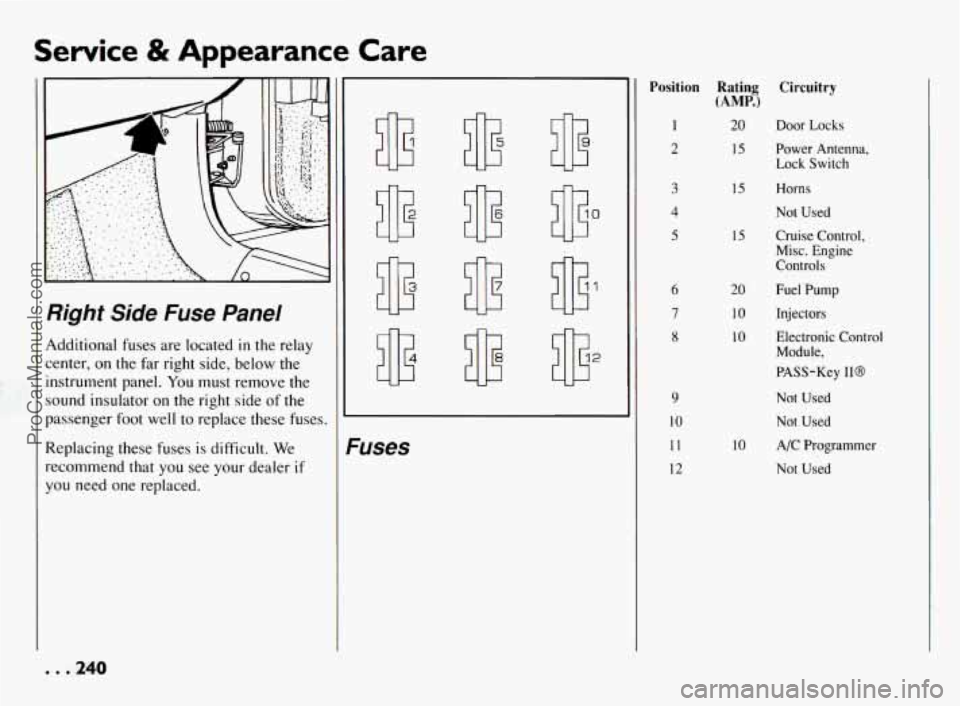
Right Side Fuse Panel
Additional fuses are located in the relay
center,
on the far right side, below the
instrument panel.
You must remove the
sound insulator on the right side of the
passenger foot
well to replace these fuses
Replacing these fuses is difficult.
We
recommend that you see your dealer if
you need one replaced.
IL ).
t
U
:uses
Position
1
2
3
4
5
9
10
11
12
Rating Circuitry
(AMP.)
20
15
15
15
20
10
10
10
Door Locks
Power Antenna,
Lock Switch
Horns
Not Used
Cruise Control, Mix. Engine
Controls
Fuel Pump
Injectors Electronic Control
Module,
PASS-Key
110
Not Used
Not Used
A/C Programmer
Not Used
. . .240
ProCarManuals.com
Page 283 of 290
Index
Gear Positions (see “Shifting
Gearshift Lever (see “Shifting
GloveBox
..................... 52
Graphic Equalizer (see “Audio Systems”)
the
Transaxle”)
the Transaxle”)
Halogen Bulb Replacement
. . 220. 244
Hazard Warning Flashers
......... 166
Head Restraints ................. 10
Headlight & Taillight.
Removing and Replacing
... 220. 22 1
Headlight Washers ............... 7 1
Head-Up Display ............... 107
Headlights
..................... 74
High-Low Beam Changer
...... 76
Instrument Panel Intensity Control
.................... 76
Lamp Monitor
............... 103
“On” Reminder
............... 75
Replacement Bulb
............ 244
Washers
..................... 71
Wiring
..................... 241
Heater (see “Comfort Controls”)
Heater. Engine Block
............. 55
Heater. Engine Coolant ........... 55
High Beams .................... 76
“Highway Hypnosis”
............ I53
Hill and Mountain Roads ......... 153
Hills. Parking on
............... 163 Hood
Release
.................. 199
Safety Warning
. . 168. 169. 177. 200
Warning. Overheated
Engine
... 176. 178.200.214. 215
Horn
.......................... 67
Hot Engine. Safety Warnings
. . 176. 178.
200.214. 215
How
the Anti-Lock Brake
System Works
................ 142
Hydroplaning
.................. 150
lhentification Number. Vehicle
.... 237
Idling Your Engine
......... 62.64. 66
If You’re Stuck in Sand. Mud.
Ice. or Snow
.................. 192
Ignition
Key
........................ 42
Positions
.................... 52
Illuminated Entry
................ 50
Indicator Lights (see “Warning Lights”)
Infant Restraint (see “Child Restraints”)
Inflation. Tires
................. 224
Inside Rearview Mirror
........... 78
Instrument Panel
................ 87
Instrument Panel Clusters ...... 88. 89
Intensity Control ................ 76
Jack. Tire
.................... 184
Jump Starting
.................. 167
Instrument
Panel Warning Lights
.... 91
Keyless Entry. Remote ........... 44
Keys
...............t.......... 42
Camp Monitor
................ 103
Lane Change Indicator
............ 68
Lap-Shoulder Safety Belt
......... 16
Front ....................... 25
Rear
........................ 26
Use by Children
.............. 37
Light Controls
.................. 74
Lighters
....................... 84
Lights
Air Bag System
............... 22
Daytime Running Lights
........ 75
Fog Lights ................... 77
Headlights
............ 74,76, 220
“On” Reminder
............... 75
Parking
..................... 74
Reading
.................. 77, 78
Removing
& Replacing
Bulbs
............ 220.221, 244
Replacement Bulbs
........... 244
Taillights
............... 221, 244
Turn Signal
.................. 68
Underhood
................. 200
Warning Lights
............... 91
Loading Your Vehicle
........... 222
Locks
......................... 43
Locks, Rear Door Security
......... 46
Locks, Remote Control
........... 44
I . . 282
ProCarManuals.com