1994 OLDSMOBILE SILHOUETTE tire type
[x] Cancel search: tire typePage 131 of 276
results in no improvement in sound
quality,
try cleaning the tape player.
Proper tape player cleaning should be
done with a
wiping action nonabrasive
cleaner cassette. To properly clean your
; tape player, you should follow the
I
directions on the cleaning cassette.
Cassettes are subject to wear and the
1 sound quality may degrade over time.
Always verlfy that the cassette tape is in
good condition before obtaining service
on your tape player.
:are of Your Compact Discs
Handle discs carefully. Store them in
their original cases or other protective
cases and away from direct sunlight and
dust. If the surface of a disc is soiled,
dampen a clean, soft cloth in a mild,
neutral detergent solution and clean it,
wiping
from the center to the edge.
Be sure never to touch the signal
surface when handling discs. Pick up
discs by grasping the outer edges or the
edge of the hole and the outer edge.
In
YC
an
be
ve
frc
th
I
I
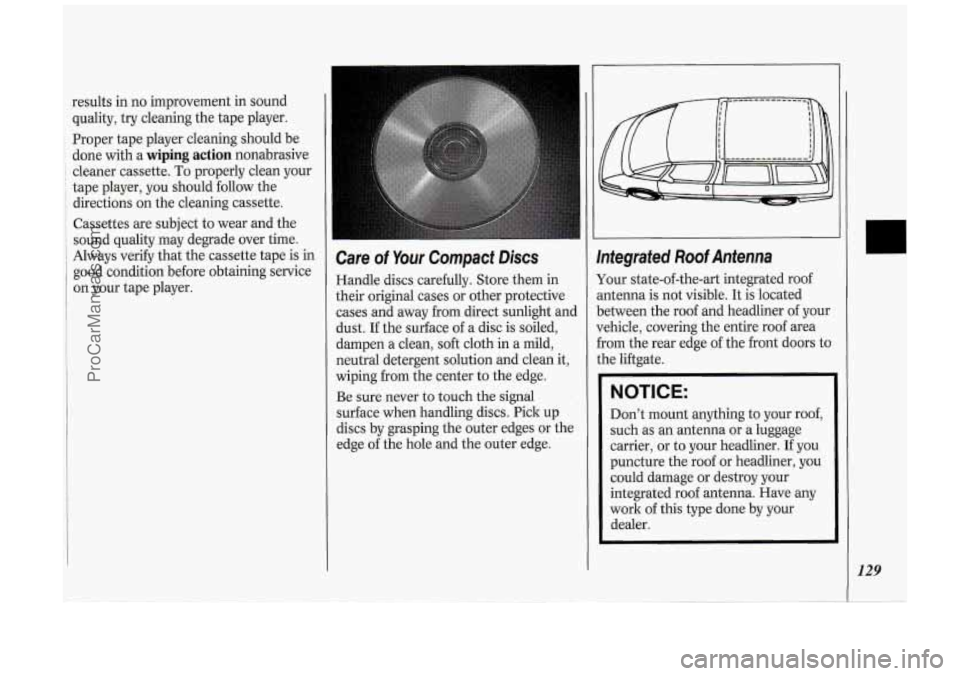
mtegrated Roof Antenna
)ur state-of-the-art integrated roof
ltenna is not visible. It is located
!tween the roof and headliner of your
Ihicle, covering the entire roof area
3m the rear edge
of the front doors to
.e liftgate.
NOTICE:
Don't mount anything to your roof,
such as an antenna or a luggage
carrier, or to your headliner. If you
puncture the roof or headliner, you
could damage or destroy your
integrated roof antenna. Have any
work of this type done by your
dealer.
129
ProCarManuals.com
Page 143 of 276
drop back again and wait for another
opportunity.
slow vehicle, wait your turn. But take
care that someone isn’t trying to pass
you as you pull out to pass the slow
vehicle. Remember to glance over
your shoulder and check the blind
spot.
Check your mirrors, glance over your
shoulder, and start your left lane
change signal before moving out
of
the right lane to pass. When you are
far enough ahead of the passed
vehicle to see its front in your inside
mirror, activate your right lane change
signal and move back into the right
lane. (Remember that your right
outside mirror
is convex. The vehicle
you just passed may seem to be
farther away from you than it really
is.)
Try not to pass more than one vehicle
at a time on two-lane roads. Reconsider before passing the next
vehicle.
vehicle
too rapidly. Even though the
If other cars are lined up to pass a
Don’t overtake a slowly moving brake
lights are not flashing, it may be
slowing down or starting to turn.
If you’re being passed, make it easy
for the following driver to get ahead of
you. Perhaps you can ease a little to
the right.
Loss of Control
Let’s review what driving experts say
about what happens when the three
control systems (brakes, steering and
acceleration) don’t have enough friction
where the tires meet the road to do
what the driver has asked.
In any emergency, don’t give up. Keep
trying to steer and constantly seek
an
escape route or area of less danger.
In a skid, a driver can lose control of
the vehicle. Defensive drivers avoid
most skids by taking reasonable care
suited to existing conditions, and by not
“overdriving” those conditions. But
skids are always possible.
The three types of skids correspond to
your Oldsmobile’s three control systems.
In the braking skid your
wheels aren’t rolling. In the steering or
cornering skid, too much speed or
steering in
a curve causes tires to slip
and lose cornering force. And in the
acceleration skid
too much throttle
causes the driving wheels to spin.
A cornering skid is best handled by
easing your foot
off the accelerator
pedal.
If you have the traction control
system, remember: It helps avoid only
the acceleration skid. If you do not have
traction control, or
if the system is off,
then an acceleration skid is also best
handled by easing your foot
off the
accelerator pedal.
If your vehicle starts to slide, ease your
foot off the accelerator pedal and
quicltly steer the way you want the
vehicle to go.
If you start steering
quickly enough, your vehicle may
straighten out. Always be ready for a
second skid
if it occurs.
Of course, traction is reduced when
water, snow, ice, gravel, or other
material is on the road. For safety,
you’ll want to slow down and adjust
your driving to these conditions. It is
important to slow down on slippery
141
ProCarManuals.com
Page 155 of 276
I
I I
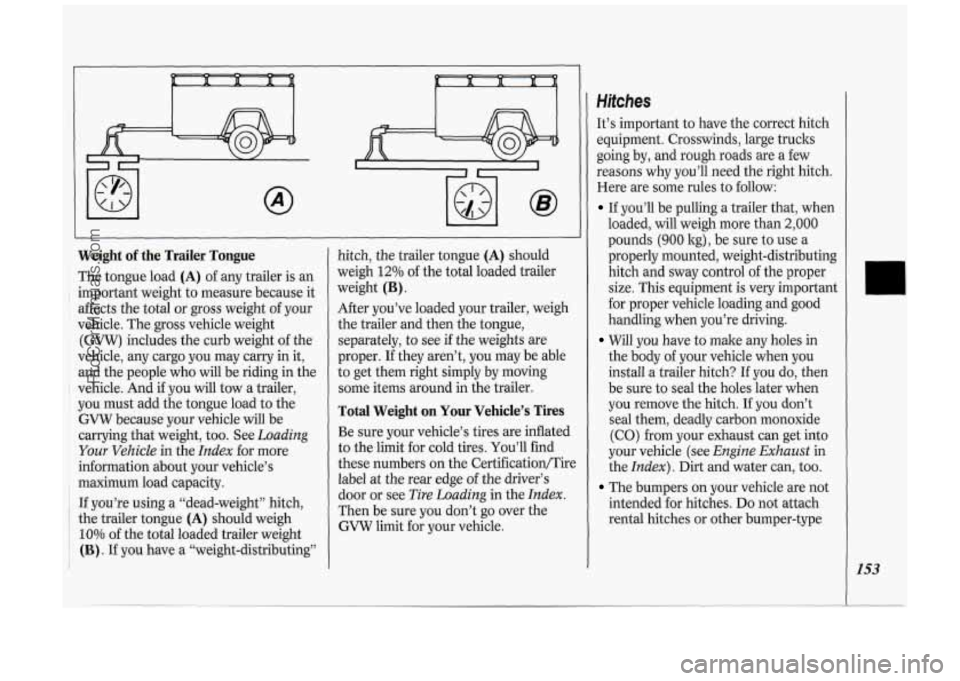
Weight of the Trailer Tongue
The tongue load (A) of any trailer is an
important weight to measure because it
affects the total
or gross weight of your
vehicle. The
gross vehicle weight
(GVW) includes the curb weight of the
vehicle, any cargo you may carry in it,
and the people who will be riding in the
vehicle. And if you will tow a trailer,
you must add the tongue load to the
GVW because your vehicle will be
carrying that weight, too. See
Loading
Your Vehicle in the Index for more
information about your vehicle’s
maximum load capacity.
I If you’re using a “dead-weight’’ hitch, 1 the trailer tongue (A) should weigh
i 10% of the total loaded trailer weight
’ (B). If you have a “weight-distributing”
I
hitch, the trailer tongue (A) should
weigh
12% of the total loaded trailer
weight
(B) .
After you’ve loaded your trailer, weigh
the trailer and then the tongue,
separately, to see
if the weights are
proper. If they aren’t, you may be able
to get them right simply by moving
some items around in the trailer.
Total Weight on Your Vehicle’s Tires
Be sure your vehicle’s tires are inflated
to the limit for cold tires. You’ll find
these numbers on the Certification/Tire
label at the rear edge
of the driver’s
door or see
Tire Loading in the Index.
Then be sure you don’t go over the
GVW limit for your vehicle.
Hifches
It’s important to have the correct hitch
equipment. Crosswinds, large trucks
going by, and rough roads are a few
reasons why you’ll need the right hitch.
Here are some rules to follow:
If you’ll be pulling a trailer that, when
loaded, will weigh more than
2,000
pounds (900 kg), be sure to use a
properly mounted, weight-distributing
hitch and sway control of the proper
size. This equipment is very important
for proper vehicle loading and good
handling when you’re driving.
Will you have to make any holes in
the body of your vehicle when you
install a trailer hitch? If you do, then
be sure to seal the holes later when
you remove the hitch. If you don’t
seal them, deadly carbon monoxide
(CO) from your exhaust can get into
your vehicle (see
Engine Exhaust in
the
Index). Dirt and water can, too.
The bumpers on your vehicle are not
intended for hitches.
Do not attach
rental hitches or other bumper-type
153
ProCarManuals.com
Page 164 of 276
Problems on the Road
I62
10. Now start the vehicle with the good
battery and run the engine for a
while.
11. Try to start the vehicle with the
dead battery. If it won’t start after a
few tries,
it probably needs service. w I
12. Remove the cables in reverse order
to prevent electrical shorting. Take
care that they don’t touch each
other or any other metal.
A
8
liowing Your Vehicle
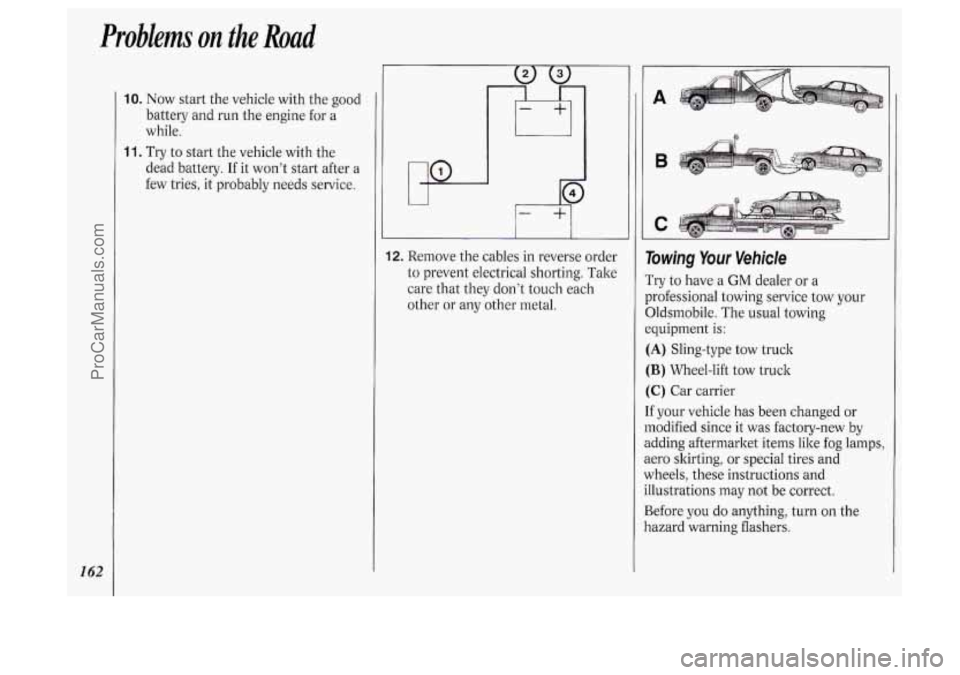
Try to have a GM dealer or a
xofessional towing service tow your
3ldsmobile. The usual towing
:quipment
is:
[A) Sling-type tow truck
[B) Wheel-lift tow truck
:C) Car carrier
f your vehicle has been changed or
nodified since it was factory-new by
idding aftermarket items like fog lamps,
tero skirting, or special tires and
vheels, these instructions and
llustrations may not be correct.
3efore you do anything, turn on the
lazard warning flashers.
ProCarManuals.com
Page 207 of 276
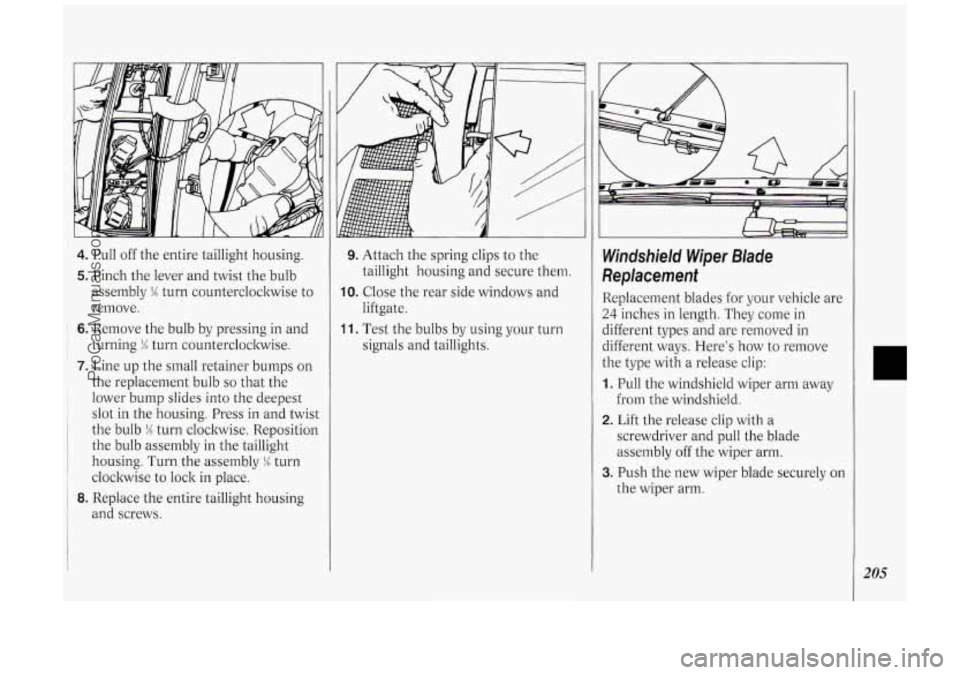
4. Pull off the entire taillight housing.
5. Pinch the lever and twist the bulb
assembly
M turn countercloclwise to
remove.
~ 6. Remove the bulb by pressing in and
1 turning % turn counterclockwise.
7. Line up the small retainer bumps on
the replacement bulb
so that the
1 lower bump slides into the deepest
' slot in the housing. Press in and twist
the bulb
!4 turn clockwise. Reposition
the bulb assembly in the taillight
housing. Turn the assembly
M turn
clockwise to lock in place.
' 8. Replace the entire taillight housing
and screws.
9. Attach the spring clips to the
taillight housing and secure them.
liftgate.
signals and taillights.
IO. Close the rear side windows and
11. Test the bulbs by using your turn
Windshield Wiper Blade
Replacement
Replacement blades for your vehicle are
24 inches in length. They come in
different types and are removed in
different ways. Here's how to remove
the type with a release clip:
1. Pull the windshield wiper arm away
from the windshield.
2. Lift the release clip with a
screwdriver and pull the blade
assembly off the wiper arm.
the wiper arm.
3. Push the new wiper blade securely on
205
ProCarManuals.com
Page 210 of 276
Sewice & Appearunce Care
208
Inflation-Tire Pressure
The CertificatiodTire label which is on
the rear edge of the driver’s door shows
the correct inflation pressures for your
tires, when they’re cold. “Cold” means
your vehicle has been sitting for at least
three hours or driven no more than a mile.
NOTICE:
Don’t let anyone tell you that
underinflation
or overinflation is all
right. It’s not. If your tires don’t
have enough air (underinflation)
you can get:
Too much flexing
Too much heat
Tire overloading
Bad wear
Bad handling
Bad fuel economy.
If your tires have too much air
(overinflation) you can get:
Unusual wear
Bad handling
Rough ride
Needless damage from road
hazards.
When to Check
Check your tires once a month or more.
Don’t forget your compact spare tire. It
should be at
60 psi (420 1tPa).
How to Check
Use a good quality pocket-type gage to
check tire pressure. Simply loolting at
the tires will not tell you the pressure,
especially
if you have radial tires -
which may look properly inflated even if
they’re underinflated.
If your tires have valve caps, be sure to
put them back on. They help prevent
leaks by keeping out dirt and moisture.
-
f
x
Tire Inspection and Rotation
To make your tires last longer, have
them inspected and rotated at the
mileages recommended in the
Maintenance Schedule. See
Scheduled
Maintenance Services
in the Index.
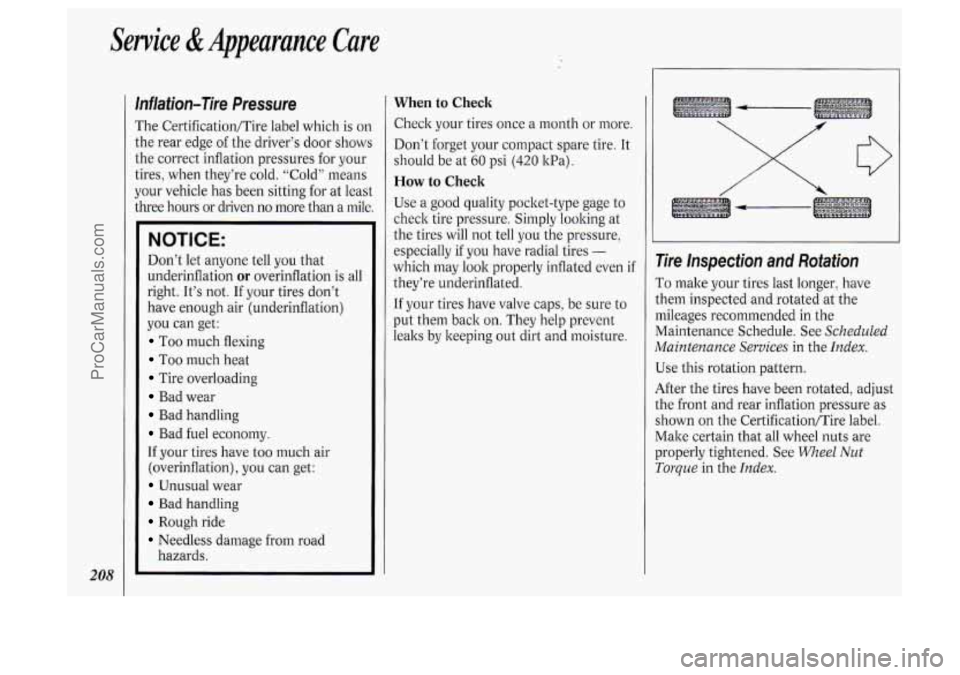
Use this rotation pattern.
After the tires have been rotated, adjust
the front and rear inflation pressure as
shown on the CertificationlTire label.
Make certain that all wheel nuts are
properly tightened. See
Wheel Nut
Toque in the Index.
ProCarManuals.com
Page 211 of 276
i TREAD WEAR INDICATORS
When It’s Time for New Tires
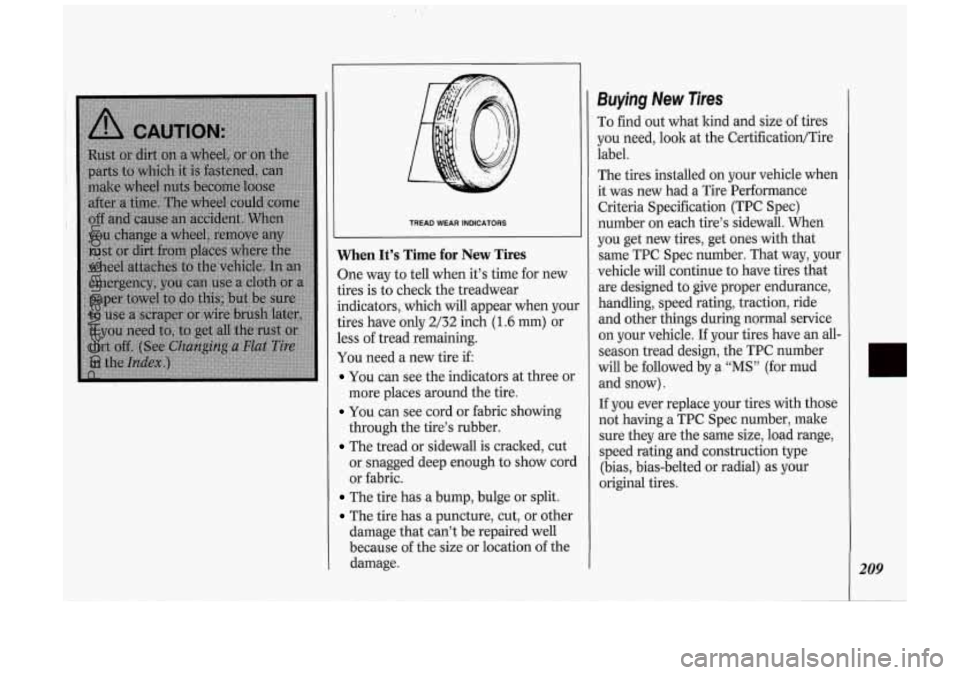
One way to tell when it’s time for new
tires is to check the treadwear
indicators, which will appear when you.
tires have only
2/32 inch (1.6 mm) or
less
of tread remaining.
You need a new tire if:
You can see the indicators at three or
You can see cord or fabric showing
The tread or sidewall is cracked, cut
more places
around the tire.
through the tire’s rubber.
or snagged deep enough to show cord
or fabric.
The tire has a bump, bulge or split.
The tire has a puncture, cut, or other
damage that can’t be repaired well
because
of the size or location of the
damage.
Buying New Tires
To find out what kind and size of tires
you need, look at the Certification/Tire
label.
The tires installed on your vehicle when
it was new had a Tire Performance
Criteria Specification (TPC Spec)
number on each tire’s sidewall. When
you get new tires, get ones with that
same TPC Spec number. That way, your
vehicle will continue to have tires that
are designed to give proper endurance,
handling, speed rating, traction, ride
and other things during normal service
on your vehicle.
If your tires have an all-
season tread design, the TPC number
will be followed by
a “MS” (for mud
and snow).
If you ever replace your tires with those
not having a TPC Spec number, make
sure they are the same size, load range,
speed rating and construction type
(bias, bias-belted or radial) as your
original tires. Iz
209
ProCarManuals.com
Page 213 of 276
have been approved for use on General
~ Motors vehicles. All passenger type
(P Metric) tires must conform to
Federal safety requirements in addition
to these grades.
Wheel Alignment and Tire
Balance
The wheels on your vehicle were
aligned and balanced carefully at the
factory to give you the longest tire life
and best overall performance.
In most cases, you will not need to have
your wheels aligned again. However,
if
you notice unusual tire wear or your
vehicle pulling one way or the other, the
alignment may need to be reset. If you
notice your vehicle vibrating when
driving on a smooth road, your wheels
may need
to be rebalanced.
Wheel Replacement
Replace any wheel that is bent, cracked
or badly rusted. If wheel nuts keep
coming loose, the wheel, wheel bolts,
and wheel nuts should be replaced.
If
the wheel leala air, replace it (except
some aluminum wheels, which can
sometimes be repaired). See your Oldsmobile dealer
if any of these
conditions exist.
Your dealer will know the kind of wheel
you need.
Each new wheel should have the same
load carrying capacity, diameter, width,
offset, and be mounted the same way as
the one it replaces.
If you need to replace any of your
wheels, wheel bolts, or wheel nuts,
replace them only with new GM
original equipment parts. This way, you
will be sure to have the right wheel,
wheel bolts, and wheel nuts for your
Oldsmobile model.
NOTICE:
The wrong wheel can also cause
problems with bearing life, brake
cooling, speedometer/odometer
calibration, headlight aim, bumper
height, vehicle ground clearance,
and tire or tire chain clearance to
the body and chassis.
Used Replacement Wheels
21 1
ProCarManuals.com