1994 OLDSMOBILE SILHOUETTE fuel
[x] Cancel search: fuelPage 12 of 276
How to Use this Manual
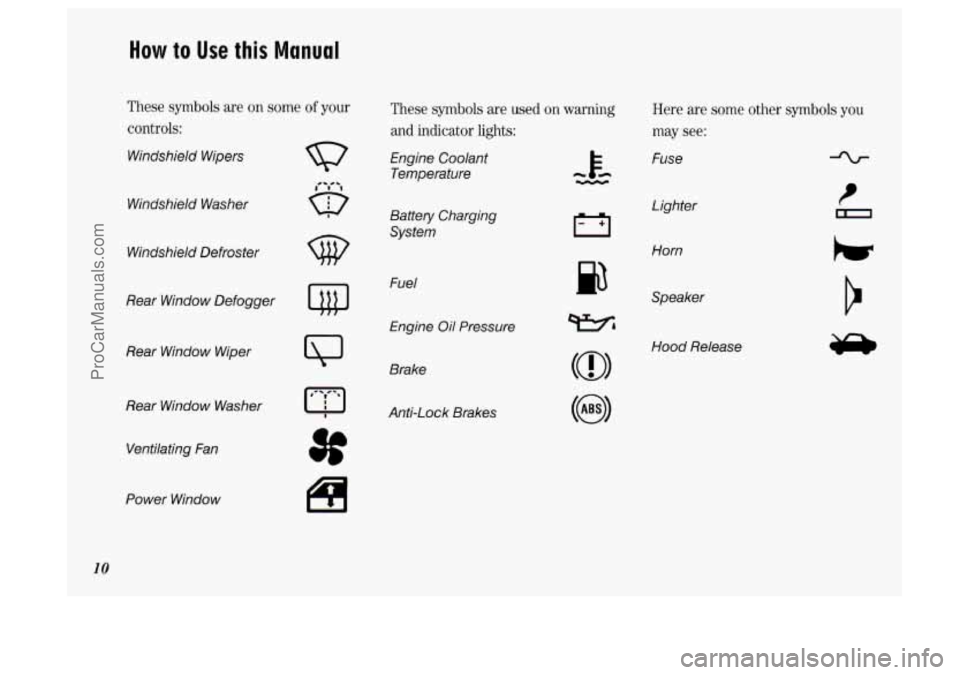
These symbols are on some of your
controls:
Windshield Wipers
Windshield Washer
w
Windshield Defroster
Rear Window Defogger
Rear Window Wiper
Rear Window Washer Ventilating Fan
Power Window
10
3f
These symbols are used on warning
and indicator lights:
Engine Coolant Temperature
Battery Charging
System
Fuel
Engine
Oil Pressure
Brake
AntXock Brakes
p3
Here are some other symbols you
may see:
Fuse
Lighter
Horn
Speaker
Hood Release
ProCarManuals.com
Page 61 of 276
NOTICE:
Don‘t try to shift to P (Park) if your
Oldsmobile is moving. If you do,
you could damage the transaxle.
Shift to
P (Park) only when your
vehicle is stopped.
To start your 3100 V6 engine
(Code D) :
1. Without pushing the accelerator
pedal, turn your ignition key to
Start.
When the engine starts, let go of the
ltey. The idle speed will go down as
your engine gets warm.
NOTICE:
Holding your key in Start for longer
than
15 seconds at a time will cause
your battery to be drained much
sooner. And the excessive heat can
damage your starter motor.
2. If it doesn’t start right away, hold
your key in
Start. If it doesn’t start in
three seconds (or starts but then stops), push the accelerator pedal
about one-quarter of the way down
for
12 more seconds, or until it starts.
3. If your engine still won’t start (or
starts but then stops), it could
be
flooded with too much gasoline. Try
this: Wait
15 seconds to let the
starter motor cool down. Then push
your accelerator pedal all the way to
the floor. Hold it there. Then hold the
key in
Start. This clears the extra
gasoline from the engine. When the
engine starts, let go
of the key and
the accelerator pedal. If the engine
still doesn‘t start, wait another
15
seconds and do Step 2 again.
NOTICE:
Your engine is designed to work
with the electronics in your vehicle.
If you add electrical parts or
accessories, you could change the
way the fuel injection system
operates. Before adding electrical
equipment, check with your dealer.
If you don’t, your engine might not
perform properly. If you ever have
to have your vehicle towed, see the
part
of this manual that tells how to
do it without damaging your
vehicle. See
Towing Your Vehicle
in the Index.
To start your 3800 V6 engine
(Code L):
1. Without pushing the accelerator
pedal, turn your ignition key to
Start.
When the engine starts, let go of the
ltey. The idle speed will go down as
your engine gets warm.
59
ProCarManuals.com
Page 62 of 276
Features & Controls
60
NOTICE:
Holding your key in Start for longer
than
15 seconds at a time will cause
your battery to be drained much
sooner. And the excessive heat can
damage your starter motor.
2. If it doesn’t start right away, hold
your key in
Start for about three to
five seconds at a time until your
engine starts. Wait about
15 seconds
between each try to help avoid
draining your battery.
3. If your engine still won’t start (or
starts but then stops), it could be
flooded with too much gasoline. Try
pushing your accelerator pedal all the
way to the floor and holding it there
as you hold the key in
Start for about
three seconds.
If the vehicle starts
briefly but then stops again, do the
same thing, but this time keep the
pedal down for five
or six seconds.
This clears the extra gasoline from
the engine. After waiting about
15
seconds, repeat the normal starting
procedure.
NOTICE:
Your engine is designed to work
with the electronics in your vehicle.
If you add electrical parts or
accessories, you could change the
way the fuel injection system
operates. Before adding electrical
equipment, check with your dealer.
If you don’t, your engine might not
perform properly.
If you ever have
to have your vehicle towed, see the
part of this manual that tells how to
do it without damaging your
vehicle. See
Towing Your Vehicle
in the Index.
I Driving Through Deep
Standing Water
NOTICE:
If you drive too quickly through
deep puddles or standing water,
water can come in through your
engine’s air intake and badly
damage your engine.
If you can’t
avoid deep puddles or standing
water, drive through them very
slowly.
ProCarManuals.com
Page 63 of 276
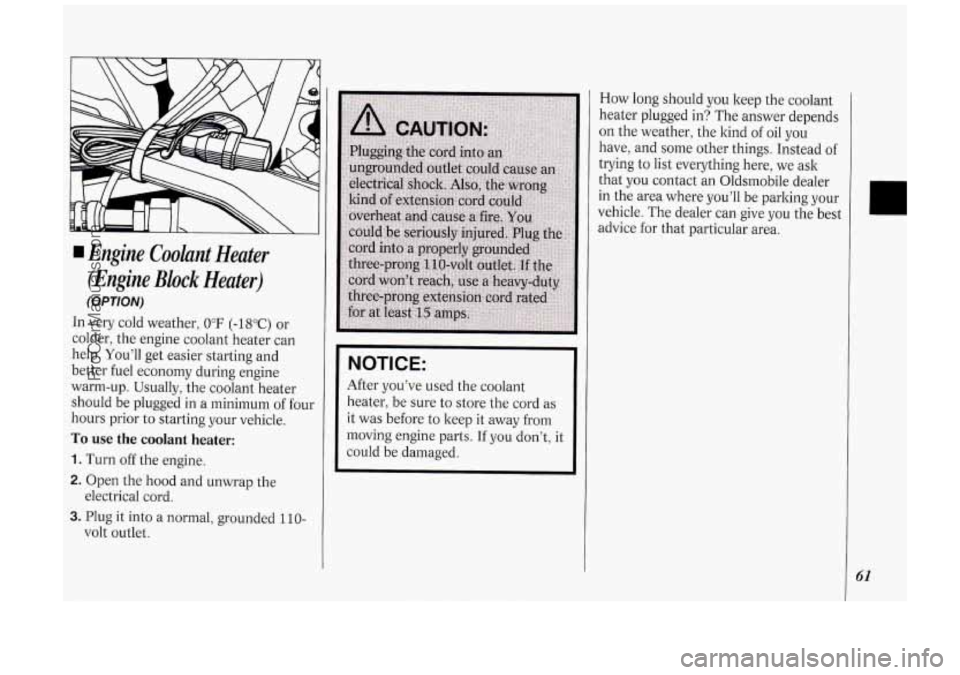
Engine Cooknt Heater
(Engine
Block Heater)
(OPTION)
In very cold weather, 0°F (-18°C) or
colder, the engine coolant heater can
help. You’ll get easier starting and
better fuel economy during engine
warm-up. Usually, the coolant heater
should be plugged in a minimum of four
hours prior to starting your vehicle.
To use the coolant heater:
1. Turn off the engine.
2. Open the hood and unwrap the
3. Plug it into a normal, grounded 110-
electrical cord.
volt outlet.
NOTICE:
After you’ve used the coolant
heater, be sure to store the cord as
it was before to keep it away from
moving engine parts. If you don’t, it
could be damaged. How
long should you keep the coolant
heater plugged in? The answer depends
on the weather, the kind
of oil you
have, and some other things. Instead
of
trying to list everything here, we ask
that
you contact an Oldsrnobile dealer
in the area where you’ll be parking your
vehicle. The dealer can give you the best
advice for that particular area.
41
ProCarManuals.com
Page 66 of 276

Features & Controls
64
R NoD2l
Forward Gears
(Automatic Overdrive):
If your automatic transaxle has
automatic overdrive, this position is for
normal driving. If you need more power
for passing, and you’re:
Going less than about 35 mph (56
km/h), push your accelerator pedal
about halfway down.
Going about 35 mph (56 Itm/h) or
more, push the accelerator all the way
down.
You’ll shift down
to the next gear and
have more power.
NOTICE:
This NOTICE applies only if you
have the
3800 V6 engine and the
automatic Overdrive transaxle. If
your vehicle
is so equipped, and if it
seems to start up rather slowly, or if
it seems not to shift gears as you go
faster, something may
be wrong
with a transaxle system sensor. If
you drive very far that way, your
vehicle can be damaged.
So, if this
happens, have your vehicle serviced
right away. Until then, you can use
2 (Second Gear) when you are
drivin less than
35 mph (56 ltm/h)
and
d D (Overdrive) for higher
speeds.
D (Third Gear): If your automatic
transaxle does not have Overdrive, this
position is for normal driving, at all
speeds, in most street and highway
situations.
If your automatic transaxle has
Overdrive,
D is like m, but you never
go into Overdrive. Here are some times
you might choose
D instead of m:
When driving on hilly, winding roads.
When towing a trailer, so there is less
When going down a steep hill.
2 (Second Gear): This position gives
you more power but lower fuel
economy. You can use
2 on hills. It can
help control your speed as you go down
steep mountain roads, but then you
would also want to use your brakes
off
and on.
shifting between gears.
NOTICE:
Don’t drive in 2 (Second Gear) for
more than
5 miles (8 ltm), or at
speeds over
55 mph (88 ltm/h), or
you can damage your transaxle.
Use
D (m or D if your vehicle has
Overdrive) as much as possible.
Don’t shift into
2 unless you are
going slower than
65 mph (105
ltm/h), or you can damage your
engine.
1 (First Gear): This position gives you
even more power (but lower fuel
economy) than
2. You can use it on
very steep hills, or in deep snow or
ProCarManuals.com
Page 99 of 276

The Instrument Panel-Your
Information System
Your instrument panel is designed to let
you know at
a glance how your vehicle
is running. You’ll know how fast you’re
going, how much fuel you’re using, and
many other things you’ll need
to drive
safely
and economically.
Refer to the accompanying diagram
of
your instrument panel to locate the
components listed below.
1. Side Vents
2. Light Controls
3. Turn Signal/Multifunction Lever
4. Tilt Steering Wheel Lever
5. Instrument Cluster
6. Gearshift Lever
7. Wipermasher Controls
8. Center Vents
9. Storage Compartment
IO. Side Vents
11. Circuit Brealter/Relay Panel
12. Glove Box/Fuse Panel
13. Audio System
14. Rear Fan Controls
15. Cup Holders/Ashtray
16. Locking Storage Bin
17. Lighter
18. Interior Lights Override Switch
19. Traction Control Switch
20. Climate Controls
21. Hazard Warning Flashers Switch
22. Ignition Switch
23. Horn
24. Steering Wheel Touch Controls
(Option)
97
ProCarManuals.com
Page 101 of 276
Speedometer and Odometer
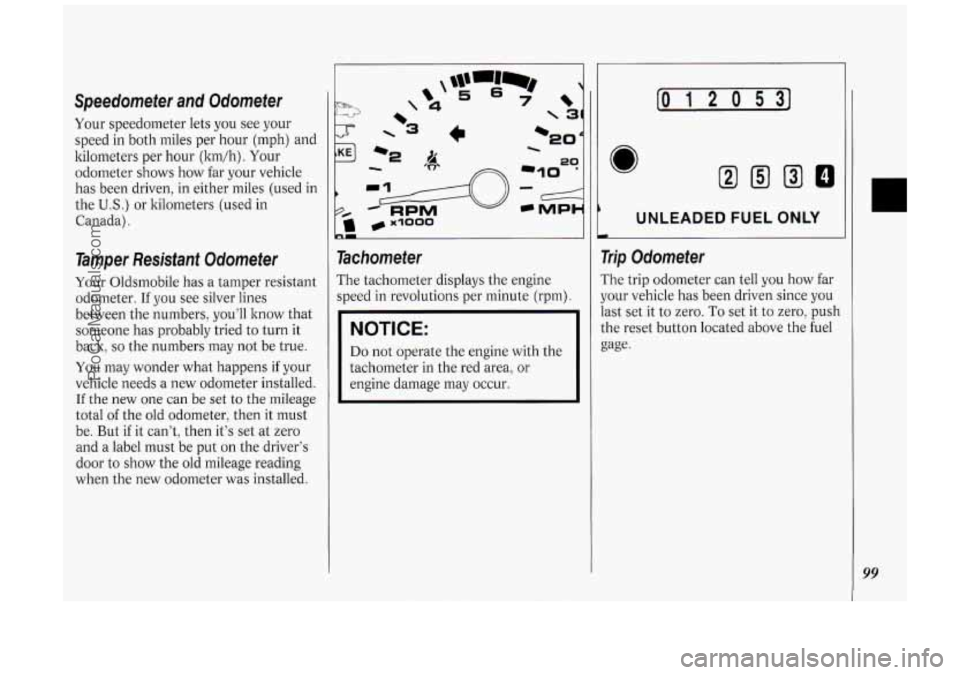
Your speedometer lets you see your
speed in both miles per hour (mph) and
kilometers per hour (ltm/h). Your
odometer shows how far your vehicle
has been driven, in either miles (used in
the
U.S.) or kilometers (used in
Canada).
Tamper Resistant Odometer
Your Oldsmobile has a tamper resistant
odometer.
If you see silver lines
between the numbers, you’ll know that
someone has probably tried to turn it
back,
so the numbers may not be true.
You may wonder what happens if your
vehicle needs a new odometer installed.
If the new one can be set to the mileage
total of the old odometer, then it must
be. But if it can’t, then it’s set at zero
and a label must be put on the driver’s
door to show the old mileage reading
when the new odometer was installed.
\‘ 4
4
Tachometer
The tachometer displays the engine
speed in revolutions per minute (rpm).
NOTICE:
Do not operate the engine with the
tachometer in the red area, or
engine damage may occur.
[o I 2 0 531
UNLEADED FUEL ONLY
Trip Odometer
The trip odometer can tell you how far
your vehicle has been driven since
you
last set it to zero. To set it to zero, push
the reset button located above the fuel
gage.
99
ProCarManuals.com
Page 102 of 276
Features & Controls
100
Warning Lights, Gages and
Indicators
This section describes the warning
lights and gages that may be on your
vehicle. The pictures will help you
locate them.
Warning lights and gages can signal that
something
is wrong before it becomes
serious enough to cause an expensive
repair or replacement. Paying attention
to your warning lights and gages could
also save you or others from injury.
Warning lights go on when there may
be or is a problem with one of your
vehicle's functions. As you will see in
the details on the next few pages, some
warning lights come on briefly when
you turn the ignition key just to let you
know they're working. If you are
familiar with this section, you should
not be alarmed when this happens.
Gages can indicate when there may be
or
is a problem with one of your
vehicle's functions. Often gages and
warning lights work together to let you
know when there's a problem with your
vehicle. When
one of the warning lights comes
on and stays on when you are driving,
or when one
of the gages shows there
may be a problem, check the section
that tells you what to do about it. Please
follow the manual's advice. Waiting to
do repairs can be costly
- and even
dangerous.
So please get to know your
warning lights and gages. They're a big
help.
- UNLtADtU FUtL
-
I
loo= ,
fuel Gage
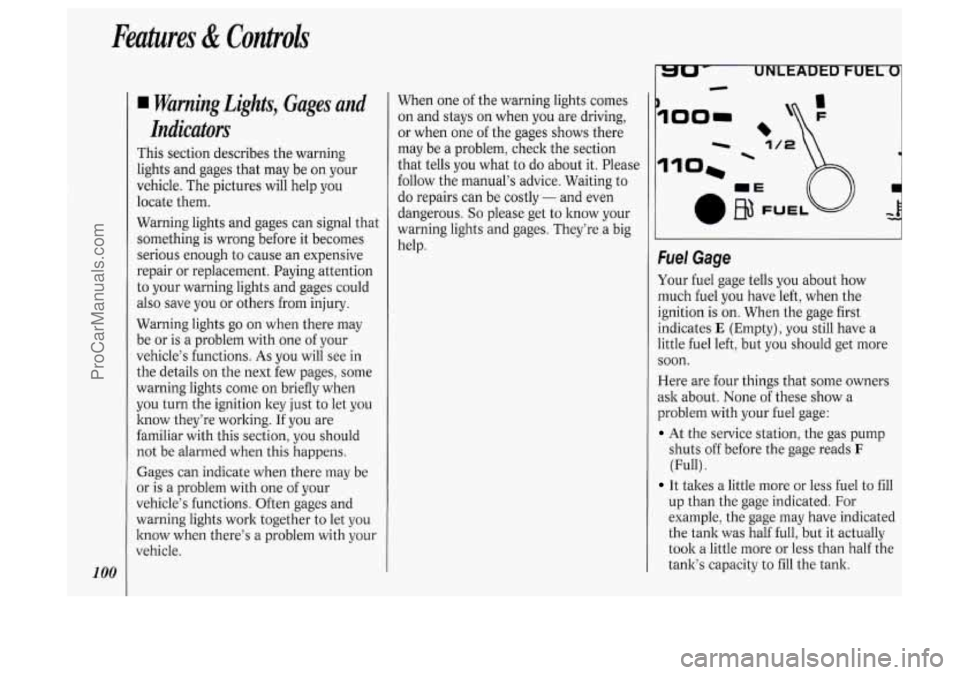
Your fuel gage tells you about how
much fuel you have left, when the
ignition is
on. When the gage first
indicates
E (Empty), you still have a
little fuel left, but you should get more
soon.
Here are four things that some owners
ssk about. None of these show a
problem with your fuel gage:
At the service station, the gas pump
shuts off before the gage reads
F
(Full) .
It takes a little more or less fuel to fill
up than the gage indicated. For
example, the gage may have indicated
the tank was half full, but it actually
took a little more or less than half the
tank's capacity to
fill the tank.
ProCarManuals.com