1994 OLDSMOBILE SILHOUETTE inflation pressure
[x] Cancel search: inflation pressurePage 180 of 276

Problems on the Road
1 78
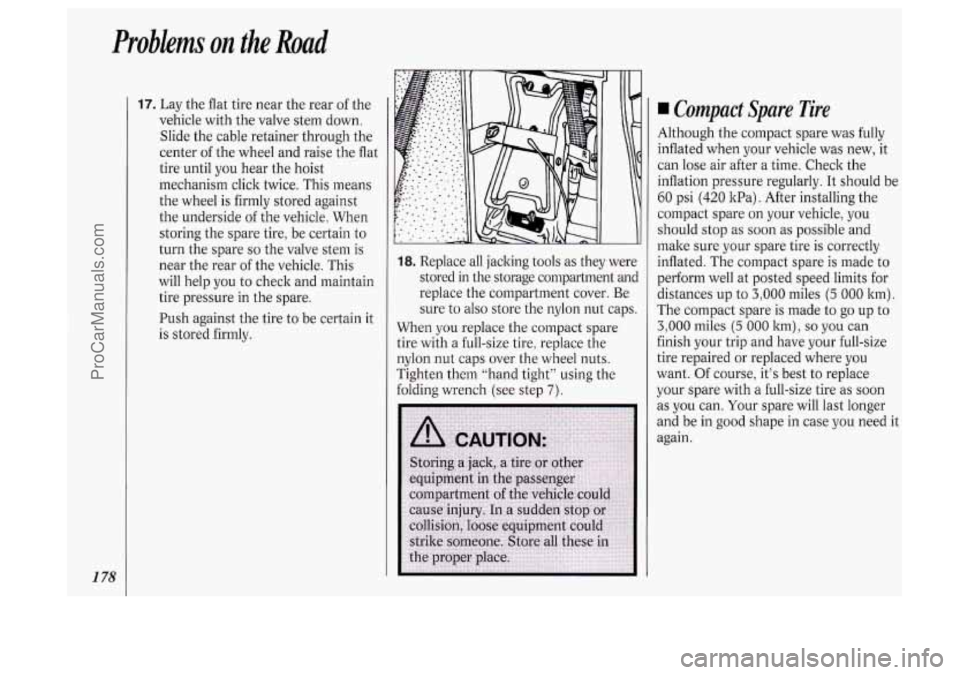
17. Lay the flat tire near the rear of the
vehicle with the valve stem down.
Slide the cable retainer through the
center of the wheel and raise the flat
tire until you hear the hoist
mechanism click twice. This means
the wheel is firmly stored against
the underside of the vehicle. When
storing the spare tire, be certain to
turn the spare
so the valve stem is
near the rear of the vehicle. This
will help you to check and maintain
tire pressure in the spare.
Push against the tire to be certain it
is stored firmly.
18. Replace all jacking tools as they were
stored in the storage compartment and
replace the compartment cover. Be
sure to also store the nylon nut caps.
When
you replace the compact spare
tire with a full-size tire, replace the
nylon nut caps over the wheel nuts.
Tighten them “hand tight” using the
folding wrench (see step
7).
Compact Spare Tire
Although the compact spare was fr .Ill!
inflatedwhen you; vehiile was new, :
can lose air after a time. Check the
jr
it
inflation pressure regularly. It should be
60 psi (420 1tPa). After installing the
compact spare on your vehicle, you
should stop as soon as possible and
make sure your spare tire is correctly
inflated. The compact spare is made to
perform well at posted speed limits for
distances up to
3,000 miles (5 000 ltm).
The compact spare
is made to go up to
3,000 miles (5 000 ltm), so you can
finish your trip and have your full-size
tire repaired
or replaced where you
want. Of course, it’s best to replace
your spare with
a full-size tire as soon
as you can. Your spare will last longer
and be in good shape in case you need it
again.
ProCarManuals.com
Page 208 of 276

Service &Appearance Care
206
GVWR CAWR FRT CAWR RR
THIS VEHICLE CONFORMS TO ALL APPLICABLE US. FEDERAL
MOTOR VEHICLE SAFETY STANDARDS IN EFFECT ON THE DATE
OF MANUFALTURESHOWN ABOVE.
.MODEL.
M.P.V.
MPHY FRT TlRESlZE
RTG RIM WliKP, (COLD1
RR SPA MFD
fly GENERAL MOTORS CORP XWXX
LWKG
SERIAI. NUMBER SPEED
SEE
OWNERS MANUAL FOR ADDI'TIONAL INFORMATlOh
Loading Your Vehicle
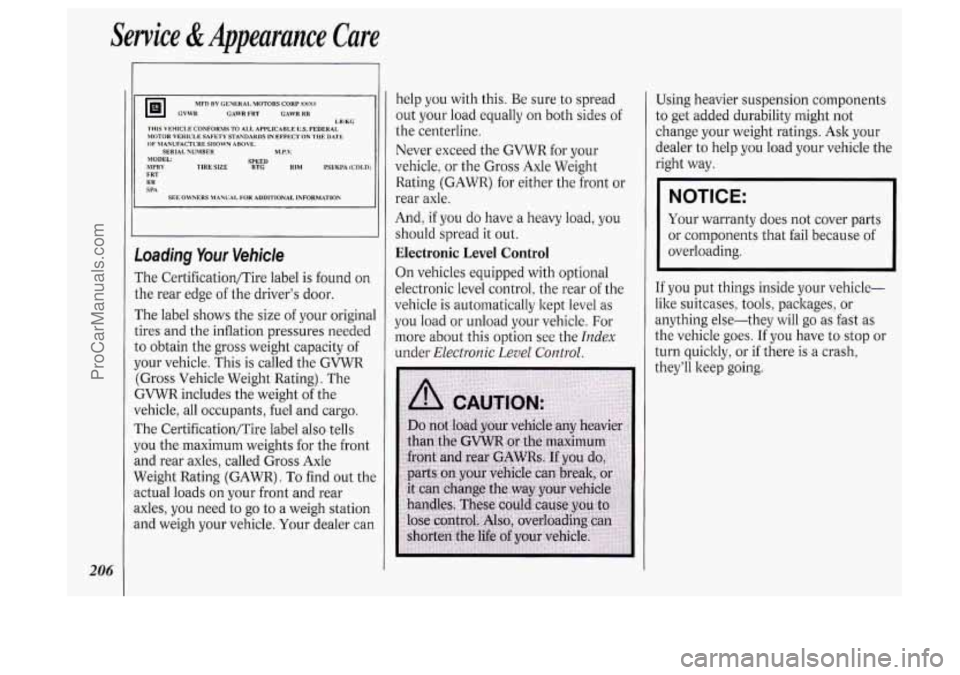
The Certification/Tire label is found on
the rear edge of the driver's door.
The label shows the size
of your original
tires and the inflation pressures needed
to obtain the gross weight capacity
of
your vehicle. This is called the GVWR
(Gross Vehicle Weight Rating). The
GVWR includes the weight of the
vehicle, all occupants, fuel and cargo.
The Certification/Tire label also tells
you the maximum weights for the front
and rear axles, called Gross Axle
Weight Rating (GAWR).
To find out the
actual loads
on your front and rear
axles, you need to go to a weigh station
and weigh your vehicle, Your dealer can help
you with
this. Be sure to spread
out your load equally on both sides
of
the centerline.
Never exceed the
GVWR for your
vehicle, or the Gross Axle Weight
Rating (GAWR) for either the front or
rear axle.
And,
if you do have a heavy load, you
should spread it out.
Electronic Level Control
On vehicles equipped with optional
electronic level control, the rear
of the
vehicle is automatically kept level as
you load or unload your vehicle. For
more about this option see the
Index
under Electronic Level Control.
Using heavier suspension components
to get added durability might not
change your weight ratings. Ask your
dealer to help you load your vehicle the
right way.
NOTICE:
Your warranty does not cover parts
or components that fail because
of
overloading.
If you put things inside your vehicle-
like suitcases, tools, packages, or
anything else-they will go
as fast as
the vehicle goes.
If you have to stop or
turn quickly! or if there is a crash,
they'll keep going.
ProCarManuals.com
Page 210 of 276

Sewice & Appearunce Care
208
Inflation-Tire Pressure
The CertificatiodTire label which is on
the rear edge of the driver’s door shows
the correct inflation pressures for your
tires, when they’re cold. “Cold” means
your vehicle has been sitting for at least
three hours or driven no more than a mile.
NOTICE:
Don’t let anyone tell you that
underinflation
or overinflation is all
right. It’s not. If your tires don’t
have enough air (underinflation)
you can get:
Too much flexing
Too much heat
Tire overloading
Bad wear
Bad handling
Bad fuel economy.
If your tires have too much air
(overinflation) you can get:
Unusual wear
Bad handling
Rough ride
Needless damage from road
hazards.
When to Check
Check your tires once a month or more.
Don’t forget your compact spare tire. It
should be at
60 psi (420 1tPa).
How to Check
Use a good quality pocket-type gage to
check tire pressure. Simply loolting at
the tires will not tell you the pressure,
especially
if you have radial tires -
which may look properly inflated even if
they’re underinflated.
If your tires have valve caps, be sure to
put them back on. They help prevent
leaks by keeping out dirt and moisture.
-
f
x
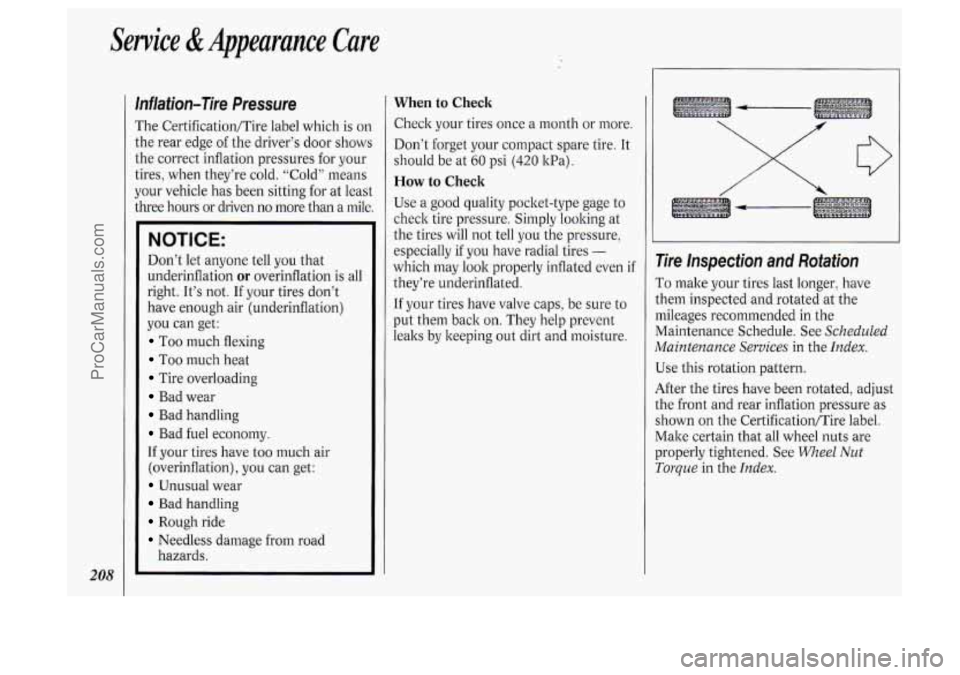
Tire Inspection and Rotation
To make your tires last longer, have
them inspected and rotated at the
mileages recommended in the
Maintenance Schedule. See
Scheduled
Maintenance Services
in the Index.
Use this rotation pattern.
After the tires have been rotated, adjust
the front and rear inflation pressure as
shown on the CertificationlTire label.
Make certain that all wheel nuts are
properly tightened. See
Wheel Nut
Toque in the Index.
ProCarManuals.com
Page 242 of 276

240
Section B: Owner Checks and Services Be sure any necessary repairs are completed at once.
Whenever any fluids or lubricants are added to your vehicle,
Listed below are owner checks and services which should be malte Sure they are the proper ones, as shown in Section
D.
performed at the intervals specified to help ensure the safety,
dependability and emission control performance of your
vehicle.
Each Fuel Fill (It is important
for you or a service station attendant to perform
these underhood
checks at each fuel fill.)
I
Check the engine coolant level and add the proper coolant mix if necessary. See Coolant in the
Engine Index for further details.
CHECK
OR SERVICE
I
WHAT TO DO
Check the engine oil level and add the proper oil if necessary. See Engine Oil in the Index for
further details.
Engine
Oil Level
Windshield Washer Check the windshield washer fluid level in the windshield washer tank and add the proper fluid if
Fluid Level necessary. See
Windshield Washer Fluid in the Index for further details. I
It Leasf Once a Month
CHECK
OR SERVICE
I
WHAT TO DO I
Tire Inflation I
Check tire inflation. Make sure they are inflated to the pressures specified on the Certification/
Tire label located
on the rear edge of the driver’s door. See Tires in the Index for further details.
Cassette Deck
I
Clean cassette deck. Cleaning should be done every 15 hours of tape play. See Audio Systems in
the
Index for further details.
ProCarManuals.com
Page 271 of 276

Starting Your Vehicle if the Battery is
Steering “Dead” (see
Jump Starting)
In Emergencies .............................. 139
Off-Road Recovery ........................ 140
Power
............................................. 138
Tips ................................................ 138
Steering Wheel. Tilt ............................ 69
Steering Wheel Touch Controls
...... 127
Stereo Sound Systems
(see
Audio Systems )
Storing Your Vehicle ........................ 203
Compact Overhead Console
........... 95
Compartment
................................... 83
Cup Holder ...................................... 89
Locking Bin ..................................... 90
Luggage Carrier
............................... 92
Overhead Console
........................... 79
Rear Compartment
.......................... 91
Sunglasses
........................................ 83
Stuck. If You Are ........................... 179
Sunroof
............................................... 95
Sun Visors
.......................................... 87
Supplemental Restraint
System
(SRS) ................................... 26
Storage
Convenience Net
............................. 91
Garage Door Opener
....................... 80
Glove Boxes
..................................... 88
T achometer ....................................... 99
Taillights
........................................... 204
Tape Player (see
Audio Systems)
Technical Facts & Specifications
Bulbs
...................................... 228. 229
Capacities
& Specifications .......... 224
Circuit Brealters/Relays
................. 222
Add-on
......................... 60. 117. 219
Engine
............................................ 226
Fluids
& Lubricants ...................... 227
Fuses
.............................. 219. 220. 221
Replacement Parts
......................... 226
Service Parts Identification
Label
............................................ 218
Vehicle Identification Number
(VIN)
........................................... 218
Temperature Display
.......................... 81
Temperature Warning ...................... 103
Theft
.................................................... 50
Thermostat ....................................... 199
Tilt Steering Wheel
............................. 69
Time. Setting the
.............................. 117
Tire Loading
..................................... 206
Tires
.................................................. 207
“Blow Out”
.................................... 172
Buying New
................................... 209
Chains
.................................... 178. 212
Electrical
Equipment.
Flat. Changing
............................... 172 Inflation
................... 85. 172. 178.
208
Loading
.......................................... 206
Pressure
......................................... 208
Quality Grading
............................. 210
Spare. Compact
............................. 178
Wear Indicators
............................. 209
Wheel Alignment
& Tire
Balance
........................................ 211
Wheel Replacement
....................... 211
Torque Lock
....................................... 67
Towing a Trailer
............................... 151
Inspection & Rotation ................... 208
Wheel Nut Torque
................. 177, 225
Top Strap
............................................ 36
Towing Your Vehicle
....................... 162
Traction Control System
................... 137
Traction Control System
Warning Light
................................ 105
Trailer Towing
.................................. 151
Brakes ............................................ 154
Maintenance .................................. 156
Parking on
Hills .............................. 156
Safety Chains
................................. 154
(see
Automatic Transaxle)
(see Automatic Transaxle)
Transaxle, Automatic
Transmission, Automatic
Trip Odometer
.................................... 99
Turn Signal Indicator ......................... 71
Turn Signal/Multifunction Lever
...... 70 269
ProCarManuals.com