1994 OLDSMOBILE SILHOUETTE climate control
[x] Cancel search: climate controlPage 86 of 276
Features & Controls
84
Center Dome Light
Located in the center of your vehicle,
this light has no switch of its
own. It
will go on each time you open the
doors, unless you turn the interior lights
override switch in the center instrument
panel console to
OFF.
If you have the optional rear climate
control, you will not have a center dome
light.
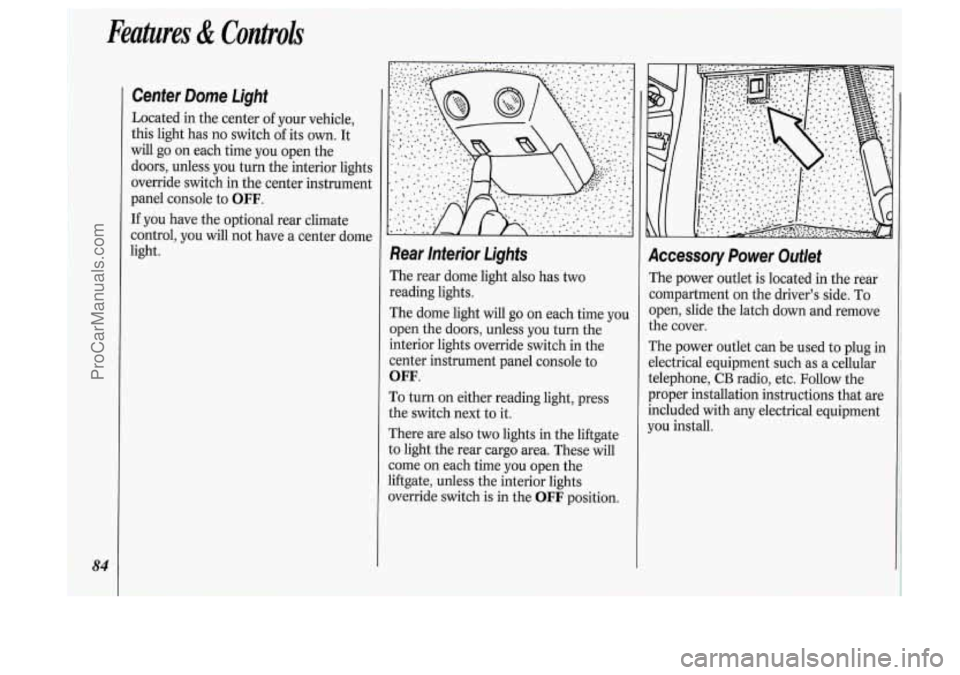
Rear lnterior Lights
The rear dome light also has two
reading lights.
The dome light will go
on each time you
open the doors, unless you turn the
interior lights override switch in the
center instrument panel console to
OFF.
To turn on either reading light, press
the switch next to it.
There are also
two lights in the liftgate
to light the rear cargo area. These will
come
on each time you open the
liftgate, unless the interior lights
override switch is in the
OFF position.
Accessory Power Outlet
The power outlet is located in the rear
compartment on the driver’s side. To
open, slide the latch down and remove
the cover.
The power outlet can be used to plug in
electrical equipment such as a cellular
telephone,
CB radio, etc. Follow the
proper installation instructions that are
included with any electrical equipment
you install.
ProCarManuals.com
Page 93 of 276
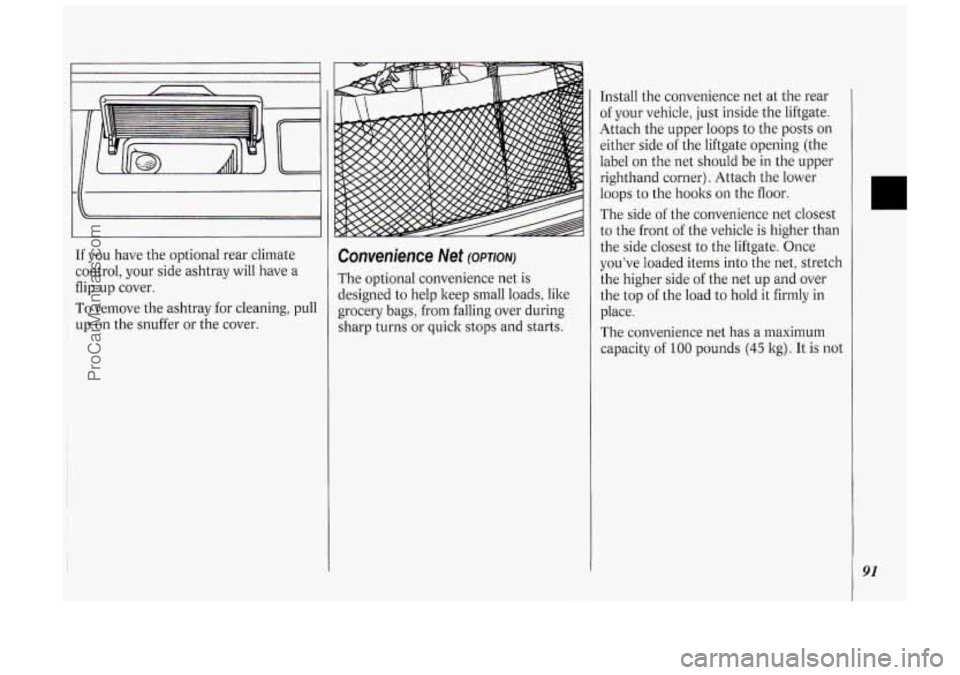
If you have the optional rear climate
control, your side ashtray will have a
flip-up cover.
~ To remove the ashtray for cleaning, pull
up on the snuffer or the cover.
Convenience Net (OPTION)
The optional convenience net is
designed to help keep small loads, like
grocery bags, from falling over during
sharp turns or quick stops and starts. Install
the convenience net at the rear
of your vehicle, just inside the liftgate.
Attach the upper loops to the posts on
either side of the liftgate opening (the
label on the net should be in the upper
righthand corner). Attach the lower
loops to the hoolts on the floor.
The side of the convenience net closest
to the front of the vehicle is higher than
the side closest to the liftgate. Once
you’ve loaded items into the net, stretch
the higher side of the net up and over
the top of the load to hold it firmly in
place.
The convenience net has a maximum
capacity of
100 pounds (45 kg). It is not
L3
91
ProCarManuals.com
Page 99 of 276

The Instrument Panel-Your
Information System
Your instrument panel is designed to let
you know at
a glance how your vehicle
is running. You’ll know how fast you’re
going, how much fuel you’re using, and
many other things you’ll need
to drive
safely
and economically.
Refer to the accompanying diagram
of
your instrument panel to locate the
components listed below.
1. Side Vents
2. Light Controls
3. Turn Signal/Multifunction Lever
4. Tilt Steering Wheel Lever
5. Instrument Cluster
6. Gearshift Lever
7. Wipermasher Controls
8. Center Vents
9. Storage Compartment
IO. Side Vents
11. Circuit Brealter/Relay Panel
12. Glove Box/Fuse Panel
13. Audio System
14. Rear Fan Controls
15. Cup Holders/Ashtray
16. Locking Storage Bin
17. Lighter
18. Interior Lights Override Switch
19. Traction Control Switch
20. Climate Controls
21. Hazard Warning Flashers Switch
22. Ignition Switch
23. Horn
24. Steering Wheel Touch Controls
(Option)
97
ProCarManuals.com
Page 111 of 276
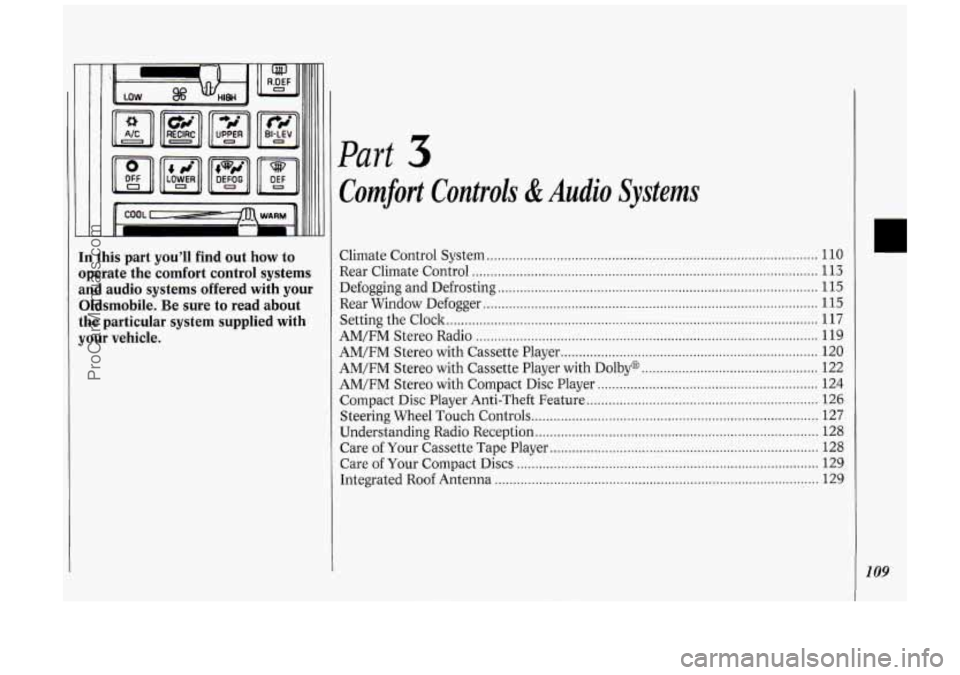
In this part you’ll find out how to
operate the comfort control systems
and audio systems offered with your
Oldsmobile
. Be sure to read about
the particular system supplied with
your vehicle
.
Part
Comfort Controls & Audio Systems
Climate Control System ........................................................................\
.................. 110
Rear Climate Control ........................................................................\
...................... 113
Defogging and Defrosting
........................................................................\
............... 115
Rear Window Defogger
........................................................................\
................... 115
AM/FM Stereo Radio
........................................................................\
..................... 119
Setting the
Clock
........................................................................\
............................. 117
AM/FM Stereo with Cassette Player
...................................................................... 120
AM/FM Stereo with Cassette Player with Dolby@
................................................ 122
AM/FM Stereo with Compact Disc Player ............................................................ 124
Compact Disc Player Anti-Theft Feature ............................................................... 126
Steering Wheel Touch Controls ........................................................................\
...... 127
Understanding Radio Reception ........................................................................\
..... 128
Care of Your Compact Discs
........................................................................\
.......... 129
Integrated Roof Antenna
........................................................................\
................ 129
Care
of Your Cassette Tape Player
........................................................................\
. 128
ProCarManuals.com
Page 112 of 276
Comfort Controls &Audio Systems
110
Climate Control System
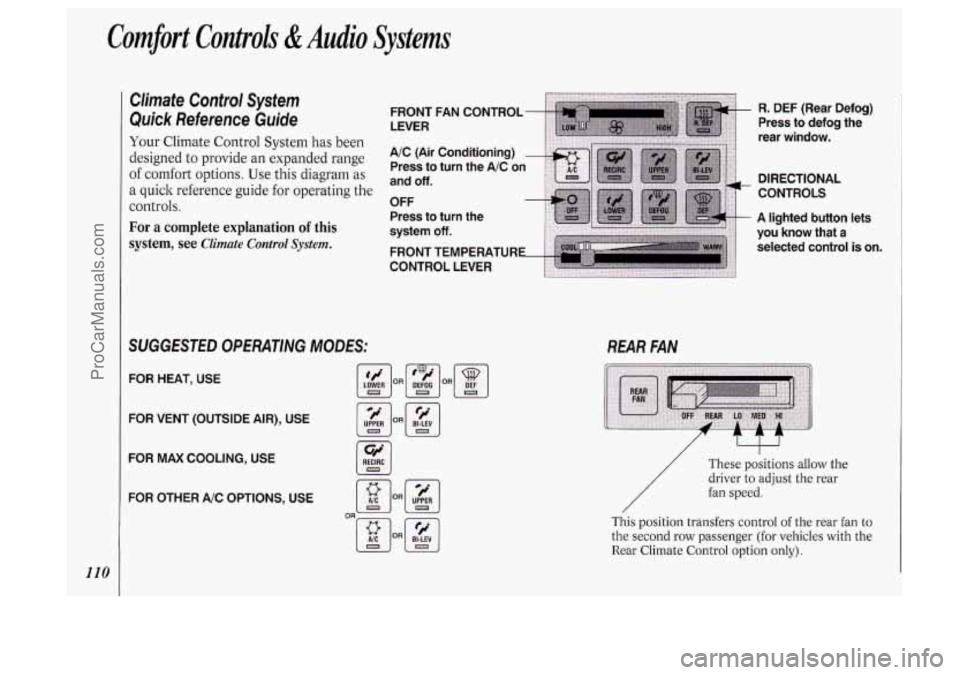
Quick Reference Guide
Your Climate Control System has been
designed to provide an expanded range
of comfort options. Use this diagram as
a quick reference guide for operating the
controls.
For a complete explanation of this
system,
see Climate Control System.
SUGGESTED OPERATlNG MODES: REAR FAN
FOR HEAT, USE
FOR VENT (OUTSIDE AIR), USE
FOR MAX COOLING, USE
FOR OTHER A/C OPTIONS, USE
[Y] RECiRC
R. DEF (Rear Defog)
Press to defog the
rear window.
DIRECTIONAL
CONTROLS
A lighted button lets
you know that a
selected control
is on.
/ I
/
These positions allow the
driver to adjust the rear
fan speed.
This
position transfers control of the rear fan to
the second row passenger (for vehicles with the
Rear Climate Control option only).
ProCarManuals.com
Page 113 of 276
![OLDSMOBILE SILHOUETTE 1994 Owners Manual I Climate Control System
Your vehicle’s heater and air
conditioner work best if you keep your
windows closed. Your vehicle also has
flow-through ventilation, described late]
in this s OLDSMOBILE SILHOUETTE 1994 Owners Manual I Climate Control System
Your vehicle’s heater and air
conditioner work best if you keep your
windows closed. Your vehicle also has
flow-through ventilation, described late]
in this s](/manual-img/31/58207/w960_58207-112.png)
I Climate Control System
Your vehicle’s heater and air
conditioner work best if you keep your
windows closed. Your vehicle also has
flow-through ventilation, described late]
in this section, to bring outside air into
your vehicle.
If you have the optional engine coolant
heater and use it during cold weather,
0°F (-18°C) or lower, your heating
system will more quicldy provide heat
because the engine coolant is already
warmed. See the
Index under Engine
Coolant Heater.
OFF: Press to turn the system off. Press
any climate control setting to turn the
system on.
8: Slide the lever to the right to increase
fan speed,
decrease fan speed. to the left
to
Temperature Control Lever: Slide
the
lever to the right for warmer, heated air;
slide it to the left for cooled air.
Air Conditioner
When the temperature outside is above
freezing, the air conditioner compressor
will automatically condition the air
when
you press RECIRC (the A/C
indicator light will glow), DEFOG or
DEF (the A/C indicator light will not
Press
A/C (the A/C indicator light will
glow) to condition the air when you
press
UPPER, BI-LEV or LOWER. To
turn off the air conditioner compressor
in these settings, press
A/C again (the
indicator light will go off).
glow).
Each time you turn on the ignition, the
air conditioner will default to the setting
you had selected before last turning off
the ignition.
When the air conditioner compressor is
on, you may sometimes notice slight
changes in your vehicle’s engine
performance and power. This is normal, because
the system is designed to help
fuel economy while it maintains the
desired cooling level.
The air conditioner removes moisture
from the air,
so you may sometimes
notice water dripping from under your
vehicle when it
is idling or after it has
been turned off. This is normal.
On very hot days, your vehicle will cool
down more quickly and economically if
you open the windows long enough to
let hot inside air escape. For all settings,
adjust the temperature control lever and
fan speed as desired.
Directional Controls
RECIRC (Recirculate): Press to get
maximum cooling or quick cool-down
on very hot days. This setting
recirculates much of the air inside your
vehicle. It should not be used for long
periods of time because the air may
become too cold and dry.
Slide the temperature control lever
down to the coolest setting and adjust
the fan speed as desired.
UPPER: For normal cooling on hot
days, press
A/C along with UPPER.
1
111
ProCarManuals.com
Page 115 of 276
h d II
II I(
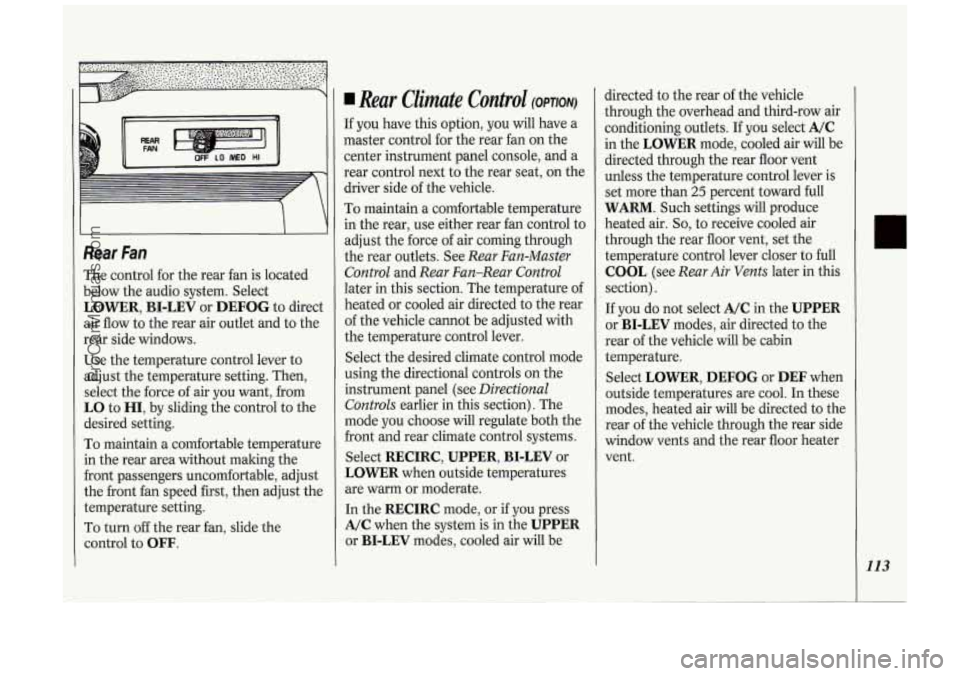
Rear Fan
The control for the rear fan is located
below the audio system. Select
LOWER, BI-LEV or DEFOG to direct
air flow to the rear air outlet and to the
rear side windows.
Use the temperature control lever to
adjust the temperature setting. Then,
select the force of air you want, from
LO to HI, by sliding the control to the
desired setting.
To maintain a comfortable temperature
in the rear area without making the
front passengers uncomfortable, adjust
the front fan speed first, then adjust the
temperature setting.
To turn off the rear fan, slide the
control to
OFF.
Rear Climate Control (OPTION)
If you have this option, you will have a
master control for the rear fan on the
center instrument panel console, and a
rear control next to the rear seat, on the
driver side of the vehicle.
To maintain a comfortable temperature
in the rear, use either rear fan control to
adjust the force
of air coming through
the rear outlets. See
Rear Fan-Master
Control
and Rear Fan-Rear Control
later in this section. The temperature of
heated or cooled air directed to the rear
of the vehicle cannot be adjusted with
the temperature control lever.
Select the desired climate control mode
using the directional controls on the
instrument panel (see
Directional
Controls
earlier in this section). The
mode you choose will regulate both the
front and rear climate control systems.
Select
RECIRC, UPPER, BI-LEV or
LOWER when outside temperatures
are warm or moderate.
In the
RECIRC mode, or if you press
A/C when the system is in the UPPER
or BI-LEV modes, cooled air will be directed
to the rear
of the vehicle
through the overhead and third-row air
conditioning outlets. If
you select A/C
in the LOWER mode, cooled air will be
directed through the rear floor vent
unless the temperature control lever is
set more than
25 percent toward full
WARM. Such settings will produce
heated air.
So, to receive cooled air
through the rear floor vent, set the
temperature control lever closer to full
COOL (see Rear Air Vents later in this
section).
If
you do not select A/C in the UPPER
or BI-LEV modes, air directed to the
rear of the vehicle will be cabin
temperature.
Select
LOWER, DEFOG or DEF when
outside temperatures are cool. In these
modes, heated air will be directed to the
rear of the vehicle through the rear side
window vents and the rear floor heater
vent.
113
ProCarManuals.com
Page 212 of 276
Service &Appearance Care
21 0
Uniform Tire Quality Grading
The following information relates to the
system developed by the United States
National Highway Traffic Safety
Administration which grades tires by
treadwear, traction and temperature
performance. (This applies only to
vehicles sold in the United States.)
Treadwear
The treadwear grade is a comparative
rating based on the wear rate
of the tire
when tested under controlled conditions
on a specified government
test course. For example, a tire graded
150 would wear one and a half (1 %)
times as well on the government course
as a tire graded
100. The relative
performance of tires depends upon the
actual conditions of their use, however,
and may depart significantly from the
norm due to variations in driving habits,
service practices and differences in road
characteristics and climate.
Traction-A, B, C
The traction grades, from highest to
lowest are:
A, B, and C. They represent
the tire’s ability to stop on wet
pavement as measured under controlled
conditions on specified government test
surfaces of asphalt and concrete.
A tire
marked
C may have poor traction
performance.
Warning: The traction grade assigned to
this tire is based on braking (straight-
ahead) traction tests and does not
include cornering (turning) traction.
Temperature-A, B, C
The temperature grades are A (the
highest)
B, and C, representing the
tire’s resistance to the generation of heat and its
ability to dissipate heat
when tested under controlled
conditions on a specified indoor
laboratory test wheel. Sustained high
temperature can cause the material
of
the tire to degenerate and reduce tire
life, and excessive temperature can lead
to sudden tire failure. The grade
C
corresponds to a level of performance
which all passenger car tires must meet
under the Federal Motor Vehicle Safety
Standard
No. 109. Grades B and A
represent higher levels of performance
on the laboratory test wheel than the
minimum required by law.
Warning: The temperature grade for
this tire is established for a tire that is
properly inflated and not overloaded.
Excessive speed, underinflation, or
excessive loading, either separately or in
combination, can cause heat buildup
and possible tire failure.
These grades are molded
on the
sidewalls of passenger car tires.
While the tires available as standard or
optional equipment on General Motors
vehicles may vary with respect to these
grades, all such tires meet General
Motors performance standards and
ProCarManuals.com