1994 OLDSMOBILE SILHOUETTE brake fluid
[x] Cancel search: brake fluidPage 149 of 276
There is something about an easy
stretch
of road with the same scenery,
along with the hum
of the tires on the
road, the drone
of the engine, and the
rush
of the wind against the vehicle that
can make you sleepy. Don’t let it
happen to you!
If it does, your vehicle
can leave the road in
less than a
second, and you could crash and be
injured.
What can you do about highway
hypnosis? First, be aware that it can
happen.
Then here are some tips:
Make sure your vehicle is well
ventilated, with a comfortably cool
interior.
ahead and to the sides. Check your
mirrors and your instruments
frequently.
If you get sleepy, pull off the road into
a rest, service, or parking area and
take a nap, get some exercise, or both.
For safety, treat drowsiness on the
highway as an emergency.
Keep your eyes moving. Scan the road
I
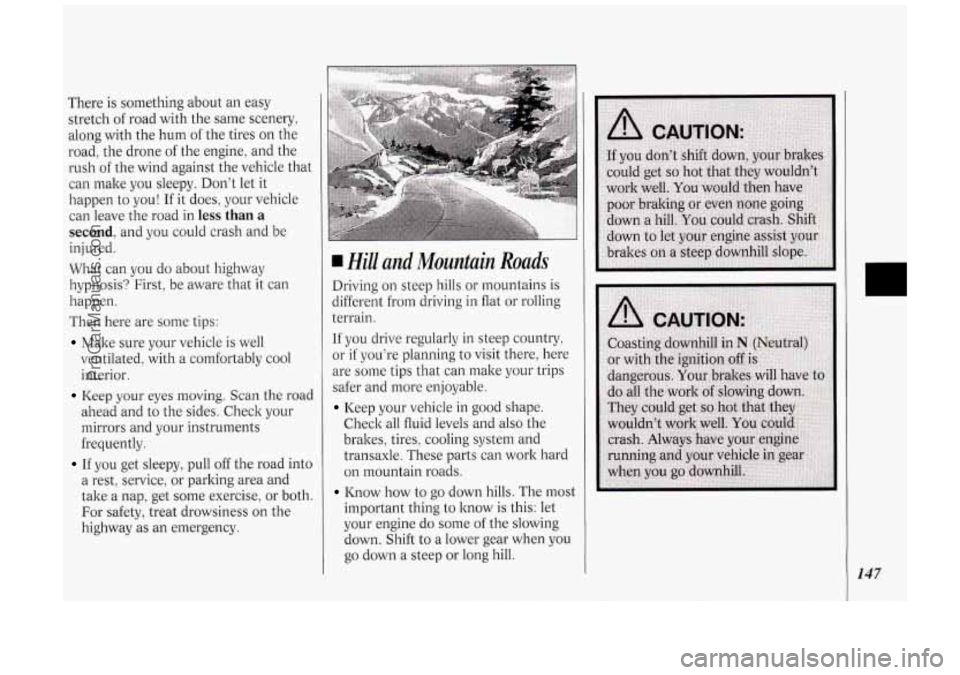
Hill and Mountain Roads
Driving on steep hills or mountains is
different from driving in flat or rolling
terrain.
If you drive regularly in steep countly,
or if you’re planning to visit there, here
are some tips that can make your trips
safer and more enjoyable.
Keep your vehicle in good shape.
Check all fluid levels and also the
brakes, tires, cooling system and
transaxle. These parts can work hard
on mountain roads.
Know how to go down hills. The most
important thing to know
is this: let
your engine do some
of the slowing
down. Shift to a lower gear when you
go down a steep
or long hill.
147
ProCarManuals.com
Page 158 of 276
Your Driving and the Road
156
Parking on Hills
You really should not park your vehicle,
with a trailer attached, on a hill. If
something goes wrong, your rig could
start to move. People can be injured,
and both your vehicle and the trailer
can be damaged.
But
if you ever have to park your rig on
a hill, here’s how to do it:
1. Apply your regular brakes, but don’t
shift into
P (Park) yet.
2. Have someone place choclts under
the trailer wheels.
3. When the wheel chocks are in place,
release the regular brakes until the
chocks absorb the load.
apply your parking brake, and then
shift to
P (Park).
4. Reapply the regular brakes. Then
5. Release the regular brakes.
When You Are Ready to Leave
Affer Parking on a Hill
1. Apply your regular brakes and hold
the pedal down while
you:
Start your engine;
Shift into a gear; and
Release the parking brake.
2. Let up on the brake pedal.
3. Drive slowly until the trailer is clear
4. Stop and have someone pick up and
of
the chocks.
store the chocks.
Maintenance When Trailer Towing
Your vehicle will need service more
often when you’re pulling a trailer. See
the Maintenance Schedule
for more on
this. Things that are especially important in
trailer operation are
automatic transaxle fluid (don’t
overfill), engine oil, belts, cooling
system, and brake adjustment. Each of
these is covered in this manual, and the
Index will help you find them quicltly. If
you’re trailering, it’s a good idea to
review these sections before you start
your trip.
Check periodically to see that all hitch
nuts and bolts are tight.
ProCarManuals.com
Page 183 of 276

Here you will find information about
the care of
your Oldsmobile . This
part begins with service and fuel
information. and then it shows how
to check important fluid and
lubricant levels
. There is also
technical information about
your
vehicle. and a section devoted to its
appearance care
.
Part 6
Service & Appearance Care
Service ........................................................................\
............................................. 182
Fuel
........................................................................\
.................................................. 183
Hood Release ........................................................................\
................................... 186
Engine Oil ........................................................................\
........................................ 190
Air Cleaner
........................................................................\
...................................... 194
Transaxle Fluid
........................................................................\
................................ 195
Engine Coolant
........................................................................\
................................ 197
Power Steering Fluid
........................................................................\
....................... 199
Windshield Washer Fluid
........................................................................\
................ 200
Brakes
........................................................................\
.............................................. 201
Battery
........................................................................\
............................................. 203
Bulb Replacement
........................................................................\
........................... 203
Windshield Wiper Blade Replacement
................................................................... 205
Loading Your Vehicle
........................................................................\
..................... 206
Tires
........................................................................\
................................................. 207
Appearance Care ........................................................................\
............................. 212
Vehicle Identification Number (VIN)
.................................................................... 218
Add-on Electrical Equipment
........................................................................\
........ 219
Fuses & Circuit Breakers ........................................................................\
................ 219
Capacities and Specifications
........................................................................\
......... 224
Normal Maintenance Replacement Parts
............................................................... 226
Fluids
& Lubricants ........................................................................\
........................ 227
Replacement
Bulbs ........................................................................\
.......................... 228
181
ProCarManuals.com
Page 190 of 276
Service &Appearance Care
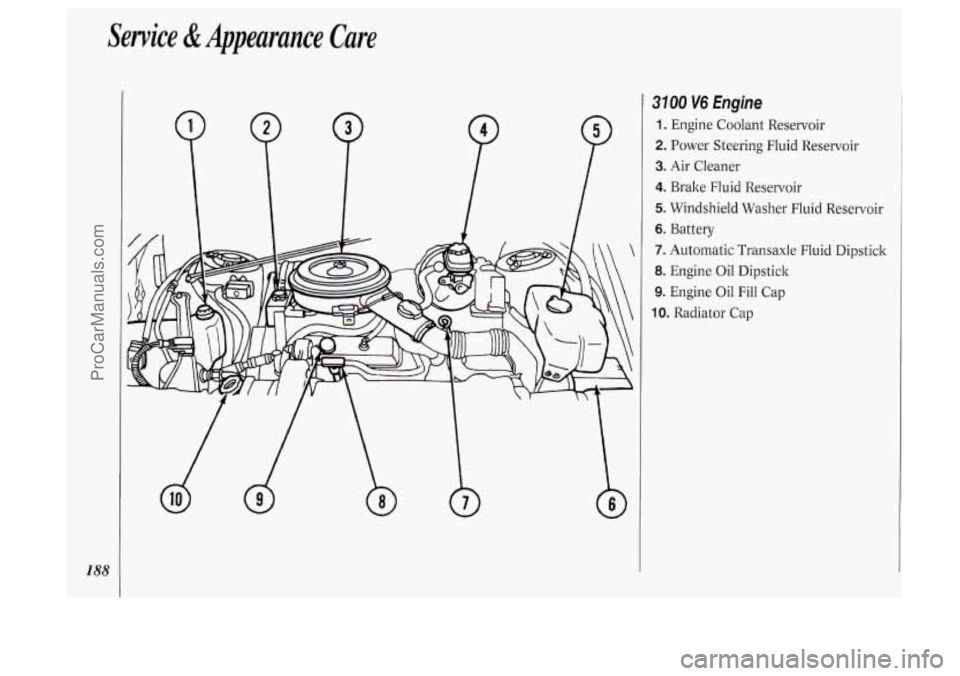
3100 V6 Engine
1. Engine Coolant Reservoir
2. Power Steering Fluid Reservoir
3. Air Cleaner
4. Brake Fluid Reservoir
5. Windshield Washer Fluid Reservoi
6. Battery r
7. Automatic
Transaxle Fluid Dipstick
8. Engine Oil Dipstick
9. Engine Oil Fill Cap
10. Radiator Cap
ProCarManuals.com
Page 191 of 276
P
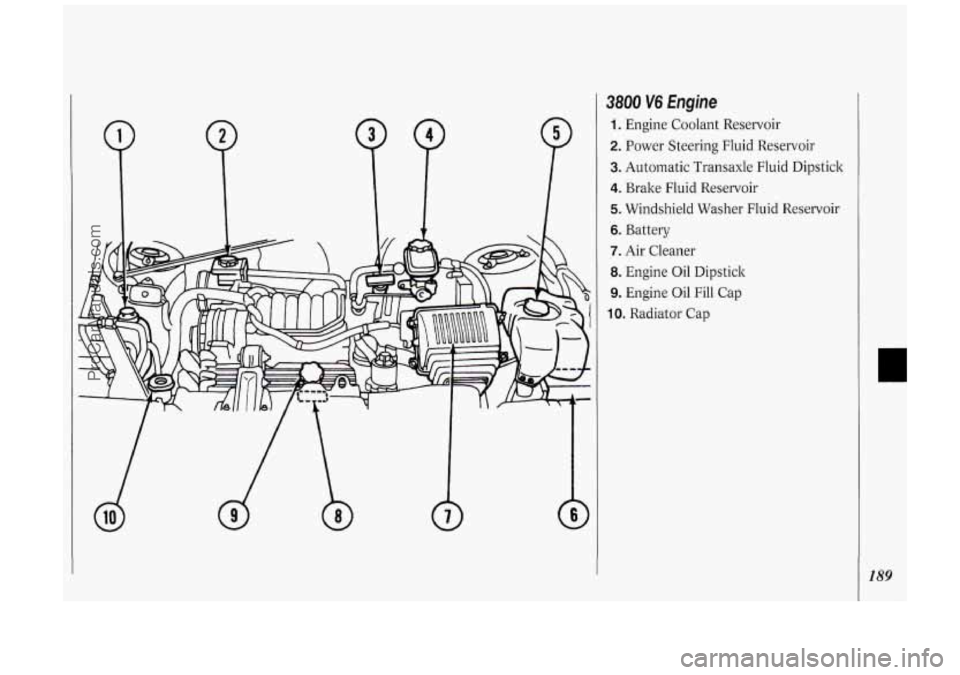
3800 V6 Engine
1. Engine Coolant Reservoir
2. Power Steering Fluid Reservoir
3. Automatic Transaxle Fluid Dipstick
4. Brake Fluid Reservoir
5. Windshield Washer Fluid Reservoir
6. Battery
7. Air Cleaner
8. Engine Oil Dipstick
9. Engine Oil Fill Cap
10. Radiator Cap
189
ProCarManuals.com
Page 198 of 276
Service &Appearance Care
196
To get the right reading, the fluid
should be at normal operating
temperature, which is
180°F to 200°F
(82°C to 93°C).
Get the vehicle warmed up by driving
about
15 miles (24 ltm) when outside
temperatures are above
50°F (10°C). If
it's colder than 50°F ( 10°C), you may
have to drive longer.
To Check the Fluid Level
Park your vehicle on a level place.
With the parking brake applied, place
With your foot on the brake pedal,
the
shift lever in
P (Park).
move the shift lever through each gear
range, pausing for about three
seconds in each range. Then, position
the shift lever in
P (Park).
Let the engine run at idle for three to
five minutes.
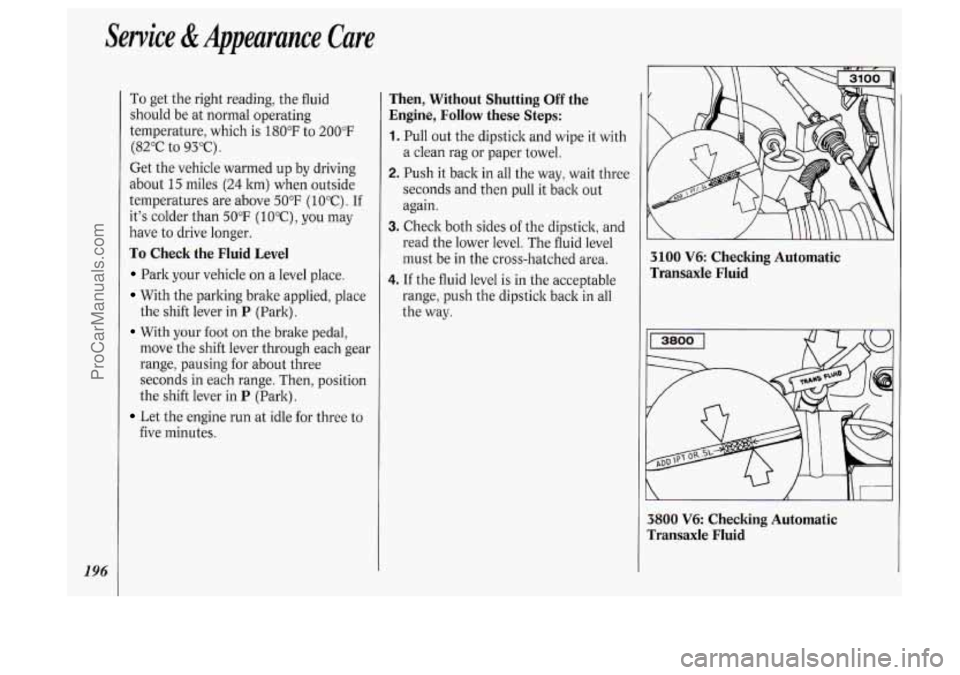
Then, Without Shutting Off the
Engine, Follow these Steps:
1. Pull out the dipstick and wipe it with
a clean rag or paper towel.
2. Push it back in all the way, wait three
seconds and then pull it back out
again.
3. Check both sides of the dipstick, and
read the lower level. The fluid level
must be in the cross-hatched area.
4. If the fluid level is in the acceptable
range, push the dipstick back in all
the way.
3100 V6: Checking Automatic
rransaxle Fluid
3800 V6: Checking Automatic
rransaxle Fluid
ProCarManuals.com
Page 203 of 276
NOTICE:
When using concentrated washer
fluid, follow the manufacturer’s
instructions for adding water.
Don’t mix water with ready-to-
use washer fluid. Water can cause
the solution to freeze and damage
your washer fluid tank and other
parts of the washer system. Also,
water doesn’t clean as well as
washer fluid.
Fill your washer fluid tank only %
full when it’s very cold. This
allows for expansion, which could
damage the tank
if it is
completely full.
Don’t use radiator antifreeze in
your windshield washer. It can
damage your washer system and
paint.
I
Brakes
Brake Master Cylinder
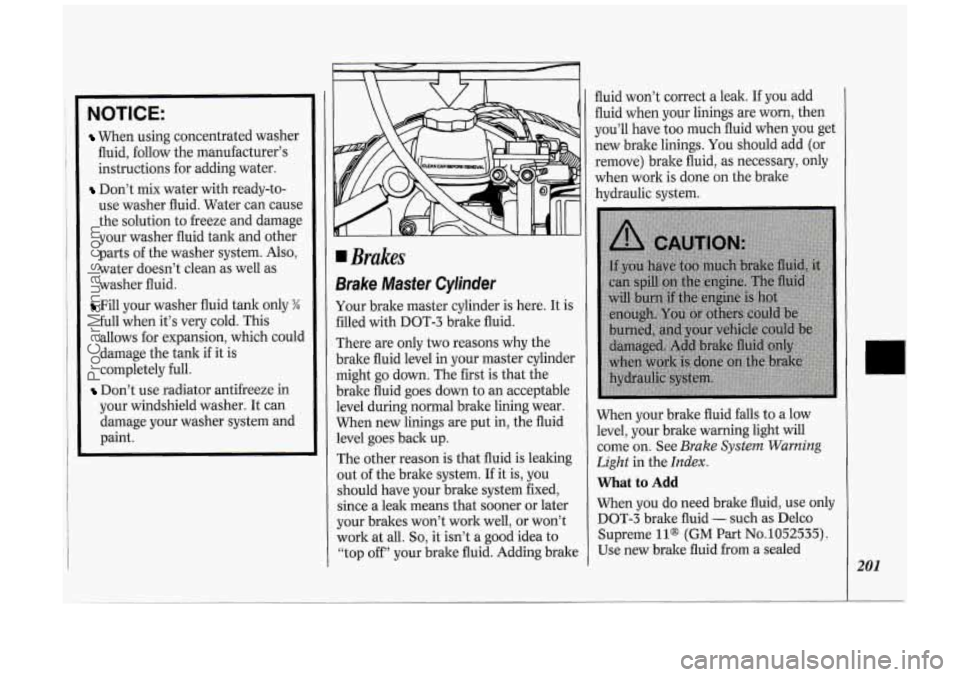
Your brake master cylinder is here. It is
filled with DOT-3 brake fluid.
There are only
two reasons why the
brake fluid level in your master cylinder
might go down. The first is that the
brake fluid goes down to an acceptable
level during normal brake lining wear.
When new linings are put in, the fluid
level goes back up.
The other reason is that fluid is leaking
out of the brake system. If it is, you
should have your brake system fixed,
since a leak means that sooner or later
your brakes won’t work well, or won’t
work at all.
So, it isn’t a good idea to
“top off’’ your brake fluid. Adding brake fluid
won’t correct a leak. If you add
fluid when your linings are worn, then
you’ll have too much fluid when you get
new brake linings. You should add (or
remove) brake fluid, as necessary, only
when work is done on the brake
hydraulic system.
When your brake fluid falls to a low
level, your brake warning light will
come on. See
Brake System Warning
Light
in the Index.
What to Add
When you do need brake fluid, use only
DOT-3 brake fluid
- such as Delco
Supreme
ll@ (GM Part No.1052535).
Use new brake fluid from a sealed
201
ProCarManuals.com
Page 204 of 276
Service & Appearance Care
202
container only, and always clean the
brake fluid reservoir cap before
removing it.
NOTICE:
DOT-5 silicone brake fluid can
Don’t let someone put in the
damage
your vehicle. Don’t use it.
wrong kind of fluid. For example,
just a few drops of mineral-based
oil, such
as engine oil, in your
brake system can damage brake
system parts
so badly that they’ll
have to be replaced.
Brake fluid can damage paint, so
be careful not to spill brake fluid
on your vehicle. If you do, wash it
off immediately. See
Appearance
Care
in the Index.
Brake Wear
Your Oldsmobile has front disc brakes
and rear drum brakes.
Disc brake pads have built-in wear
indicators that make
a high-pitched
warning sound when the brake pads are worn
and new pads are needed. The
sound may come and go or be heard all
the time your vehicle is moving (except
when you are pushing on the brake
pedal firmly).
NOTICE:
Continuing to drive with worn-out
brake pads could result in costly
brake repair.
Some driving conditions or climates
may cause
a brake squeal when the
brakes are first applied or lightly
applied. This does not mean something
is wrong with your brakes. Your
rear drum brakes don’t have wear
indicators, but if you ever hear a rear
brake rubbing noise, have the rear brake
linings inspected. Also, the rear brake
drums should be removed and
inspected each time the tires are
removed for rotation or changing. When
you have the front brakes replaced,
have the rear brakes inspected, too.
Brake linings should always be replaced
as complete axle sets.
Brake Pedal Travel
See your dealer if the brake pedal does
not return to normal height, or if there
is a rapid increase in pedal travel. This
could be a sign of brake trouble.
Brake Adjustment
Every time you apply the brakes
moderately, with or without the vehicle
moving, your brakes adjust for wear.
ProCarManuals.com