1994 OLDSMOBILE SILHOUETTE warning
[x] Cancel search: warningPage 10 of 276
How to Use this Manual
Safety Warnings and Symbols
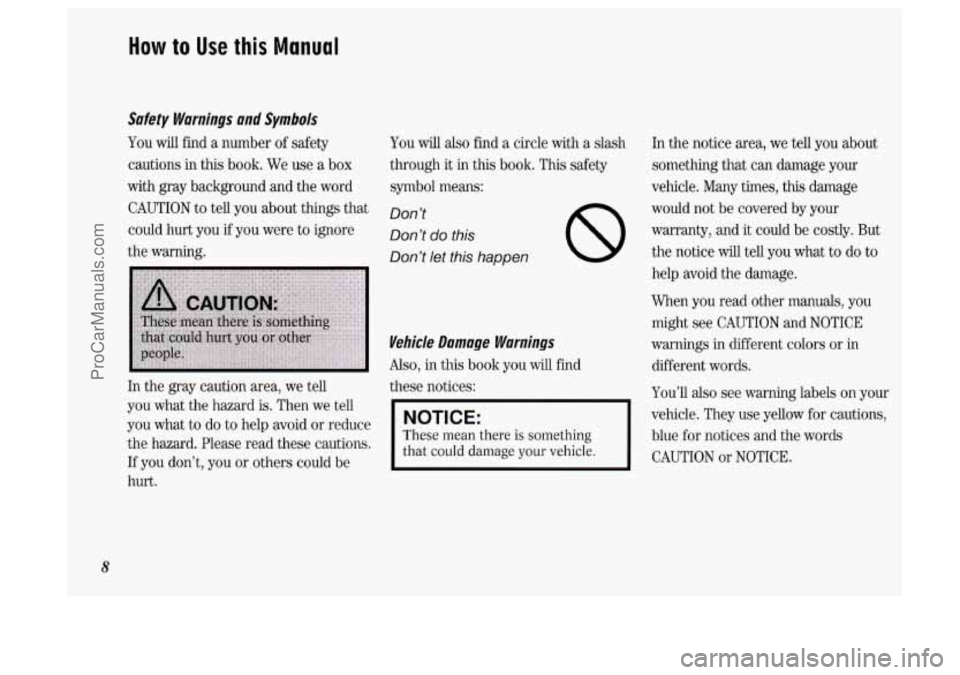
You will find a number of safety
cautions
in this book. We use a box
with gray background and the word
CAUTION to tell you about things that
could hurt you if you were to ignore
the warning.
In the gray caution area, we tell
you what the hazard is. Then we tell
you what to do to help avoid or reduce
the hazard. Please read these cautions.
If you don’t, you or others could be
hurt.
8
You will also find a circle with a slash
through it in this book. This safety
symbol means:
Don’t
Don’t
do this
Don’t let this happen
Vehic/e Damage Warnings
Also, in this book you will find
these notices:
NOTICE:
These mean there is something
that
could damage your vehicle. In the notice area,
we tell you about
something that can damage your
vehicle. Many times, this damage
would not be covered
by your
warranty, and
it could be costly. But
the notice will tell you what to do to
help avoid the damage.
Wen you read other manuals, you
might see CAUTION
and NOTICE
warnings in different colors or
in
different words.
You’ll also see warning labels on your
vehicle. They use yellow for cautions,
blue
for notices and the words
CAUTION or NOTICE.
ProCarManuals.com
Page 11 of 276
Vehicle Symbols
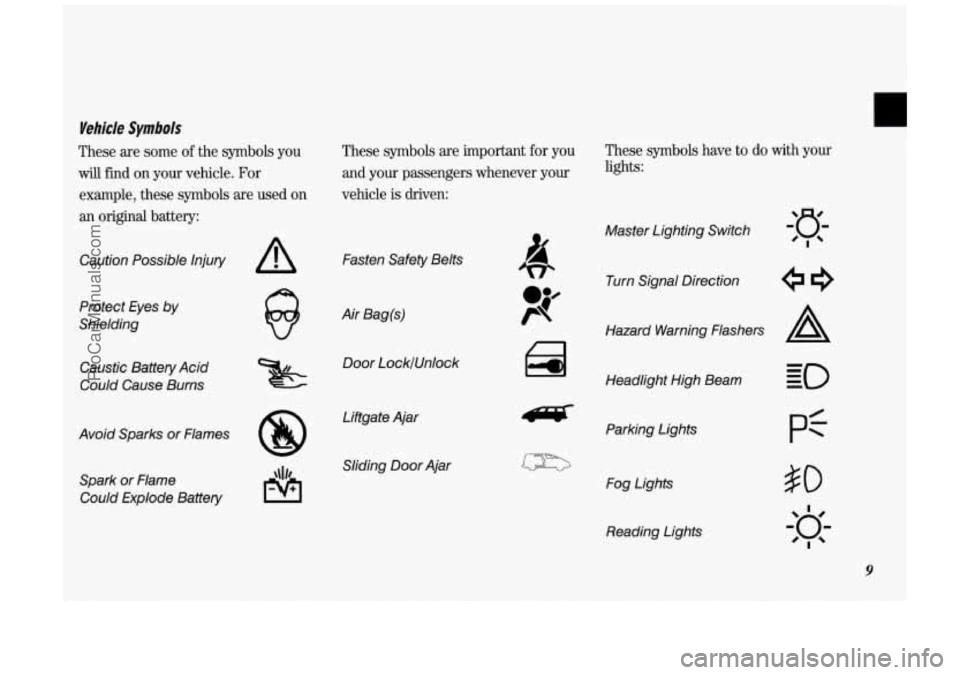
These are some of the symbols you
will find on your vehicle. For
example, these symbols are used
on
an original battery: These symbols are important
for you
and your passengers whenever your
vehicle
is driven:
Caution Possible Injury
Protect Eyes
by
Shielding
Caustic Battery Acid
Could Cause Burns
Avoid Sparks or Flames Spark or Flame Could Explode Battery
A
8
Fasten Safety Belts
Air Bag(s) Door LockfUnlock
Liftgate Ajar Sliding
Door Ajar
These symbols have to do with your
lights:
Master Lighting Switch
Turn Signal Direction
Hazard Warning Flashers
A
Headlight High Beam Parking Lights
Fog Lights Reading Lights
pf
9
ProCarManuals.com
Page 12 of 276
How to Use this Manual
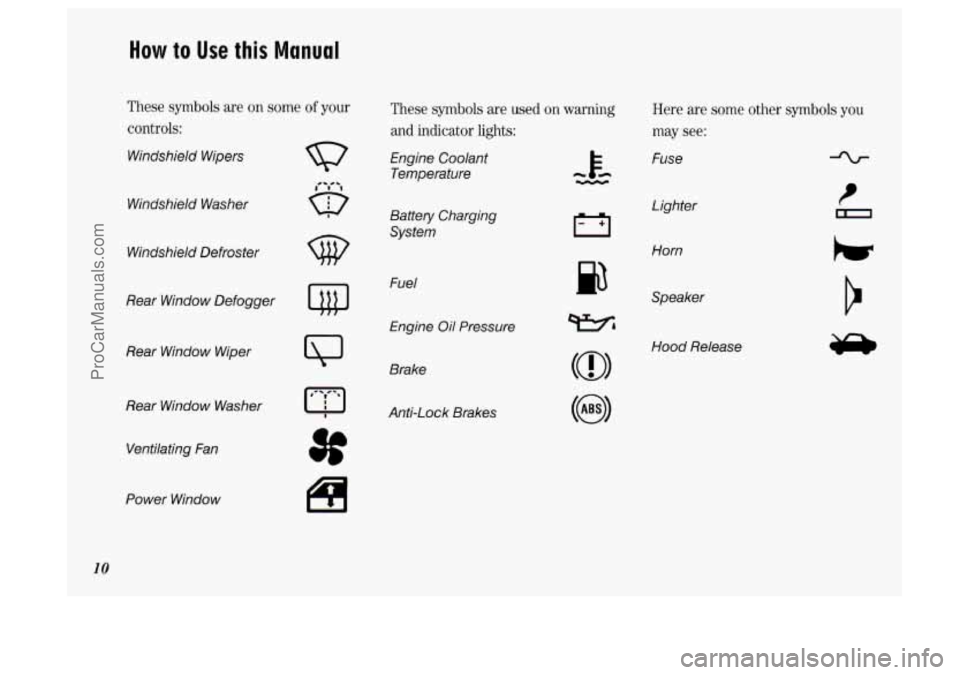
These symbols are on some of your
controls:
Windshield Wipers
Windshield Washer
w
Windshield Defroster
Rear Window Defogger
Rear Window Wiper
Rear Window Washer Ventilating Fan
Power Window
10
3f
These symbols are used on warning
and indicator lights:
Engine Coolant Temperature
Battery Charging
System
Fuel
Engine
Oil Pressure
Brake
AntXock Brakes
p3
Here are some other symbols you
may see:
Fuse
Lighter
Horn
Speaker
Hood Release
ProCarManuals.com
Page 45 of 276
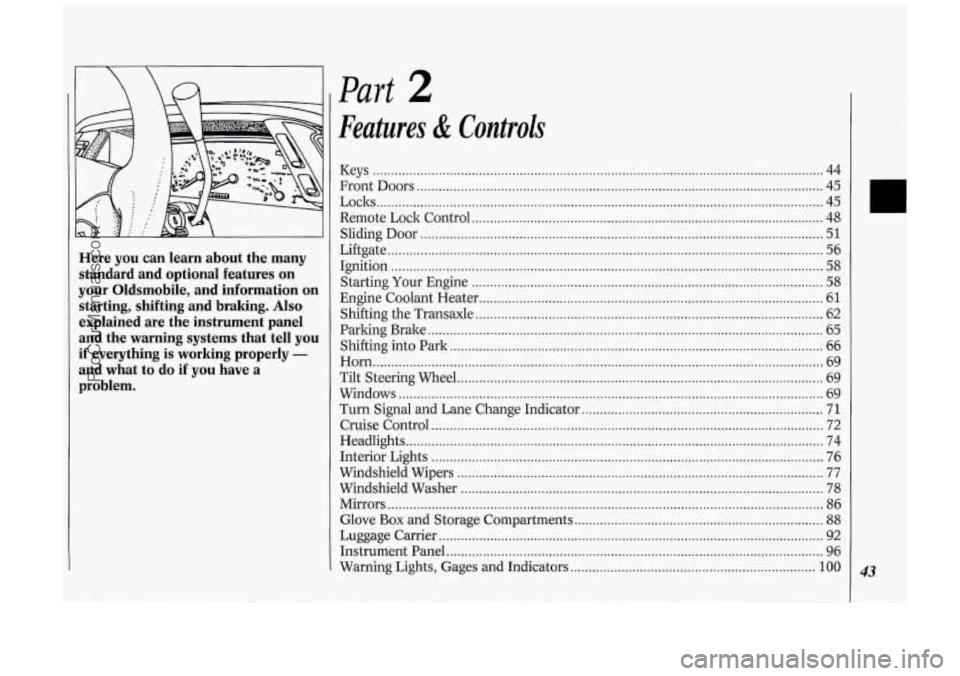
Here you can learn about the many standard and optional features on
your Oldsmobile. and information on
starting. shifting and braking
. Also
explained are the instrument panel
and the warning systems that tell you
if everything is working properly -
and what to do if you have a
problem
.
Part 2
Features & Controls
Keys ........................................................................\
................................................... 44
Front Doors
........................................................................\
....................................... 45
Remote Lock Control
........................................................................\
........................ 48
Liftgate
........................................................................\
............................................... 56
Starting Your Engine
........................................................................\
........................ 58
Engine Coolant Heater ........................................................................\
...................... 61
Loclts
........................................................................\
.................................................. 45
Sliding Door
........................................................................\
...................................... 51
Ignition ........................................................................\
.............................................. 58
Shifting the Transaxle
........................................................................\
....................... 62
Parking Brake
........................................................................\
.................................... 65
Shifting into Park
........................................................................\
.............................. 66
Horn ........................................................................\
................................................... 69
Tilt Steering Wheel
........................................................................\
............................ 69
Windows
........................................................................\
............................................ 69
Turn Signal and Lane Change Indicator
.................................................................. 71
Cruise Control ........................................................................\
................................... 72
Headlights
........................................................................\
.......................................... 74
Interior Lights
........................................................................\
................................... 76
Windshield Wipers
........................................................................\
............................ 77
Windshield Washer
........................................................................\
........................... 78
Mirrors
........................................................................\
............................................... 86
Glove
Box and Storage Compartments .................................................................... 88
Luggage Carrier ........................................................................\
................................. 92
Instrument Panel
........................................................................\
............................... 96
Warning Lights, Gages and Indicators
................................................................... 100 43
ProCarManuals.com
Page 55 of 276
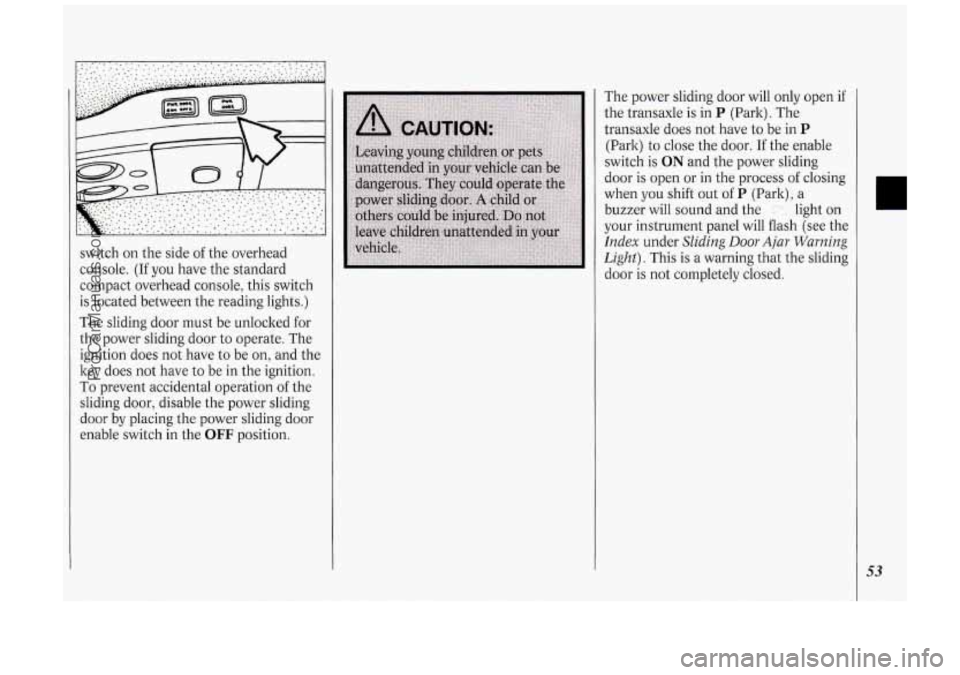
switch on the side of the overhead
console. (If you have the standard
compact overhead console, this switch
is located between the reading lights.)
The sliding door must be unlocked for
the power sliding door to operate. The
ignition does not have to be on, and the
key does not have to be in the ignition.
To prevent accidental operation
of the
sliding door, disable the power sliding
door by placing the power sliding door
enable switch in the
OFF position. The
power sliding door will only open if
the transaxle is in
P (Park). The
transaxle does not have to be in
P
(Park) to close the door. If the enable
switch is
ON and the power sliding
door is open or in the process
of closing
when you shift out of
P (Park), a
buzzer will sound and the '- -. light on
your instrument panel will flash (see the
Index under Sliding Door Ajar Warning
Light).
This is a warning that the sliding
door
is not completely closed.
c
53
ProCarManuals.com
Page 59 of 276
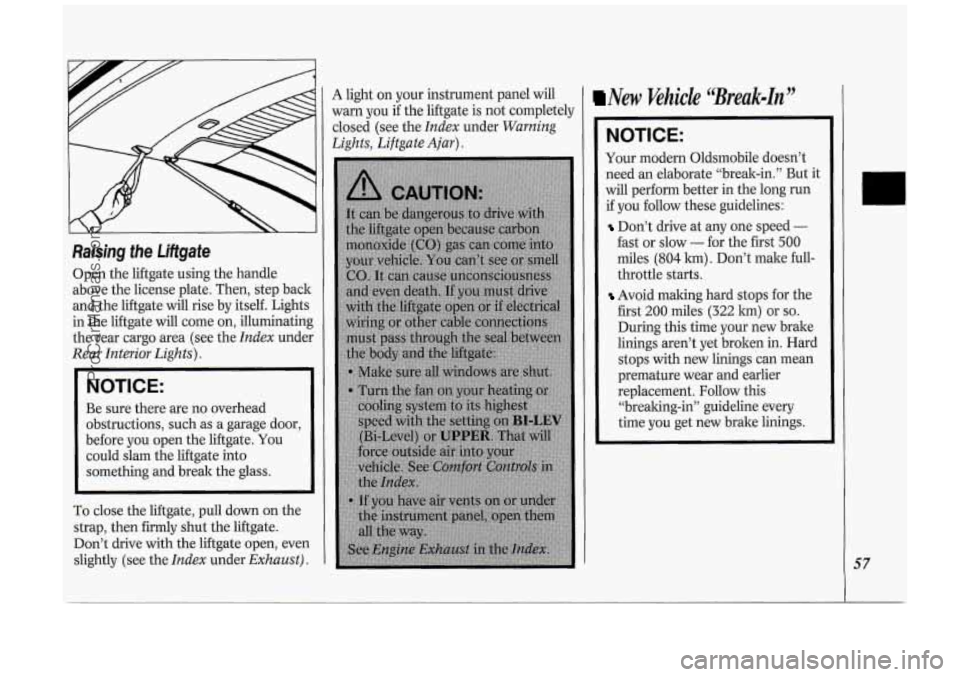
Raising the Liftgate
Open the liftgate using the handle
above the license plate. Then, step back
and the liftgate will rise by itself. Lights
in the liftgate will come on, illuminating
the rear cargo area (see the
Index under
Rear Interior Lights).
NOTICE:
Be sure there are no overhead
obstructions, such as a garage door,
before you open the liftgate. You
could slam the liftgate into
something and break the glass.
To close the liftgate, pull down on the
strap, then firmly shut the liftgate.
Don’t drive with the liftgate open, even
slightly (see the
Index under Exhaust).
A light on your instrument panel will
warn you
if the liftgate is not completely
closed (see the
Index under Warning
Lights, Liftgate Ajar).
New Vehicle “Break-In”
NOTICE:
Your modern Oldsmobile doesn’t
need an elaborate “break-in.” But it
will perform better in the long run
if you follow these guidelines:
Don’t drive at any one speed -
fast or slow - for the first 500
miles (804 km) . Don’t make full-
throttle starts.
Avoid making hard stops for the
first
200 miles (322 km) or so.
During this time your new brake
linings aren’t yet broken in. Hard
stops with new linings can mean
premature wear and earlier
replacement. Follow this
“breaking-in” guideline every
time you get new brake linings.
57
ProCarManuals.com
Page 60 of 276

Features & Con&oli
58
U
I Ignition Switch
With the ignition key in the ignition
switch, you can turn the switch to five
positions:
Accessory: An “on” position in which
you can operate your electrical power
accessories. Press in the ignition switch
as you turn the top
of it toward you.
Lock: The only position in which you
can remove the ltey. This loclts your
steering wheel, ignition and transaxle.
Off Unlocks the steering wheel,
ignition, and transaxle, but does not
send electrical power to any accessories
Use this position
if your vehicle must be
pushed or towed, but never try to push-
start your vehicle.
A warning chime will
sound
if you open the driver’s door the
ignition.
Run: An “on” position to which the
switch returns after you start your
engine and release the switch. The
switch stays in the
Run position when
the engine is running. But even when
the engine is not running, you can use
Run to operate your electrical power
accessories, and to display some
instrument panel warning lights.
Start: Starts the engine. When the
engine starts, release the ltey. The
ignition switch will return to
Run for
normal driving.
Note that even if the engine is not
running, the positions
Accessory and
Run are “on” positions that allow you
to operate your electrical accessories,
such as the radio.
NOTICE:
If your key seems stuck in Lock
and you can’t turn it, be sure it is
all the way in. If it is, then turn the
steering wheel left and right while
you turn the key hard. But turn the
key only with your hand. Using a
tool
to force it could break the key
or the ignition switch. If none of
this works, then your vehicle needs
service.
I Starting Your Engine
Engines start differently. The 8th digit
of your Vehicle Identification Number
(VIN) shows the code letter or number
for your engine.
You will find the VIN
at the top left of your instrument panel.
(See
Vehicle Identification Number in
the
Index.) Follow the proper steps to
start the engine.
Move your shift lever
to P (Park) or N
(Neutral). Your engine won’t start in
any other position
- that’s a safety
feature.
To restart when you’re already
moving, use
N (Neutral) only.
ProCarManuals.com
Page 67 of 276
ud. If the selector lever is put in 1, thc
ansaxle won’t shift into first gear unti
le vehicle is going slowly enough.
NOTICE:
If your front wheels can’t rotate,
don’t try to drive.
This might
happen
if you were stuck in very
deep sand or mud or were up
against a solid object.
You could
damage your transaxle. Also,
if you
stop when going uphill, don’t hold
your vehicle there with only the
accelerator pedal. This could
overheat and damage the transaxle.
Use your brakes or shift into
P
(Park) to hold your vehicle in
position on a hill.
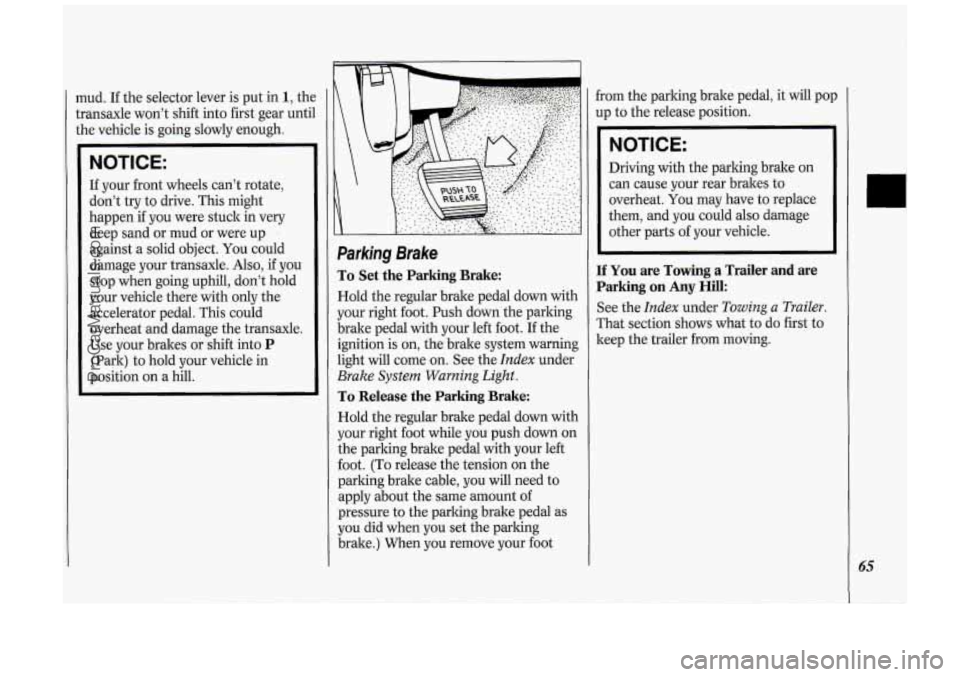
Parking Brake
To Set the Parking Brake:
Hold the regular brake pedal down with
your right foot. Push down the parking
brake pedal with your left foot. If the
ignition is on, the brake system warning
light will come
on. See the Index under
Brake System Warning Light.
To Release the Parking Brake:
Hold the regular brake pedal down with
your right foot while you push down on
the parking brake pedal with your left
foot. (To release the tension on the
parking brake cable, you will need to
apply about the same amount of
pressure to the parking brake pedal as
you did when you set the parking
brake.) When you remove your foot from
the parking brake pedal, it will pop
up to the release position.
NOTICE:
Driving with the parking brake on
can cause your rear brakes to
overheat.
You may have to replace
them, and you could also damage
other parts of your vehicle.
If You are Towing a Trailer and are
Parking on
Any Hill:
See the Index under Towing a Trailer.
That section shows what to do first to
keep the trailer from moving.
ProCarManuals.com