1994 OLDSMOBILE SILHOUETTE power steering
[x] Cancel search: power steeringPage 60 of 276

Features & Con&oli
58
U
I Ignition Switch
With the ignition key in the ignition
switch, you can turn the switch to five
positions:
Accessory: An “on” position in which
you can operate your electrical power
accessories. Press in the ignition switch
as you turn the top
of it toward you.
Lock: The only position in which you
can remove the ltey. This loclts your
steering wheel, ignition and transaxle.
Off Unlocks the steering wheel,
ignition, and transaxle, but does not
send electrical power to any accessories
Use this position
if your vehicle must be
pushed or towed, but never try to push-
start your vehicle.
A warning chime will
sound
if you open the driver’s door the
ignition.
Run: An “on” position to which the
switch returns after you start your
engine and release the switch. The
switch stays in the
Run position when
the engine is running. But even when
the engine is not running, you can use
Run to operate your electrical power
accessories, and to display some
instrument panel warning lights.
Start: Starts the engine. When the
engine starts, release the ltey. The
ignition switch will return to
Run for
normal driving.
Note that even if the engine is not
running, the positions
Accessory and
Run are “on” positions that allow you
to operate your electrical accessories,
such as the radio.
NOTICE:
If your key seems stuck in Lock
and you can’t turn it, be sure it is
all the way in. If it is, then turn the
steering wheel left and right while
you turn the key hard. But turn the
key only with your hand. Using a
tool
to force it could break the key
or the ignition switch. If none of
this works, then your vehicle needs
service.
I Starting Your Engine
Engines start differently. The 8th digit
of your Vehicle Identification Number
(VIN) shows the code letter or number
for your engine.
You will find the VIN
at the top left of your instrument panel.
(See
Vehicle Identification Number in
the
Index.) Follow the proper steps to
start the engine.
Move your shift lever
to P (Park) or N
(Neutral). Your engine won’t start in
any other position
- that’s a safety
feature.
To restart when you’re already
moving, use
N (Neutral) only.
ProCarManuals.com
Page 72 of 276
Features & Conkoh
70
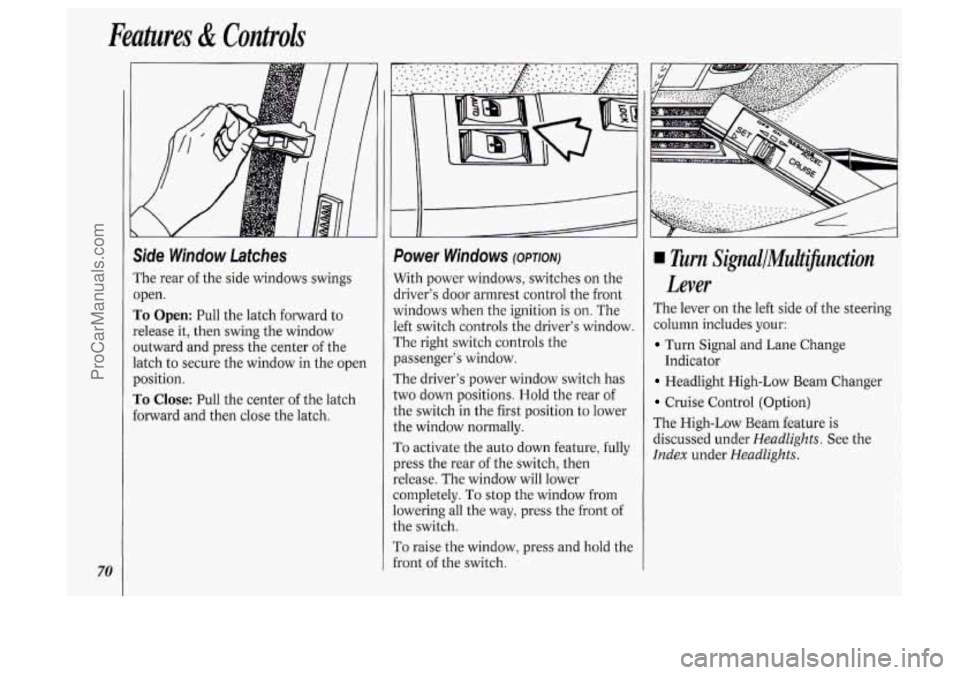
Side Window Latches
The rear of the side windows swings
open.
To Open: Pull the latch forward to
release it, then swing the window
outward and press the center
of the
latch to secure the window in the open
position.
To Close: Pull the center of the latch
forward and then close the latch.
I
f
Power Windows (OPTION)
With power windows, switches on the
driver's door armrest control the front
vindows when the ignition is
on. The
.eft switch controls the driver's window.
The right switch controls the
?assenger's window.
The driver's power window switch has
:wo down positions. Hold the rear
of
:he switch in the first position to lower
:he window normally.
To activate the auto down feature, fully
?res the rear
of the switch, then
:elease. The window will lower
:ompletely.
To stop the window from
owering all the way, press the front of
:he switch.
r'o raise the window, press and hold the
i-ont
of the switch.
Turn SignallMultifinction
Lever
The lever on the left side of the steering
column includes your:
Turn Signal and Lane Change
Headlight High-Low Beam Changer
Cruise Control (Option)
The High-Low Beam feature is
discussed under
Headlights. See the
Index under HeadZights.
Indicator
ProCarManuals.com
Page 129 of 276
1. Turn the ignition on. (Radio off.)
2. Press the SET button. The display
will show 000.
3. Enter the six digits of the code
following steps
6-9 above. The
display will show the numbers as
entered.
4. Press the AM/FM button and the
time appears, indicating that the
disabling sequence was successful. If
the display indicates
SEC, the
numbers did not match and the unit
is still secured.
Disabling the Anti-Theft System:
1. Press PREV and FF together for five
seconds with the ignition on and
radio power
off. The display will
show
SEC, indicating the unit is in
the secure mode. (If
"- - -" appears on
the display, the anti-theft system has
already been disabled.)
2. Press the SET button. The display
will show
000.
3. Enter the first three digits of the code
following steps
6 and 7 of the
preceding paragraphs. The display will
show the numbers
as entered.
4. Press AM/FM. The radio will display
000.
5. Repeat steps 6 and 7 to enter the
second three digits of the code. The
display will show the numbers as
entered.
6. Press AM/FM. If "- - -" then the time
appears, the disabling sequence was
successful (the numbers matched the
secret code) and the unit
is in the
UNSECURED mode. If the display
shows
SEC, the disabling sequence
was unsuccessful (the numbers did
not match) and the unit will remain
in the
SECURED mode.
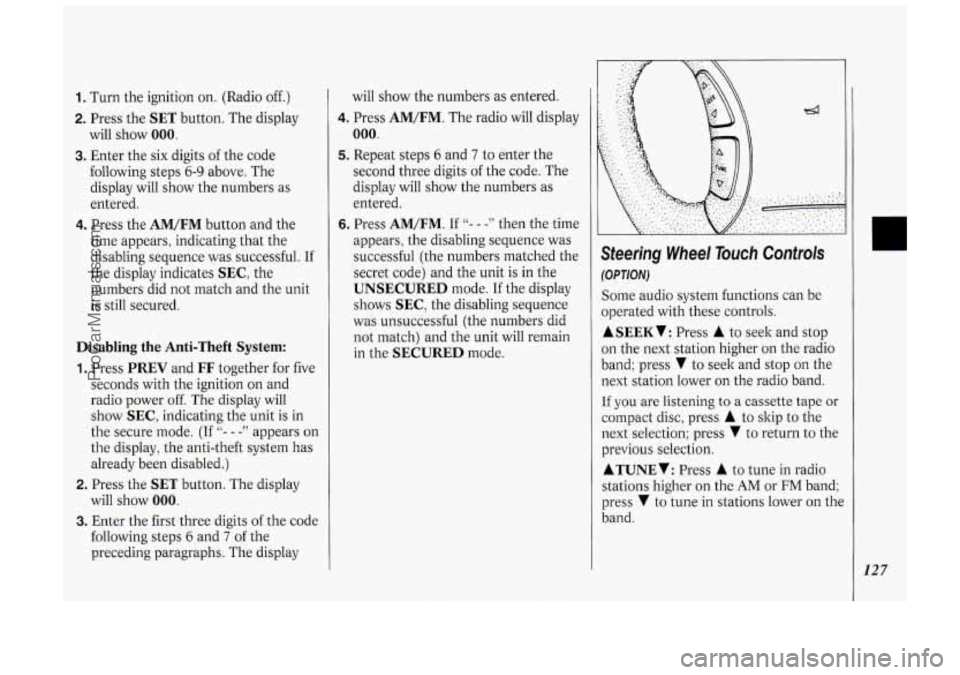
Steering Wheel Touch Controls
(OPTION)
Some audio system functions can be
operated with these controls.
ASEEKV: Press A to seek and stop
on the next station higher on the radio
band; press
V to seek and stop on the
next station lower on the radio band.
If you are listening to a cassette tape or
compact disc, press
A to skip to the
next selection; press
V to return to the
previous selection.
ATUNEV: Press A to tune in radio
stations higher on the
AM or FM band;
press
V to tune in stations lower on the
band.
127
ProCarManuals.com
Page 140 of 276
Your Driving and the Road
138
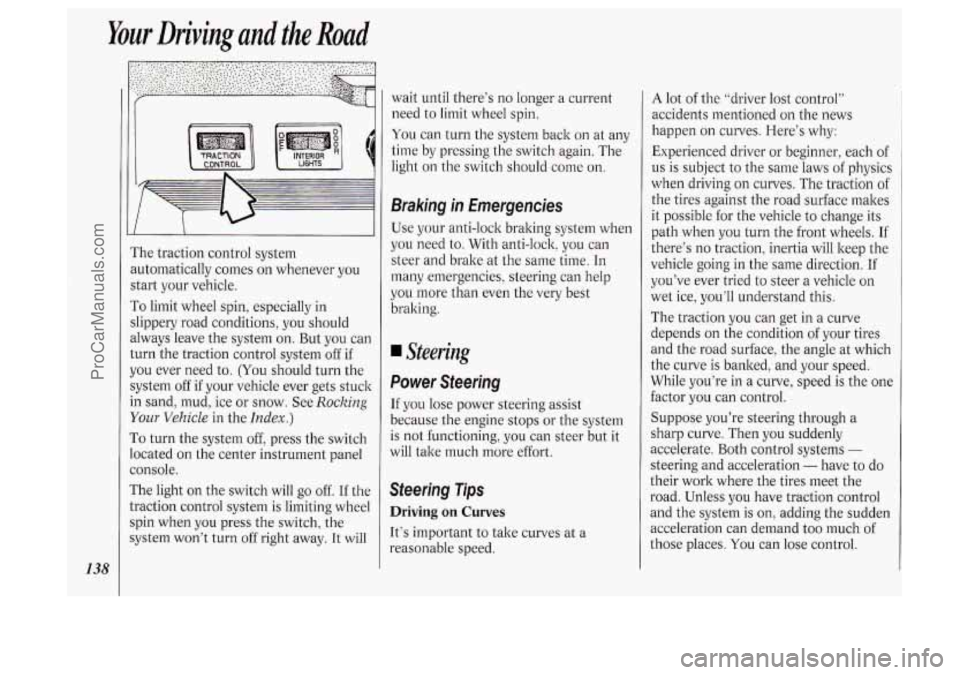
I’he traction control system
mtomatically comes
on whenever you
start your vehicle.
To limit wheel spin, especially in
slippery road conditions, you should
dways leave the system on. But you can
:urn the traction control system off if
IOU ever need to. (You should turn the
;ystem off
if your vehicle ever gets stuck
n sand, mud, ice or snow. See Rocking
Your Vehicle in the Index.)
To turn the system off, press the switch
ocated on the center instrument panel
:onsole.
The light on the switch will go
off. If the
Lraction control system is limiting wheel
;pin when you press the switch, the
;ystem won’t turn
off right away. It will wait until
there’s
no longer a current
need to limit wheel spin.
You can turn the system back on at any
time by pressing the switch again. The
light
on the switch should come on.
Braking in Emergencies
Use your anti-lock braking system when
you need to. With anti-lock, you can
steer and brake at the same time.
In
many emergencies, steering can help
you more than even the very best
braking.
Steering
Power Steering
If you lose power steering assist
because the engine stops or the system
is not functioning, you can steer but it
will take much more effort.
Steering Tips
Driving on Curves
It’s important to take curves at a
reasonable speed.
A lot of the “driver lost control”
accidents mentioned on the news
happen
on curves. Here’s why:
Experienced driver or beginner, each of
us is subject to the same laws of physics
when driving
on curves. The traction of
the tires against the road surface makes
it possible for the vehicle to change its
path when you turn the front wheels. If
there’s
no traction, inertia will keep the
vehicle going in the same direction.
If
you’ve ever tried to steer a vehicle on
wet ice, you’ll understand this.
The traction you can get in a curve
depends
on the condition of your tires
and the road surface, the angle at which
the curve is banked, and your speed.
While you’re in a curve, speed
is the one
factor you can control.
Suppose you’re steering through a
sharp curve. Then you suddenly
accelerate. Both control systems
-
steering and acceleration - have to do
their work where the tires meet the
road. Unless you have traction control
and the system is on, adding the sudden
acceleration can demand too much
of
those places. You can lose control.
ProCarManuals.com
Page 183 of 276

Here you will find information about
the care of
your Oldsmobile . This
part begins with service and fuel
information. and then it shows how
to check important fluid and
lubricant levels
. There is also
technical information about
your
vehicle. and a section devoted to its
appearance care
.
Part 6
Service & Appearance Care
Service ........................................................................\
............................................. 182
Fuel
........................................................................\
.................................................. 183
Hood Release ........................................................................\
................................... 186
Engine Oil ........................................................................\
........................................ 190
Air Cleaner
........................................................................\
...................................... 194
Transaxle Fluid
........................................................................\
................................ 195
Engine Coolant
........................................................................\
................................ 197
Power Steering Fluid
........................................................................\
....................... 199
Windshield Washer Fluid
........................................................................\
................ 200
Brakes
........................................................................\
.............................................. 201
Battery
........................................................................\
............................................. 203
Bulb Replacement
........................................................................\
........................... 203
Windshield Wiper Blade Replacement
................................................................... 205
Loading Your Vehicle
........................................................................\
..................... 206
Tires
........................................................................\
................................................. 207
Appearance Care ........................................................................\
............................. 212
Vehicle Identification Number (VIN)
.................................................................... 218
Add-on Electrical Equipment
........................................................................\
........ 219
Fuses & Circuit Breakers ........................................................................\
................ 219
Capacities and Specifications
........................................................................\
......... 224
Normal Maintenance Replacement Parts
............................................................... 226
Fluids
& Lubricants ........................................................................\
........................ 227
Replacement
Bulbs ........................................................................\
.......................... 228
181
ProCarManuals.com
Page 190 of 276
Service &Appearance Care
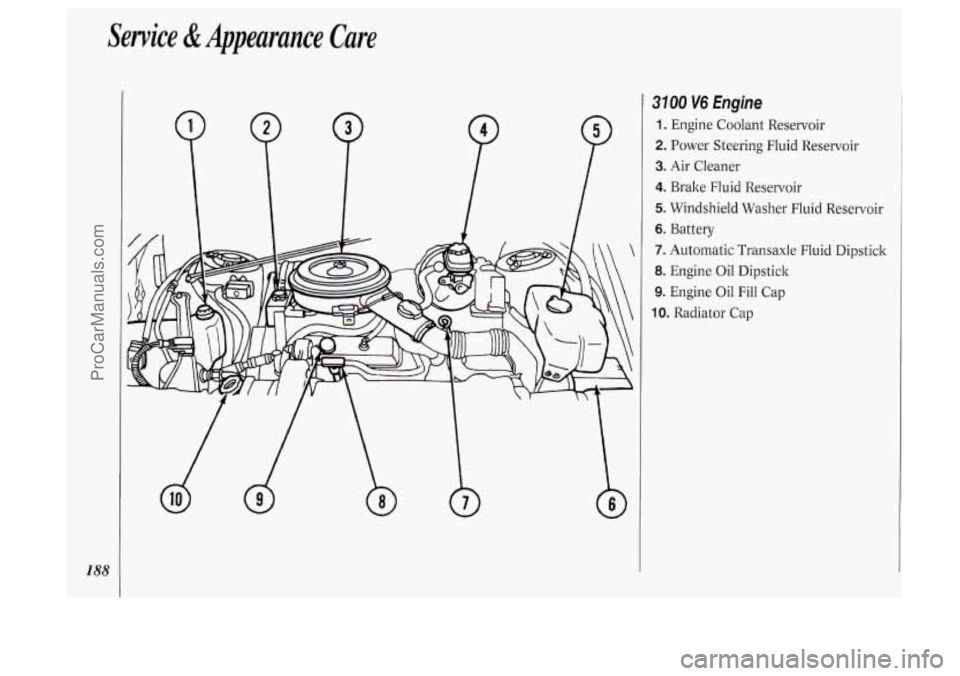
3100 V6 Engine
1. Engine Coolant Reservoir
2. Power Steering Fluid Reservoir
3. Air Cleaner
4. Brake Fluid Reservoir
5. Windshield Washer Fluid Reservoi
6. Battery r
7. Automatic
Transaxle Fluid Dipstick
8. Engine Oil Dipstick
9. Engine Oil Fill Cap
10. Radiator Cap
ProCarManuals.com
Page 191 of 276
P
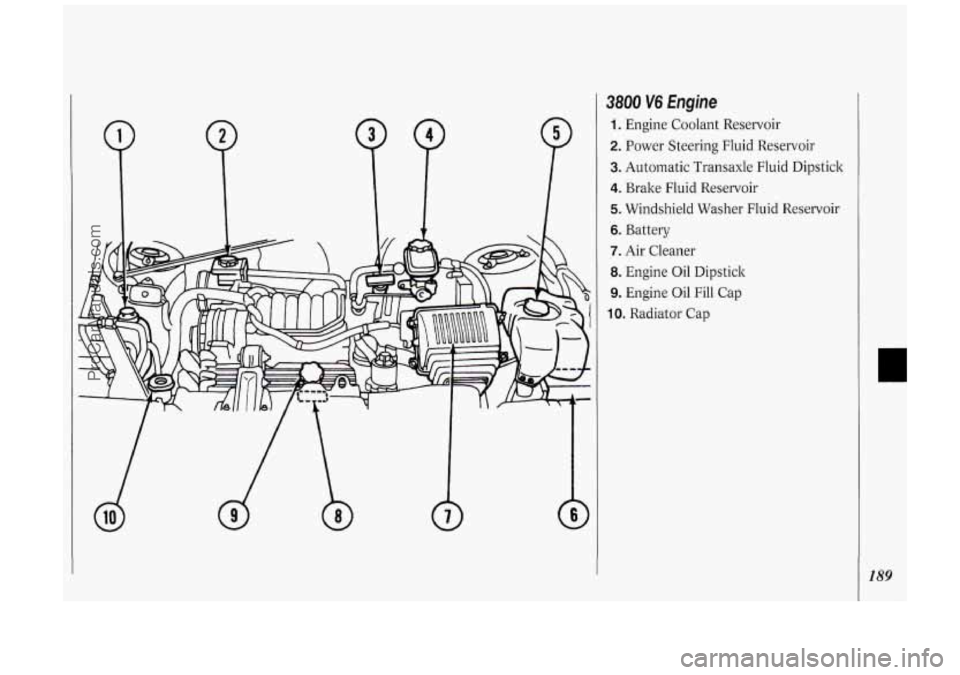
3800 V6 Engine
1. Engine Coolant Reservoir
2. Power Steering Fluid Reservoir
3. Automatic Transaxle Fluid Dipstick
4. Brake Fluid Reservoir
5. Windshield Washer Fluid Reservoir
6. Battery
7. Air Cleaner
8. Engine Oil Dipstick
9. Engine Oil Fill Cap
10. Radiator Cap
189
ProCarManuals.com
Page 201 of 276
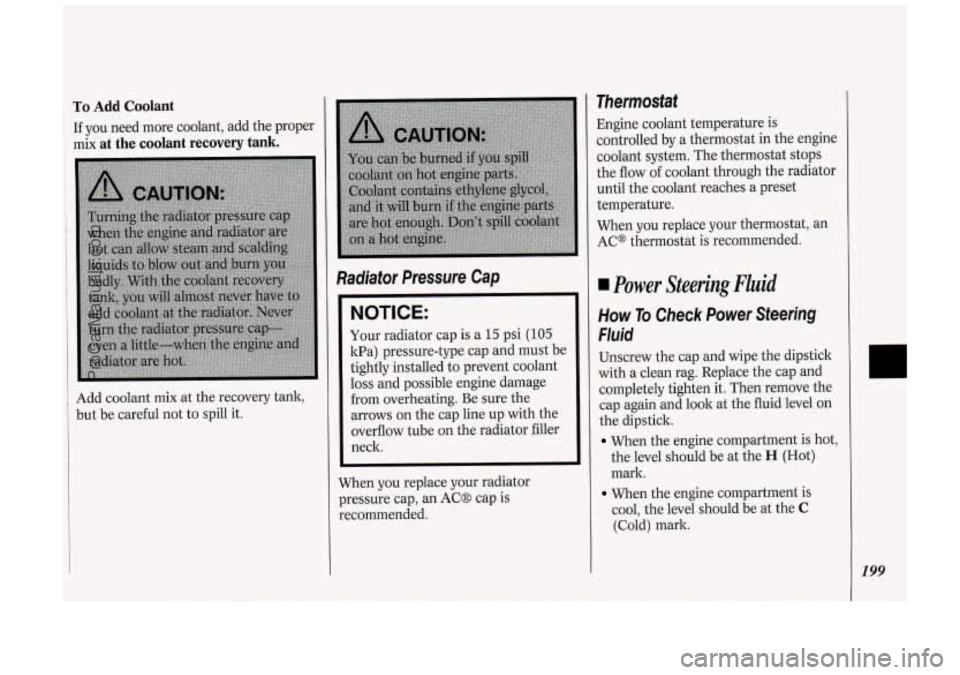
To Add Coolant
If you need more coolant, add the proper
mix
at the coolant recovery tank.
Add coolant mix at the recovery tank,
but be careful not to spill it.
Radiator Pressure Cap
NOTICE:
Your radiator cap is a 15 psi (105
kPa) pressure-type cap and must be
tightly installed to prevent coolant
loss and possible engine damage
from overheating. Be sure the
arrows on the cap line up with the
overflow tube on the radiator filler
neck.
When you replace your radiator
pressure cap, an AC8 cap is
recommended.
Thermostat
Engine coolant temperature is
controlled by a thermostat in the engine
coolant system. The thermostat stops
the flow of coolant through the radiator
until the coolant reaches a preset
temperature.
When you replace your thermostat, an
AC@ thermostat is recommended.
Power Steering Fluid
How To Check Power Steering
Fluid
Unscrew the cap and wipe the dipstick
with a clean rag. Replace the cap and
completely tighten it. Then remove the
cap again and look at the fluid level on
the dipstick.
When the engine compartment is hot,
the level should be at the
H (Hot)
mark.
When the engine compartment is
cool, the level should be at the
C
(Cold) mark.
199
ProCarManuals.com