1994 OLDSMOBILE SILHOUETTE display
[x] Cancel search: displayPage 60 of 276

Features & Con&oli
58
U
I Ignition Switch
With the ignition key in the ignition
switch, you can turn the switch to five
positions:
Accessory: An “on” position in which
you can operate your electrical power
accessories. Press in the ignition switch
as you turn the top
of it toward you.
Lock: The only position in which you
can remove the ltey. This loclts your
steering wheel, ignition and transaxle.
Off Unlocks the steering wheel,
ignition, and transaxle, but does not
send electrical power to any accessories
Use this position
if your vehicle must be
pushed or towed, but never try to push-
start your vehicle.
A warning chime will
sound
if you open the driver’s door the
ignition.
Run: An “on” position to which the
switch returns after you start your
engine and release the switch. The
switch stays in the
Run position when
the engine is running. But even when
the engine is not running, you can use
Run to operate your electrical power
accessories, and to display some
instrument panel warning lights.
Start: Starts the engine. When the
engine starts, release the ltey. The
ignition switch will return to
Run for
normal driving.
Note that even if the engine is not
running, the positions
Accessory and
Run are “on” positions that allow you
to operate your electrical accessories,
such as the radio.
NOTICE:
If your key seems stuck in Lock
and you can’t turn it, be sure it is
all the way in. If it is, then turn the
steering wheel left and right while
you turn the key hard. But turn the
key only with your hand. Using a
tool
to force it could break the key
or the ignition switch. If none of
this works, then your vehicle needs
service.
I Starting Your Engine
Engines start differently. The 8th digit
of your Vehicle Identification Number
(VIN) shows the code letter or number
for your engine.
You will find the VIN
at the top left of your instrument panel.
(See
Vehicle Identification Number in
the
Index.) Follow the proper steps to
start the engine.
Move your shift lever
to P (Park) or N
(Neutral). Your engine won’t start in
any other position
- that’s a safety
feature.
To restart when you’re already
moving, use
N (Neutral) only.
ProCarManuals.com
Page 81 of 276
NOTICE:
When using concentrated washer
fluid, follow the manufacturer’s
instructions for adding water.
Don’t mix water with ready-to-
use washer fluid. Water can cause
the solution to freeze and damage
your washer fluid tank and other
parts of the washer system. Also,
water doesn’t clean as well as
washer fluid.
Fill your washer fluid tank only
3/4 full when it’s very cold. This
allows for expansion, which could
damage the tank
if it is
completely full.
Don’t use radiator antifreeze in
your windshield washer. It can
damage your paint.
Rear Window Wiper and Washer
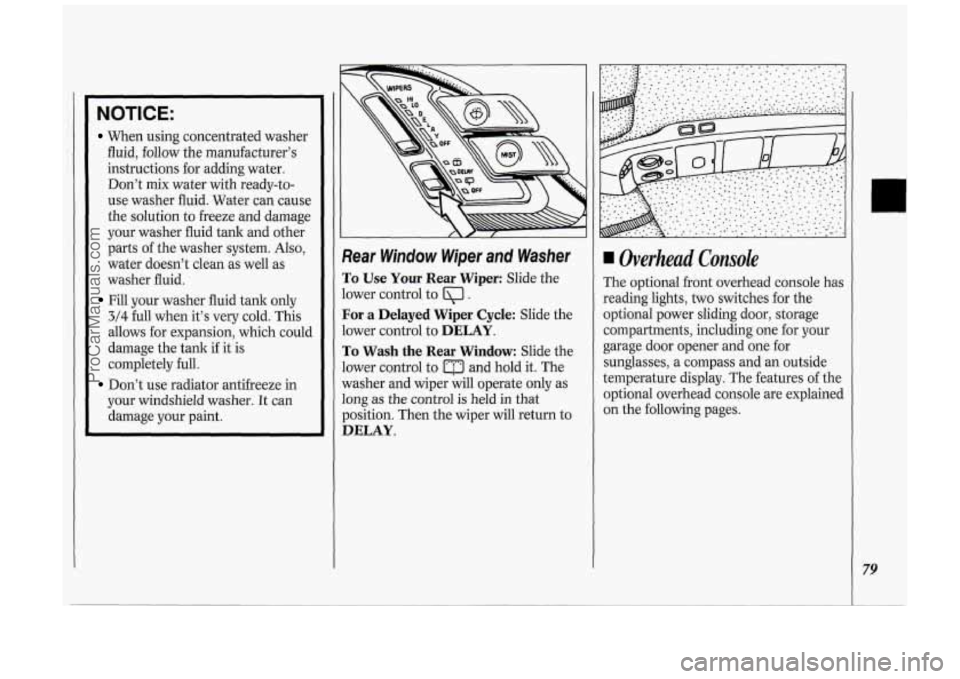
To Use Your Rear Wiper: Slide the
lower control to
Ql .
For a Delayed Wiper Cycle: Slide the
lower control to
DELAY.
To Wash the Rear Window: Slide the
lower control to
a and hold it. The
washer and wiper will operate only as
long as the control is held in that
position. Then the wiper will return to
DELAY.
4 Overhead Console
The optional front overhead console has
reading lights,
two switches for the
optional power sliding door, storage
compartments, including one for your
garage door opener and one for
sunglasses, a compass and an outside
temperature display. The features of the
optional overhead console are explained
on the following pages.
79
ProCarManuals.com
Page 83 of 276
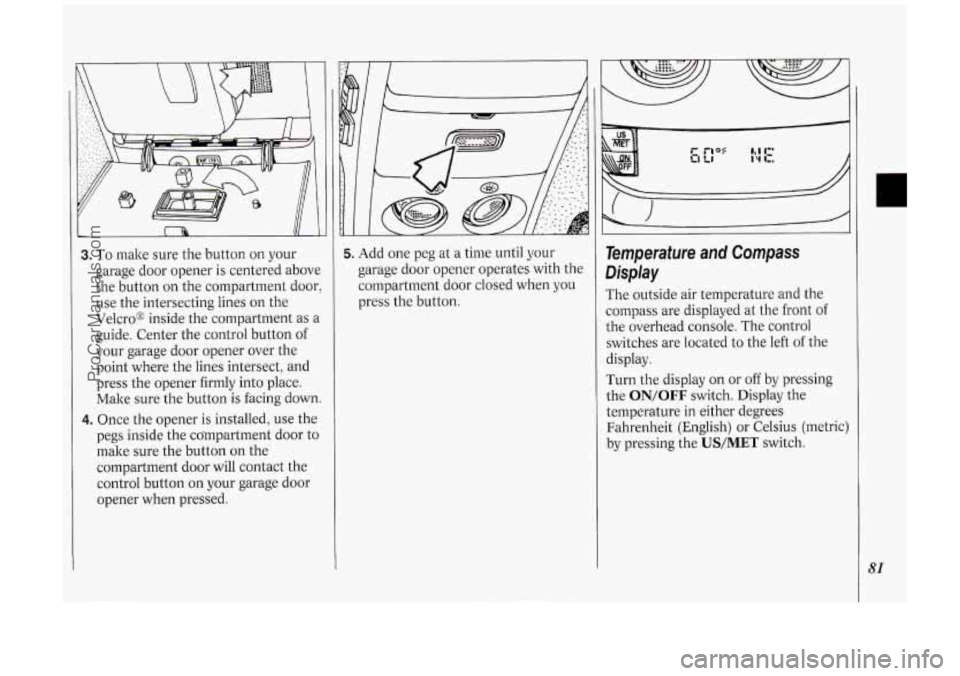
3. To make sure the button on your
garage door opener is centered above
the button on the compartment door,
use the intersecting lines
on the
Velcro@ inside the Compartment as
a
guide. Center the control button of
your garage door opener over the
point where the lines intersect, and
press the opener firmly into place.
Make sure the button is facing down.
4. Once the opener is installed, use the
pegs inside the compartment door to
make sure the button on the
compartment door will contact the
control button
on your garage door
opener when pressed.
5. Add one peg at a time until your
garage door opener operates with the
compartment door closed when you
press the button. Temperature and Compass
Display
The outside air temperature and the
compass are displayed at the front of
the overhead console. The control
switches are located to the left
of the
display.
Turn the display on or
off by pressing
the
ON/OFF switch. Display the
temperature in either degrees
Fahrenheit (English) or Celsius (metric)
by pressing the
US/MET switch.
81
ProCarManuals.com
Page 84 of 276
Features & Controls
82
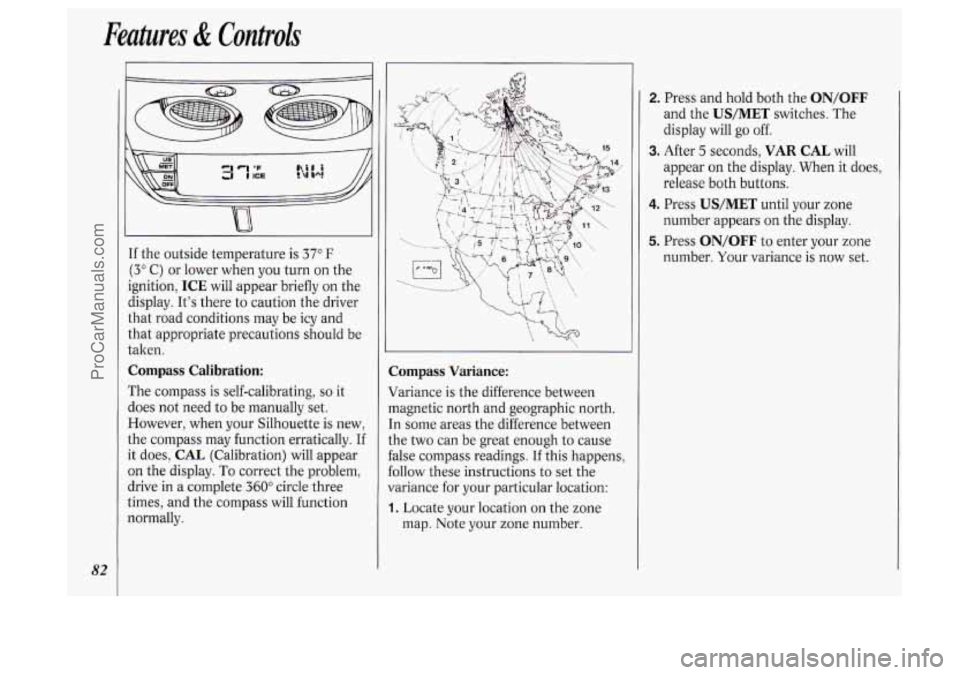
If the outside temperature is 37" F
(3" C) or lower when you turn on the
ignition,
ICE will appear briefly on the
display. It's there to caution the driver
that road conditions may be icy and
that appropriate precautions should be
taken.
Compass Calibration:
The compass is self-calibrating, so it
does not need to be manually set.
However, when your Silhouette is new,
the compass may function erratically. If
it does,
CAL (Calibration) will appear
on the display.
To correct the problem,
drive in a complete
360" circle three
times, and the compass will function
normally.
Compass Variance:
v'ariance is the difference between
nagnetic north and geographic north.
:n some areas the difference between
:he two can be great enough to cause
'alse compass readings.
If this happens,
ollow these instructions to set the
rariance for your particular location:
I. Locate your location on the zone
map. Note your zone number.
2. Press and hold both the ON/OFF
and the US/MET switches. The
display will go off.
3. After 5 seconds, VAR CAL will
appear
on the display. When it does,
release both buttons.
4. Press US/MET until your zone
number appears on the display.
5. Press ON/OFF to enter your zone
number. Your variance is now set.
ProCarManuals.com
Page 101 of 276
Speedometer and Odometer
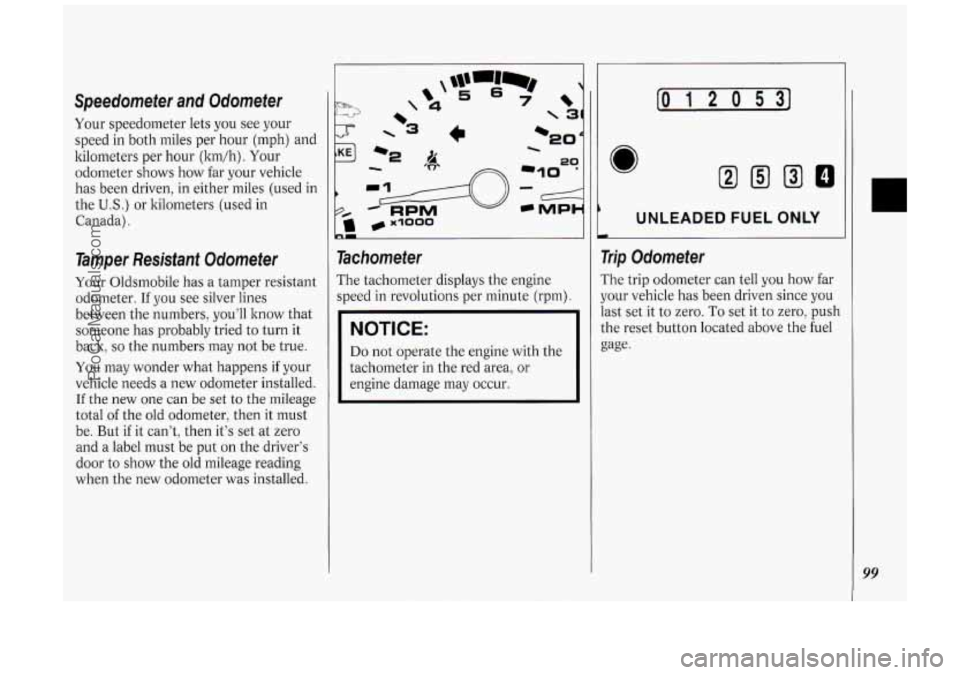
Your speedometer lets you see your
speed in both miles per hour (mph) and
kilometers per hour (ltm/h). Your
odometer shows how far your vehicle
has been driven, in either miles (used in
the
U.S.) or kilometers (used in
Canada).
Tamper Resistant Odometer
Your Oldsmobile has a tamper resistant
odometer.
If you see silver lines
between the numbers, you’ll know that
someone has probably tried to turn it
back,
so the numbers may not be true.
You may wonder what happens if your
vehicle needs a new odometer installed.
If the new one can be set to the mileage
total of the old odometer, then it must
be. But if it can’t, then it’s set at zero
and a label must be put on the driver’s
door to show the old mileage reading
when the new odometer was installed.
\‘ 4
4
Tachometer
The tachometer displays the engine
speed in revolutions per minute (rpm).
NOTICE:
Do not operate the engine with the
tachometer in the red area, or
engine damage may occur.
[o I 2 0 531
UNLEADED FUEL ONLY
Trip Odometer
The trip odometer can tell you how far
your vehicle has been driven since
you
last set it to zero. To set it to zero, push
the reset button located above the fuel
gage.
99
ProCarManuals.com
Page 105 of 276
18 ‘I I
Voltmeter
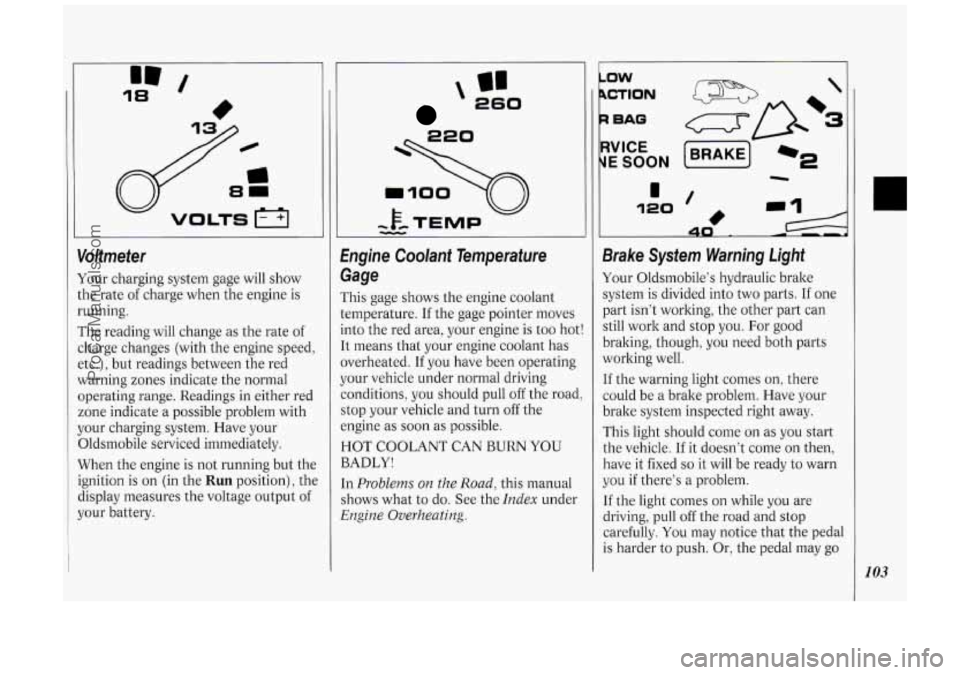
Your charging system gage will show
:he rate
of charge when the engine is
running.
The reading will change as the rate of
:barge changes (with the engine speed,
?tc.), but readings between the red
warning zones indicate the normal
3perating range. Readings in either red
zone indicate a possible problem with
your charging system. Have your
Oldsmobile serviced immediately.
When the engine is not running but the
ignition
is on (in the Run position), the
display measures the voltage output of
your battery.
I’ 260
1
‘
1
Engine Coolant Temperature
Gage
rhis gage shows the engine coolant
Iemperature. If the gage pointer moves
.nto the red area, your engine is too hot
[t means that your engine coolant has
werheated. If you have been operating
{our vehicle under normal driving
:onditions, you should pull off the road
;top your vehicle and turn off the
mgine as soon as possible.
HOT COOLANT CAN BURN YOU
BADLY!
[n
Problems on the Road, this manual
shows what to do. See the
Index under
Engine Overheating.
LOW
BAG
E SOON
Brake System Warning Light
Your Oldsmobile’s hydraulic brake
system is divided into two parts.
If one
part isn’t working, the other part can
still work and stop you. For good
braking, though, you need both parts
working well.
If the warning light comes on, there
could be a brake problem. Have your
brake system inspected right away.
This light should come on as you start
the vehicle. If it doesn’t come on then,
have it fixed
so it will be ready to warn
you if there’s a problem.
If the light comes on while you are
driving, pull off the road and stop
carefully.
You may notice that the pedal
is harder to push.
Or, the pedal may go
103
ProCarManuals.com
Page 119 of 276
4 Audio Systems
The following pages describe the audio
systems available for your Oldsmobile,
and how to get the best performance
from them. Please read about the
system in your vehicle.
Hearing damage from loud noise is
almost undetectable until it is too late.
Your hearing can adapt to higher
volumes of sound. Sound that seems
normal can be loud and harmful to your
hearing. Take precautions by adjusting
the volume control on your radio to a
safe sound level before your hearing
adapts
to it.
To help avoid hearing loss or damage:
1. Adjust the volume control to the
lowest setting.
2. Increase volume slowly until you
hear comfortably and clearly.
NOTICE:
Before you add any sound
equipment
to your vehicle - like a
tape player,
CB radio, mobile
telephone or two-way radio
- be
sure you can add what you want. If
you can, it’s very important to do it
properly. Added sound equipment
may interfere with the operation
of
your vehicle’s engine, Delco@ radio
or other systems, and even damage
them. And, your vehicle’s systems
may interfere with the operation of
sound equipment that has been
added improperly.
So, before
adding sound equipment, check
with your dealer and be sure to
check Federal rules covering mobile
radio and telephone units.
111 111 AUTO REVERSE
Setting the Clock
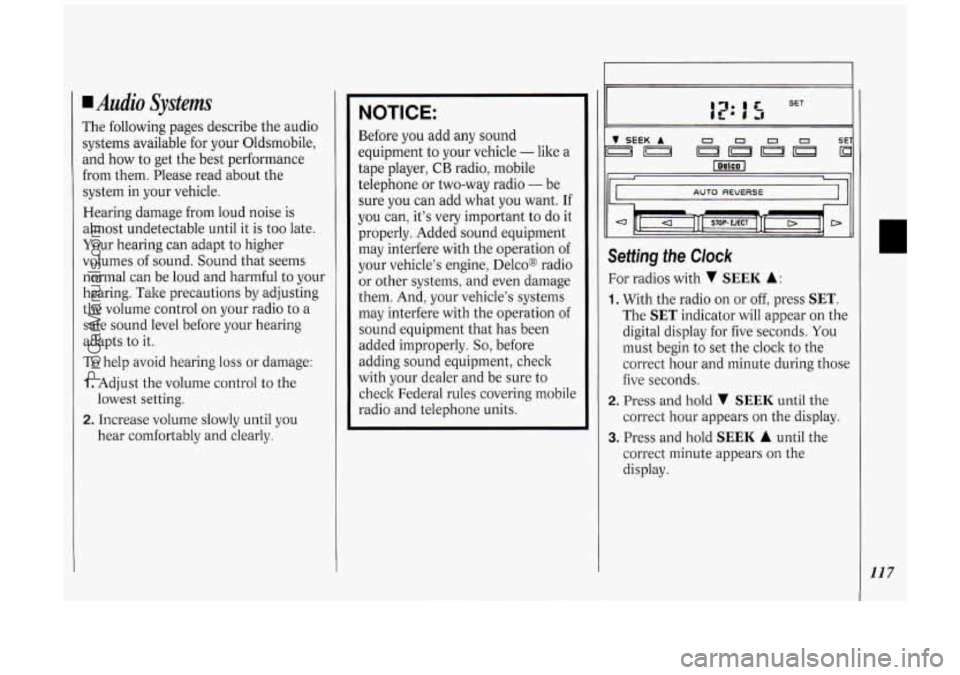
For radios with v SEEK A:
1. With the radio on or off, press SET.
The SET indicator will appear on the
digital display for five seconds. You
must begin to set the clock to the
correct hour and minute during those
five seconds.
correct hour appears on the display.
2. Press and hold v SEEK until the
3. Press and hold SEEK A until the
correct minute appears on the
display.
117
ProCarManuals.com
Page 120 of 276
Comfort Controli &Audio Systems
118
bc
1.
2.
3.
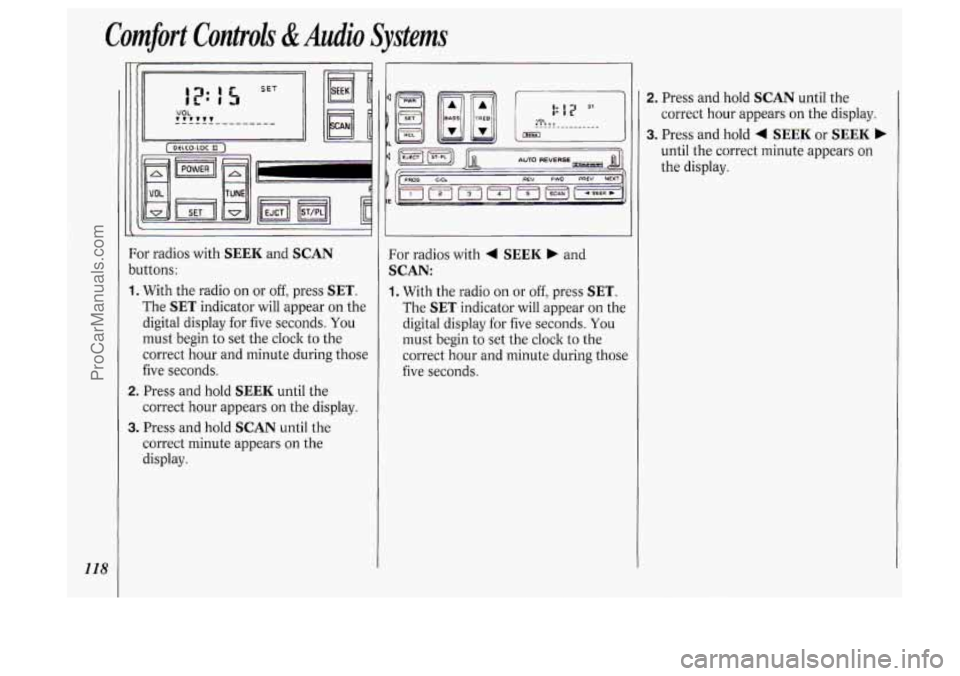
)r radios with SEEK and SCAN
Ittons:
With the radio on or
off, press SET.
The SET indicator will appear on the
digital display for five seconds. You
must begin to set the clock to the
correct hour and minute during those
five seconds.
Press and hold
SEEK until the
correct hour appears
on the display.
Press and hold
SCAN until the
correct minute appears on the
display. For radios with
4 SEEK b and
SCAN:
1. With
the radio on or off, press SET.
The SET indicator will appear on the
digital display
for five seconds. You
must begin to set the clock to the
correct hour and minute during those
five seconds.
1
2. Press and hold SCAN until the
correct hour appears
on the display.
3. Press and hold 4 SEEK or SEEK b
until the correct minute appears on
the display.
ProCarManuals.com