1994 OLDSMOBILE SILHOUETTE ABS
[x] Cancel search: ABSPage 8 of 276
How to Use this Manual
MANY PEOPLE READ THEIR OWNER’S
manual from beginning to end when
they
first receive their new vehicle.
This
wdl help you learn about the
features and controls for your vehicle.
In
this manual, you’ll find that
pictures and words work together
to explain things quickly.
There are nine parts with thumb-
tabbed pages in this manual.
Each part begins with
a brief list of
contents,
so you can usually tell at a
glance if that part contains the
information you want.
You can bend the manual slightly
to
reveal the tabs that help you find a
part.
6
Part 1: Seats & Restraint Systems
This part tells you how to use your
seats and safety belts properly.
Part 2: Features 8 Controls
This part explains how to start and
operate your Oldsmobile.
Part 4: Your Driving and the Road
Here you’ll find helpful information
and tips about the road and how to
drive under different conditions.
Part 5: Problems on the Road
This part tells you what to do if you
have
a problem while driving, such as
Part 3: Comfort Controls & Audio Systems a flat tire or engine overheating.
This
part tells you how to adjust the
ventilation and comfort controls and
how to operate your audio system.
ProCarManuals.com
Page 137 of 276
brake pedal. That’s perception time.
Then you have to bring up your foot
and do it. That’s
reaction time.
Average reaction time is about 3/4 of a
second. But that’s only an average. It
might be less with one driver and as
long as two or three seconds or more
with another. Age, physical condition,
alertness, coordination, and eyesight all
play a part.
So do alcohol, drugs and
frustration. But even in
% of a second, a
vehicle moving at
60 mph (100 kwh)
travels
66 feet (20 m). That could be a
lot of distance in an emergency,
so
keeping enough space between your
vehicle and others is important.
And, of course, actual stopping
distances vary greatly with the surface
of the road (whether it’s pavement or
gravel); the condition of the road (wet,
dry, icy); tire tread; and the condition of
your brakes.
Avoid needless heavy braking. Some
people drive in spurts
- heavy
acceleration followed by heavy braking
- rather than keeping pace with traffic.
This is a mistake. Your brakes may not
have time to cool between hard stops.
Your brakes will wear out much faster if you
do a lot of heavy braking. If you
keep pace with the traffic and allow
realistic following distances, you will
eliminate a lot of unnecessary braking.
That means better braking and longer
brake life.
If your engine ever stops while you’re
driving, brake normally but don’t pump
your brakes.
If you do, the pedal may
get harder to push down. If your engine
stops, you will still have some power
brake assist. But you will use it when
you brake. Once the power assist is
used up, it may take longer to stop and
the brake pedal will be harder to push.
Anti-Lock Brakes (ABS)
Your Oldsmobile has an advanced
electronic braking system that will help
prevent skidding.
135
ProCarManuals.com
Page 138 of 276
Your Driving and the Road
* x1000
136
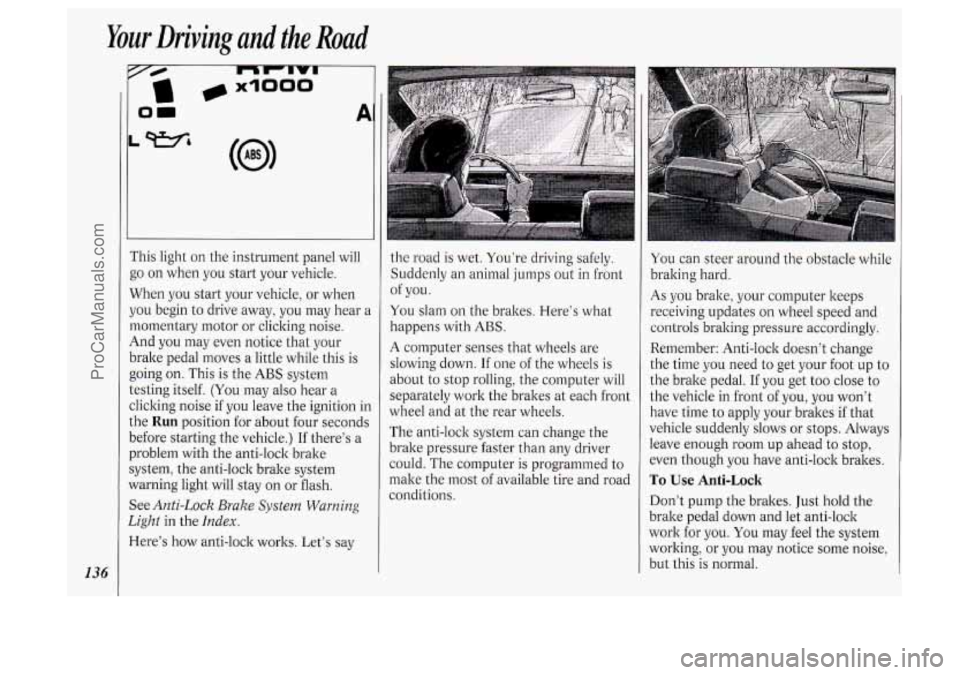
i‘his light on the instrument panel will
go on when you start your vehicle.
When you start your vehicle, or when
jou begin to drive away, you may hear a
nomentary motor or clicking noise.
4nd you may even notice that your
)rake pedal moves
a little while this is
going on. This is the
ABS system
:esting itself.
(You may also hear a
:licking noise if you leave the ignition in
.he
Run position for about four seconds
Iefore starting the vehicle.) If there’s a
Jroblem with the anti-lock brake
iystem, the anti-lock brake system
Yarning light will stay on or flash.
See
Anti-Lock Brake System Warning
2ight
in the Index.
lere’s how anti-lock works. Let’s say
1
the road is wet. You’re driving safely.
Suddenly an animal jumps out
in front
You slam on the brakes. Here’s what
happens with
ABS.
A computer senses that wheels are
slowing down.
If one of the wheels is
about to stop rolling, the computer will
separately work the brakes at each front
wheel and at the rear wheels.
The anti-lock system can change the
brake pressure faster than any driver
could. The computer is programmed to
make the most of available tire and road
conditions. of
you.
You can steer around the obstacle while
braking hard.
As you brake, your computer keeps
receiving updates on wheel speed and
controls braking pressure accordingly.
Remember: Anti-lock doesn’t change
the time you need
to get your foot up to
the brake pedal.
If you get too close to
the vehicle in front of you, you won’t
have time to apply your brakes if that
vehicle suddenly slows or stops. Always
leave enough room up ahead to stop,
even though you have anti-lock brakes.
To Use Anti-Lock
Don’t pump the brakes. Just hold the
brake pedal down and let anti-lock
work for you. You may feel the system
working, or you may notice some noise,
but this is normal.
ProCarManuals.com
Page 144 of 276
Your Driving and the Rod
142
surfaces because stopping distance will
be longer and vehicle control more
limited.
While driving on a surface with reduced
traction, try your best to avoid sudden
steering, acceleration, or braking
(including engine braking by shifting to
a lower gear). Any sudden changes
could cause the tires to slide.
You may
not realize the surface is slippery until
your vehicle
is skidding. Learn to
recognize warning clues
- such as
enough water, ice or packed snow on
the road to make a “mirrored surface”
- and slow down when you have any
doubt.
Remember: Any anti-lock braking
system
(ABS) helps avoid only the
braking skid.
Driving at Night
Night driving is more dangerous than
day driving. One reason is that some
drivers are likely to be impaired
- by
alcohol or drugs, with night vision
problems, or by fatigue.
Here are some tips on night driving.
Drive defensively.
Don’t drink and drive.
Adjust your inside rearview mirror to
reduce the glare from headlights
behind you.
Since you can’t see as well, you may
need to slow down and keep more
space between you and other vehicles.
Slow down, especially on higher
speed roads. Your headlights can light
up only
so much road ahead.
In remote areas, watch for animals.
If you’re tired, pull off the road in a
safe place and rest.
Night Vision
No one can see as well at night as in the
daytime. But as we get older these
differences increase.
A 50-year-old
driver may require at least twice as
much light to see the same thing at
night
as a 20-year-old.
What you do in the daytime can also
affect your night vision. For example, if
you spend the day in bright sunshine
you are wise to wear sunglasses. Your
eyes will have less trouble adjusting to
night. But if you’re driving, don’t wear
sunglasses at night. They may cut down
on glare from headlights, but they also
make a lot
of things invisible.
You can be temporarily blinded by
approaching lights. It can take a second
or two, or even several seconds, for
your eyes to readjust to the dark. When
you are faced with severe glare (as from
ProCarManuals.com
Page 158 of 276
Your Driving and the Road
156
Parking on Hills
You really should not park your vehicle,
with a trailer attached, on a hill. If
something goes wrong, your rig could
start to move. People can be injured,
and both your vehicle and the trailer
can be damaged.
But
if you ever have to park your rig on
a hill, here’s how to do it:
1. Apply your regular brakes, but don’t
shift into
P (Park) yet.
2. Have someone place choclts under
the trailer wheels.
3. When the wheel chocks are in place,
release the regular brakes until the
chocks absorb the load.
apply your parking brake, and then
shift to
P (Park).
4. Reapply the regular brakes. Then
5. Release the regular brakes.
When You Are Ready to Leave
Affer Parking on a Hill
1. Apply your regular brakes and hold
the pedal down while
you:
Start your engine;
Shift into a gear; and
Release the parking brake.
2. Let up on the brake pedal.
3. Drive slowly until the trailer is clear
4. Stop and have someone pick up and
of
the chocks.
store the chocks.
Maintenance When Trailer Towing
Your vehicle will need service more
often when you’re pulling a trailer. See
the Maintenance Schedule
for more on
this. Things that are especially important in
trailer operation are
automatic transaxle fluid (don’t
overfill), engine oil, belts, cooling
system, and brake adjustment. Each of
these is covered in this manual, and the
Index will help you find them quicltly. If
you’re trailering, it’s a good idea to
review these sections before you start
your trip.
Check periodically to see that all hitch
nuts and bolts are tight.
ProCarManuals.com
Page 222 of 276
![OLDSMOBILE SILHOUETTE 1994 Owners Manual Service &Appeurunce Cure
220
+I
r=J
HORN
prpl
m
STOP-HA2 F-PUMP
m3 AUX
r?]
.pg
TURN BIU
GAGE
prpl LPS
(31 ABS
RDO 2
pTo4
ca
rn
ca
R-WIPER F-WIPER
rfpl IGN
HTR-A/C R-BLWR
Posi OLDSMOBILE SILHOUETTE 1994 Owners Manual Service &Appeurunce Cure
220
+I
r=J
HORN
prpl
m
STOP-HA2 F-PUMP
m3 AUX
r?]
.pg
TURN BIU
GAGE
prpl LPS
(31 ABS
RDO 2
pTo4
ca
rn
ca
R-WIPER F-WIPER
rfpl IGN
HTR-A/C R-BLWR
Posi](/manual-img/31/58207/w960_58207-221.png)
Service &Appeurunce Cure
220
+I
r=J
HORN
prpl
m
STOP-HA2 F-PUMP
m3 AUX
r?]
.pg
TURN BIU
GAGE
prpl LPS
(31 ABS
RDO 2
pTo4
ca
rn
ca
R-WIPER F-WIPER
rfpl IGN
HTR-A/C R-BLWR
Position Rating (AMP.)
CTSY
ELC
HORN STOP HAZ
F PUMP
AUX
TAIL
ECM
TURN B/U
GAGE
LPS
ABS RD02
WIPER
FflIPER
IGN
HTR A/C
R BLWR 15
20
15
15
10
20
15
10
15
7.5
7.5
3
15
20
25 15
25
25
Circuitry
Dome Lamps, Courtesy Lamps, Power Door Lock Switches, Glove
Box Lamp, Power Mirrors, Power Sliding Delay Lock Module
Auto Level Control, Underhood Lamp
Horns, Horn Relay, Safety Belt Buzzer
Front/Rear Turn Lamps, Front Side Marker Lamps, Rear Stop Lamps,
Instrument Cluster Turn Indicator Lamps, Cruise Brake Switch
Fuel Pump, Oil Pressure Sender/Fuel Pump Switch
Radio, Front Cigar Lighter, Accessory Power Outlet
Front Park Lamps, Rear Tail Lamps, Front Side Marker Lamps,
License Plate Lamp, Radio, Heat/Vent/AC Control Head, Power
Sliding Door
Throttle Body Fuel Injection, Fuel Pump Relay, Elec. Vac. Reg. Valve,
Elec. Control Module, Elec. Spark Control Module
Front/Rear Turn Lamps, Front Side Marker Lamps, Cluster Turn
Telltale, Back-up Lamps, Fog Lamps
Cluster, Anti-Lock Brake System Lamp Module, Elec. Level Control Sensor
Cluster, Radio, Wiper Switch, Headlamp Switch? Rear Blower Switch,
Heat/Vent/AC Control Head, Door Switch Illumination, Front/Rear
Ashtray Illumination Bulbs
Anti-Lock Brake System Radio
Rear WiperNasher Motors; Overhead Console Compass
Front Wiperflasher Motor
A/C Compressor, A/C Solenoid Box, Compressor Relay, Temp.
Door
Motor, Low Blower Relay; Heat/Vent/AC Control Head; Cruise
Module; Cooling Fan Relay; Rear Defogger Relay; Key Chime; Vehicle
Speed Sensor Buffer and Generator Charge Discrete, Transaxle
Converter Clutch Switch
Front/Rear Blower Motors, High Blower Relay
Rear Blower, Rear Heat/Vent/AC
ProCarManuals.com
Page 223 of 276

r&
p.L34
R-WIPER
F-WIPER
c-,
HTR-AIC
m3 R-BLWR
1
Position Rating
(AMP.)
CTSY
ELC HORN
STOP HAZ
RDOl/AUX
TAIL
ABS ECM
TURN B/U
GAGE
LPS
RD02
WIPER
FmIPER
IGN
HTR A/C
R BLWR 15
20
15
15
20
15
3
10
15
7.5
7.5
15
20
25
15
25
25
Circuitry
Dome
Lamps! Courtesy Lamps, Power Door Lock Switches, Glove Box
Lamp, Power Mirrors, Power Sliding Delay Lock Module
Auto Level Control, Underhood Lamp
Horns, Horn Relay, Safety Belt Buzzer
Front/Rear Turn Lamps, Front Side Marker Lamps, Rear Stop Lamps,
Instrument Cluster Turn Indicator Lamps
Radio, Front Cigar Lighter, Accessory Power Outlet
Front Park Lamps, Rear Tail Lamps, Front Side Marker Lamps, License
Plate Lamp, Radio, Heat/Vent/AC Control Head, Power Sliding Door
Anti-Lock Bralte/Traction Control System
Mass Air Flow Sensor, Electronic Control Module
Front/Rear Turn Lamps, Front Side Marker Lamps, Cluster Turn Telltale,
Back-up Lamps,
Fog Lamps
Cluster, Anti-Lock Brake System Lamp Module, Elec. Level Control Sensor
Cluster, Radio, Wiper Switch, Headlamp Switch, Rear Blower Switch,
Heat/Vent/AC Control Head, Door Switch Illumination, Front/Rear
Ashtray Illumination Bulbs
Radio
Rear Wiper/Washer Motors; Overhead Console Compass
Front Wipermasher Motor
A/C Solenoid Box, Temp. Door Motor, Low Blower Relay; Heat/Vent/AC
Control Head; Cooling Fan Relay; Rear Defogger Relay; Key Chime;
Transaxle Converter Clutch Solenoid and Generator Charge Discrete
Front/Rear Blower Motors, High Blower Relay
Rear Blower, Rear Heat/Vent/AC
221
ProCarManuals.com
Page 224 of 276

Service &Appearance Care
222
I
1-
9 0
U
Circuit BreakerlRelay Panel
Circuit breakers and relays are located in the circuit breakerhelay panel. This is
located behind the panel under the glove box, near the passenger's door.
Position Rating
(AMP.)
1
2
3
I
5
6
7
3
3
10
15
30
30
30
Circuitry
Hazard Flasher
With
3800 V6 engine only: Canister Purge Solenoid, A/C
Clutch Control Relay, Cruise Control
Not Used
Power Windows Circuit Breaker
Power Seat/Power Sliding
Door Motor Circuit Breaker
Rear Defogger Circuit Breaker
Air Conditioning Blower Relay
Horn Relay
Chime Module
Defogger Timer Relay
Anti-Lock Brake System (ABS)
Junction Block Fuse
You'll find this fuse under the hood in
the
ABS junction block, located next to
the remote positive
jump starting
terminal.
To open the junction block, press in on
both sides of the cover.
ProCarManuals.com