1994 OLDSMOBILE SILHOUETTE reset
[x] Cancel search: resetPage 75 of 276
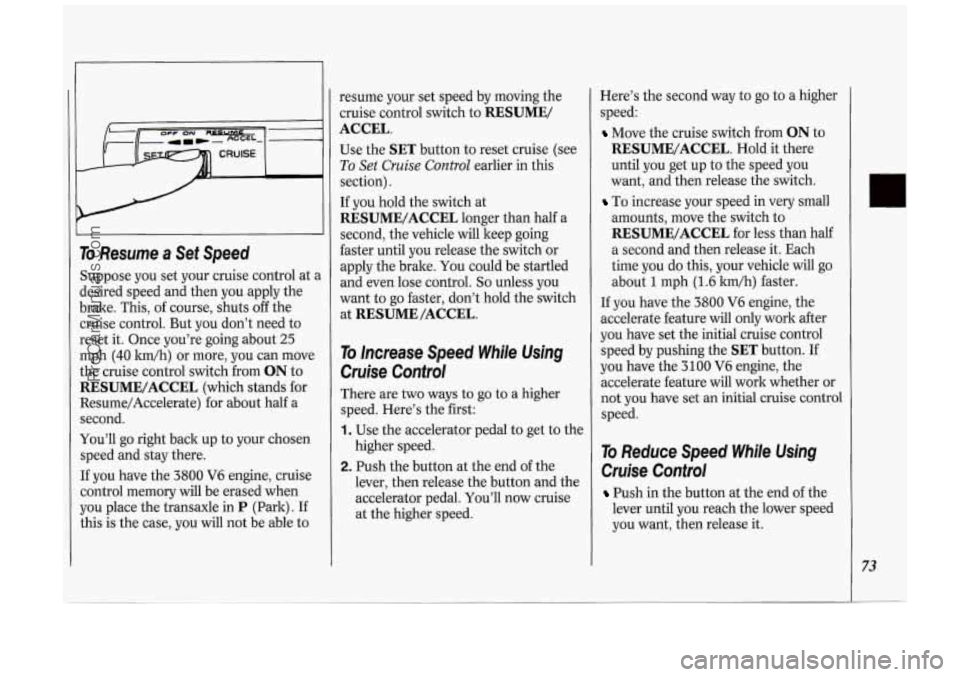
ro Resume a Set Speed
Suppose you set your cruise control at a
lesired speed and then you apply the
brake. This, of course, shuts
off the
mise control. But you don’t need to
reset it. Once you’re going about
25
rnph (40 km/h) or more, you can move
the cruise control- switch from
ON to
RESUME/ACCEL (which stands for
Resume/Accelerate) for about half a
second.
You’ll go right back up to your chosen
speed and stay there.
If you have the
3800 V6 engine, cruise
control memory will be erased when
you place the transaxle in P (Park). If
this is the case, you will not be able to resume
your set speed by moving the
cruise control switch to
RESUME/
ACCEL.
Use the SET button to reset cruise (see
To Set Cruise Control earlier in this
section).
If you hold the switch at
RESUME/ACCEL longer than half a
second, the vehicle will keep going
faster until
you release the switch or
apply the brake. You could be startled
and even lose control.
So unless you
want to go faster, don’t hold the switch
at
RESUME/ACCEL.
To Increase Speed While Using
Cruise Control
There are two ways to go to a higher
speed. Here’s the first:
1. Use the accelerator pedal to get to the
2. Push the button at the end of the
higher
speed.
lever, then release the button and the
accelerator pedal. You’ll now cruise
at the higher speed. Here’s the second
way to go to a higher
speed:
Move the cruise switch from ON to
RESUME/ACCEL. Hold it there
until you get up to the speed you
want, and then release the switch.
To increase your speed in very small
amounts, move the switch to
RESUME/ACCEL for less than half
a second and then release it. Each
time you do this, your vehicle will go
about
1 mph (1.6 km/h) faster.
If you have the 3800 V6 engine, the
accelerate feature will only work after
you have set the initial cruise control
speed by pushing the
SET button. If
you have the
3100 V6 engine, the
accelerate feature will work whether or
not you have set an initial cruise control
speed.
To Reduce Speed While Using
Cruise Control
Push in the button at the end of the
lever until you reach the lower speed
you want, then release it.
73
ProCarManuals.com
Page 88 of 276
86
Features & Controls
you may damage the system. After 30
minutes, wait at least 10 minutes before
restarting the air inflator.
To turn off the inflator, press OFF and
detach the hose, first from the inflated
object, then from the outlet. Place the
inflator kit tools
in the pouch and store
it in the glove box.
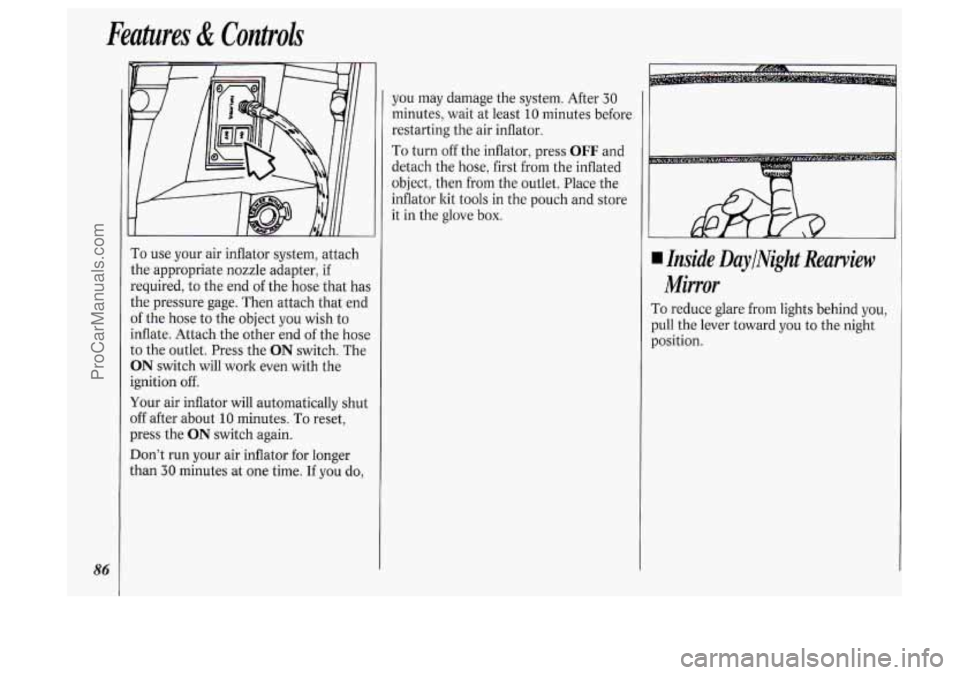
To use your air inflator system, attach
the appropriate nozzle adapter, if
required, to the end of the hose that has
the pressure gage. Then attach that end
of the hose to the object you wish to
inflate. Attach the other end
of the hose
to the outlet. Press the
ON switch. The
ON switch will work even with the
ignition off.
Your air inflator will automatically shut
off after about
10 minutes. To reset,
press the
ON switch again.
Don’t run your air inflator for longer
than
30 minutes at one time. If you do,
4 Inside DaylNight Rearview
Mirror
To reduce glare from lights behind you,
pull the lever toward you to the night
position.
ProCarManuals.com
Page 101 of 276
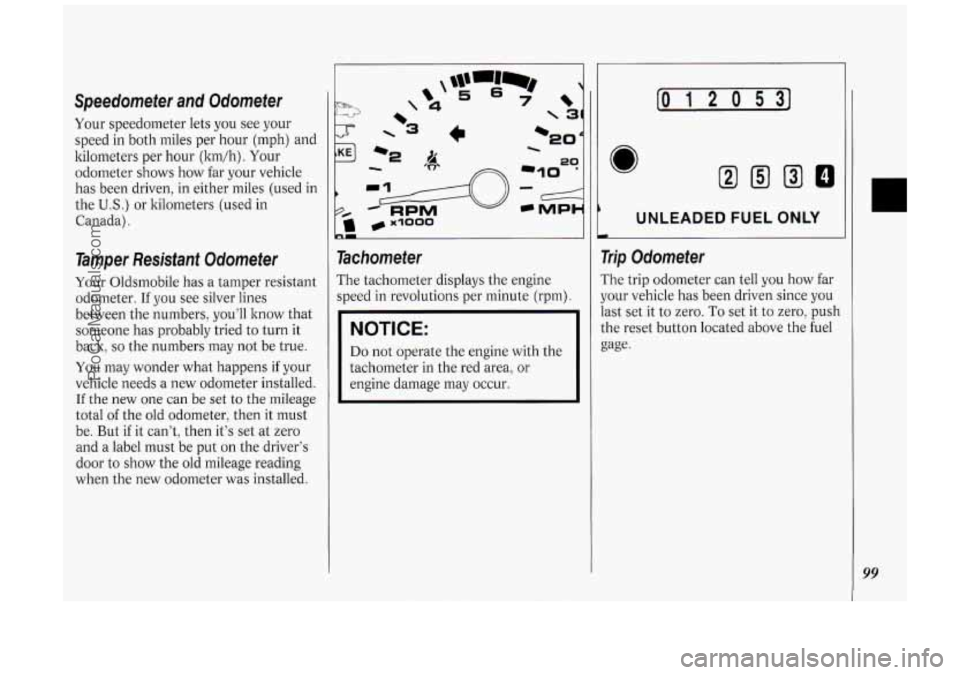
Speedometer and Odometer
Your speedometer lets you see your
speed in both miles per hour (mph) and
kilometers per hour (ltm/h). Your
odometer shows how far your vehicle
has been driven, in either miles (used in
the
U.S.) or kilometers (used in
Canada).
Tamper Resistant Odometer
Your Oldsmobile has a tamper resistant
odometer.
If you see silver lines
between the numbers, you’ll know that
someone has probably tried to turn it
back,
so the numbers may not be true.
You may wonder what happens if your
vehicle needs a new odometer installed.
If the new one can be set to the mileage
total of the old odometer, then it must
be. But if it can’t, then it’s set at zero
and a label must be put on the driver’s
door to show the old mileage reading
when the new odometer was installed.
\‘ 4
4
Tachometer
The tachometer displays the engine
speed in revolutions per minute (rpm).
NOTICE:
Do not operate the engine with the
tachometer in the red area, or
engine damage may occur.
[o I 2 0 531
UNLEADED FUEL ONLY
Trip Odometer
The trip odometer can tell you how far
your vehicle has been driven since
you
last set it to zero. To set it to zero, push
the reset button located above the fuel
gage.
99
ProCarManuals.com
Page 106 of 276
Features & Controls
104
closer to the floor. It may take longer to
stop. If the light is still on, have the
vehicle towed for service. (See
Towing
Your Vehicle in the Index.)
The brake system warning light will also
come on when
you set your parking
brake, and it will stay on if your parking
brake doesn’t release fully. If it stays on
after your parking brake is fully
released, it means you have
a brake
problem.
L Wb
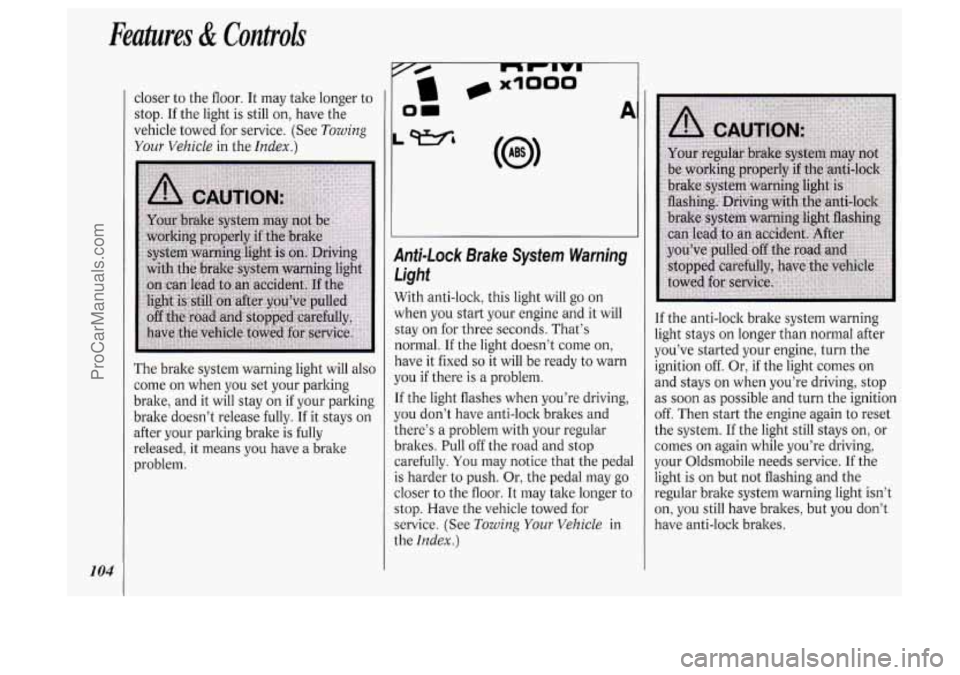
Anti-Lock Brake System Warning
Light
With anti-lock, this light will go on
when you start your engine and it will
stay on for three seconds. That’s
normal. If the light doesn’t come on,
have it fixed
so it will be ready to warn
you if there is a problem.
If the light flashes when you’re driving,
you don’t have anti-lock brakes and
there’s a problem with your regular
brakes. Pull off the road and stop
carefully.
You may notice that the pedal
is harder to push. Or, the pedal may go
closer to the floor. It may take longer to
stop. Have the vehicle towed for
service. (See
Towing Your Vehicle in
the
Index.)
I
If the anti-lock brake system warning
light stays on longer than normal after
you’ve started your engine, turn the
ignition off. Or, if the light comes on
i
and stays on when you’re driving, stop !
as soon as possible and turn the ignition
off. Then start the engine again to reset
! I
the system. If the light still stays on, or j
comes on again while you’re driving, ~
your Oldsmobile needs service. If the !
light is on but not flashing and the
regular brake system warning light isn’t
on,
you still have brakes, but you don’t
have anti-lock brakes.
ProCarManuals.com
Page 122 of 276
120
Comfort Controls &Audio Systems
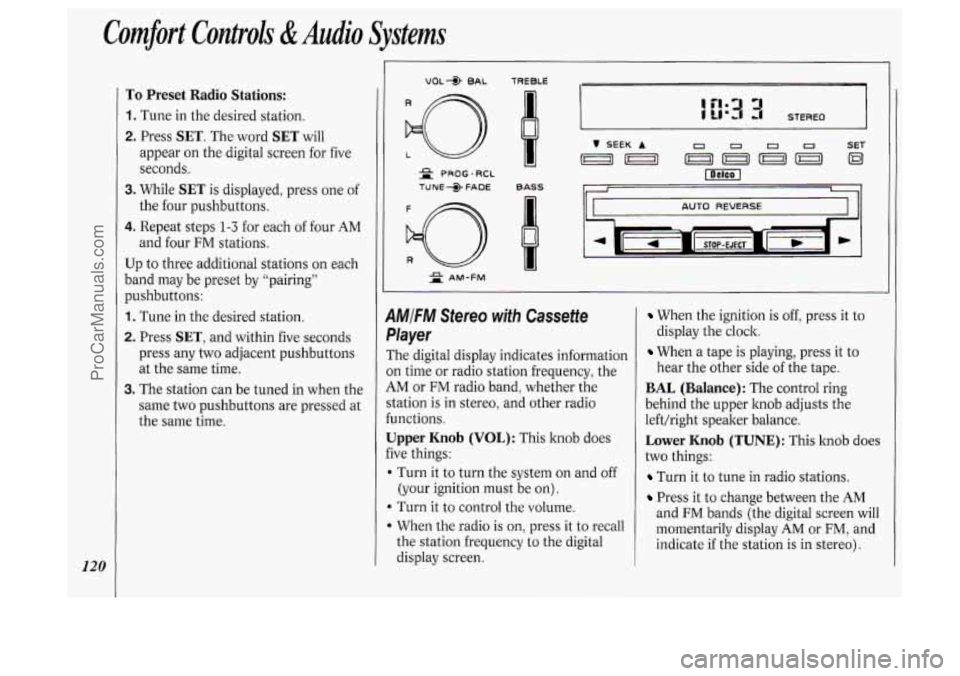
To Preset Radio Stations:
1. Tune in the desired station.
2. Press SET. The word SET will
appear on the digital screen for five
seconds.
3. While SET is displayed, press one of
the four pushbuttons.
4. Repeat steps 1-3 for each of four AM
and four
FM stations.
Up to three additional stations
on each
band may be preset by “pairing”
pushbuttons:
1. Tune in the desired station.
2. Press SET, and within five seconds
press any two adjacent pushbuttons
at the same time.
3. The station can be tuned in when the
same two pushbuttons are pressed at
the same time.
VOL* BAL TREBLE I= - -
= PROG-RCL
TUNE +> FADE BASS
d
AUTO REVERSE
2 AM-FM
1MIFM Stereo with Cassette
,layer
The digital display indicates information
)n time or radio station frequency, the
iM or FM radio band, whether the
‘tation is in stereo, and other radio
unctions.
Jpper Knob (VOL): This knob does
ive things:
I Turn it to turn the system on and off
(your ignition must be on).
b Turn it to control the volume.
When the radio is on, press it to recall
the station frequency to the digital
display screen.
When the ignition is off, press it to
display the clock.
When a tape is playing, press it to
hear the other side
of the tape.
BAL (Balance): The control ring
behind the upper knob adjusts the
left/right speaker balance.
Lower Knob (TUNE): This knob does
two things:
Turn it to tune in radio stations.
Press it to change between the AM
and FM bands (the digital screen will
momentarily display
AM or FM, and
indicate if the station is in stereo).
ProCarManuals.com
Page 123 of 276
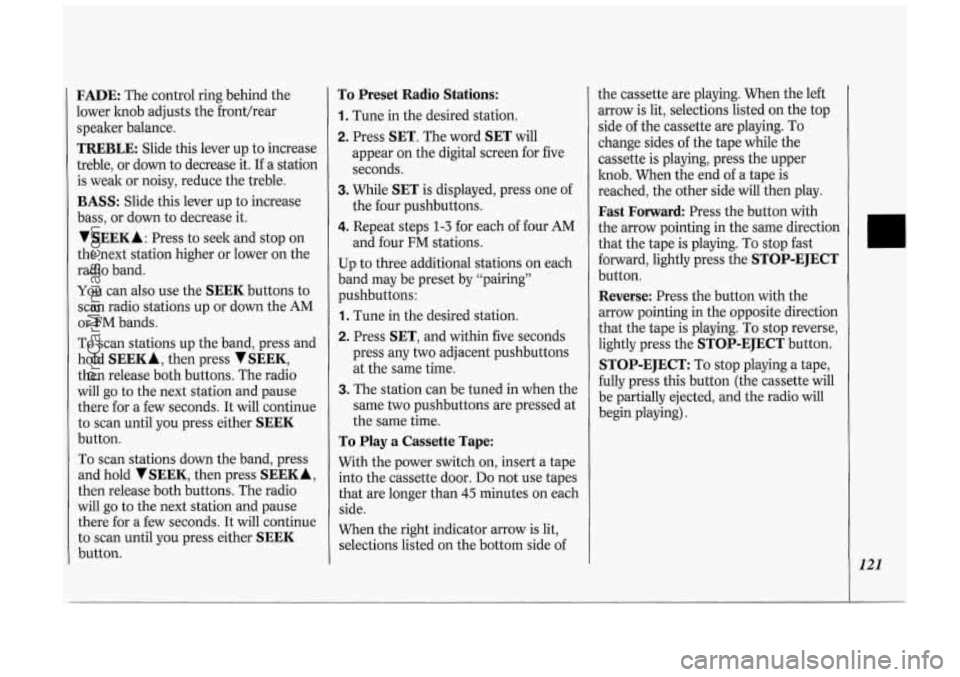
FADE: The control ring behind the
lower knob adjusts the fronthear
speaker balance.
TREBLE: Slide this lever up to increase
treble, or down to decrease it. If a station
is weak or noisy, reduce the treble.
BASS: Slide this lever up to increase
bass, or down to decrease it.
VSEEKA : Press to seek and stop on
the next station higher or lower on the
radio band.
You can also use the
SEEK buttons to
scan radio stations up or down the AM
or FM bands.
To scan stations up the band, press and
hold
SEEKA, then press VSEEK,
then release both buttons. The radio
will
go to the next station and pause
there for
a few seconds. It will continue
to scan until you press either
SEEK
button.
To scan stations down the band, press
and hold
V SEEK, then press SEEK A,
then release both buttons. The radio
will
go to the next station and pause
there for a few seconds. It will continue
to scan until you press either
SEEK
button.
To Preset Radio Stations:
1. Tune in the desired station.
2. Press SET. The word SET will
appear
on the digital screen for five
seconds.
3. While SET is displayed, press one of
the four pushbuttons.
4. Repeat steps 1-3 for each of four AM
and four FM stations.
Up to three additional stations
on each
band may be preset by “pairing”
pushbuttons:
1. Tune in the desired station.
2. Press SET, and within five seconds
press any two adjacent pushbuttons
at the same time.
3. The station can be tuned in when the
same two pushbuttons are pressed at
the same time.
To Play a Cassette Tape:
With the power switch on, insert a tape
into the cassette door.
Do not use tapes
that are longer than
45 minutes on each
side.
When the right indicator arrow is lit,
selections listed
on the bottom side of the cassette are
playing. When the left
arrow is lit, selections listed
on the top
side of the cassette are playing. To
change sides of the tape while the
cassette is playing, press the upper
knob. When the end of a tape is
reached, the other side will then play.
Fast Forward Press the button with
the arrow pointing in the same direction
that the tape is playing. To stop fast
forward, lightly press the
STOP-EJECT
button.
Reverse: Press the button with the
arrow pointing in the opposite direction
that the tape is playing. To stop reverse,
lightly press the
STOP-EJECT button.
STOP-EJECT: To stop playing a tape,
fully press this button (the cassette will
be partially ejected, and the radio will
begin playing).
121
ProCarManuals.com
Page 124 of 276
Comfort Controls &Audio Systems
122
AMIFM Stereo with Cassette
Pkyer with Dolby@
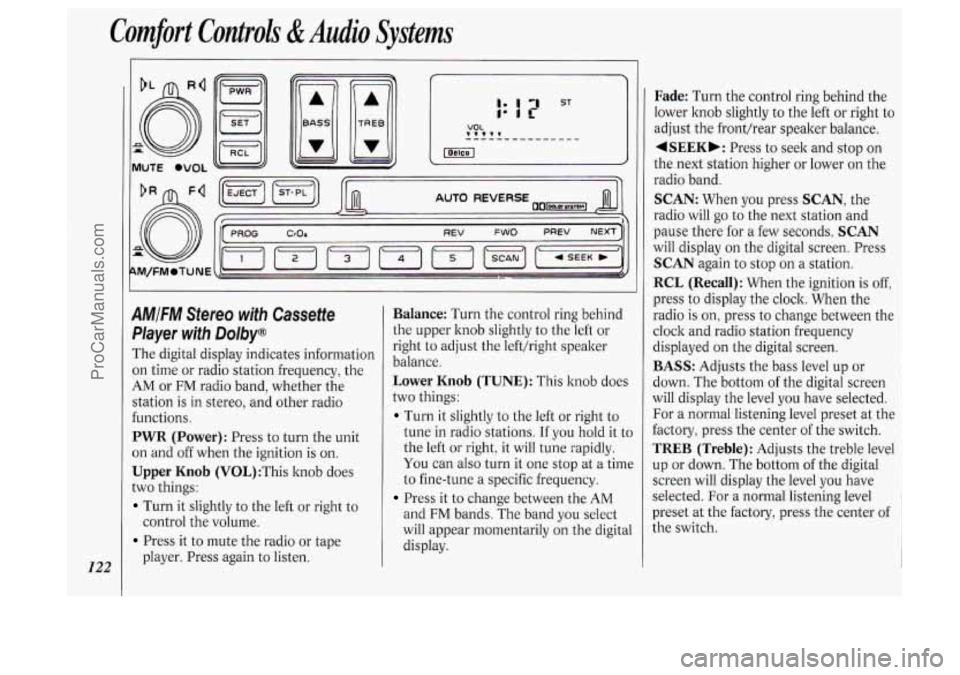
The digital display indicates information
on time or radio station frequency, the
AM or FM radio band, whether the
station
is in stereo, and other radio
functions.
PWR (Power): Press to turn the unit
on and off when the ignition
is on.
Upper Knob (V0L):This knob does
two things:
Turn it slightly to the left or right to
Press it to mute the radio or tape
control the
volume.
player. Press again to listen.
Balance: Turn the control ring behind
the upper knob slightly to the left or
right to adjust the lefthight speaker
balance.
Lower Knob (TUNE): This knob does
two things:
Turn it slightly to the left or right to
tune in radio stations. If you hold it to
the left or right, it will tune rapidly.
You can also turn it one stop at a time
to fine-tune a specific frequency.
Press it to change between the AM
and FM bands. The band you select
will appear momentarily on the digital
display.
Fade: Turn the control ring behind the
lower knob slightly to the left or right to
adjust the fronthear speaker balance.
4SEEKb: Press to seek and stop on
the next station higher or lower on the
radio band.
SCAN: When you press SCAN, the
radio will
go to the next station and
pause there for a few seconds.
SCAN
will display on the digital screen. Press
SCAN again to stop on a station.
RCL (Recall): When the ignition is off,
press to display the clock. When the
radio
is on, press to change between the
clock and radio station frequency
displayed on the digital screen.
BASS: Adjusts the bass level up or
down. The bottom
of the digital screen
will display the level you have selected.
For a normal listening level preset at the
factory, press the center of the switch.
TREB (Treble): Adjusts the treble level
up or down. The bottom of the digital
screen will display the level you have
selected. For a normal listening level
preset at the factory, press the center of
the switch.
ProCarManuals.com
Page 125 of 276
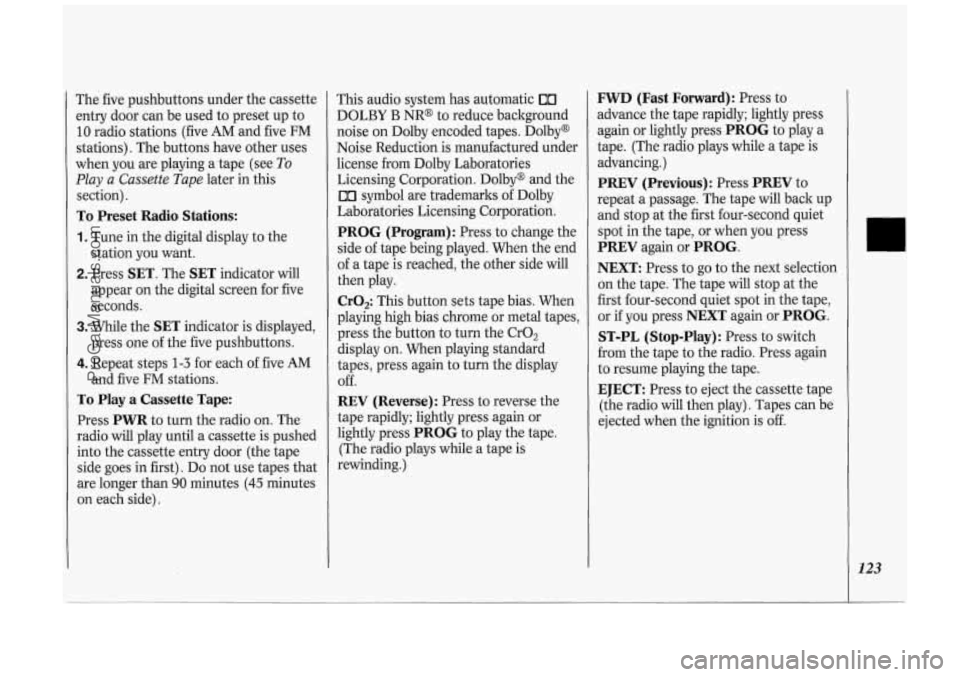
The five pushbuttons under the cassette
entry door can be used to preset up to
10 radio stations (five AM and five FM
stations). The buttons have other uses
when you are playing a tape (see
To
Play a Cassette Tape later in this
section).
To Preset Radio Stations:
1. Tune in the digital display to the
station you want.
2. Press SET. The SET indicator will
appear on the digital screen for five
seconds.
3. While the SET indicator is displayed,
press one of the five pushbuttons.
4. Repeat steps 1-3 for each of five AM
and five FM stations.
To Play a Cassette Tape:
Press PWR to turn the radio on. The
radio will play until a cassette is pushed
into the cassette entry door (the tape
side goes in first). Do not use tapes that
are longer than
90 minutes (45 minutes
on each side). This audio
system has automatic
00
DOLBY B NR@ to reduce background
noise on Dolby encoded tapes. Dolby@
Noise Reduction is manufactured under
license from Dolby Laboratories
Licensing Corporation. Dolby@ and the
00 symbol are trademarks of Dolby
Laboratories Licensing Corporation.
PROG (Program): Press to change the
side of tape being played. When the end
of a tape is reached, the other side will
then play.
Cr02: This button sets tape bias. When
playing high bias chrome or metal tapes,
press the button to turn the CrO,
display on. When playing standard
tapes, press again to turn the display
Off.
REV (Reverse): Press to reverse the
tape rapidly; lightly press again or
lightly press
PROG to play the tape.
(The radio plays while a tape is
rewinding.)
FWD (Fast Forward): Press to
advance the tape rapidly; lightly press
again or lightly press
PROG to play a
tape. (The radio plays while a tape is
advancing.)
PREV (Previous): Press PREV to
repeat a passage. The tape will back up
and stop at the first four-second quiet
spot in the tape, or when you press
PREV again or PROG.
NEXT:
Press to go to the next selection
on the tape. The tape will stop at the
first four-second quiet spot in the tape,
or if you press
NEXT again or PROG.
ST-PL (Stop-Play):
Press to switch
from the tape to the radio. Press again
to resume playing the tape.
EJECT: Press to eject the cassette tape
(the radio will then play). Tapes can be
ejected when the ignition is
off.
123
ProCarManuals.com