1994 CHEVROLET S10 oil change
[x] Cancel search: oil changePage 108 of 340
Downloaded from www.Manualslib.com manuals search engine Oil Pressure Gage
I
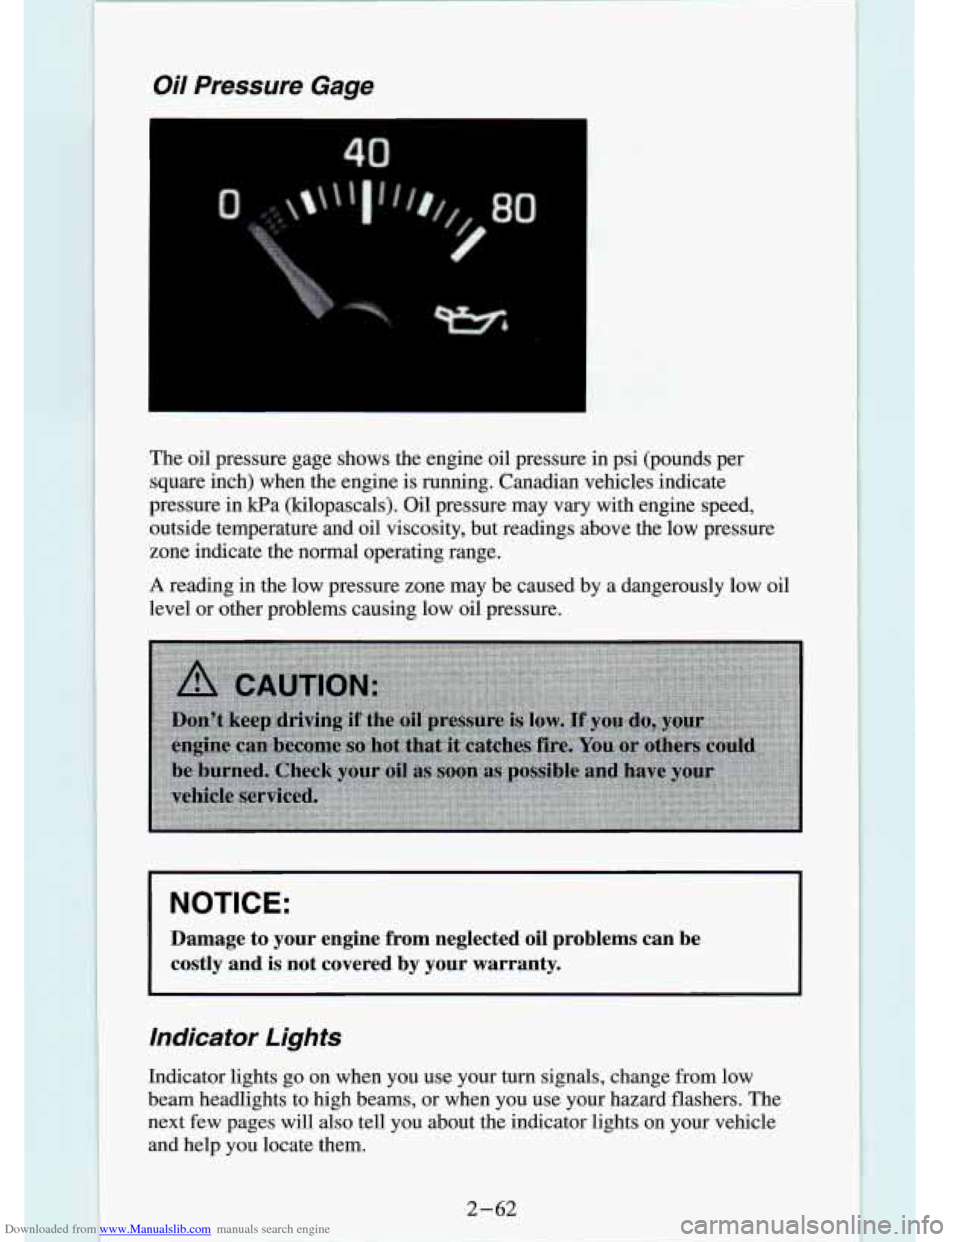
The oil pressure gage shows the engine oil pressure in psi (pounds per
square inch) when the engine is running. Canadian vehicles indicate
pressure in Pa (kilopascals). Oil pressure may vary with engine speed,
outside temperature and oil viscosity, but readings above the l\
ow pressure
zone indicate the normal operating range.
A reading in the low pressure zone may be caused by a dangerously low oil \
level or other problems causing low oil pressure.
NOTICE:
Damage to your engine from neglected oil problems can be
costly and
is not covered by your warranty.
Indicator Lights
Indicator lights go on when you use your turn signals, change from low
beam headlights to high beams, or when you use your hazard fl\
ashers. The
next few pages will also tell you about the indicator lights \
on your vehicle
and help you locate them.
Page 231 of 340
Downloaded from www.Manualslib.com manuals search engine Engine Oil Additives
Don’t add anything to your oil. Your GM dealer is ready to advise if you
think something should be added.
When to Change Engine Oil
See if any one of these is true for you:
Most trips are less than 4 miles (6 km).
0 It’s below freezing outside and most trips are less than 10 miles (16
km).
The engine is at low speed most of the time (as in door-to-door
delivery, or in stop-and-go traffic).
You tow a trailer often.
Most trips are through dusty places.
0 The vehicle is frequently operated off-road.
If any one of these is true for your vehicle, then you need to change your oil
andfilter every 3,000 miles (5 000 km) or 3 months - whichever comes
first.
If none of them is true, change the oil every
7,500 miles (12 500 km) or 12
months - whichever comes first. Change the filter at the first oil change
and at every other oil change after that.
Four-wheel Drive Remote Oil Filter
If your vehicle has four-wheel drive, you will have a remote oil filter
located under the radiator support. There is a special access \
door in the
vehicle body skirt shield.
Engine Coolant Heater (Engine Block Heater)
An engine coolant heater can be a big help if you have to park outside in
very cold weather,
0 “F (-1 8 O C) or colder. If your vehicle has this option,
see “Engine Coolant Heater
” in the Index.
What to Do with Used Oil
Did you know that used engine oil contains certain elements that may be
unhealthy for your skin and could even cause cancer? Don’t let used oil stay
on your skin for very long. Clean your skin and nails with soap and water,
or a good hand cleaner. Wash or properly throw away clothing or rags
containing wed engine oil. (See the manufacturer’s warnings about the use
and disposal of oil products.)
6-13
Page 232 of 340
Downloaded from www.Manualslib.com manuals search engine Used oil can De a real threat to the environment. If you change your own oil,
be sure to drain all free-flowing oil from the filter before \
disposal. Don’t
ever dispose of oil by putting
it in the trash, pouring it on the ground, into
sewers, or into streams or bodies of water. Instead, recycle it by taking it to
a place that collects used oil. If you have a problem properly disposing of
your used oil, ask your dealer, a service station or
a local recycling center
for help.
Air Cleaner
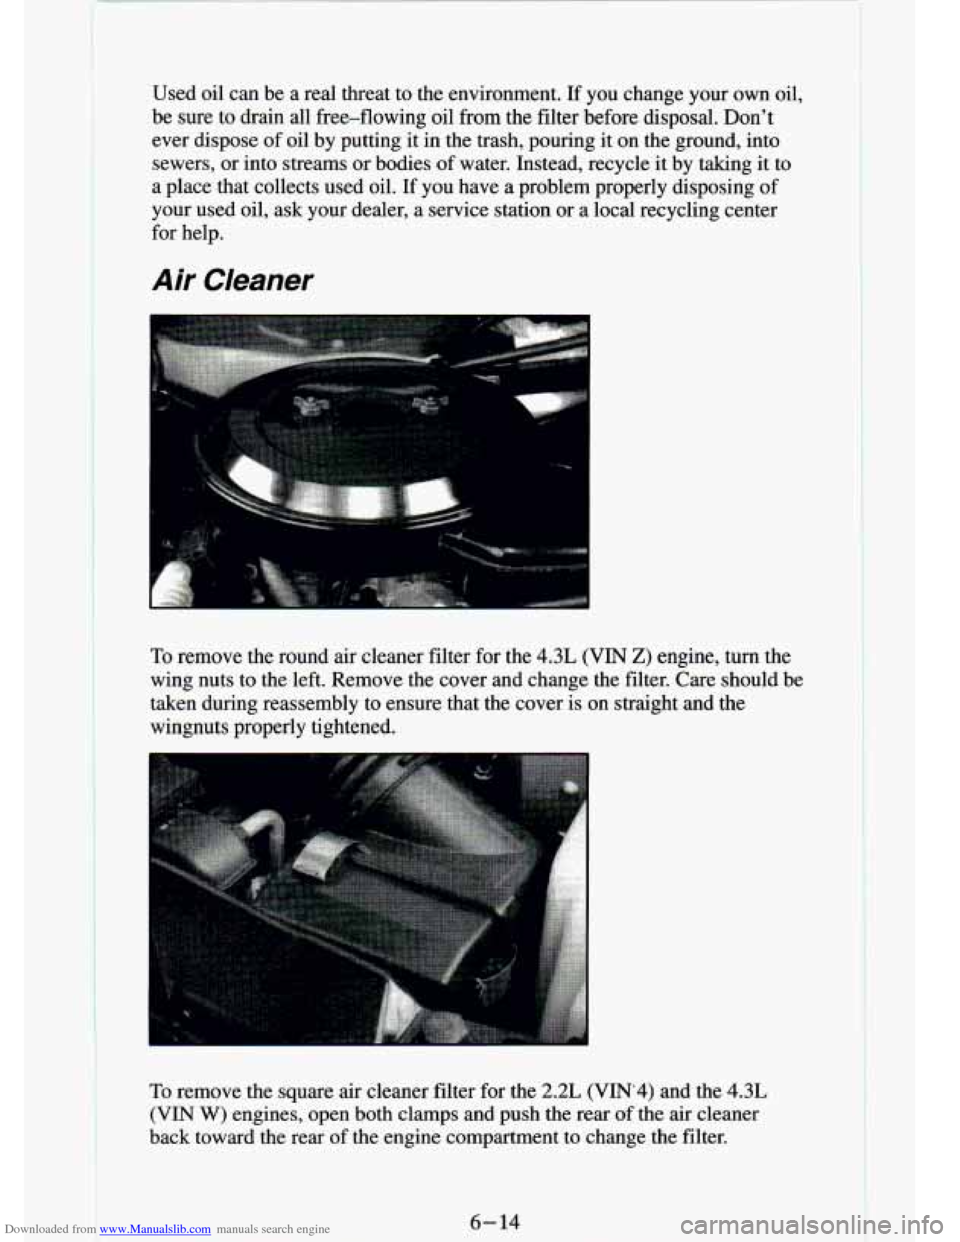
To remove the round air cleaner filter for the 4.3L (VIN 2) engine, turn the
wing nuts to the left. Remove the cover and change the filter\
. Care should be
taken during reassembly to ensure that the cover is on straigh\
t and the
wingnuts properly tightened.
To remove the square air cleaner filter for the 2.2L (VnV.4) and the 4.3L
(VIN W) engines, open both clamps and push the rear of the air cleaner
back toward the rear of the engine compartment to change the filter.
Page 233 of 340
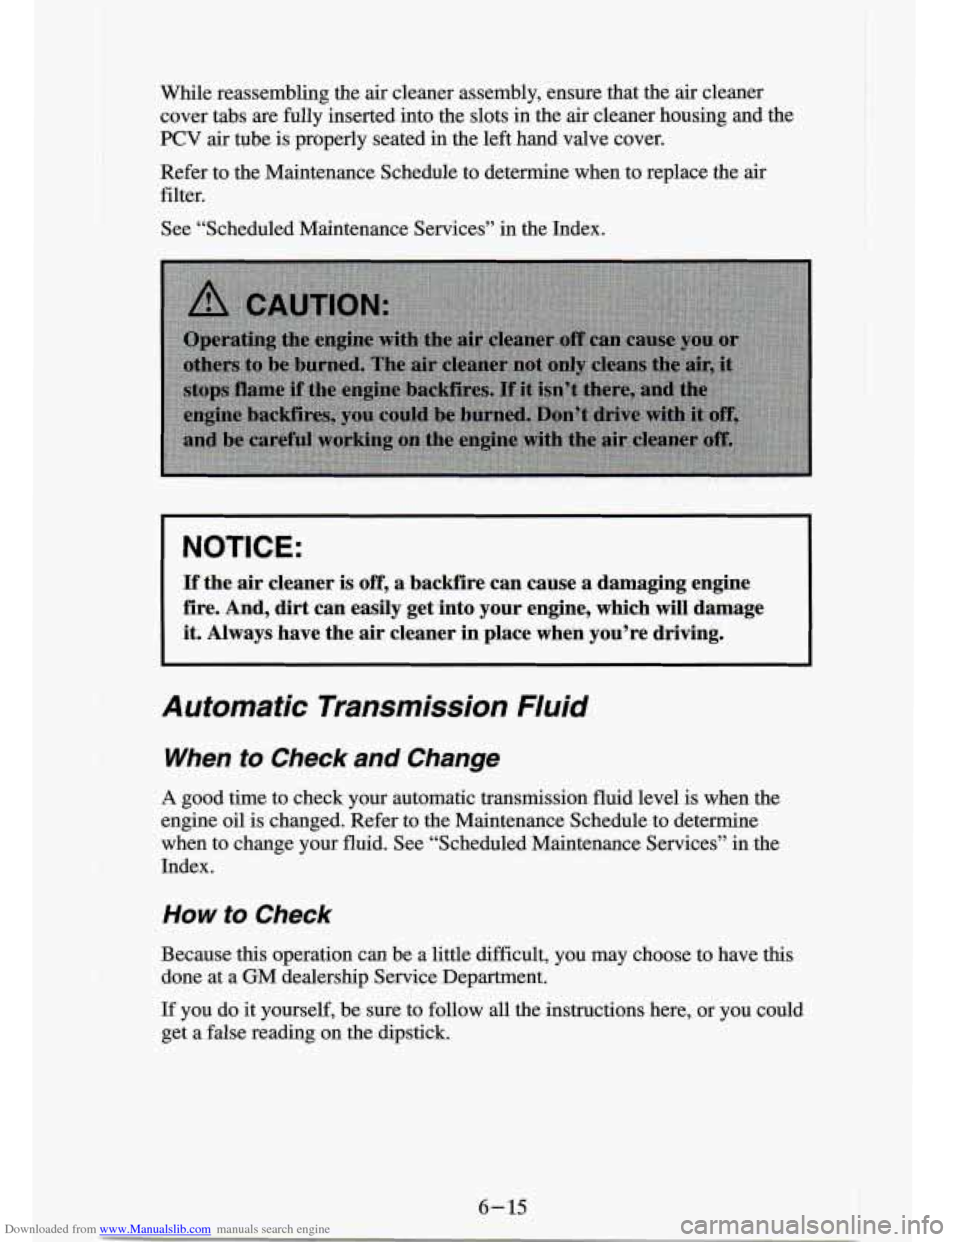
Downloaded from www.Manualslib.com manuals search engine While reassembling the air cleaner assembly, ensure that the air cleaner
cover tabs
are fully inserted into the slots in the air cleaner housing and the
PCV air tube is properly seated in the left hand valve cover.
Refer to
the Maintenance Schedule to determine when to replace the air
filter.
See “Scheduled Maintenance Services”
in the Index.
NOTICE:
If’ the air cleaner is off, a backfire can cause a damaging engine
fire.
And, dirt can easily get into your engine, which will damage
it. Always have the
air cleaner in place when you’re driving.
Automatic Transmission Fluid
When to Check and Change
A good time to check your automatic transmission fluid level is when the
engine oil is changed. Refer to the Maintenance Schedule to determine
when to change your fluid. See “Scheduled Maintenance Services” in the
Index.
How to Check
Because this operation can be a little difficult, you may choose to have this
done at a
GM dealership Service Department.
If you
do it yourself, be sure to follow all the instructions here, or you \
could
get a false reading on the dipstick.
6-15 I
Page 236 of 340
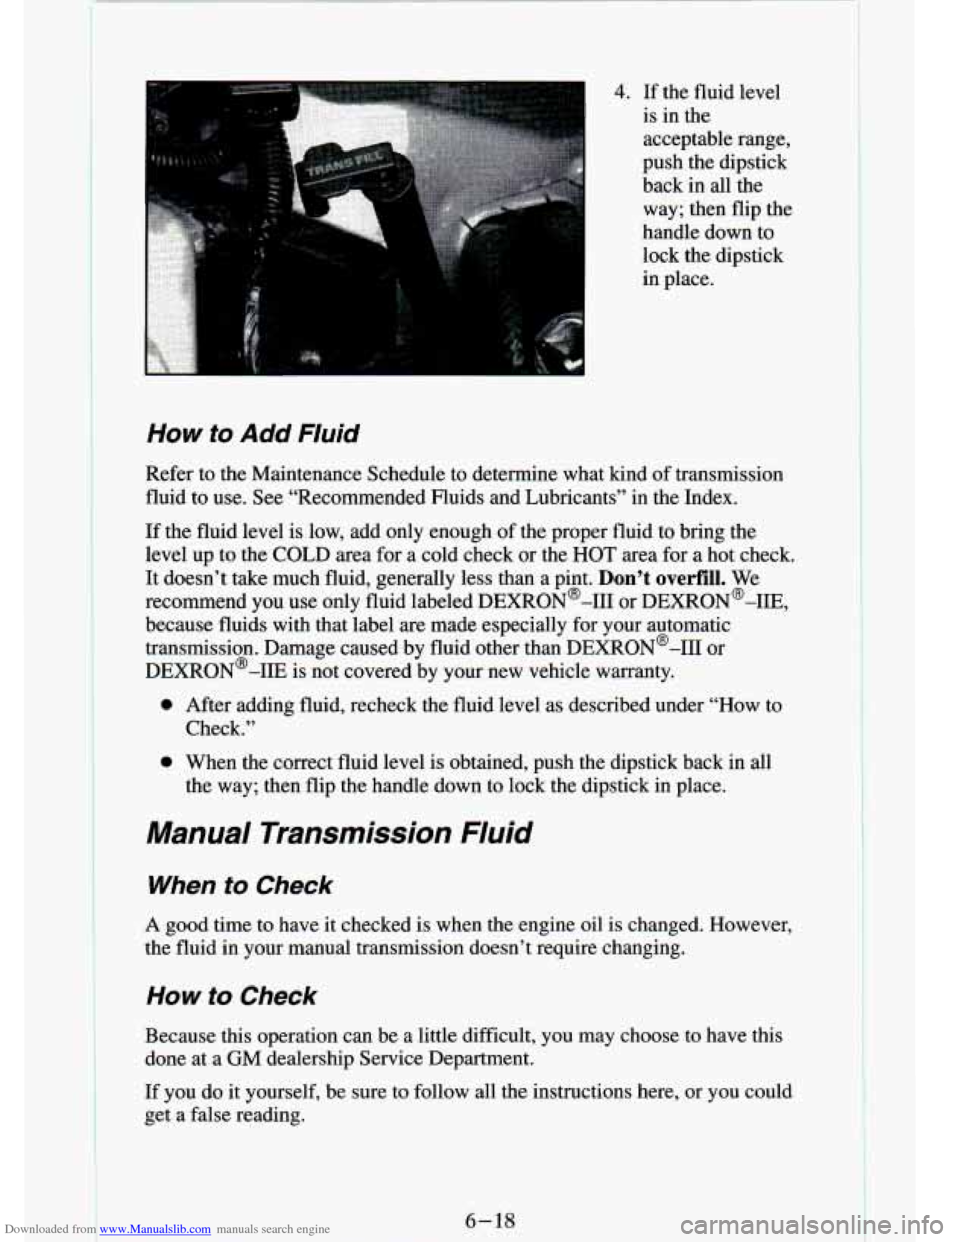
Downloaded from www.Manualslib.com manuals search engine 4. If the fluid level
is in the
acceptable range,
push the dipstick
back in all the
way; then flip the
handle down to
lock the dipstick
in place.
How to Add Fluid
Refer to the Maintenance Schedule to determine what kind of transmission
fluid to use. See “Recommended Fluids and Lubricants”
in the Index.
If the fluid level is low, add only enough of the proper fluid to bring the
level up to the COLD area for a cold check or the
HOT area for a hot check.
It doesn’t take much fluid, generally less than a pint.
Don’t overfill. We
recommend you use only fluid labeled DEXRON@-I11 or DEXRON@-IIE,
because fluids with that label are made especially for your automatic
transmission. Damage caused by fluid other than DEXRON@-I11 or
DEXR0N’-IIE is not covered by your new vehicle warranty.
0 After adding fluid, recheck the fluid level as described under “How to
Check.”
0 When the correct fluid level is obtained, push the dipstick ba\
ck in all
the way; then flip the handle down to lock the dipstick in place.
Manual Transmission Fluid
When to Check
A good time to have it checked is when the engine oil is changed. However,
the fluid in your manual transmission
doesn’t require changing.
How to Check
Because this operation can be a little difficult, you may choose to have this
done at a
GM dealership Service Department.
If you do it yourself, be sure to follow all the instructions\
here, or you could get a false reading.
6-18
Page 302 of 340
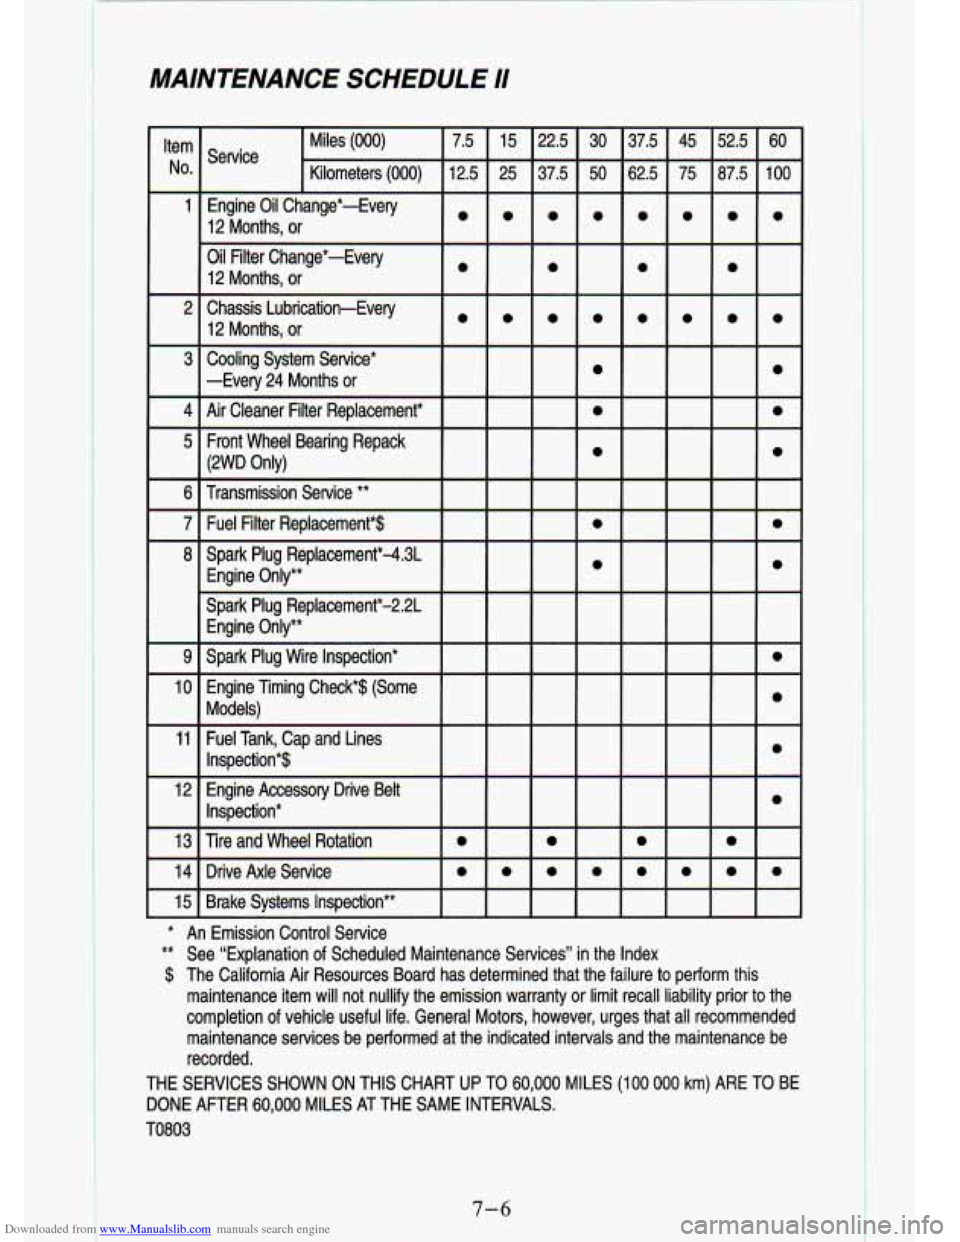
Downloaded from www.Manualslib.com manuals search engine MAINTENANCE SCHEDULE I/
Item Miles (000) 7.5 15 22.5 30 37.5 45 52.5 60
No. Kilometers
(000) 12.5 25 37.5 50 62.5 75 87.5 100
Service
1 Engine Oil Change*-Every 12 Months, or
Oil Filter Change*-Every
12 Months, or
2 Chassis Lubrication-Every 12 Months, or
3 Cooling System Service*
0
-Every 24 Months or
o.......
0 0 0 0
o.......
0
*
11 Fuel Tank, Cap and Lines
12 Engine Accessory Drive Belt
13 Tire and Wheel Rotation
0 0 0 0
14 Drive Axle Service OO......
15 Brake Systems Inspection**
* An Emission Control Service
** See “Explanation of Scheduled Maintenance Services” in the Index
$ The California Air Resources Board has determined that the fail\
ure to perform this Inspection*$
Inspection*
0
0
maintenance item will not nullify the emission warranty or limit recall liability prior to the
completion of vehicle useful life. General Motors, however, urges that all recommended
maintenance services be performed at the indicated intervals and the maintenance be
recorded.
THE SERVICES SHOWN ON THIS CHART
UP TO 60,000 MILES (100 000 km) ARE TO BE
DONE AFTER 60,000 MILES
AT THE SAME INTERVALS.
TO803
Page 303 of 340
Downloaded from www.Manualslib.com manuals search engine Explanation Of Scheduled Maintenance Services
Below are explanations of the services listed in the maintenance charts.
The proper fluids and lubricants to use are listed
in this section. Make sure
whoever services your vehicle uses these. All parts should be \
replaced and
all necessary repairs done before you or anyone else drives the vehicle.
1. ENGINE OIL AND OIL FILTER CHANGE* - ALWAYS USE
API SERVICE SH OR SG ENERGY CONSERVING I1 OILS
OF THE
PROPER VISCOSITY. The “SH” or
“SG’ designation may be shown
alone or in combination with others, such as “SWCD”, or
“SH, SG,
CD,” or “SGKD”, etc. To determine the preferred viscosity oil for your
vehicle’s engine (e.g. SAE 5W-30), see “Engine
Oil” in the Index.
2. CHASSIS LUBRICATION - Lubricate the front suspension, ball
joint, steering linkage, and transfer case shift linkage, parking brake\
cable guides, propshaft splines, universal joints, brake pedal springs,
and clutch pedal springs at the intervals specified on the proper
maintenance schedule, or at every engine oil change, whichever comes
first
.
Ball joints should not be lubricated unless their temperature is 10°F
(-12°C) or higher. When the weather is cold, let them warm up before
lubricating them or they could be damaged.
Also, be sure
to check all the vehicle fluid levels at this time.
3.
COOLING SYSTEM SERVICE* - Drain, flush and refill the
system with new or approved recycled coolant conforming to “\
GM
Specification 6038-M” (4.3L engine) or “GM Specification 6043-M”
(2.2L engine). See “Engine Coolant” in the Index for the proper coolant
and mixture to use in your vehicle.
Also inspect the hoses and replace them if they are cracked, \
swollen, or
deteriorated. Clean the outside of the radiator and air conditioning
condenser. Wash the radiator neck. To ensure proper operation,
pressure test the radiator and cap.
4. AIR CLEANER FILTER REPLACEMENT* - Replace at
specified intervals. Ask your dealer for the proper replacement
intervals for your driving conditions.
5. FRONT WHEEL BEARING REPACK (%WHEEL DRIVE
ONLY) - Clean and repack the front wheel bearings at each brake
relining, or at the specified interval, whichever comes first.
*An Emission Control Service
7-7
Page 308 of 340
Downloaded from www.Manualslib.com manuals search engine Periodic Maintenance Inspections
Listed below are inspections and services which should be perfo\
rmed at
least twice a year (for instance, each spring and fall). You should let your
GM dealer’s service department or other qualified service center do these
jobs. Make sure any necessary repairs are completed
at once.
Steering and Suspension Inspection? - Inspect front and rear suspension
and steering system for damaged, loose or missing parts, signs of wear or
lack of lubrication. Inspect power steering lines and hoses for proper
hook-up, binding, leaks, cracks, chafing, etc.
Lu‘ ~ kate the steering linkage.
Accelerator Control System - Lubricate all pivot points with engine oil,
except the
TBI throttle shaft. Do not lubricate the cam pulley. Remove all
external deposits from pulley.
Do not oil any accelerator or cruise control
cables. Replace any cables that have high effort or excessive \
wear.
Exhaust System Inspection - Inspect the complete system. Inspect the
body near the exhaust system. Look for broken, damaged, missing
or
out-of-position parts, as well as open seams, holes, loose conn\
ections or
other conditions which could cause a heat buildup in the
floor pan or could
let exhaust fumes seep into the passenger compartments. See “Engine
Exhaust” in the Index.
Drive Axle Service - Check readfront axle fluid level and add as needed.
Check constant velocity joints and axle seals for leaking.
Transfer Case (four-wheel drive) Inspection? - Every 12 months or at
oil change intervals, check front axle and transfer case and add l\
ubricant
when necessary. Check vent hose at transfer case
for kinks and proper
installation. More frequent lubrication may be required on off-road use.
7- 12
?A fluid loss in these systems may indicate a problem. Have them inspected
and repaired at once.