Page 236 of 340

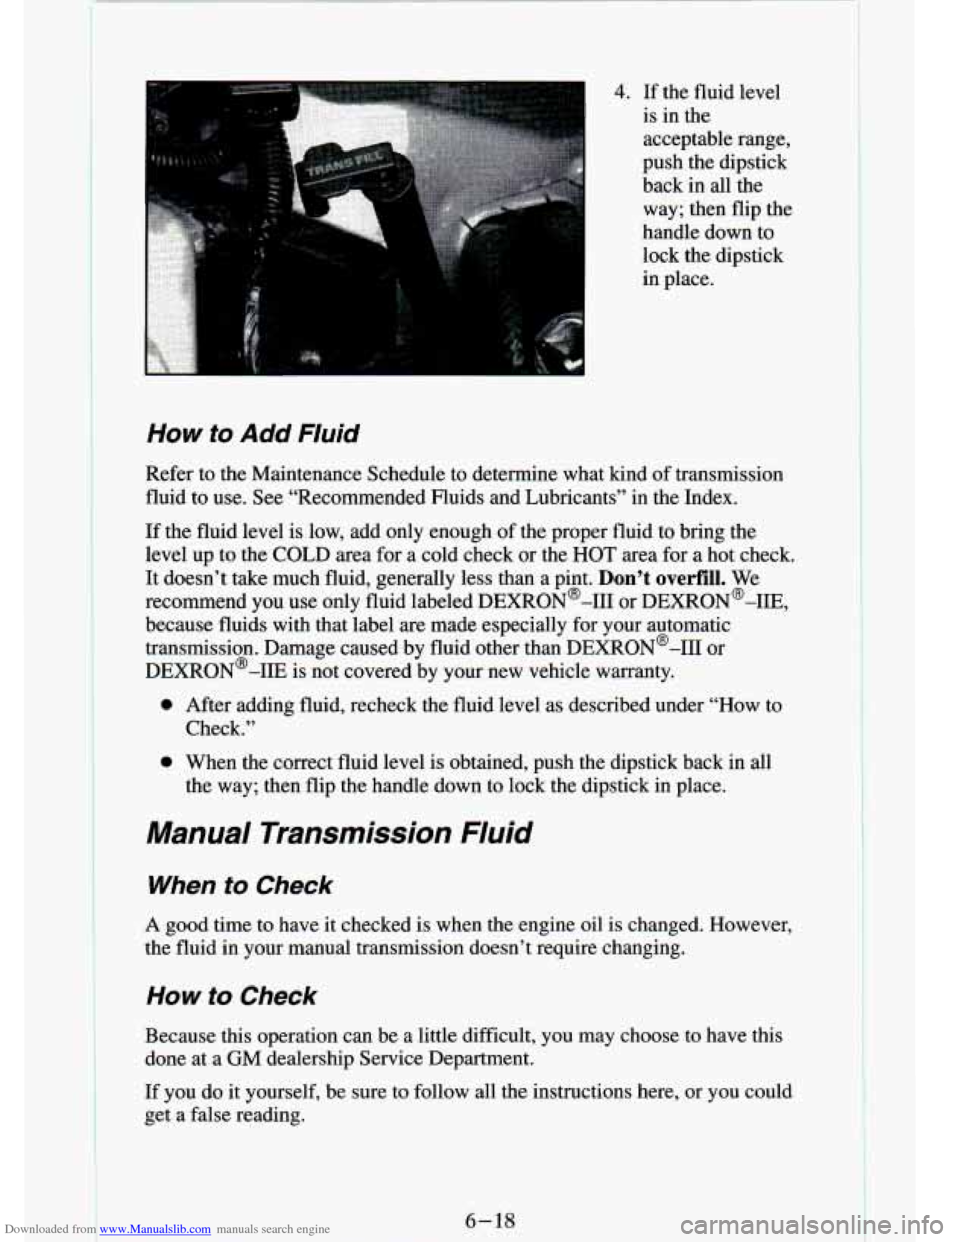
Downloaded from www.Manualslib.com manuals search engine 4. If the fluid level
is in the
acceptable range,
push the dipstick
back in all the
way; then flip the
handle down to
lock the dipstick
in place.
How to Add Fluid
Refer to the Maintenance Schedule to determine what kind of transmission
fluid to use. See “Recommended Fluids and Lubricants”
in the Index.
If the fluid level is low, add only enough of the proper fluid to bring the
level up to the COLD area for a cold check or the
HOT area for a hot check.
It doesn’t take much fluid, generally less than a pint.
Don’t overfill. We
recommend you use only fluid labeled DEXRON@-I11 or DEXRON@-IIE,
because fluids with that label are made especially for your automatic
transmission. Damage caused by fluid other than DEXRON@-I11 or
DEXR0N’-IIE is not covered by your new vehicle warranty.
0 After adding fluid, recheck the fluid level as described under “How to
Check.”
0 When the correct fluid level is obtained, push the dipstick ba\
ck in all
the way; then flip the handle down to lock the dipstick in place.
Manual Transmission Fluid
When to Check
A good time to have it checked is when the engine oil is changed. However,
the fluid in your manual transmission
doesn’t require changing.
How to Check
Because this operation can be a little difficult, you may choose to have this
done at a
GM dealership Service Department.
If you do it yourself, be sure to follow all the instructions\
here, or you could get a false reading.
6-18
Page 254 of 340
Downloaded from www.Manualslib.com manuals search engine Front ParklTurn Signal Lights
(Composite and Sealed Beam)
If you have fog lamps, the fog lamp bracket must be removed \
before you can replace the front park/turn signal lights.
1. Reach under the bumper and behind the parking/turn signal light\
assembly.
3. Pull the bulb out of the socket.
_. Turn the socket to
the left
and pull it
out.
4. Push the new bulb into the socket.
5. Put the socket back into the parking/turn signal light assembly and turn
it to the right until it locks in place.
6-36
Page 255 of 340
Downloaded from www.Manualslib.com manuals search engine Rear Lights
1. Open the tailgate.
2. Remove the light assembly screws
near the tailgate
latch and pull out
the light
assembly.
3. Pull the light assembly away
from the pickup
side panel.
4. Turn the socket to
the left to remove
it.
Push the tab in
while you turn
the socket.
5. Pull the bulb out.
6. Push the new bulb into the socket.
7. Put the socket into the light assembly and turn the socket to the right
until it locks in place.
8. Replace the light assembly. Install and tighten the screws.
9. Close the tailgate.
6-37
Page 258 of 340
Downloaded from www.Manualslib.com manuals search engine To Remove the Old Wiper Blade:
* Lift the wiper arm until it locks into a vertical position.
1. Blade Assembly
2. Arm Assembly
3. Locking Tab
4. Blade Pivot
5. Hook Slot
6. Arm Hook
Press down on the blade assembly pivot locking tab. Pull down on the
blade assembly to release it from the wiper
arm hook.
Kemove the insert from the blade assembly. The insert has two notches
at one end that
are locked by bottom claws of the blade assembly. At
the notched end, pull the insert from the blade assembly.
6-40
t -:
. L .
..
Page 260 of 340
Downloaded from www.Manualslib.com manuals search engine Be sure that the notches are locked by the bottom claws. Make sure that
all other claws are properly locked on both sides of the insert slots.
2
1. Claw in Notch
2. Correct Installation
3. Incorrect Installation
Put the blade assembly pivot in the wiper arm hook. Pull up until the
Carefully lower the wiper arm and blade assembly onto the wind\
shield.
pivot locking tab locks
in the hook slot.
Air Conditioning
Every now and then have your dealership check your air conditi\
oning
system to be sure it has not lost any cooling ability.
If you think the system
is not working properly, have your dealership check it out as soo\
n as
possible.
The air conditioning will not work when the temperature is
- - v 40°F
(4°C).
Page 261 of 340

Downloaded from www.Manualslib.com manuals search engine Lubrication
Accelerator Control System
Refer to the Maintenance Schedule to determine how often the a\
ccelerator linkage pivot points must be lubricated and what type
of lubricant to use.
Accelerator cables and cruise control cables should not be lubr\
icated. Any
cables that are worn or are hard
to pull should be replaced.
When cleaning the engine compartment with water or steam, avoid\
directing the flow onto the throttle linkage
in a manner that would cause moisture to
enter the cables.
Hood Latches and Hood Hinge
Refer to the Maintenance Schedule to determine how to lubricate\
the hood
latch and hood hinge assembly.
Propeller Shaft Slip Splines/Universal Joints
Refer to the Maintenance Schedule to determine how often the slip and
universal joints must be lubricated and what type
of lubricant to use.
Body
Normal use of your vehicle will cause metal to metal wear at some points on
the cab and body if they are not lubricated.
For exposed surfaces, such as door checks, door lock bolts, lock s\
triker
plates, dovetail bumper wedges, etc., a thin film
of engine oil should be
applied.
Where oil holes are provided in the body or cab, a dripless oil can be used.
The seat adjusters and seat track should be lubricated with chassis\
grease.
Door weatherstrips and rubber hood bumpers should be wiped clea\
n with a wet cloth and lightly coated with a rubber lubricant.
Never use too much
of any lubricant and be sure to wipe up any extra
lubricant when you are finished.
Window regulators and controls are inside the doors. They are lubricated
with a long lasting grease.
If lubrication is required your dealer should
perform this service.
Refer to the Maintenance Schedule to determine how often to lubricate
these items and what type of lubricant to use.
Page 262 of 340

Downloaded from www.Manualslib.com manuals search engine Lock Cylinders
To be sure your locks operate properly, they must be lubricated.
Refer to the Maintenance Schedule to determine
how often to lubricate them
and what type
of lubricant to use.
You should not use penetrating oils because they could wash out the factory
installed lubricant and cause
the lock to bind. De-icers which contain
alcohol could
also wash away the lubricant, so be sure to lubricate the lock
after using a de-icer of this type.
Tailgate Handle
The tailgate handle pivot points on your vehicle should be lubricated to keep
the handle working smoothly.
Refer to the Maintenance Schedule to determine
how often to lubricate them
and what type
of lubricant to use.
Exhaust System
To help prevent damage to your exhaust system, do not continue to drive
your vehicle if you notice:
Engine misfiring
Loss of performance
Other unusual operating conditions
Have your engine and exhaust system serviced regularly.
Three- Way Catalytic Converter
Your vehicle's three-way catalytic converter is designed to reduce the
pollutants in your vehicle's exhaust. Use only unleaded fuel in your vehicle.
If you use leaded fuel, you could damage your three-way catalytic converter
and other engine components.
Malfunction Indicator Lamp (SERVICE ENGINE SOON )
This light on your instrument panel lets you know when your emission
system needs service. The light will come on briefly when you start your
engine to let you know that the system
is working. If it does not come on
when you start your engine, or if it comes on and stays on while you're
driving, your system may
need service. Your vehicle should still be
driveable, but you should have your system serviced right away.
6-44
Page 263 of 340

Downloaded from www.Manualslib.com manuals search engine Engine Control Module System
This system has an oxygen (02) sensor that helps keep your engine’s
air-fuel mixture at a proper level. Use only unleaded fuel in your vehicle.
If
you use leaded fuel, you could damage your oxygen (02) sensor and affect
your vehicle’s emissions.
Loading Your Vehicle
The CertificatiodTire label is found on the driver’s door lock pillar. The
label shows the size of your original tires and the inflation pressures needed
to obtain the
gross weight capacity of your vehicle. This is called the
GVWR (Gross Vehicle Weight Rating). The GVWR includes the weight of
the vehicle,
all occupants, fuel and cargo.
The CertificatiodTire label
also tells you the maximum weights for the
front and rear axles, called Gross Axle Weight Rating
(GAWR). To find out
the actual
loads on your front and rear axles, you need to go to a weigh
station and weigh
your vehicle. Your dealer can help you with this. Be sure
to spread out your load equally
on both sides of the centerline.
Never exceed the GVWR for your vehicle, or the Gross Axle Weight Rating
(GAWR) for either the front or rear axle.
And, if you do have a heavy load, you should spread it out.
6-45