1994 CHEVROLET CORVETTE light
[x] Cancel search: lightPage 72 of 274
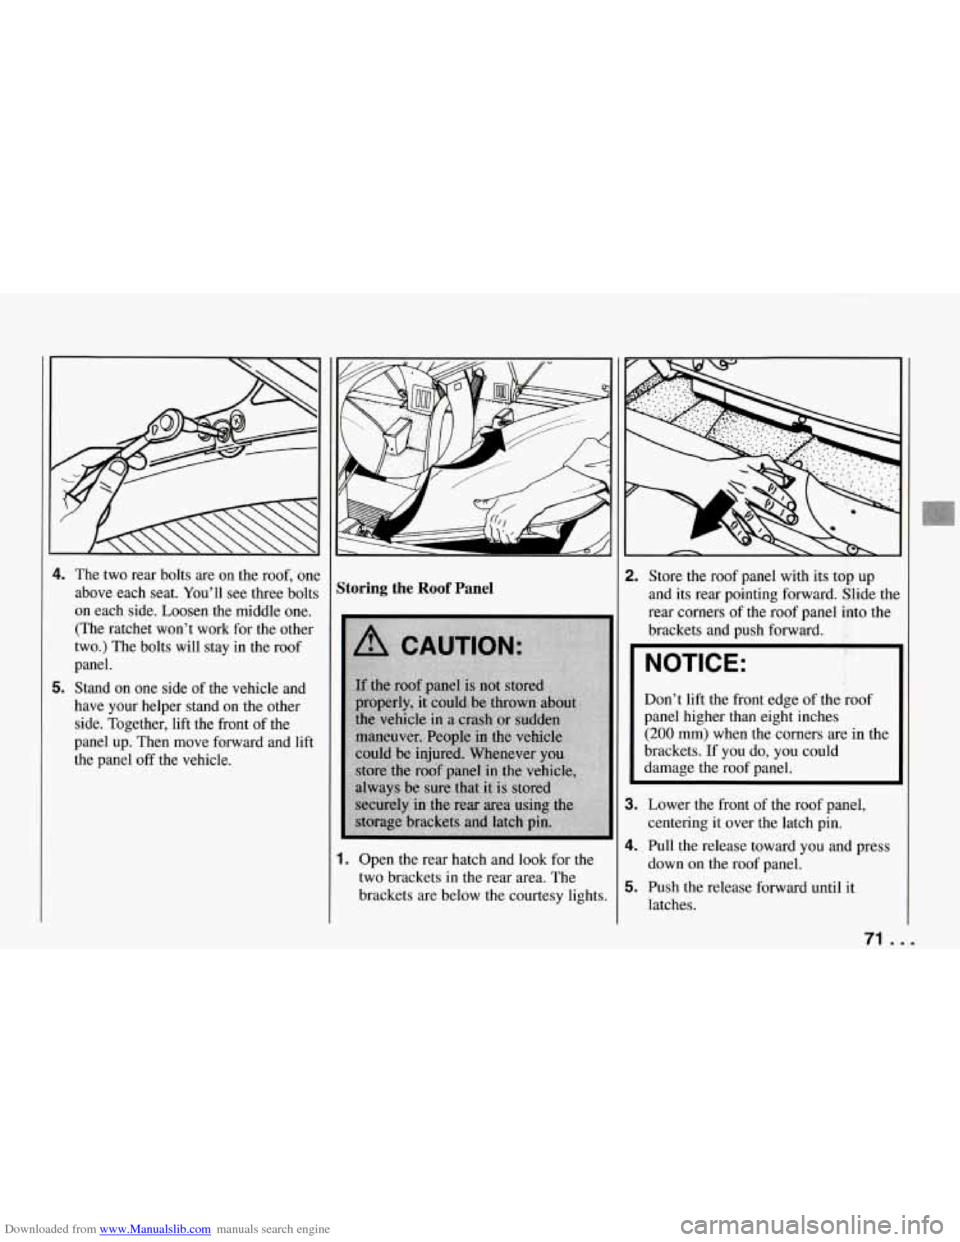
Downloaded from www.Manualslib.com manuals search engine 4. The two rear bolts are on the roof, one
above each seat. You’ll see three bolts
on each side. Loosen the middle one. (The ratchet won’t work for the other
two.) The bolts will stay in the roof
panel.
5. Stand on one side of the vehicle and
have your helper stand on the other
side. Together, lift the front of the
panel up. Then move forward and lift
the panel
off the vehicle.
Storing the Roof Panel
1. Open the rear hatch and look for the
two brackets in the rear area. The
brackets are below the courtesy lights.
2. Store the roof panel with its top up
and its rear pointing forward. Slide tht
rear corners of the roof panel into the
brackets and push forward.
NOTICE:
Don’t lift the front edge of the roof
panel higher than eight inches
(200 mm) when the corners are in the
brackets. If you do, you could
damage the roof panel.
3. Lower the front of the roof panel,
centering it over the latch pin.
4. Pull the release toward you and press
down on the roof panel.
5. Push the release forward until it
latches.
71 ...
Page 76 of 274
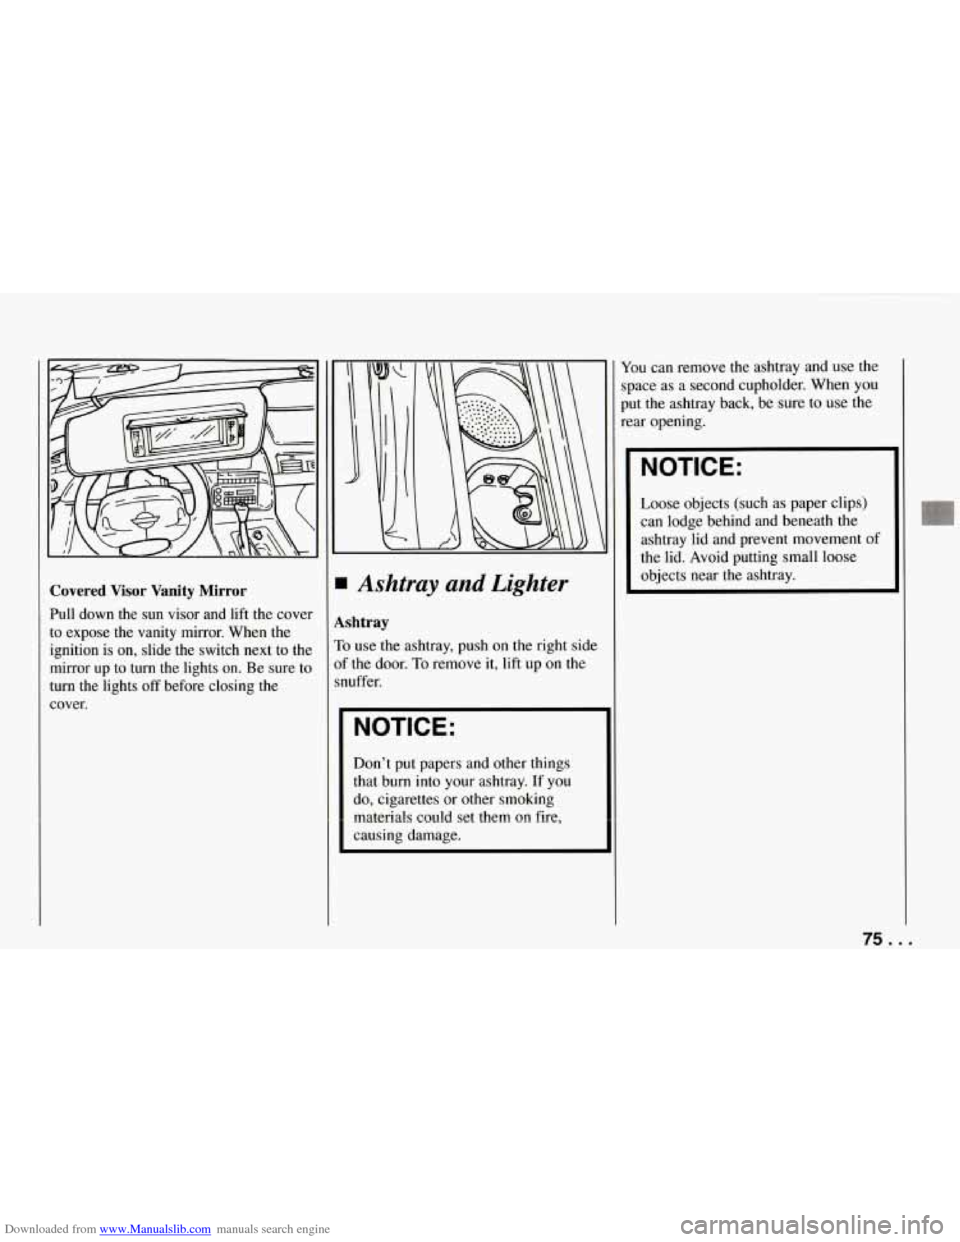
Downloaded from www.Manualslib.com manuals search engine Covered Visor Vanity Mirror
Pull down the sun visor and lift the cover
to expose the vanity mirror. When the
ignition is on, slide the switch next to the
mirror up
to turn the lights on. Be sure to
turn the lights
off before closing the
cover.
Ashtray and Lighter
shtray
t use the ashtray, push on the right side
the door.
To remove it, lift up on the
uffer.
NOTICE:
Don’t put papers and other things
that burn into your ashtray. If you
do, cigarettes or other smoking
materials
could set them on fire,
causing damage. You
can remove the ashtray and use the
space as a second cupholder. When you
put the ashtray back, be sure to use the
rear opening.
NOTICE:
Loose objects (such as paper clips)
can lodge behind and beneath the
ashtray lid and prevent movement of
the lid. Avoid putting small loose
objects near the ashtray.
75 ...
Page 77 of 274
Downloaded from www.Manualslib.com manuals search engine Features and Controls
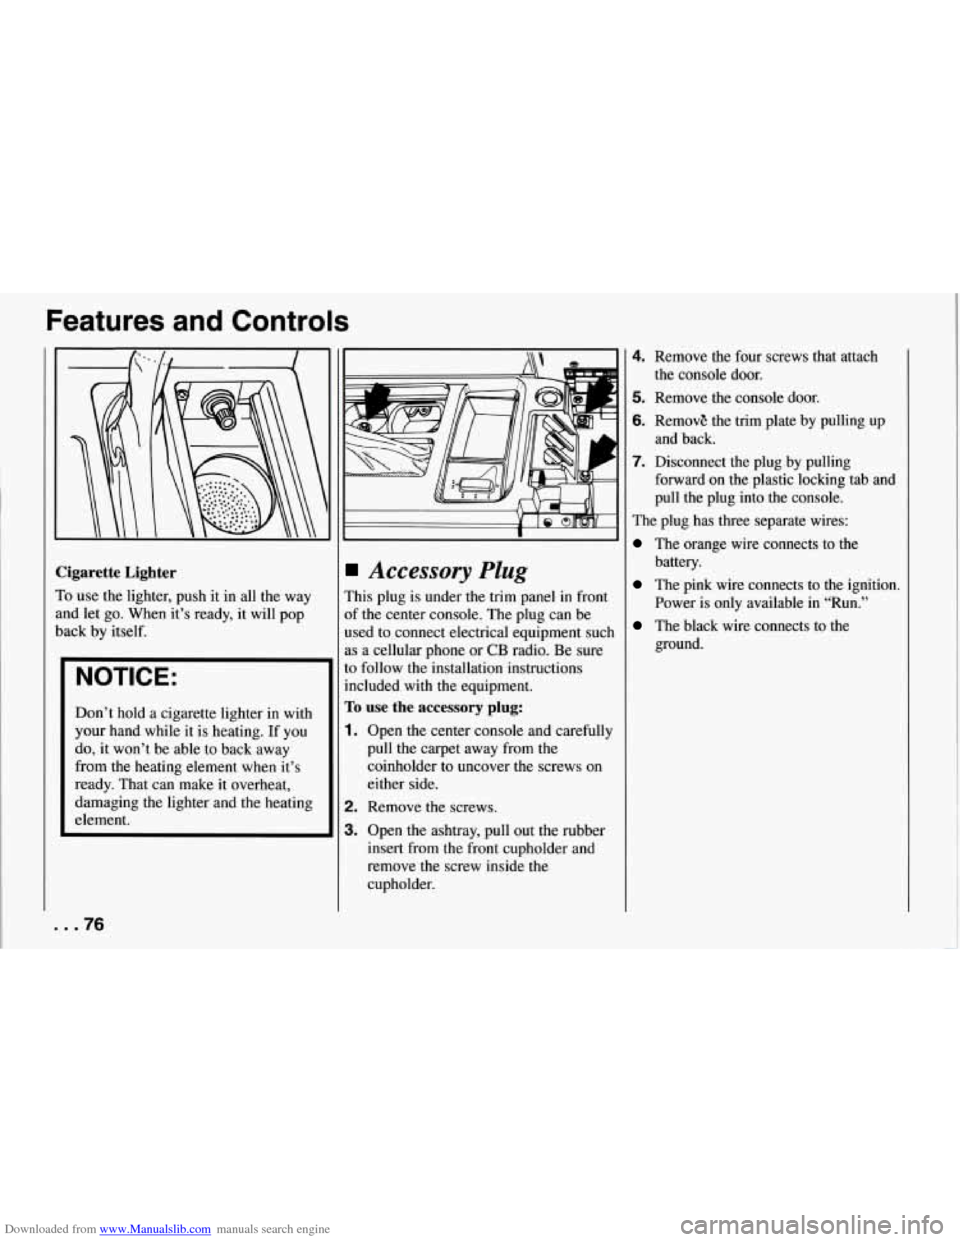
Cigarette Lighter
To use the lighter, push it in all the way
and let go. When it’s ready, it will pop
back by itself.
NOTICE:
Don’t hold a cigarette lighter in with
your hand while it is heating. If you
do, it won’t be able to back away
from the heating element when it’s
ready. That can make it overheat,
damaging the lighter and the heating
element.
Accessory Plug
This plug is under the trim panel in front
of the center console. The plug can be
used to connect electrical equipment such
as a cellular phone
or CB radio. Be sure
to follow the installation instructions
included with
the equipment.
To use the accessory plug:
1. Open the center console and carefully
pull the carpet away from the
coinholder to uncover the screws on
either side.
2. Remove the screws.
3. Open the ashtray, pull out the rubber
insert from the front cupholder and
remove the screw inside the
cupholder.
4. Remove the four screws that attach
5. Remove the console door.
6. RemovE the trim plate by pulling up
7. Disconnect the plug by pulling
the console door.
and back.
forward on the plastic locking tab and
pull the plug into the console.
The plug has three separate wires:
The orange wire connects to the
battery.
The pink wire connects to the ignition.
Power is only available in “Run.”
The black wire connects to the
ground.
... 76
Page 80 of 274

Downloaded from www.Manualslib.com manuals search engine Instrument Panel
1. Acceleration Slip Regulation Switch
2. Side Window Defogger Vent
3. Side Air Vent
4. Turn Signaweadlight Beam Lever
5. Tilt Lever
6. Instrument Cluster
7. Ignition Switch
8. Trip Monitor Controls
9. Solar Sensor
IO. Center Air Vent
11. Driver Information Center
12. Comfort Controls
13. Fuse Panel
14. Audio System
15. Ashtray/Lighter/Cupholder
16. Selective Ride Control (if equipped)
17. Power Seat Control (if equipped)
18. Shift Lever
19. Horn
20. Main Light Control
21. Fog Lamp Switch
79 ...
Page 83 of 274
Downloaded from www.Manualslib.com manuals search engine Features and Controls
Warning Lights, Gauges
and Indicators
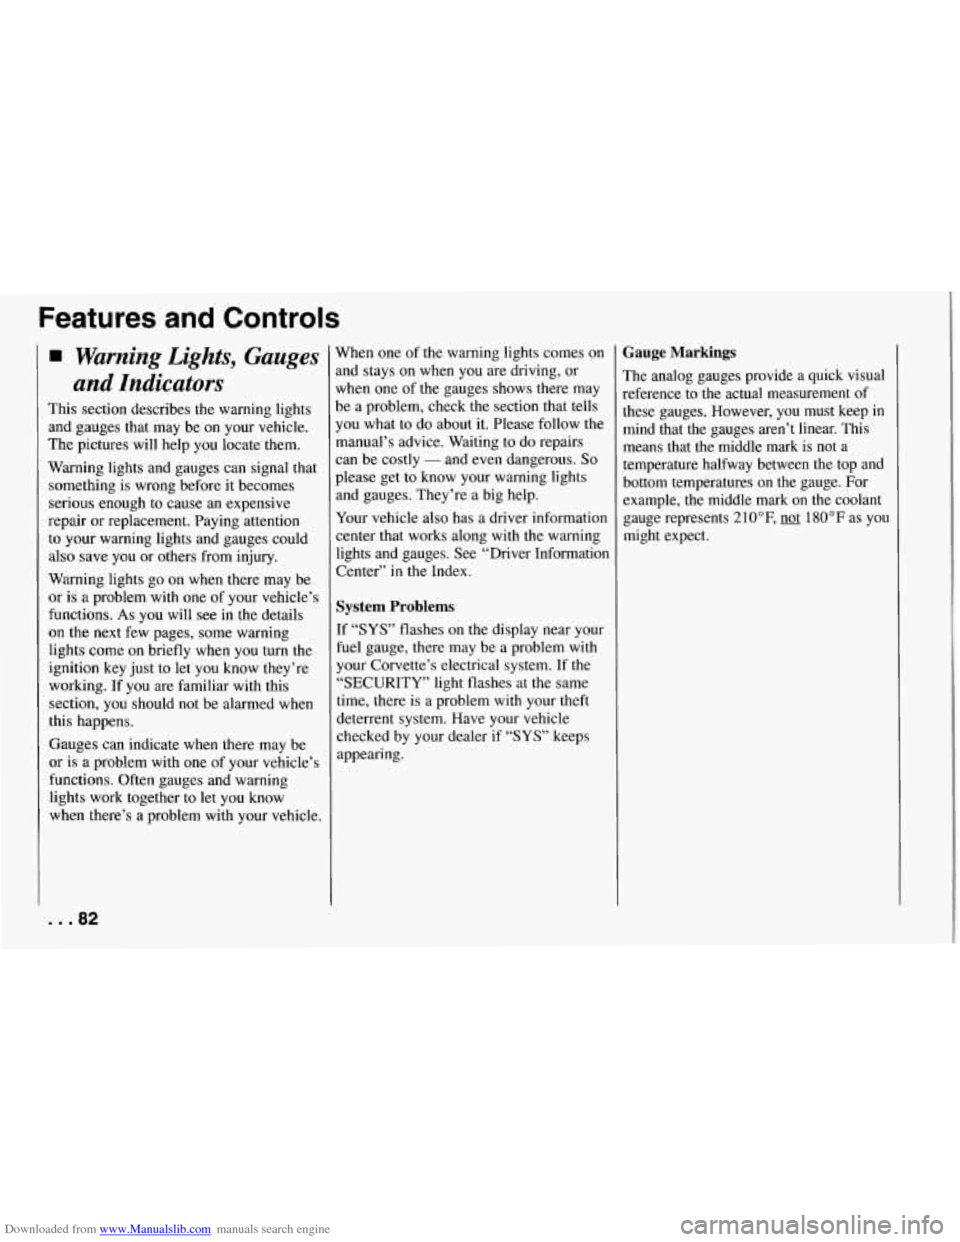
This section describes the warning lights
and gauges that may be on your vehicle.
The pictures will help you locate them.
Warning lights and gauges can signal that
something is wrong before it becomes
serious enough to cause an expensive
repair or replacement. Paying attention
to your warning lights and gauges could
also save you or others from injury.
Warning lights go on when there may be
or
is a problem with one of your vehicle’s
functions.
As you will see in the details
on the
next few pages, some warning
lights come on briefly when you turn the
ignition key just to let you know they’re
working. If you are familiar with this
section, you should not be alarmed when
this happens.
Gauges can indicate when there may be
or is a problem with one of your vehicle’s
functions. Often gauges and warning
lights work together to
let you know
when there’s a problem with your vehicle.
... 82
When one of the warning lights comes on
and stays on when you are driving, or
when one of the gauges shows there may
be a problem, check the section that tells
you what to do about
it. Please follow the
manual’s advice. Waiting to
do repairs
can be costly
- and even dangerous. So
please get to know your warning lights
and gauges. They’re a big help.
Your vehicle also has a driver information
center that works along with the warning
lights and gauges. See “Driver Information Center’’
in the Index.
System Problems
If “SYS” flashes on the display near your
fuel gauge, there may be a problem with
your Corvette’s electrical system. If the
“SECURITY” light flashes at the same
time, there is a problem with your theft
deterrent system. Have your vehicle
checked by your dealer
if “SYS’ keeps
appearing.
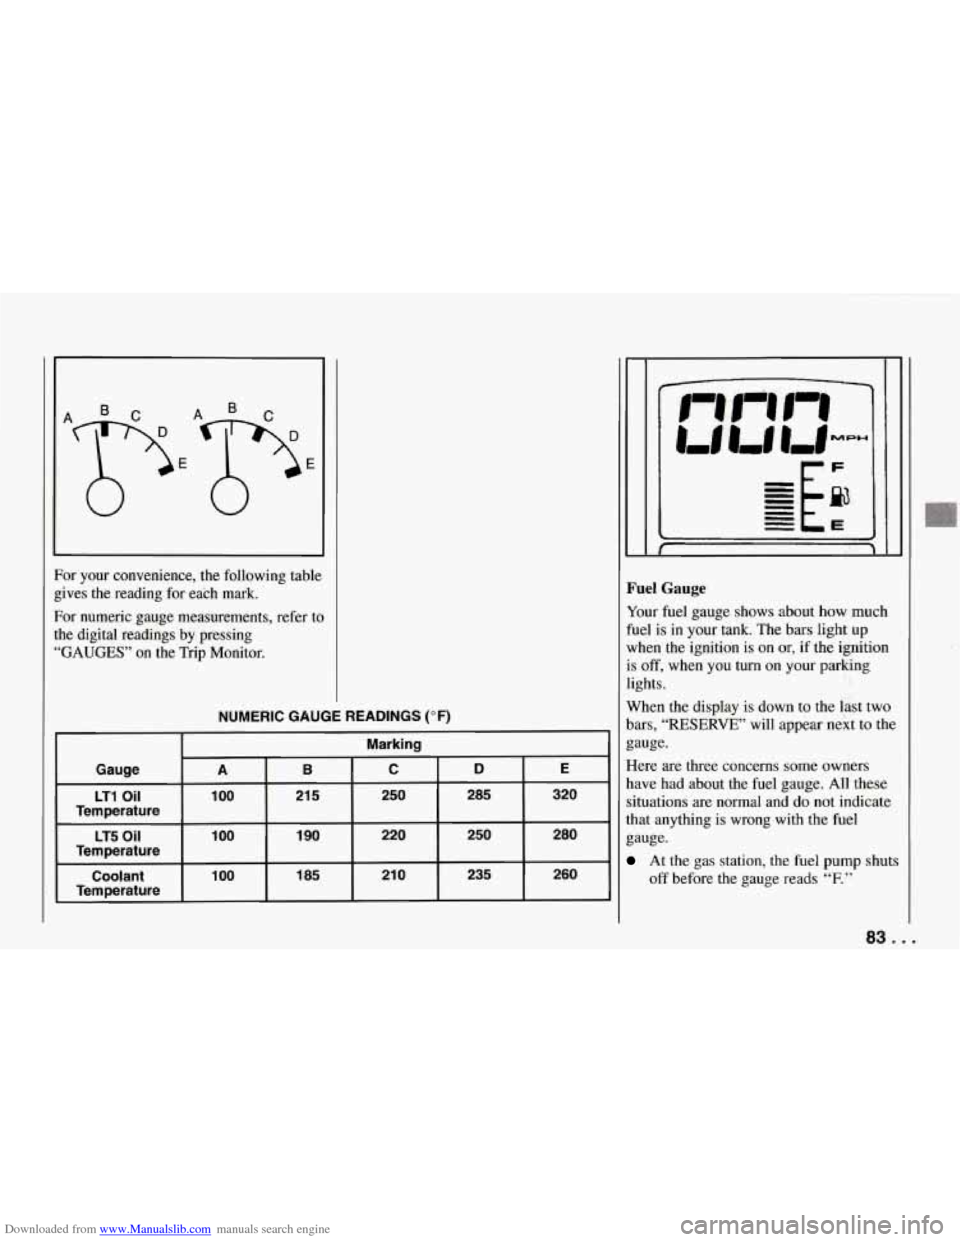
Gauge Markings
The analog gauges provide a quick visual
reference to the actual measurement of
these gauges. However, you must keep in mind that the gauges aren’t linear. This means that the middle mark is not
a
temperature halfway between the top and
bottom temperatures on the gauge. For
example, the middle mark on the coolant
gauge represents 210°F,
not 180°F as you
might expect.
Page 84 of 274
Downloaded from www.Manualslib.com manuals search engine For your convenience, the following table
gives the reading for each mark.
For numeric gauge measurements, refer to
the digital readings by pressing
“GAUGES” on the Trip Monitor.
NUMERIC GAUGE READINGS (OF)
Marking
Gauge
B C D E A
LT1 Oil 100
185 21
0 235 260 100 Coolant 1
90 220 250 280 1 00 LT5 Oil
21 5 250 285 320
Temperature
Temperature
Temperature
Fuel Gauge
Your fuel gauge shows about how much
fuel is in your tank. The bars light up
when the ignition is on or, if the ignition
is
off, when you turn on your parking
lights.
When the display
is down to the last two
bars,
“RESERVE” will appear next to the
gauge.
Here are three concerns some owners
have had about the fuel gauge. All these
situations are normal and do not indicate
that anything is wrong with the fuel
gauge.
At the gas station, the fuel pump shuts
off before the gauge reads
“F.”
83 ...
Page 85 of 274

Downloaded from www.Manualslib.com manuals search engine Features and Controls
It takes more (or less) fuel to fill up
than the gauge reads. For example, the
gauge reads half full, but it took more
(or less) than half of the tank’s
capacity to fill it.
The gauge moves a little when you
turn, stop or speed up.
You can use the Trip Monitor to display
more detailed fuel information. Each time
you press “FUEL INFO,” one
of the
following will appear next to the fuel
gauge.
INST The fuel economy calculated
for your current driving conditions.
AVERAGE: The fuel economy
calculated for the current tank of fuel,
or since you last reset the display.
RANGE: The distance you can drive
before refueling.
Blank: The fuel gauge is displayed
alone.
You should reset the fuel information
display every time you refuel. Press
“RESET FUEL” on the Trip Monitor. :loser to the floor.
It may
take longer to
stop. If the light is still on, have the
vehicle towed for service. (See “Towing
Your Vehicle” in the Index.)
... 84
Brake System Warning Light
Your Corvette’s hydraulic brake system
is divided into two parts. If one part isn’t
working, the other part can still work and
stop you. For good braking, though, you
need both parts working well.
This light should come on as you start thc
vehicle. If it doesn’t come on then, have
it fixed
so it will be ready to warn you if
there’s a problem. If this warning light
stays on, there could be
a brake problem.
Have your brake system inspected right
away.
If the light comes on while you are
driving, pull
off the road and stop
carefully. You may notice that the pedal
is harder to push. Or, the pedal may go
Page 86 of 274

Downloaded from www.Manualslib.com manuals search engine I
1
E
E
1
S
t
r
r
’arking Brake Indicator Light
rhis light will come on when you set your
mking brake, and it will stay on if your
)arking brake doesn’t release fully.
rhis light should also come on as you
tart the.vehicle. If it doesn’t come on
hen, have it fixed
so it will be ready to
cmind you if the parking brake hasn’t
&eleased fully.
SERVICE
Anti-Lock Brake System Warning
Light
With anti-lock, this light will come on
when you start your engine and may stay
on for about two seconds. That’s normal.
If the light doesn’t come on, have it fixed
so it will be ready to warn you if there is i
problem.
If the light stays on, turn the ignition off.
Or, if the light comes on when you’re
driving, stop as soon as possible and turn
the ignition
off. Then start the engine
again to reset the system. If the light still
stays on, or comes on again while you’re
driving, your Corvette needs service. If
the regular brake system warning light
isn’t on, you still have brakes, but you
don’t have anti-lock brakes.
If the regular
brake system warning light is also on, you
don’t have anti-lock brakes and there’s a
problem with your regular brakes. See
“Brake System Warning Light” earlier in
this part.
85 ...