Page 128 of 243
Downloaded from www.Manualslib.com manuals search engine Here you’ll find what to do
about some problems that can
occur
on the road .
Part 5
Problems on the Road
Hazard Warning Flashers ........................................................................\
............... 128
Jump Starting
........................................................................\
.................................. 128
Towing Your Vehicle
........................................................................\
...................... 132
Engine Overheating
........................................................................\
......................... 136
If a Tire Goes Flat ........................................................................\
........................... 145
Changing a Flat Tire
........................................................................\
........................ 146
Compact Spare Tire ........................................................................\
........................ 151
If You’re Stuck: In Sand, Mud, Ice or Snow
......................................................... 152
Page 148 of 243
Downloaded from www.Manualslib.com manuals search engine 1. If you have carpeting, pull it back
from the floor of the trunk or rear
area.
2. Turn the center retainer nut on the
compact spare tire housing counterclockwise to remove it, then
lift the tire cover.
You will find the
jacking instructions label
on the
underside
of the tire cover.
..
3. If your vehicle is equipped with a
spare tire housing lid hook, pull the
front
of the lid up and hook it to the
rear upper edge
of the trunk.
4. Remove the wing bolt securing the
compact spare tire, spacer and wheel
wrench by turning it
counterclockwise. Then lift off the
spacer and remove the spare tire.
5. Your vehicle may use a foam tray, or
a bracket and wing bolt, for storing
the jack and the tools. Remove the
bolt securing the jack by turning it
counterclockwise. Then remove the
jack. Or, remove the jack and the
wheel wrench from the foam tray.
I
Page 150 of 243
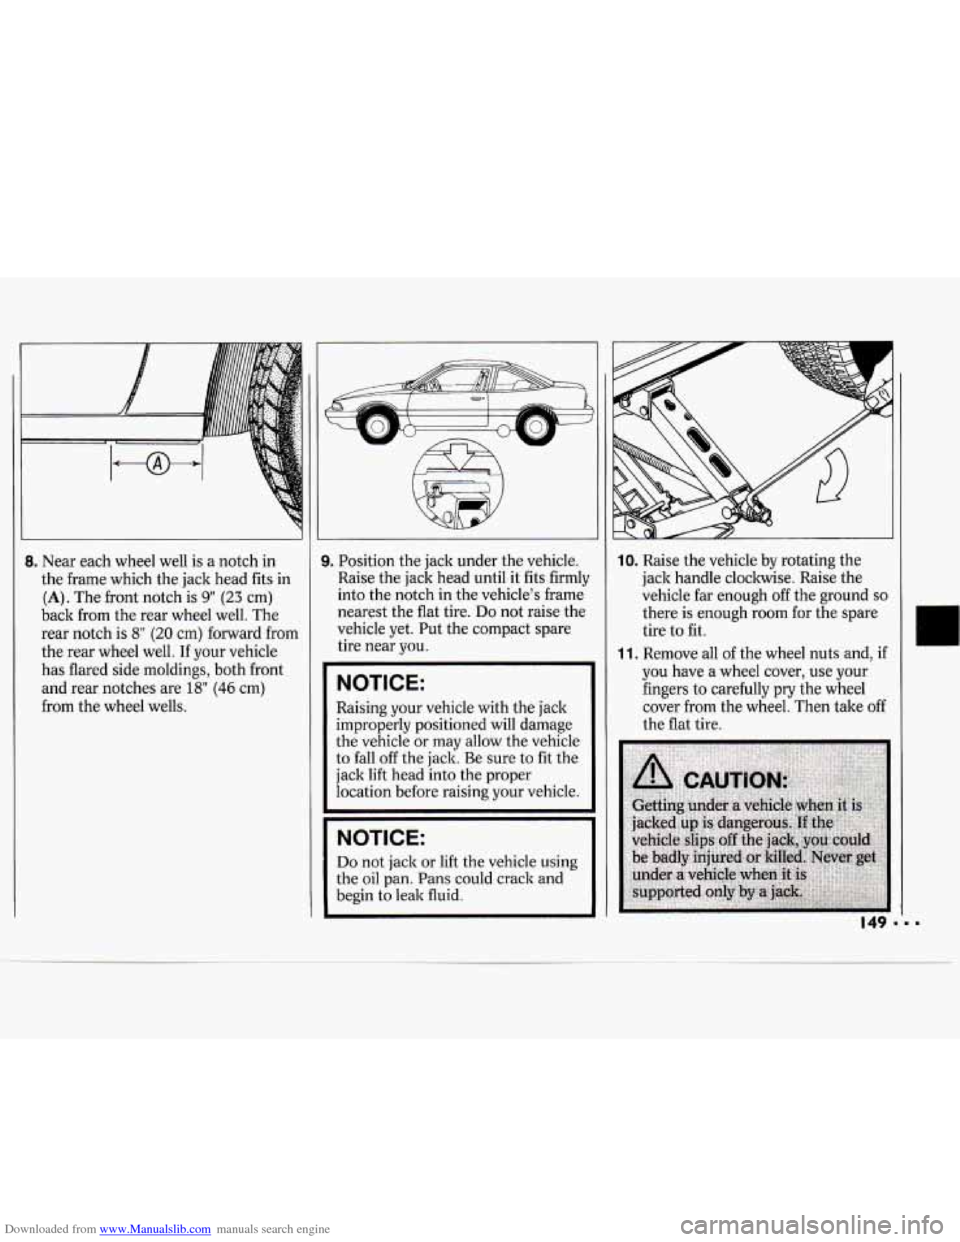
Downloaded from www.Manualslib.com manuals search engine 8. Near each wheel well is a notch in
the frame which the jack head fits in
(A). The front notch is 9" (23 cm)
back from the rear wheel well. The
rear notch is
8" (20 cm) forward from
the rear wheel well.
If your vehicle
has flared side moldings, both front
and rear notches are
18" (46 cm)
from the wheel wells.
I
~~ ~ ~~
9. Position the jack under the vehicle.
Raise the jack head until
it fits firmly
into the notch in the vehicle's frame
nearest the flat tire.
Do not raise the
vehicle yet. Put the compact spare
tire near you.
NOTICE:
Raising your vehicle with the jack
improperly positioned will damage
the vehicle or may allow the vehicle
to fall off the jack. Be sure to fit the
jack lift head into the proper
location before raising your vehicle.
NOTICE:
Do not jack or lift the vehicle using
the oil pan. Pans could crack and
begin to leak fluid.
10. Raise the vehicle by rotating the
jack handle cloclnvise. Raise the
vehicle far enough off the ground
so
there is enough room for the spare
tire to fit.
11. Remove all of the wheel nuts and, if
you have a wheel cover, use your
fingers to carefully pry the wheel
cover from the wheel. Then take off
the flat tire.
149 I
Page 152 of 243
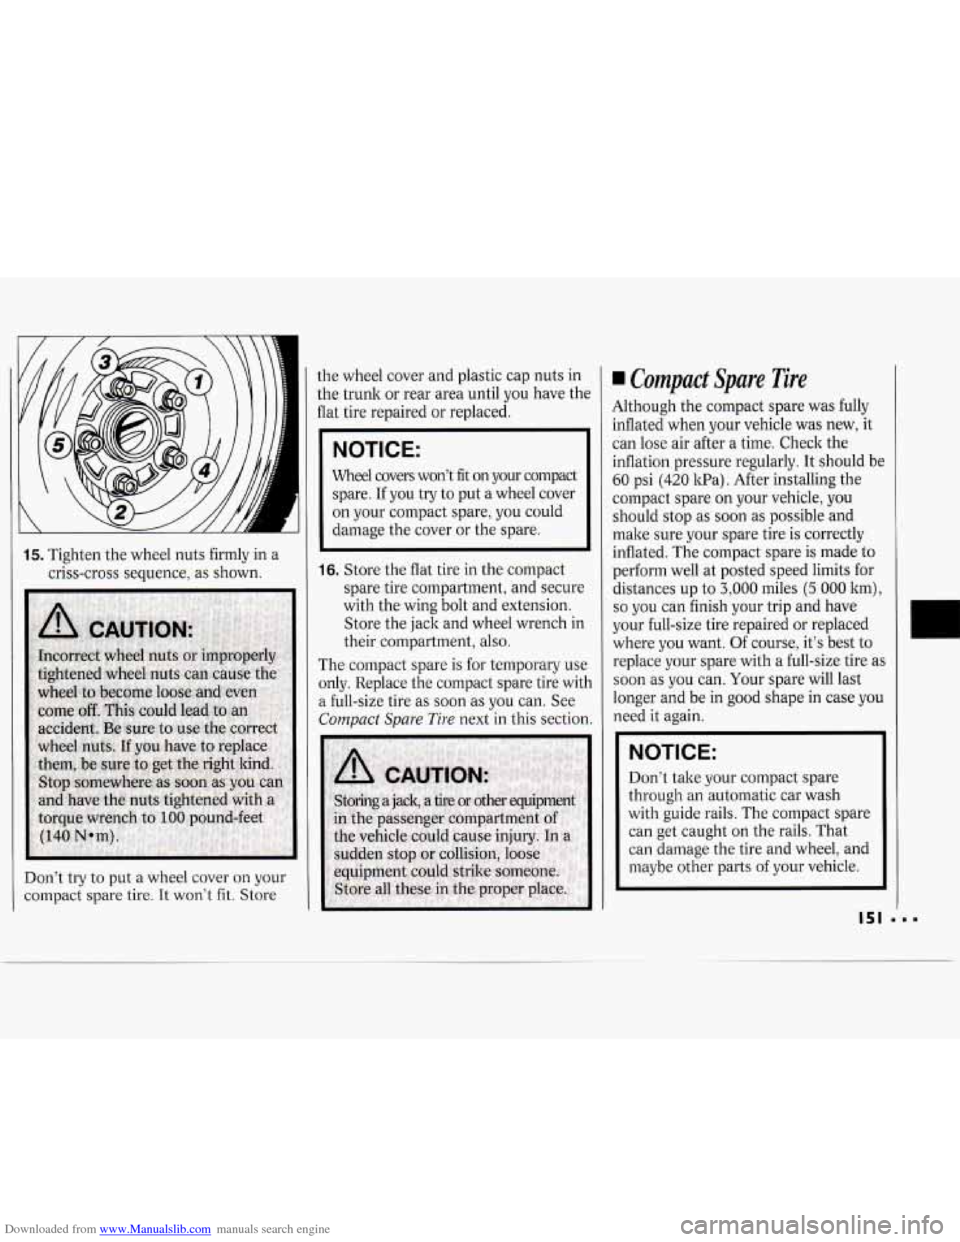
Downloaded from www.Manualslib.com manuals search engine 15. Tighten the wheel nuts firmly in a
criss-cross sequence, as shown.
Don’t try to put a wheel cover
on your
compact spare tire.
It won’t fit. Store the
wheel cover and plastic cap nuts in
the trunk or rear area until you have the
flat tire repaired or replaced.
IICE: I
Wheel covers won’t fit on your compact
spare. If you try to put a wheel cover
on your compact spare, you could
damage the cover or the spare.
16. Store the flat tire in the compact
spare tire compartment, and secure
with the wing bolt and extension.
Store the jack and wheel wrench in
their compartment, also.
The compact spare
is for temporary use
only. Replace the compact spare tire with
a full-size tire as soon as you can. See
Compact Spare Tire next in this section.
Compact Spare Tire
Although the compact spare was fully
inflated when your vehicle was new, it
can lose air after a time. Check the
inflation pressure regularly. It should be
60 psi (420 1cPa). After installing the
compact spare on your vehicle, you
should stop as soon as possible and
make sure your spare tire is correctly
inflated. The compact spare is made
to
perform well at posted speed limits for
distances up to
3,000 miles (5 000 lcm),
so you can finish your trip and have
your full-size tire repaired or replaced
where you want. Of course, it‘s best
to
replace your spare with a full-size tire as
soon as
you can. Your spare will last
longer and be in good shape in case you
need it again.
NOTICE:
Don’t take your compact spare
through an automatic car wash
with guide rails. The compact spare
can get caught on the rails. That
can damage the tire and wheel, and
maybe other parts
of your vehicle.
151
Page 153 of 243
Downloaded from www.Manualslib.com manuals search engine Problems on the Road
Don’t use your compact spare on some
other vehicle.
And don’t mix
your compact spare or
wheel with other wheels or tires. They
won’t fit. Keep your spare and its wheel
together.
NOTICE:
Tire chains won’t fit your compact
spare. Using them will damage your
vehicle and destroy the chains too.
Don’t use tire chains on your
compact spare.
If You’re Stuck: In Sand,
Mud, Ice or Snow
What you don’t want to do when your
vehicle is stuck is to spin your wheels.
The method known as “rocking” can
help you get out when you’re stuck, but
you must use caution.
NOTICE:
Spinning your wheels can destroy
parts of your vehicle as well as the
tires.
If you spin the wheels too fast
while shifting your transaxle back
and forth, you can destroy your
transaxle.
Rocking your vehicle to get it out:
First, turn your steering wheel left and
right. That will clear the area around
your front wheels. Then shift back and
forth between
R (Reverse) and a
fonGard gear (or with a manual
transaxle, between First or Second gear
and Reverse), spinning the wheels as
little as possible. Release the accelerator
pedal while you shift, and press lightly
on the accelerator pedal when the
transaxle is in gear.
If that doesn’t get
you out after a few tries, you may need
to be towed out. If
you do need to be
towed out, see
Towing Your Vehicle in
the
Index.
Page 182 of 243
Downloaded from www.Manualslib.com manuals search engine Tires
We don’t make tires. Your new vehicle
comes with high quality tires made by a
leading tire manufacturer. These tires
are warranted by the tire manufacturers
and their warranties are delivered with
every new Chevrolet.
If your spare tire
is a different brand than your road tires,
you will have a tire warranty folder from
each
of these manufacturers.
Page 184 of 243
Downloaded from www.Manualslib.com manuals search engine When to Check
Check your tires once a month or more.
Don't forget your compact spare tire. It
should be at
60 psi (420 1tPa).
How to Check
Use a good quality pocket-type gage to
check tire pressure. Simply looking at
the tires
will not tell you the pressure,
especially if you have radial tires
-
which may look properly inflated even if
they're underinflated.
If your tires have valve caps, be sure to
put them back on. They help prevent
leaks by keeping out dirt and moisture.
x
Tire lnspection and Rotation
To make your tires last longer, have
them inspected and rotated at the
mileages recommended in the
Maintenance Schedule. See
Scheduled
Maintenance Services
in the Index.
Use this rotation pattern.
After the tires have been rotated, adjust
the front and rear inflation pressure as
shown on the Tire-Loading Information
label. Make certain that all wheel nuts
are properly tightened. See
Wheel Nut
Torque in the Index.
Page 195 of 243
Downloaded from www.Manualslib.com manuals search engine Service & Appearance Care
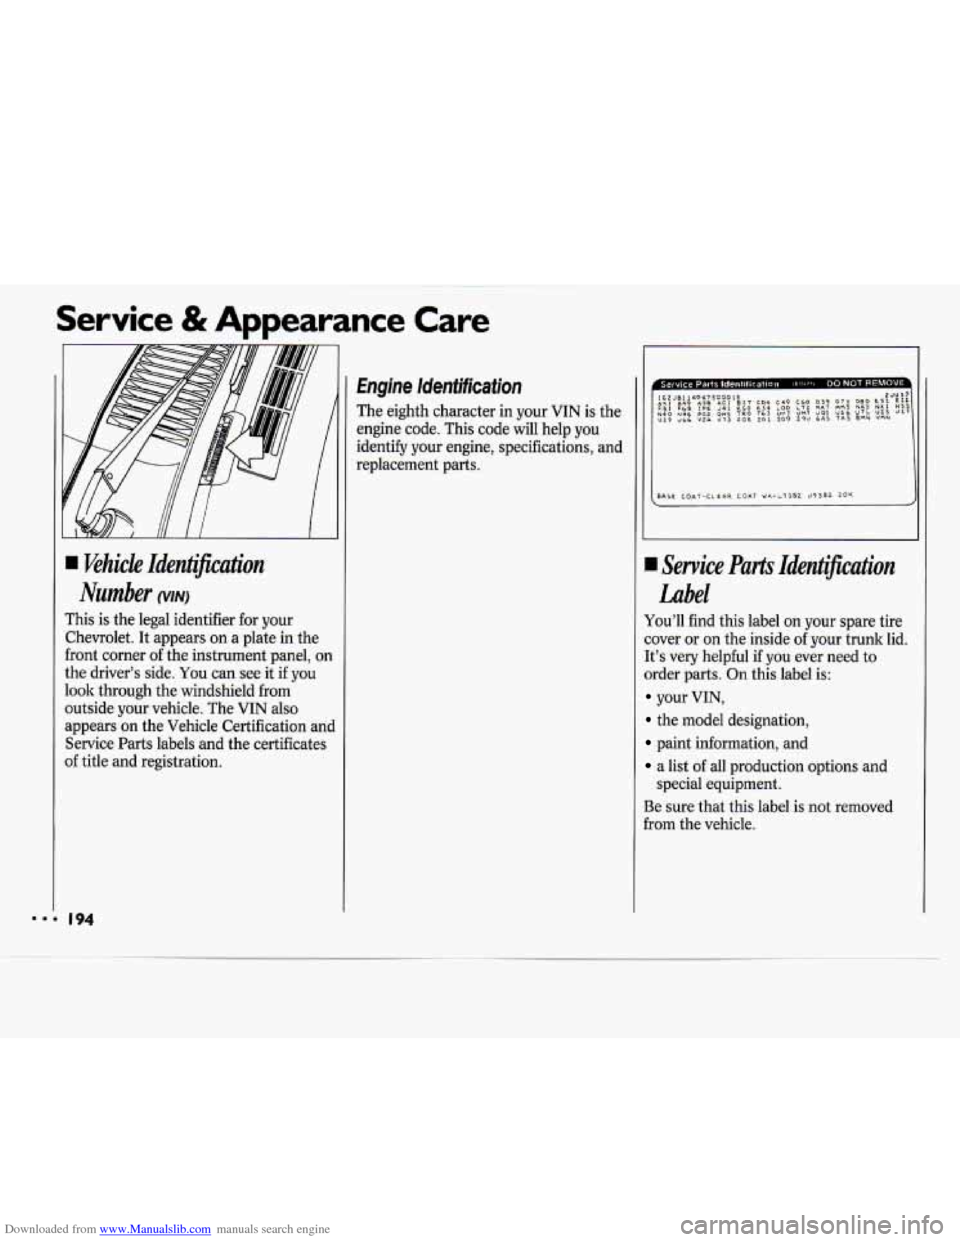
I khicle Identification
Number
This is the legal identifier for your
Chevrolet. It appears on a plate in the
front corner
of the instrument panel, on
the driver's side. You can see it if you
look through the windshield from
outside your vehicle. The
VIN also
appears on the Vehicle Certification and
Service Parts labels and the certificates
of title and registration.
Engine ldenfificafion
The eighth character in your VIN is the
engine code. This code will help you
identify your engine, specifications, and
replacement parts.
SASE COAT-CLEA~ COAT W4--1382 09382 20K
.I Service Parts Identification
Label
You'll find this label on your spare tire
cover or on the inside of your trunk lid.
It's very helpful
if you ever need to
order parts. On this label is:
your VIN,
the model designation,
paint information, and
a list of all production options and
Be sure that this label
is not removed
from the vehicle.
special
equipment.