1994 CHEVROLET BLAZER weight
[x] Cancel search: weightPage 81 of 348
Downloaded from www.Manualslib.com manuals search engine 3. If you have four-wheel drive with a manual transfer case shift lever, be
sure
the transfer case is in a drive gear - not in “N” (Neutral).
4. Move the ignition key to LOCK.
5. Remove the key and take it with you. If you can walk away from your
vehicle with the ignition
key in your hand, your vehicle is in “P”
(Park).
Leaving Your Vehicle With the Engine Running
(Automatic Transmission Models Only)
Torque Lock (Automatic Transmission)
If you are parking on a hill and you don’t shift your transmission into “P”
(Park) properly,
the weight of the vehicle may put too much force on the
parking pawl
in the transmission. You may find it difficult to pull the shift
lever
out of “P’ (Park). This is called “torque lock.” To prevent torque lock,
set the parking brake and then
shift into “P” (Park) properly before you
leave the driver’s seat. To find out how, see “Shifting Into ‘P’ (Park)” in the
Index.
When
you are ready to drive, move the shift lever out of “P” (Park)
BEFORE you release the parking brake.
If “torque
lock” does occur, you may need to have another vehicle push
yours a
little uphill to take some of the pressure from the transmission, so
you can pull the shift lever out of ‘Y’ (Park).
3 31
Page 133 of 348
Downloaded from www.Manualslib.com manuals search engine Be sure the cargo is properly loaded.
Carrying small, heavy loads on the roof is not recommended.
Tie the load to the moveable tie down, (two per each side of the
siderails). Use the cross rails only to keep the load from sliding,
If you need to carry long items, move the cross rails as far apart as
possible. tie the load to the moveable tie downs provided
in the side
rails.
Also tie the load to the bumpers. Do not tie the load so tightly that
the cross rails or side rails are damaged.
NOTICE:
~ ~~
Loading cargo that weighs more than 200 pounds (91 kg) on the
luggage carrier may damage your vehicle. when you carry large
things, never let them hang over the rear or the sides of your
vehicle. Load your cargo
so that it rests on the slats and does not
scratch or damage the vehicle.
Put the cargo against the side rails and fasten it securely t\
o the
luggage carrier. Put the main weight as far forward
as you can.
Don’t exceed the maximum vehicle capacity when loading your vehicle.
For
more information on vehicle capacity and loading, see “Loading Your
Vehicle”
in the Index.
To prevent damage or loss of cargo as you’re driving, check now and then to
make sure the luggage carrier and cargo are still securely fastened.
2-79
Page 160 of 348
Downloaded from www.Manualslib.com manuals search engine Defensive Driving
The best advice anyone can give about driving is: Drive defensively.
Please start with a very important safety device
in your vehicle: Buckle up.
(See “Safety Belts”
in the Index.)
Defensive driving really means “be ready for anything.” On city streets,
rural roads, or freeways, it means “always expect the unexpected.”
Assume that pedestrians or other drivers are going to be careless and make
mistakes. Anticipate what they might do. Be ready for their mistakes.
Rear-end collisions are about the most preventable
of accidents. Yet they
are common. Allow enough following distance. It’s the best defensive
driving maneuver,
in both city and rural driving. You never know when the
vehicle
in front of you is going to brake or turn suddenly.
Drunken Driving
Death and injury associated with drinking and driving is a national tragedy.
It’s the number one contributor
to the highway death toll, claiming
thousands
of victims every year. Alcohol takes away three things that
anyone needs
to drive a vehicle:
Judgment
Muscular Coordination
Vision
Police records show that almost half of all motor vehicle-related deaths
involve alcohol
- a driver, a passenger or someone else, such as a
pedestrian, had been drinking. In most cases, these deaths are
the result of
someone who was drinking and driving. About 20,000 motor
vehicle-related deaths occur each year because
of alcohol, and thousands of
people are injured.
Just how much alcohol is
too much if a person plans to drive? Ideally, no
one should drink alcohol and then drive. But
if one does, then what’s “too
much”? It can be a lot less than many might think. Although it depends on
each person and situation, here
is some general information on the problem.
The Blood Alcohol Content (BAC) of someone who
is drinking depends
upon four things:
How much alcohol is in the drink.
The drinker’s body weight.
The amount of food that is consumed before and during drinking.
The length of time it has taken the drinker to consume the alcohol.
4-2
Page 179 of 348
Downloaded from www.Manualslib.com manuals search engine Driving Across an Incline
Sooner or later, an off-road trail will probably go across the incline of a hill.
If this happens, you have to decide whether to try to drive across the incline.
Here are some things
to consider:
0
0
0
A hill that can be driven straight up or down may be too steep to drive
across. When you go straight up or down a hill,
the length of the wheel
base (the distance from the front wheels to the rear wheels) reduces the
likelihood the vehicle will tumble end over end. But when you drive
across an incline, the much more narrow track width (the distance
between the left and right wheels) may not prevent the vehicle from
tilting and rolling over. Also, driving across an incline puts more
weight
on the downhill wheels. This could cause a downhill slide or a
rollover.
Surface conditions can
be a problem when you drive across a hill.
Loose gravel, muddy spots, or even wet grass can cause your tires to
slip sideways, downhill.
If the vehicle slips sideways, it can hit
something that will trip it (a rock, a rut, etc.) and roll over.
Hidden obstacles can make the steepness
of the incline even worse. If
you drive across a rock
with the uphill wheels, or if the downhill
wheels drop into
a rut or depression, your vehicle can tilt even more.
For reasons like these, you need to decide carefully whether to try
to drive
across an incline. Just because
the trail goes across the incline doesn’t mean
you
have to drive it. The last vehicle to try it might have rolled over.
Q: What if I’m driving across an incline that’s not too steep, but I hit
some loose gravel and start to slide downhill. What should
I do?
At If you feel your vehicle starting to slide sideways, turn downhill. This
should help straighten out the vehicle and prevent the side slipping.
However, a much better way to prevent this
is to get out and “walk the
course”
so you know what the surface is like before you drive it.
4-21
Page 196 of 348
Downloaded from www.Manualslib.com manuals search engine Don’t tow a trailer at all during the first 500 miles (800 km) your new
vehicle
is driven. Your engine, axle or other parts could be damaged.
Then, during the first 500 miles (800 km) that you tow a trailer, don’t
drive over
50 mph (80 km/h) and don’t make starts at full throttle. This
helps your engine and other parts
of your vehicle wear in at the heavier
loads.
Three important considerations have
to do with weight:
Weight of the Trailer
How heavy can a trailer safely be?
It depends on how you plan to use your rig. For example, speed, altitude,
road grades, outside temperature and how much your vehicle
is used to pull
a trailer are all important. And,
it can also depend on any special equipment
that
you have on your vehicle.
You can ask your dealer for our trailering information or advice, or
you can
write
us at the address listed in your Warranty and Owner Assistance
Information Booklet.
In Canada, write to General Motors
of Canada Limited, Customer
Assistance Center,
1908 Colonel Sam Drive, Oshawa, Ontario LlH 8P7.
Weight of the Trailer Tongue
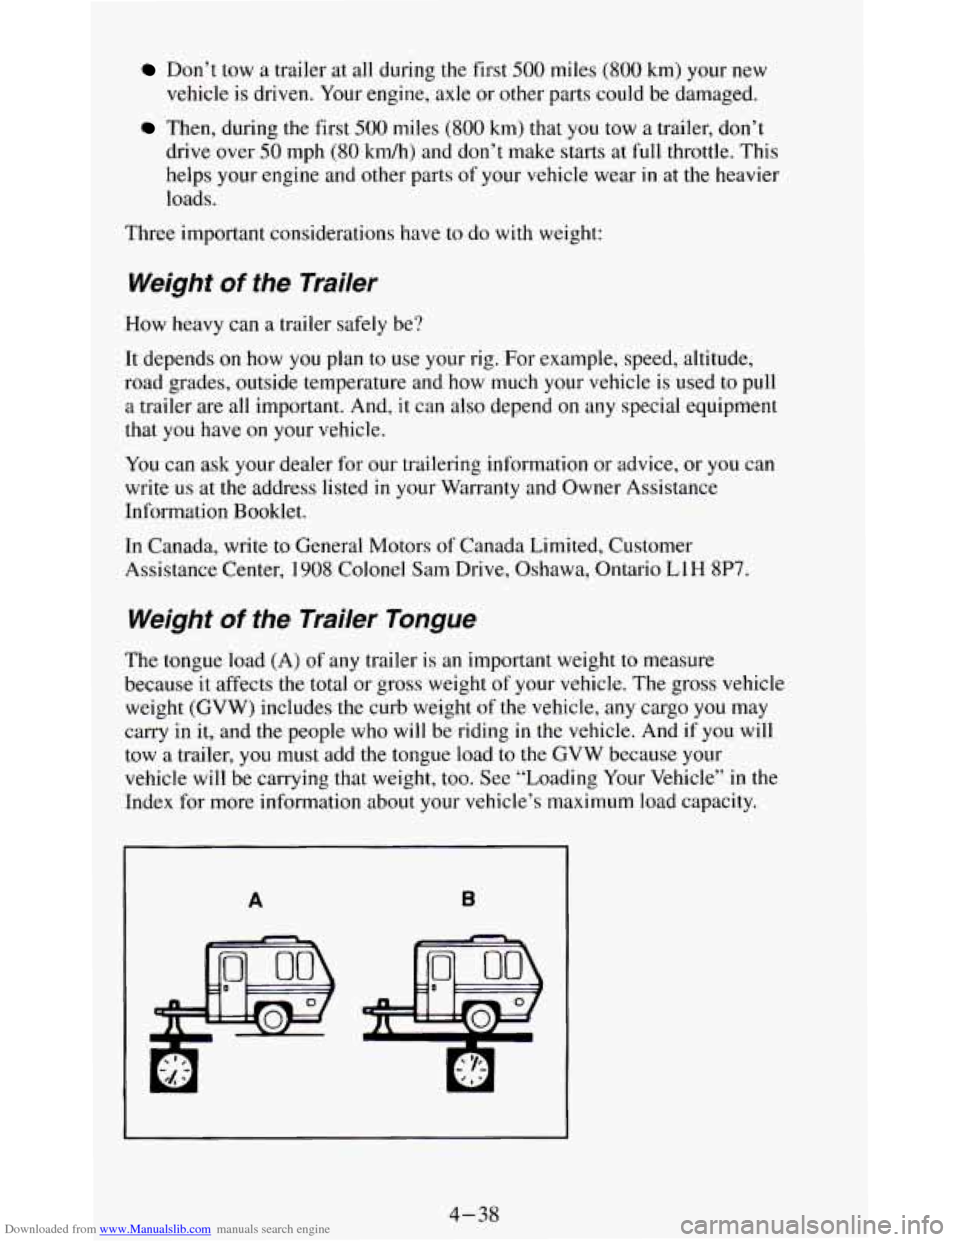
The tongue load (A) of any trailer is an important weight to measure
because it affects the total or gross weight of your vehicle. The gross vehicle
weight (GVW) includes
the curb weight of the vehicle, any cargo you may
carry in it, and the people who will be riding
in the vehicle. And if you will
tow
a trailer, you must add the tongue load to the GVW because your
vehicle will be carrying
that weight, too. See “Loading Your Vehicle” in the
Index for more information about your vehicle’s maximum load capacity.
B A
4-38
Page 197 of 348
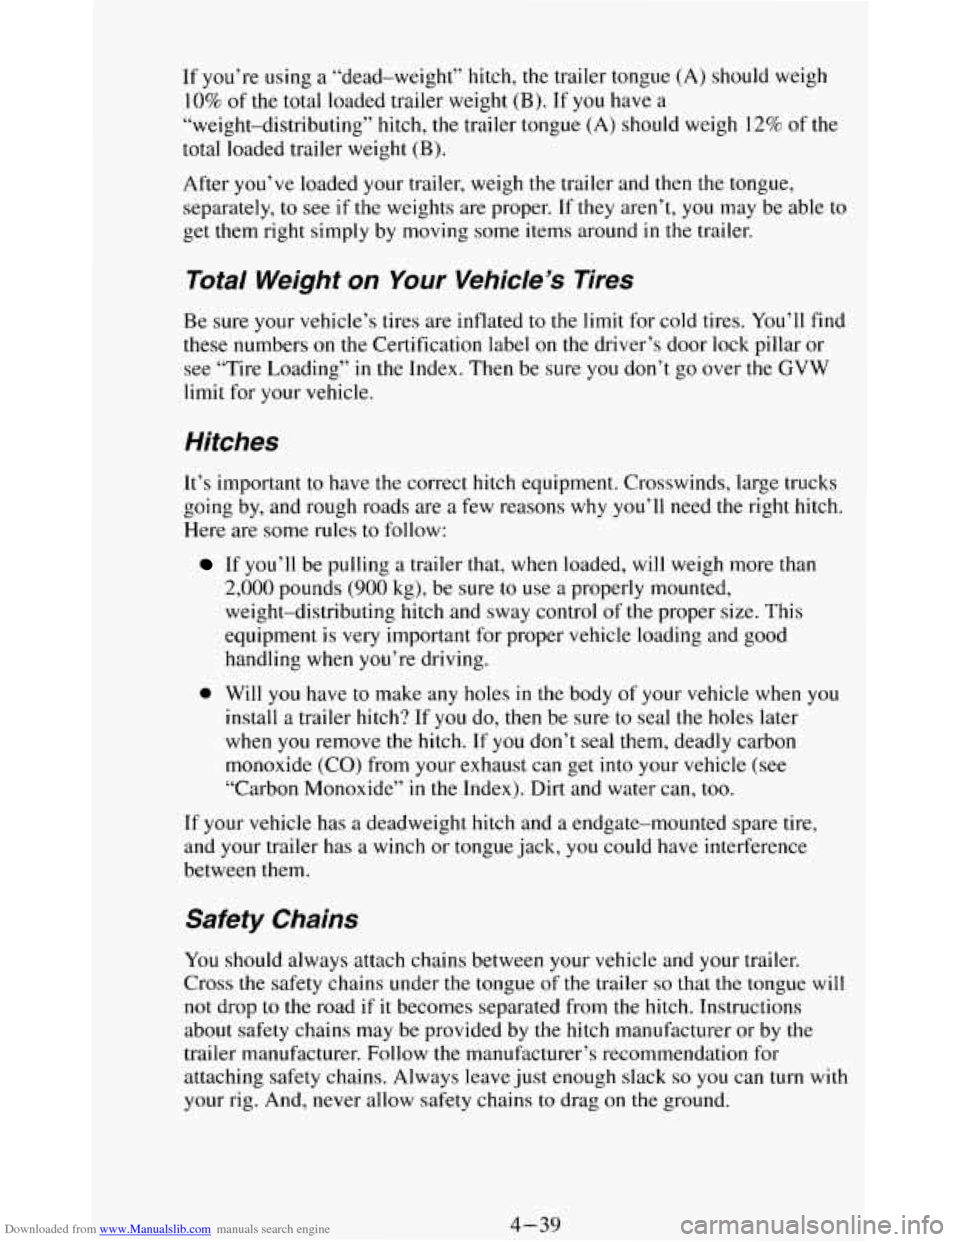
Downloaded from www.Manualslib.com manuals search engine If you’re using a “dead-weight” hitch, the trailer tongue (A) should weigh
10%
of the total loaded trailer weight (B). If you have a
“weight-distributing” hitch, the trailer tongue (A) should weigh 12% of the
total loaded trailer weight (B).
After you’ve loaded your trailer, weigh the trailer and then the tongue,
separately,
to see if the weights are proper. If they aren’t, you may be able to
get them right simply by moving some items around
in the trailer.
Total Weight on Your Vehicle’s Tires
Be sure your vehicle’s tires are inflated to the limit for cold tires. You’ll find
these numbers
on the Certification label on the driver’s door lock pillar or
see “Tire Loading”
in the Index. Then be sure you don’t go over the GVW
limit for your vehicle.
Hitches
It’s important to have the correct hitch equipment. Crosswinds, large trucks
going by, and rough roads are
a few reasons why you’ll need the right hitch.
Here are some rules
to follow:
If you’ll be pulling a trailer that, when loaded, will weigh more than
2,000 pounds (900 kg), be sure to use a properly mounted,
weight-distributing hitch and sway control of the proper size. This
equipment is very important for proper vehicle loading and good
handling when you’re driving.
0 Will you have to make any holes in the body of your vehicle when you
install a trailer hitch? If you do, then be sure to seal the holes later
when
you remove the hitch. If you don’t seal them, deadly carbon
monoxide (CO) from your exhaust can get
into your vehicle (see
“Carbon Monoxide”
in the Index). Dirt and water can, too.
If your vehicle has a deadweight hitch and a endgate-mounted spare tire,
and your trailer has
a winch or tongue jack, you could have interference
between them.
Safety Chains
You should always attach chains between your vehicle and your trailer.
Cross
the safety chains under the tongue of the trailer so that the tongue will
not drop
to the road if it becomes separated from the hitch. Instructions
about safety chains may be provided by the hitch manufacturer
or by the
trailer manufacturer. Follow
the manufacturer’s recommendation for
attaching safety chains. Always leave just enough slack
so you can turn with
your rig. And, never allow safety chains
to drag on the ground.
4-39
Page 198 of 348
Downloaded from www.Manualslib.com manuals search engine Trailer Brakes
If your trailer weighs more than 1,000 pounds (450 kg) loaded, then it needs
its own brakes
- and they must be adequate. Be sure to read and follow the
instructions for the trailer brakes
so you’ll be able to install, adjust and
maintain them properly.
Your trailer brakes system can tap into vehicle’s hydraulic brake system
except:
Don’t tap into your vehicle’s brake system
if the trailer’s brake system will
use more than 0.02 cubic inch (0.3~~) of fluid from your vehicle’s master
cylinder.
If it does, both braking systems won’t work well. You could even
lose your brakes.
Will the trailer parts take
3,000 psi (20 650 kPa) of pressure? If not, the
trailer brake system must not be used with your vehicle.
If everything checks out this far, then make the brake fluid tap at the
port on
the master cylinder that sends fluid
to the rear brakes. But don’t use copper
tubing for this. If
you do, it will bend and finally break off. Use steel brake
tubing.
Driving with a Trailer
Towing a trailer requires a certain amount of experience. Before setting out
for the open road, you’ll want
to get to know your rig. Acquaint yourself
with the feel of handling and braking with the added weight of the trailer.
And always keep in mind that the vehicle
you are driving is now a good
deal longer and not nearly
so responsive as your vehicle is by itself.
Before you start, check the trailer hitch and platform, safety chains,
electrical connector, lights, tires and mirror adjustment. If the trailer has
electric brakes, start your vehicle and trailer moving and then apply the
trailer brake controller by hand to be sure the brakes are working. This lets
you check your electrical connection at the same time.
4-40
Page 275 of 348
Downloaded from www.Manualslib.com manuals search engine Loading Your Vehicle
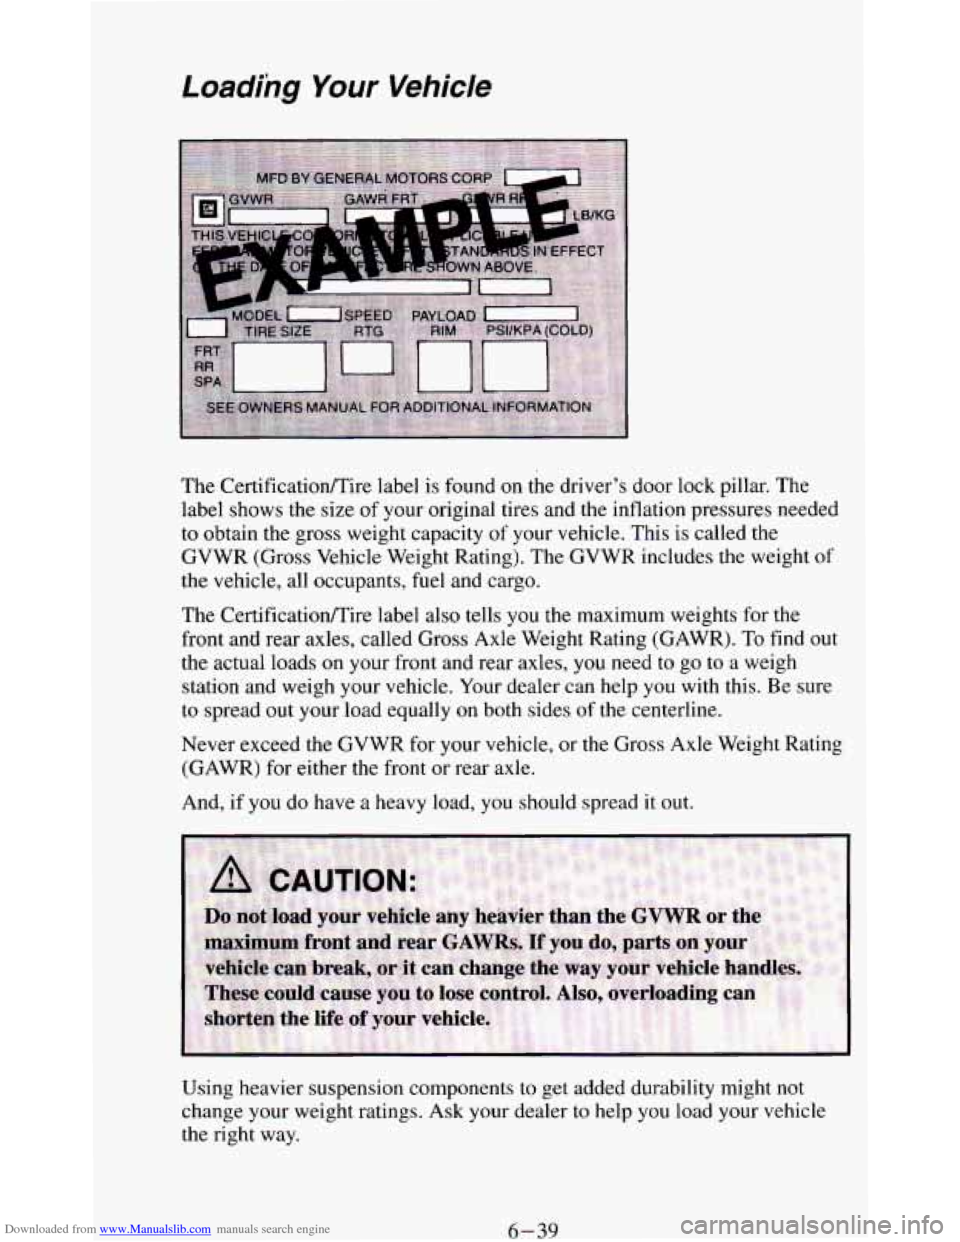
The CertificatiodTire label is found on the driver’s door lock pillar. The
label shows
the size of your original tires and the inflation pressures needed
to obtain the gross weight capacity
of your vehicle. This is called the
GVWR (Gross Vehicle Weight Rating). The GVWR includes the weight
of
the vehicle, all occupants, fuel and cargo.
The Certificationnire label
also tells you the maximum weights for the
front and rear axles, called Gross Axle Weight Rating (GAWR). To find
out
the actual loads on your front and rear axles, you need to go to a weigh
station and weigh your vehicle. Your dealer can help you with this. Be sure
to spread out your load equally on both sides
of the centerline.
Never exceed the GVWR for your vehicle, or the Gross Axle Weight Rating
(GAWR) for either the front or rear axle.
And, if you do have a heavy load, you should spread it out.
Using heavier suspension components to get added durability might not
change your weight ratings.
Ask your dealer to help you load your vehicle
the right way.
6-39