Page 275 of 399

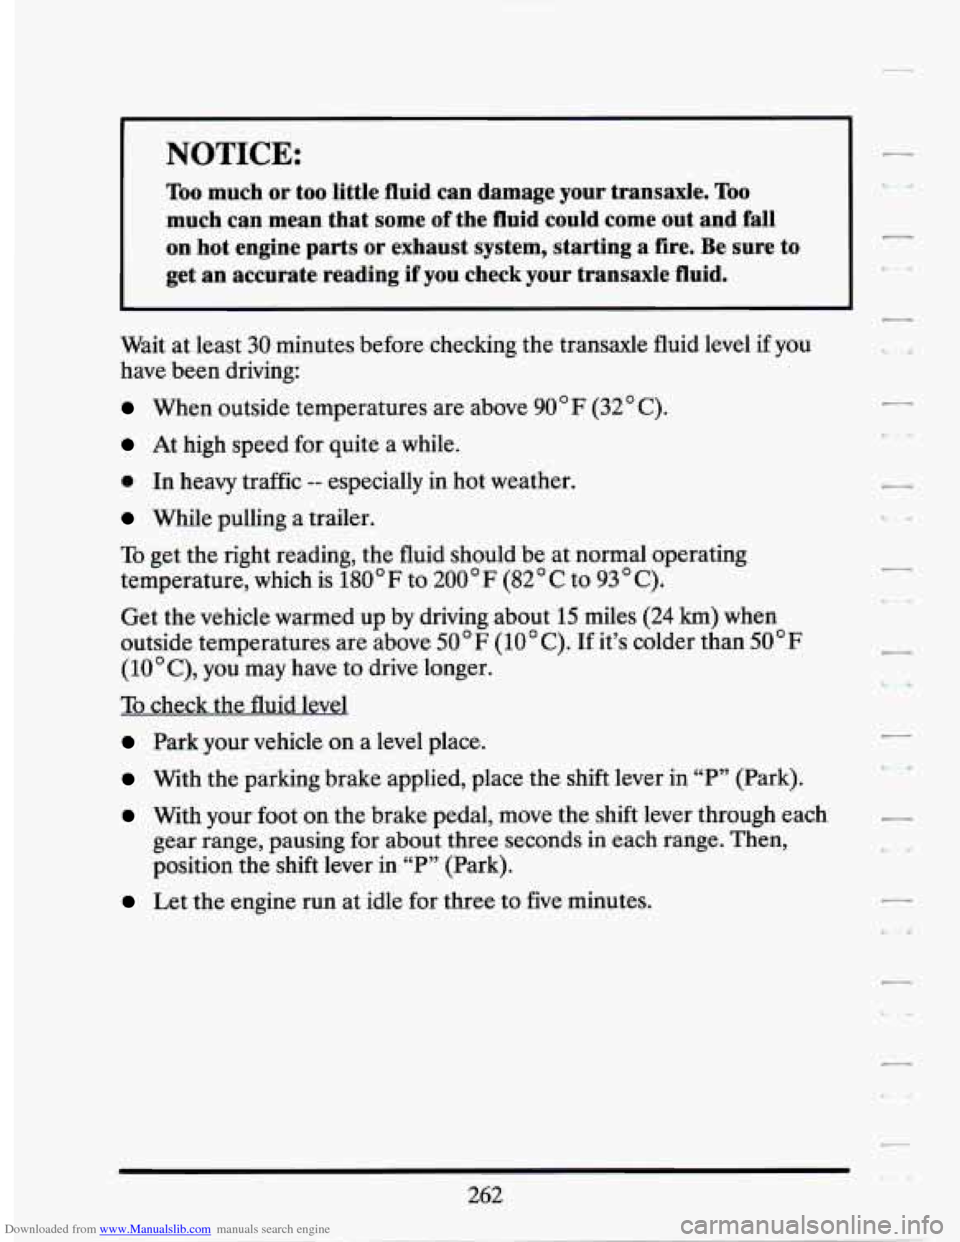
Downloaded from www.Manualslib.com manuals search engine NOTICE:
Too much or too little fluid can damage your transaxle. Too
much can mean that some of the fluid could come out and fall
on hot engine parts or exhaust system, starting a fire. Be sure to
get an accurate reading if
you check your transaxle fluid.
Wait at least 30 minutes before checking the transaxle fluid level if you
have been driving:
When outside temperatures are above 90 F (32 C).
At high speed for quite a while.
a In heavy traffic -- especially in hot weather.
While pulling a trailer.
To get the right reading, the fluid should be at normal operating
temperature, which is 180
F to 200 F (82 C to 93 C).
Get the vehicle warmed up by driving about 15 miles (24 km) when
outside temperatures are above
50 F (10 C). If it’s colder than 50 F
(10 C), you may have to drive longer.
To check the fluid level
Park your vehicle on a level place.
With the parking brake applied, place the shift lever in “P” (Park).
With your foot on the brake pedal, move the shift lever through each
gear range, pausing
for about three seconds in each range. Then,
position the shift lever in “P” (Park).
Let the engine run at idle for three to five minutes.
262
Page 285 of 399
Downloaded from www.Manualslib.com manuals search engine BRAKES
Brake Master Cylinder
Your brake master cylinder is here. It is filled with DOT-3 brake fluid.
There are only
two reasons why the brake fluid level in your master
cylinder might go down. The first
is that the brake fluid goes down to an
acceptable level during normal brake lining wear. When new linings are
put in, the fluid level goes back up. The other reason is that fluid is
leaking out of the brake system.
If it is, you should have your brake
system fixed, since a leak means that sooner or later your brakes won’t
work well, or won’t work at all.
So, it isn’t a good idea to “top off’ your
brake fluid. Adding brake fluid won’t correct a leak. If you add fluid when
your linings are worn, then you’ll have too much fluid when you get new
brake linings. You should add (or remove) brake fluid, as necessary, only
when work is done on the brake hydraulic system.
272
Page 286 of 399
Downloaded from www.Manualslib.com manuals search engine r
r
I I
!
r I
r
When your brake fluid falls to a low level, the “CHECK BRAKE
FLUID” message will display on the Driver Information Center and your
brake warning light will come on. See “Brake System Warning Light” in
the Index.
To Check Brake Fluid
Remove the cap.
i
MAX FILL
.i
/’
The fluid level must be
to the
“MAX FILE‘
line at the base of the
neck as shown.
After work is done on the brake hydraulic system, make sure the level is
above
“MIN” and or slightly below or at the “MAX” indicator.
When your brake fluid falls to a low level, your brake warning light
will
come on. See “Brake System Warning Light” in the Index.
?Khat to Add
When you do need brake fluid, use only DOT-3 brake fluid -- such as
Delco Supreme
ll@ (GM Part No.1052535). Use new brake fluid from a
sealed container
only, and always clean the brake fluid reservoir cap
before removing it.
i-
r I
r
273
Page 287 of 399
Downloaded from www.Manualslib.com manuals search engine NOTICE:
0
0
0
DOT4 silicone brake fluid can damage your vehicle. Don’t
use it.
Don’t let someone put in the wrong kind
of fluid. For
example, just
a few drops of mineral-based oil, such as
engine oil, in your brake system can damage brake system
parts
so badly that they’ll have to be replaced.
Brake fluid can damage paint,
so be careful not to spill brake
fluid on your vehicle.
If you do, wash it off immediately. See
“Appearance Care” in the Index.
Brake Wear
Your Cadillac has four-wheel disc brakes.
Disc brake pads have built-in wear indicators that make a high-pitched
warning sound when the brake pads are worn and
new pads are needed.
The sound may come and
go or be heard all the time your vehicle is
moving (except when you are pushing on the brake pedal firmly).
NOTICE:
Continuing to drive with worn-out brake pads could result in
costly brake repair.
274
Page 288 of 399

Downloaded from www.Manualslib.com manuals search engine Some driving conditions or climates may cause a brake squeal when the
brakes are first applied or lightly applied. This does not mean something
is wrong with your brakes.
Brake linings should always be replaced as complete
axle sets.
Brake Pedal Travel
See your dealer if the brake pedal does not return to normal height, or if
there is a rapid increase in pedal travel. This could be a sign of brake
trouble.
Brake Adjustment
Every time you make a moderate brake stop, your disc brakes adjust for
wear. If you rarely make a moderate or heavier stop, then your brakes
might not adjust correctly.
If you drive in that way, then -- very carefully --
make a few moderate brake stops about every 1000 miles (1600 km), so
your brakes will adjust properly.
Replacing Brake System Parts
The braking system on a modern vehicle is complex. Its many parts have
to be of top quality and work well together if the vehicle is to have really
good braking. Vehicles we design and test have top-quality
GM brake
parts in them, as your Cadillac does when it is
new. When you replace
parts
of your braking system -- for example, when your brake linings wear
down and you have to have new ones put in
-- be sure you get new
genuine
GM replacement parts. If you don’t, your brakes may no longer
work properly. For example,
if someone puts in brake linings that are
wrong for your vehicle, the balance between your front and rear brakes
can change, for the worse. The braking performance you’ve come to
expect can change in many other ways if someone puts in the wrong
replacement brake parts.
BATTERY
Every new Cadillac has a Delco Freedom@ battery. You never have to
add water to one
of these. When it’s time for a new battery, we
recommend a Delco Freedom@ battery. Get one that has the catalog
number shown on the original battery’s label.
275
Page 289 of 399

Downloaded from www.Manualslib.com manuals search engine Vehicle Storage
If you’re not going to drive your vehicle for 25 days or more, take off the
black, negative
(-) cable from the battery. This will help keep your battery
from running down.
Contact your dealer to learn how to prepare your vehicle for longer
storage periods.
Battery Power Loss
If you lose battery power or the battery is disconnected, your car’s
computer must be programmed. It takes just over
20 minutes to do it. If
you want to do it yourself, here’s how:
0
0
0
0
0
0
a
Apply the parking brake.
Make sure the front wheels are straight.
Turn off the Electronic Climate Control.
Start the engine in
“P” (Park) and let it idle for 15 minutes. Then:
Put your foot on the brake pedal, shift the transaxle to
@ and let it
idle for
3 minutes or more. Do not accelerate the engine. Then:
With the car in
@ (Drive), turn the Electronic Climate Control to
“Auto” and let the engine idle for
3 minutes or more.
Turn your engine off.
Now your computer is programmed.
276
Page 310 of 399
Downloaded from www.Manualslib.com manuals search engine r
NOTICE: I
The wrong wheel can also cause problems with bearing life,
brake cooling, speedometer/odometer calibration, headlight
aim, bumper height, vehicle ground clearance, and tire or tire
chain clearance to the body and chassis.
c I -
r
r-
Used Replacement Wheels
rire Chains
NOTICE:
Use tire chains only where legal and only when you must. Use
only
SAE Class “S” type chains that are the proper size for your
tires. Install them on the front tires and tighten them
as tightly
as possible with the ends securely fastened. Drive slowly and
follow the chain manufacturer‘s instructions.
If you can hear
the chains contacting your vehicle, stop and retighten them.
If
the contact continues, slow down until it stops. Driving too fast
with chains on will damage your vehicle.
297
Page 325 of 399

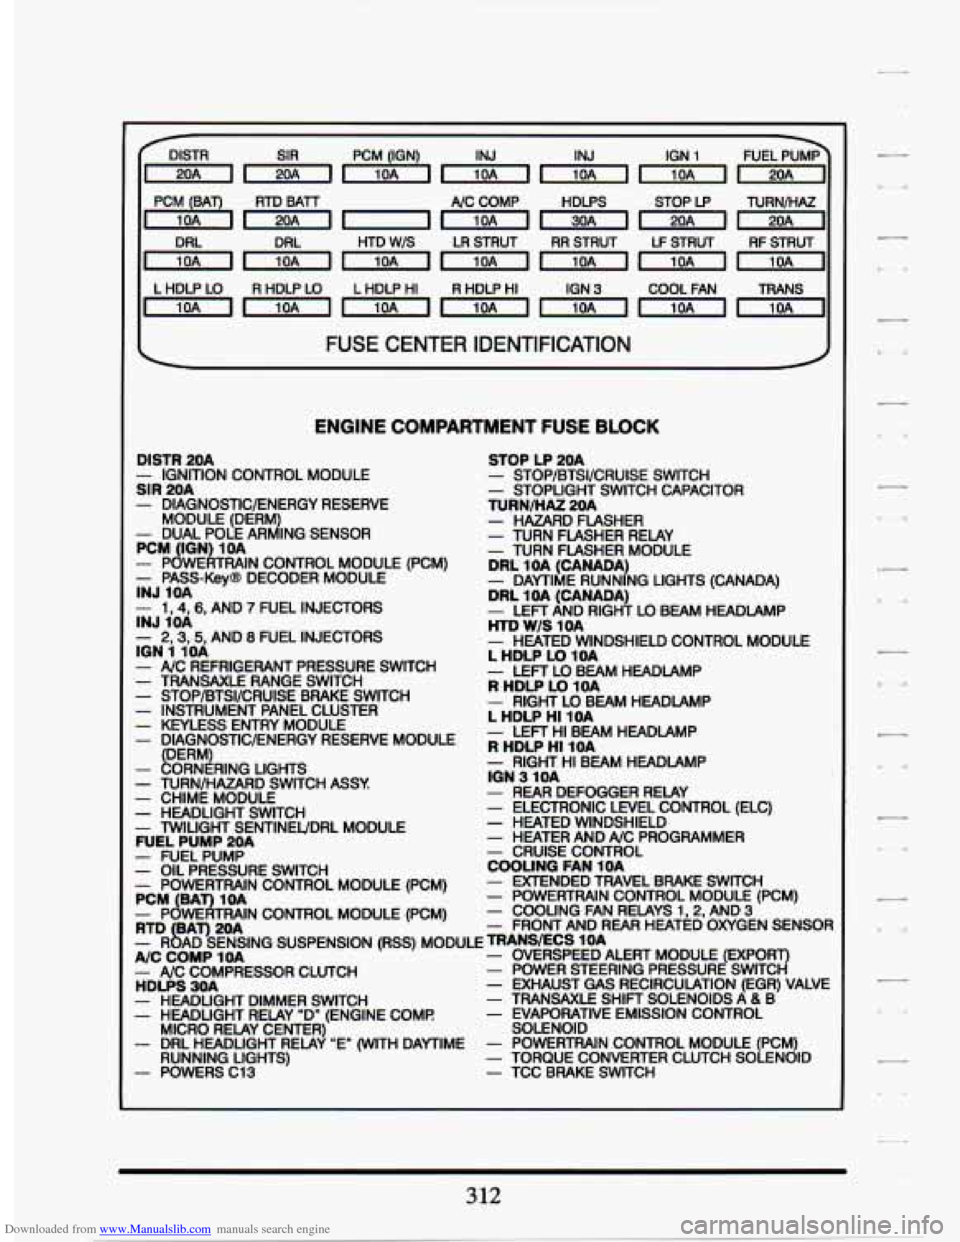
Downloaded from www.Manualslib.com manuals search engine DISTR PCM (IGN) IGN 1
, PC';":"), RTD BATT
~-1nmmmrl
A/C COMP HDLPS STOP LP TURNIHAZ
HTD
W/S LR STRUT RR STRUT LF STRUT RFSTRUT
LHDLPLO RHDLPLO LHDLPHI RHDLPHI
IGN
3 COOL FAN TRANS
~mmmrnmm~
FUSE CENTER IDENTIFICATION I
ENGINE COMPARTMENT FUSE BLOCK
DISTR 20A
SIR 20A - IGNITION CONTROL MODULE
- DIAGNOSTIC/ENERGY RESERVE
- DUAL POLE AR d ING SENSOR
MODULE (DERM PCM
(ION 1OA - PowEATmIN CONTROL MODULE - PASS-KevB DECODER MODULE INJ 1OA
- 1,4,6, AND 7 FUEL INJECTORS
- 2,3,5, AND 8 FUEL INJECTORS
- - - - - __ -
INJ 1OA
ION 1 1OA
- NC REFRIGERANT PRESSURE SWITCH ~~ ~
- TRANSAXLE RANGE SWITCH - STOP/BTSI/CRUISE BRAKE SWITCH - INSTRUMENT PANEL CLUSTER - KEYLESS ENTRY MODULE - DIAGNOSTWENERGY RESERVE MODULE
FERMl ~ ~. - ORN RING LIGHTS
- TURN/HAZARD SWITCH ASSY - CHIME MODULE - HEADLIGHT SWITCH - mlUGHT SEUTINEUDRL MODULE FUEL PUMP 20A
STOP LP 20A - STOP/BTSI/CRUISE SWITCH - STOPLIGHT SWITCH CAPACITOR TURN/HAZ 20A - HAZARD FLASHER - TURN FLASHER RELAY - TURN FLASHER MODULE ~ ~~ ~ ~~ DRL 1 OA (CANADA)
DRL 1OA (CANADA)
HTD
W/S 1OA
- DAMIME RUNNING LIGHTS (CANADA)
- LEFT AND RIGHT LO BEAM HEADLAMP
- HEATED WINDSHIELD CONTROL MODULE L HDLP LO 10A
R HDLP LO 1OA - LEFT LO BEAM HEADLAMP
- RIGHT LOBEAM HEADLAMP L HDLP HI 10A
R HDLP HI 1OA - LEFT HI BEAM HEADLAMP
- RIGHT HI BEAM HEADLAMP ION 3 -1 OA - REAR DEFOGGER RELAY - ELECTRONIC LEVEL CONTROL (ELC) - HEATED WINDSHIELD - HEATER AND A/C PROGRAMMER
COOLING FAN 10A - CRUISE CONTROL
- EXTENDED TRAVEL BRAKE SWITCH - POWERTRAIN CONTROL MODULE (PCM) - COOLING FAN RELAYS 1.2. AND 3
- PUMP^
- OIL PRESSURE SWITCH - POWERTRAIN CONTROL MODULE (PCM)
- POWERTRAIN CONTROL MODULE (PCM) PCM (BAT) 1OA
RTD BAT) 20A - FRONT AND REAR HEATED-OXYGEN SENSOR
A/C COMP 10A
HDLPS 3OA - EXHAUST GAS RECIRCULATION (EGR) VALVE
- SENSING SUSPENSlON (RSS) MODULE MODULE (EXPORT)
- NC COMPRESSOR CLUTCH - POWER STEERING PRESSURE SWITCH
- HEADLIGHT DIMMER SWITCH - TRANSAXLE SHIFT SOLENOIDS A & B - HEADLIGHT RELAY "D" (ENGINE COME - EVAPORATIVE EMISSION CONTROL
- DRL HEADLIGHT RELAY "E" (WITH DAYTIME - POWERTRAIN CONTROL MODULE (PCM)
- POWERS C13 - TCC BRAKE SWITCH
MICRO RELAY CENTER)
SOLENOID
RUNNING LIGHTS) - TORQUE CONVERTER CLUTCH SOLENOID
312