Page 221 of 308

Engine Coolant Heater (Engine Block
Heater)
An engine coolant heater can be a big help if you have
to park outside in very cold weather, 0°F (- 18 “C) or
colder. If your vehicle has this option, see “Engine
Coolant Heater”
in the Index.
What to Do with Used Oil
Did you know that used engine oil contains certain
elements that may be unhealthy for your skin and could
even cause cancer? Don’t let used oil stay on your skin
for very long. Clean your skin and nails
with soap and
water,
or a good hand cleaner. Wash or properly throw
away clothing or rags containing used engine
oil. (See
the manufacturer’s warnings about the use and disposal
of
oil products.)
Used oil can be a real threat to the environment. If you
change your own
oil, be sure to drain all free-flowing
oil from the filter before disposal. Don’t ever dispose of
oil by putting it in the trash, pouring it on the ground,
into sewers, or into streams or bodies of water. Instead,
recycle
it by taking it to a place that collects used oil. If
you have a problem properly disposing of your used oil,
ask your dealer, a service station or a local recycling
center for help.
Air Cleaner
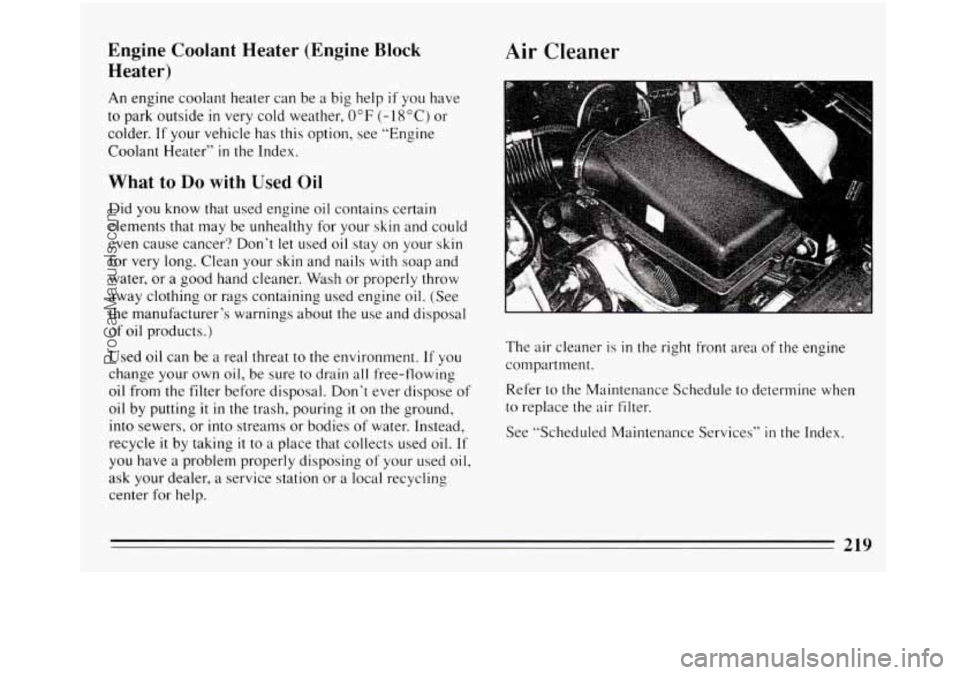
The air cleaner is in the right front area of the engine
compartment.
Refer to the Maintenance Schedule to determine when
to replace the air filter.
See “Scheduled Maintenance Services”
in the Index.
219
ProCarManuals.com
Page 234 of 308
A
B
1. Remove the electrical 4. Install the electrical connector with slotted grooves
connector
(A) from the toward to de front of vehicle.
bulb
by raising the lock
tab (B) and pulling the
connector down and
away from the bulb’s
plastic base
(C).
i
Taillamp Bulb Replacement
Remove the plastic nuts that secure the trunk trim over
the taillights area.
2.
3.
Press and turn the plastic base (C) a 1/4 turn
counterclockwise and remove from the metal
retaining ring
(E) by gently pulling back and away
from the headlight.
Install the new bulb by inserting the smallest tab
(D)
lqcated on top of the plastic base into the
corresponding notch in the metal retaining ring
(E).
Turn 1/4 turn clockwise until it stops. The small
plastic tab should be at the top
of the metal ring.
232
ProCarManuals.com
Page 257 of 308

Fuse Block
Amp Description
1.
2.
10
10
3. 20
4.
2s
5. IO
6. 15
7. 15
8. 1s
9. 20
10.
1s
11. 5
12. 1s
13. 15 Radio
& Clock, Steering
Wheel Radio Switches.
Headlight Switch, Air Bag Diagnostic Module, ABS
Lamp Driver Module, Daytime Running Lamps
Module (w/DRL), TCC/Brake Switch, Cruise
Control Cut-Out Switch, Instrument Cluster, Chime
Module, Rear Defogger Timer Relay
A/C HI Blower Relay
Wipermasher Switch
Turn Signal Flasher
TCC/Brake Switch, Hazard Flasher
Vanity Mirror, Lights, I/P Compartment Light,
Courtesy Lights, Trunk Courtesy Light,
Dome/Reading Lights, Cigar Lighter.
Air Bag Diagnostic Module
Power Door Locks, Remote Keyless Entry System
Cigar Lighter
Theft Deterrent Decoder Module
Heater, Vent A/C Solenoid Box, A/C LO Blower
Relay
Chime Module, Electronic Brake Control Module.
Theft Deterrent Decoder Module, Radio, Passive
Restraint Timer Relay, Low Oil Level Module
1s.
Amp Description
14. 15 Air Temperature Valve Motors, Instrument Cluster,
Daytime Running Lights Module (w/DRL), HVAC
Control Assembly, Multi-Function Lever, Heated
Oxygen Sensor
#2, Passenger Temperature Control
Electrical Center
#2, ABS Relay
16. 10 Antenna Relay, Outside Mirror Control, Front
Window/Door Lock Switches, Front Door Handle
Switches
17.
Not Used
18. 5 Air Bag Diagnostic Module
5 Electronic Brake Control Module, Underhood
n
CTSY ARBGl DRLKS
@m@
ClLTR VATS HVAC
This fuse panel is inside the
glove
box. Pull the cover
down to access the
fuses.
Some spare fuses and a fuse
puller are included.
255
ProCarManuals.com
Page 258 of 308
30
30
30
20
Component Center
Under Instrument Panel
Amp Description
1. Defogger Timer Relay
2. Air Conditioner Blower Relay (HI)
3. Air Conditioner Blower Relay (LO)
4. Rear Defogger Circuit Breaker
5. Power Accessories Circuit Breaker
6. Power Windows and Sunroof Circuit Braker
7. Not Used
8. Lock Control Fuse
9. Chime Module
10. Hazard Flasher
.r
I I
256
ProCarManuals.com
Page 259 of 308

15
20
15
IS
1s
' 1s
Electrical Center
Passenger Side - Underhood
Amp Description
Minifuse
1. Not Used
2. Remote Trunk Release
3. Powertrain Control Module (PCM), Fuel
Pump/Oil Pressure Switch, Fuel Pump Relay.
Fan Control
#I Relay
Switch (w/VIN
M only)
(DEGR), Heated Oxygen Sensor,
Fan Control
#2 Relay, A/C Compressor
Relay
(VIN M only)
Relay
(VIN L only)
Crankshaft Position Sensor, Camshaft
Position Sensor
Flow (MAF) Sensor
(VIN L only)
4. Automatic Transaxle, Transaxle Range
5. Generator. Digital Exhaust Recirc'ulation
6. Cruise Control Module. A/C Compressor
7. Fuel Injectors, High Resolution 24X
8. IS Powertrain Control Module (PCM), Mass Air
9. 1s Electronic Ignition (E1)-Control Module
10. 60 I/P Fuse Block, Courtesy Fuse. C/Ltr Fuse.
11. 60 Fdn Control #I Relay
Maxifuse
Elec. Fuse, ACC Fuse
Description
12.
13.
Relay
14.
1s.
16.
17.
18
60 Passenger Side Underhood Electrical Center
and
I/P Fuse Block: Blower Fuse. Stop Fuse.
Door Locks Fuse
Fan Control
#2 Relay and Component
Center: Rear Defog Circuit Breaker, Power
ACC Circuit Breaker 60
Fuel Pump
A/C Compressor
Fan Control
#2 - Secondary Cooling Fan
(Passenger
Side)
Fan Control #I - Primary Cooling Fan
(Driver Side)
Not Used
~~~~~ ~
[I [I
Erlmm
~~~
TCC ENG EMlS CRUISE
F/INJN
ECM IGN ELEK IGN
257
ProCarManuals.com
Page 260 of 308
10
25
1s
Electrical Center
Driver Side - Underhood
Amp Description
Minifuse
1. Not Used
2. Not Used
3. Not Used
4. Fog Lamps
5. Parking Lamps, Headlight Switch
6. Horn Relay, Underhood Light
7. Not Used
8. Not Used
9. Not Used
Maxifuse
10. 40
11 40
Component Center: Power Windows Circuit
Breaker, Passenger Side Underhood
Electrical Center, TCC and Engine Emissions
Fuses
I/P Fuse Block: Radio, Wiper, HVAC, ABS
and Turn Signal Fuses; Passenger Side
Underhood Electrical Center:
Fuel Injections,
ECM IGN and
ELEK IGN Fuses
Amp Description
12. 30 Headlight Switch Circuit Breaker
13. 60 ABS Relay
Relay
14. Anti-lock Brake System
1s. Fog Lamps
16. Horn
258
ProCarManuals.com
Page 277 of 308

At Least Once a Month
CHECK OR
SERVICE
Tire Inflation
Cassette Deck
WHAT TO DO
Check tire inflation. Make sure they are
inflated to the pressures specified on the
Tire-Loading Information label located
on the rear edge of the driver’s door. See
“Tires” in the Index for further details.
Clean cassette deck. Cleaning should
be done every
15 hours of tape play.
See“Audio Systems” in the Index for
further details.
At Least Once a Year
CHECK OR
SERVICE
Key Lock
Cylinders
Body Lubrication
WHAT TO DO
Lubricate the key lock cylinders with
the lubricant specified in Section D.
Lubricate all body door hinges. Also
lubricate all hinges and latches,
including those for the hood, glove box
door and console door. Section
D tells
you what to use.
WHAT TO DO
1. Before you start, be sure you have
enough room around the vehicle.
2. Firmly apply both the parking brake
(see “Parking Brake” in the Index. if
necessary) and the regular brake.
NOTE: Do not use the accelerator
pedal, and be ready to turn
off the
engine immediately if
it starts.
3. Try to start the engine in each gear.
The starter should work only in
“P”
(Park) or “N’ (Neutral). If the starter
works in any other position, your
vehicle needs service.
275
ProCarManuals.com
Page 278 of 308
CHECK OR
SERVICE WHAT TO DO
Steering
Column
in each shift lever position.
brake set, try
to turn the key to “LOCK”
Lock While
parked, and with the parking
0 The key should turn to “LOCK”
only when the shift lever is
in “P”
(Park).
The key should come out only in
“LOCK.”
CHECK OR
SERVICE
Parking Brake and
Automatic
Transaxle
“p’
(Park) Mechanism
Check
WHAT TO DO
Make sure there is room in front -of
your vehicle in case it begins to rolL
Park on a fairly steep hill, with the
vehicle facing downhill. Keeping your
foot on the regular brake, set the
parking brake.
0 To check the parking brake: With
the engine running and the
transaxle
in “N’ (Neutral), slowly
remove foot pressure from the
regular brake pedal.
Do this until
the vehicle
is held by the parking
brake only.
0 To check the “P” (Park)
mechanism’s holding ability: Shift
to
“P” (Park). Then release all
brakes.
276
ProCarManuals.com