Page 223 of 308
Wait at least 30 minutes before checking the transaxle
fluid level if you have been driving:
0 When outside temperatures are above 90°F (32°C).
0 At high speed for quite a while.
In heavy traffic -- especially in hot weather.
0 While pulling a trailer.
To get the right reading, the fluid should be at normal
operating temperature, which is
180°F to 200°F (82°C
to 93°C).
Get the vehicle warmed up by driving about 15 miles
(24 km) when outside temperatures are above 50°F
(10°C).
If it’s colder than 50°F (lO”C), you may have
to drive longer.
To check the fluid level
Park your vehicle on a level place.
0 With the parking brake applied, place the shift lever
0 With your foot on the brake pedal, move the shift
in “P” (Park).
lever through each gear range, pausing for about three seconds
in each range. Then, position the shift
lever
in “P” (Park).
0 Let the engine run at idle for three to five minutes.
Then, without shutting off the engine. follow these
steps:
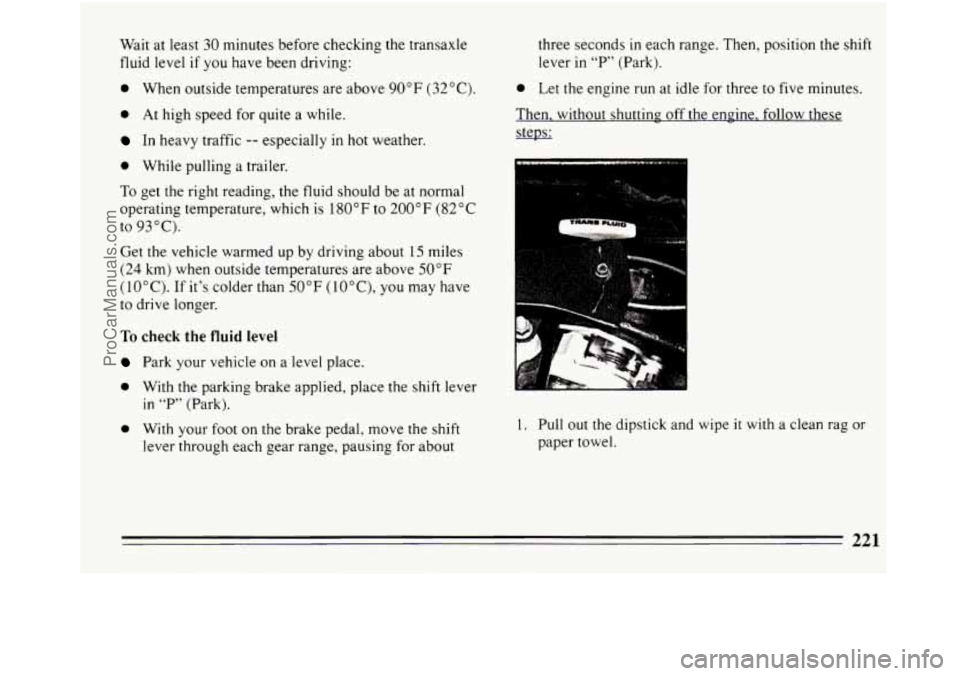
1. Pull out the dipstick and wipe it with a clean rag or
paper towel.
ProCarManuals.com
Page 224 of 308
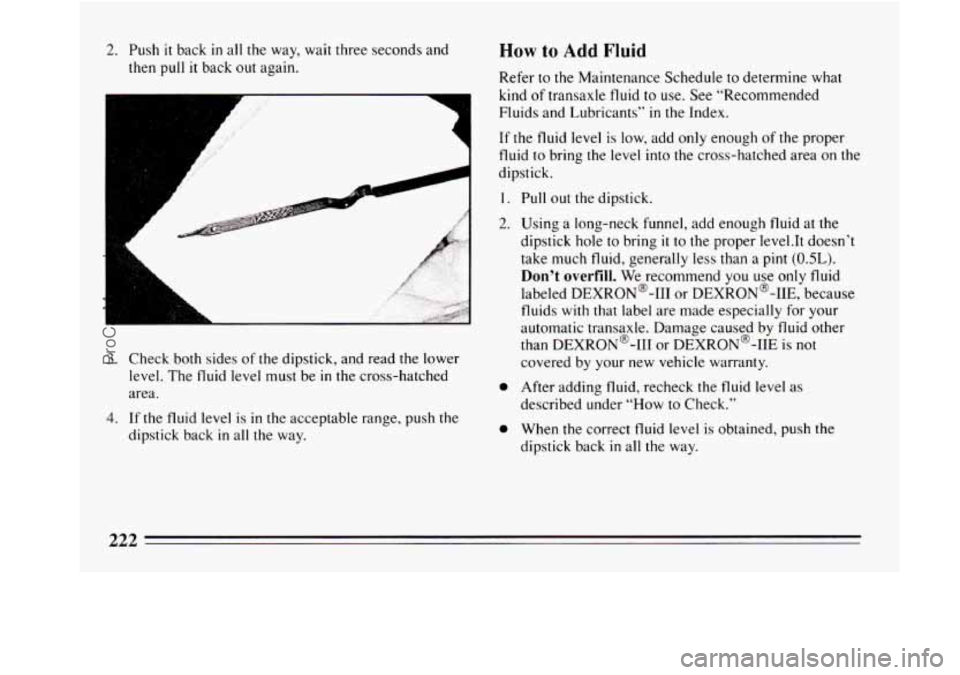
2. Push it back in all the way, wait three seconds and
then pull
it back out again.
A
L
A
A
L
3. Check both sides of the dipstick, and read the lower
level. The fluid level must be in the cross-hatched
area.
4. If
the fluid level is in the acceptable range, push the
dipstick back
in all the way.
How to Add Fluid
Refer to the Maintenance Schedule to determine what
kind of transaxle fluid to use. See “Recommended
Fluids and Lubricants’’
in the Index.
If the fluid level is low, add only enough of the proper
fluid to bring the level into the cross-hatched area
on the
dipstick.
I. Pull out the dipstick.
2. Using a long-neck funnel, add enough fluid at the
dipstick hole to bring
it to the proper 1evel.It doesn’t
take much fluid, generally less than
a pint (OSL).
Don’t overfill. We recommend you use only fluid
labeled DEXRON@-111 or DEXRON@-IIE, because
fluids
with that label are made especially for your
automatic transaxle. Damage caused by fluid other
than DEXRON@-I11 or DEXRON@-IIE is
not
covered by your new vehicle warranty.
0 After adding fluid, recheck the fluid level as
described under
“How to Check.’’
0 When the correct fluid level is obtained, push the
dipstick back
in all the way.
222
ProCarManuals.com
Page 234 of 308
A
B
1. Remove the electrical 4. Install the electrical connector with slotted grooves
connector
(A) from the toward to de front of vehicle.
bulb
by raising the lock
tab (B) and pulling the
connector down and
away from the bulb’s
plastic base
(C).
i
Taillamp Bulb Replacement
Remove the plastic nuts that secure the trunk trim over
the taillights area.
2.
3.
Press and turn the plastic base (C) a 1/4 turn
counterclockwise and remove from the metal
retaining ring
(E) by gently pulling back and away
from the headlight.
Install the new bulb by inserting the smallest tab
(D)
lqcated on top of the plastic base into the
corresponding notch in the metal retaining ring
(E).
Turn 1/4 turn clockwise until it stops. The small
plastic tab should be at the top
of the metal ring.
232
ProCarManuals.com
Page 239 of 308
Inflation - Tire Pressure
The Tire-Loading Information label which is on the deck lid
shows the correct inflation pressures for your tires, when
they’re cold. “Cold” means your vehicle has been sitting for
at least three hours or driven no more than a mile.
NOTICE:
Don’t let anyone tell you that underinflation or
overinflation is all right. It’s not. If your tires don’t
have enough air (underinflation) you can get:
0 Too much flexing
Too much heat
Tire overloading
Bad wear
0 Bad handling
Bad fuel economy.
If your tires have too much air (overinflation),
you can get:
Unusual wear
0 Bad handling
0 Rough ride
Needless damage from road hazards.
When to Check
Check your tires once a month or more.
Don’t forget your compact spare tire. It should be at
60
psi (420 kPa).
How to Check
Use a good quality pocket-type gage to check tire
pressure. Simply looking at the tires will not tell
you the
pressure, especially
if you have radial tires -- which
may look properly inflated even
if they’re underinflated.
If your tires have valve caps, be sure to put them back
on. They help prevent leaks by keeping out dirt and
moisture.
237
ProCarManuals.com
Page 243 of 308
Temperature - A, B, C
The temperature grades are A (the highest), B, and C,
representing the tire’s resistance to the generation of
heat and its ability
to dissipate heat when tested under
controlled conditions on a specified indoor laboratory
test wheel. Sustained high temperature can cause the
material of the tire
to degenerate and reduce tire life, and
excessive temperature can lead to sudden tire failure.
The grade
C corresponds to a level of performance
which all passenger car tires must meet under the
Federal Motor Vehicle Safety Standard
No. 109. Grades
B and A represent higher levels of performance on the
laboratory test
wheel than the minimum required by law.
Warning: The temperature grade for this tire is
established for a tire that is properly inflated and not
overloaded. Excessive speed, underinflation, or
excessive loading, either separately or
in combination,
can cause heat buildup and possible tire failure.
These grades are molded on
the sidewalls of passenger
car tires. While the tires
available as standard or optional
equipment
on General Motors vehicles may vary with
respect to these grades, all such tires meet General
Motors performance standards and have been approved
for use on General Motors vehicles. All passenger type
(P Metric) tires must conform to Federal safety
requirements
in addition to these grades.
Wheel Alignment and Tire Balance
The wheels on your vehicle were aligned and balanced
carefully at the factory to give you the longest tire life
and best overall performance.
In most cases, you will not need to have your wheels
aligned again. However,
if you notice unusual tire wear
or your vehicle pulling one way or the other, the
alignment may need to be reset. If you notice your
vehicle vibrating when driving on a smooth road, your
wheels may need to be rebalanced.
241
ProCarManuals.com
Page 283 of 308
Section E: Maintenance Record
After the scheduled services are performed, record the
date, odometer reading and who performed the service
in
the columns indicated. When completing the
Maintenance Performed column, insert the numbers from the
Schedule
I or Schedule I1 maintenance charts
which correspond
to the maintenance performed. Also,
you should retain all maintenance receipts. Your owner
information portfolio is
a convenient place to store
them.
ODOMETER
DATE READING SERVICED
BY MAINTENANCE PERFORMED
ProCarManuals.com
Page 285 of 308
Part 8 Customer Assistance Information
Here you will find out how to contact Buick if you need assistance. This Part also tells you how to obtain service
publications and how to report any safety defects.
Part 8 includes:
Customer Satisfaction Procedure ...................................................... 283
Assistance for Hearing/Speech Impaired ................................................ 285
Reporting Safety Defects ............................................................ 285
Courtesy Transportation ............................................................. 286
RoadsideAssistance ................................................................ 287
ServicePublications ................................................................ 288
Customer Satisfaction Procedure
Your satisfaction and goodwill are important to your
dealer and Buick. Normally, any concern with the sales
transaction or the operation of your vehicle
will be
resolved by your dealer’s Sales or Service Departments.
Sometimes, however, despite the best intentions of all
concerned, misunderstandings can occur.
If your
concern has not been resolved to your satisfaction, the
following steps should be taken: STEP
ONE -- Discuss your concern
with a member of
dealership management. Normally concerns can be
quickly resolved at that level. If the matter has already
been reviewed with the Sales, Service, or Parts Manager,
contact the owner of the dealership or the General
Manager.
283
ProCarManuals.com
Page:
< prev 1-8 9-16 17-24