1994 BUICK REGAL power steering
[x] Cancel search: power steeringPage 95 of 308
Your driver’s window has an express-down feature.
Quickly press and release the DN side of the switch, the
driver’s window will open a small amount. If the DN
side
of the switch is pressed for more than a few
seconds, the window will go all the way down. To stop
the window while it is lowering, press the UP side of the
switch. To raise the window, press and hold the UP side
of
the switch.
You may also have a lock out switch. Press
it to disable
the power window switches. This will prevent
passengers from opening and closing
the windows. The
driver can still control all the windows with the switch
in the locked position. Press it again to enable the
passenger window switches.
Horn
To sound the horn, press the horn symbol on either side
of the steering wheel.
Tilt Wheel
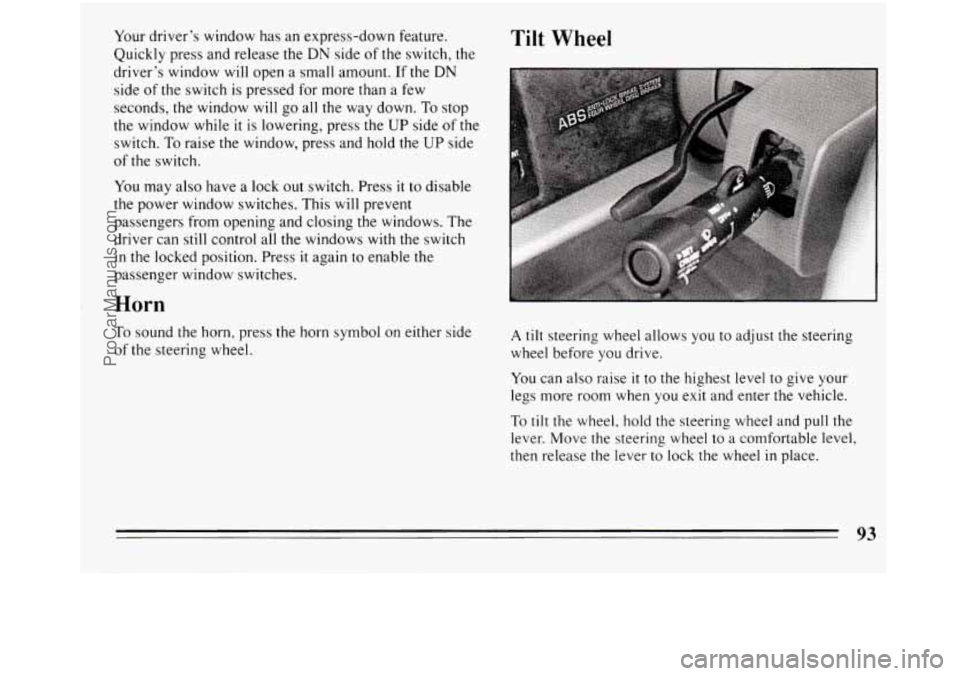
A tilt steering wheel allows you to adjust the steering
wheel before you drive.
You can also raise
it to the highest level to give your
legs more room when you exit and enter the vehicle.
To tilt the wheel, hold the steering wheel and pull the
lever. Move the steering wheel to a comfortable level,
then release the lever
to lock the wheel in place.
ProCarManuals.com
Page 136 of 308
Steering Wheel Controls Power
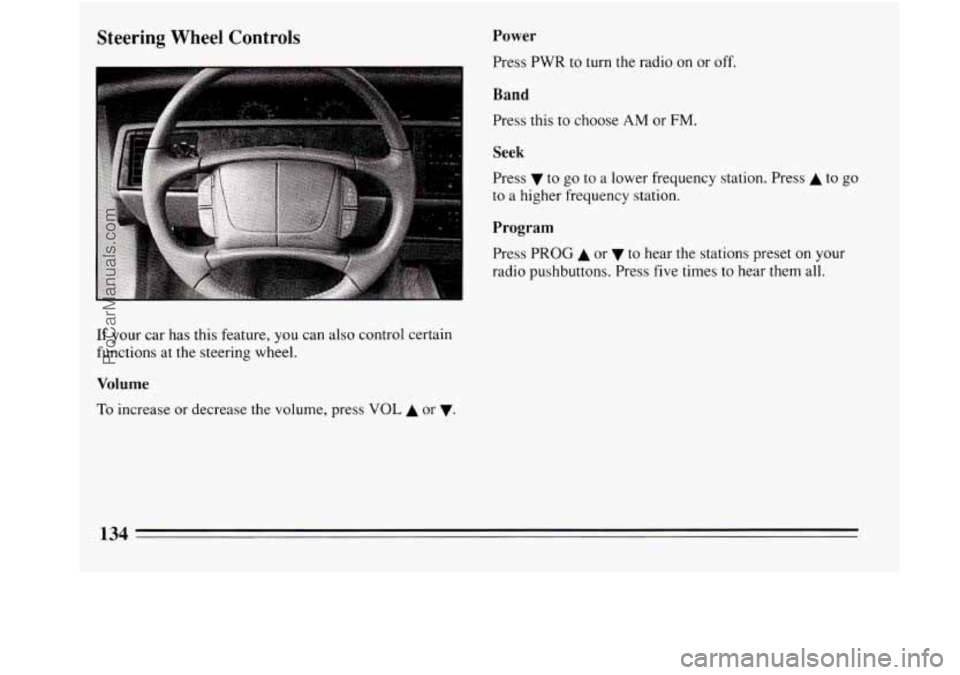
Press PWR to turn the radio on or off.
Band
Press this to choose AM or FM.
I
Seek
Press v to go to a lower frequency station. Press A to go
to a higher frequency station.
Program
Press PROG A or to hear the stations preset on your
radio pushbuttons. Press five times
to hear them all.
If your car has this feature, you can also control certain
functions at the steering wheel.
Volume
To increase or decrease the volume, press VOL A or v.
134
ProCarManuals.com
Page 148 of 308
The anti-lock system can change the brake pressure
faster than any driver could. The computer is
programmed
to make the most of available tire and road
conditions.
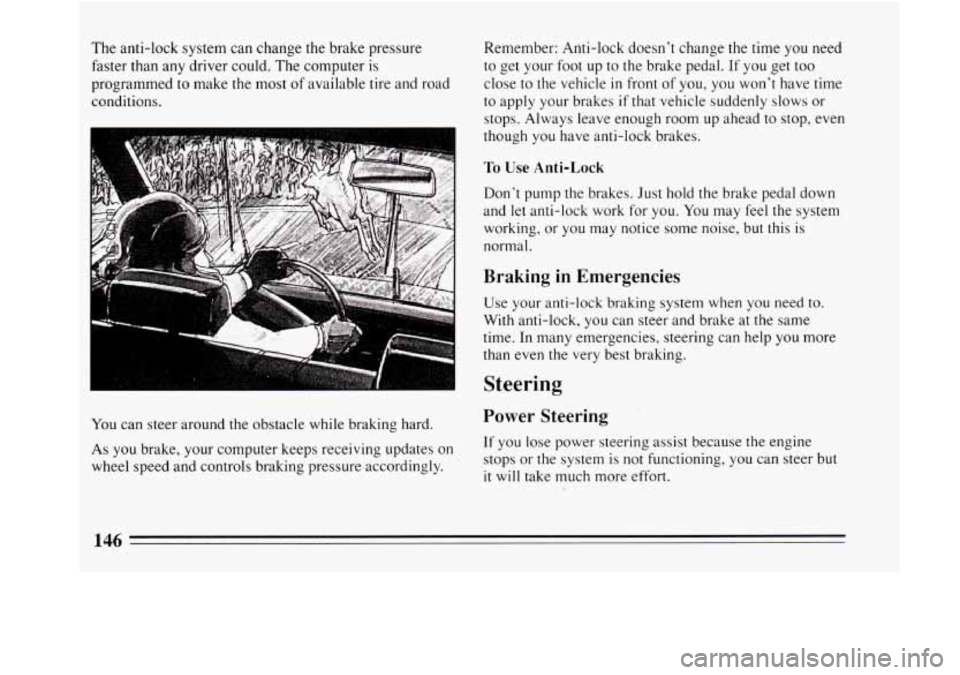
You can steer around the obstacle while braking hard.
As
you brake, your computer keeps receiving updates on
wheel speed and controls braking pressure accordingly. Remember: Anti-lock doesn’t change the time
you need
to get your foot up to
the brake pedal. If you get too
close to the vehicle
in front of you, you won’t have time
to apply your brakes
if that vehicle suddenly slows or
stops. Always leave enough room up ahead to stop, even
though
you have anti-lock brakes.
To Use Anti-Lock
Don’t pump the brakes. Just hold the brake pedal down
and
let anti-lock work for you. You may feel the system
working, or you may notice some noise, but this is
normal.
Braking in Emergencies
Use your anti-lock braking system when you need to.
With anti-lock, you can steer and brake at the same
time. In many emergencies, steering can help
you more
than even the very best braking.
Steering
Power Steering
If you lose power steering assist because the engine
stops or the system is not functioning, you can steer but
it will take much more effort.
146
ProCarManuals.com
Page 209 of 308

Part 6 Service and Appearance Care
Here you will find information about the care of your Buick . This part begins with service and fuel information. and
then
it shows how to check important fluid and lubricant levels . There is also technical information about your
vehicle. and a section devoted to its appearance care
.
Part 6 includes:
Service ........................................................................\
.. 208
Fuel
........................................................................\
..... 209
HoodRelease
..................................................................... 212
Engineoil
....................................................................... \
214
Aircleaner
....................................................................... \
219
Automatic Transaxle Fluid
................................................... : ....... 220
Enginecoolant
.................................................................... 223
PowerSteeringFluid
............................................................... 226
Windshield Washer Fluid
............................................................ 227
Brakes
........................................................................\
... 228
Battery
........................................................................\
.. 231
LoadingYourVehicle
............................................................... 235
Tires
........................................................................\
.... 236
Vehicle Identification Number (VIN)
.................................................. 253
Fuses and Circuit Breakers
....................... ’. ................................... 254
Capacities and Specifications
......................................................... 260
BulbReplacement
................................................................. 232
Appearancecare
.................................................................. 244
207
ProCarManuals.com
Page 228 of 308
Power Steering Fluid
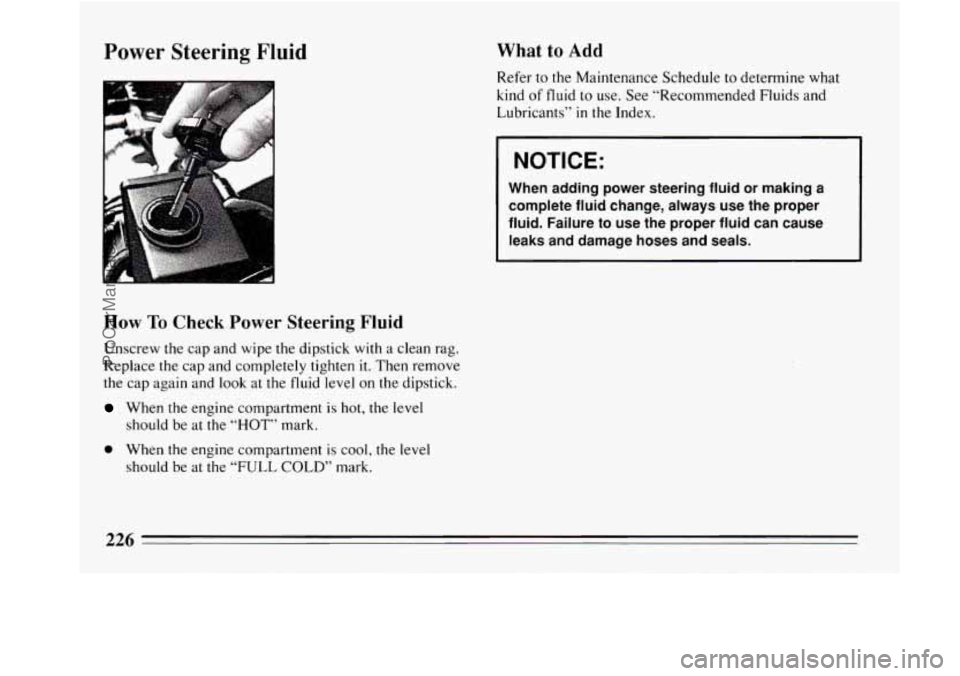
How To Check Power Steering Fluid
Unscrew the cap and wipe the dipstick with a clean rag.
Replace the cap and completely tighten
it. Then remove
the cap again and look at the fluid level on the dipstick.
When the engine compartment is hot, the level
should be at the
“HOT” mark.
0 When the engine compartment is cool, the level
should be at the
“FULL COLD” mark.
What to Add
Refer to the Maintenance Schedule to determine what
kind of fluid to use. See “Recommended Fluids and
Lubricants”
in the Index.
NOTICE:
When adding power steering fluid or making a
complete fluid change, always use the proper
fluid. Failure to use the proper fluid can cause
leaks and damage hoses and seals.
226
ProCarManuals.com
Page 257 of 308

Fuse Block
Amp Description
1.
2.
10
10
3. 20
4.
2s
5. IO
6. 15
7. 15
8. 1s
9. 20
10.
1s
11. 5
12. 1s
13. 15 Radio
& Clock, Steering
Wheel Radio Switches.
Headlight Switch, Air Bag Diagnostic Module, ABS
Lamp Driver Module, Daytime Running Lamps
Module (w/DRL), TCC/Brake Switch, Cruise
Control Cut-Out Switch, Instrument Cluster, Chime
Module, Rear Defogger Timer Relay
A/C HI Blower Relay
Wipermasher Switch
Turn Signal Flasher
TCC/Brake Switch, Hazard Flasher
Vanity Mirror, Lights, I/P Compartment Light,
Courtesy Lights, Trunk Courtesy Light,
Dome/Reading Lights, Cigar Lighter.
Air Bag Diagnostic Module
Power Door Locks, Remote Keyless Entry System
Cigar Lighter
Theft Deterrent Decoder Module
Heater, Vent A/C Solenoid Box, A/C LO Blower
Relay
Chime Module, Electronic Brake Control Module.
Theft Deterrent Decoder Module, Radio, Passive
Restraint Timer Relay, Low Oil Level Module
1s.
Amp Description
14. 15 Air Temperature Valve Motors, Instrument Cluster,
Daytime Running Lights Module (w/DRL), HVAC
Control Assembly, Multi-Function Lever, Heated
Oxygen Sensor
#2, Passenger Temperature Control
Electrical Center
#2, ABS Relay
16. 10 Antenna Relay, Outside Mirror Control, Front
Window/Door Lock Switches, Front Door Handle
Switches
17.
Not Used
18. 5 Air Bag Diagnostic Module
5 Electronic Brake Control Module, Underhood
n
CTSY ARBGl DRLKS
@m@
ClLTR VATS HVAC
This fuse panel is inside the
glove
box. Pull the cover
down to access the
fuses.
Some spare fuses and a fuse
puller are included.
255
ProCarManuals.com
Page 279 of 308

CHECKOR SERVICE I
WHAT TO DO
Underbody At least every spring, use plain water to
Flushing flush any corrosive materials from the
underbody. Take care
to clean
thoroughly any areas where mud and
other debris can collect.
Section C: Periodic Maintenance
Inspections
Listed below are inspections and services which should
be performed
at least twice a year (for instance, each
spring and fall).
You should let your GM dealer’s
service department or other qualified service center do
these jobs. Make sure any necessary repairs are
completed at once.
.
INSPECTION
OR SERVICE
Restraint Systems
Steering,
Suspension and
Front-Wheel-
Drive Axle Boot
md Seal
Inspection
WHAT SHQULD BE DONE
Now and then, make sure all your belts,
buckles, latch plates, retractors,
anchorages and reminder systems are
working properly. Look for any loose
parts or damage. If you see anything
that might keep a restraint system from
doing its jobs, have
it repaired
Inspect the front and rear suspension
and steering system for damaged, loose
or missing parts, signs of wear, or lack
of lubrication. Inspect the power
steering lines and hoses for proper
hookup, binding, leaks, cracks,
chafing, etc. Clean and then inspect the
drive axle boot seals for damage, tears
or leakage. Replace seals
if necessary.
277
ProCarManuals.com
Page 281 of 308
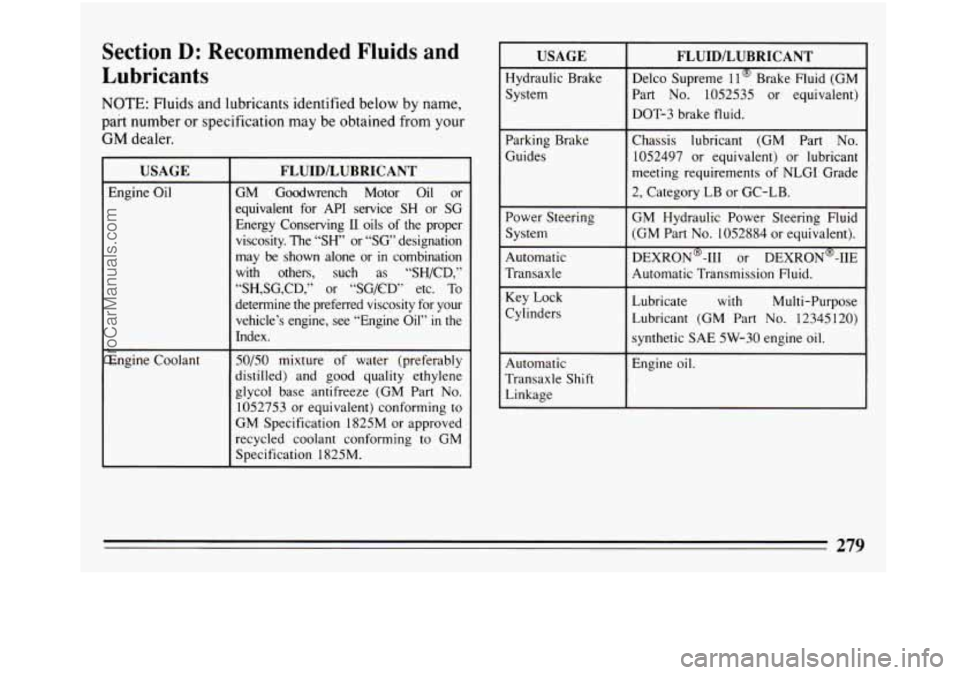
Section D: Recommended Fluids and
Lubricants
NOTE: Fluids and lubricants identified below by name,
pai-t number or specification may be obtained from your
GM dealer.
USAGE
Engine Oil
-
-
-
Engine Coolant
FLUIDlLUBRICANT
GM Goodwrench Motor Oil or
equivalent for
API service SH or SG
Energy Conserving
I1 oils of the proper
viscosity. The
“SH’ or “SG’ designation
may be shown alone or in combination with others, such as “SH/CD,”
“SH,SG,CD,” or “SG/CD” etc. To
determine the preferred viscosity for your vehicle’s engine, see “Engine Oil”
in the
Index.
50/50 mixture of water (preferably
distilled) and good quality ethylene
glycol base antifreeze (GM Part
No.
1052753 or equivalent) conforming to
GM Specification 1825M
or approved
recycled coolant conforming to GM
Specification
1825M.
USAGE
Hydraulic Brake
System
Parking Brake
Guides
Power Steering
System
Automatic
Transaxle
Key Lock
Cylinders
Automatic
Transaxle Shift
Linkage
FLUIDlLUBRICANT
Delco Supreme ll@ Brake Fluid (GM
Part No. 1052535 or equivalent)
DOT-3 brake fluid.
Chassis lubricant (GM Part No.
1052497 or equivalent) or lubricant
meeting requirements of NLGI Grade
2, Category LB or GC-LB.
GM Hydraulic Power Steering Fluid
(GM Part
No. 1052884 or equivalent).
DEXRON@-111
or DEXRON@-IIE
Automatic Transmission Fluid.
Lubricate
with Multi-Purpose
Lubricant (GM Part
No. 12345120)
synthetic SAE 5W-30 engine oil.
Engine oil.
279
ProCarManuals.com