1993 VOLKSWAGEN GOLF change wheel
[x] Cancel search: change wheelPage 22 of 156
Downloaded from www.Manualslib.com manuals search engine CONTROLS AND EQUIPMENT
Attention A child seat in which the child sits with its back to the direction of travel may only be used if the passenger-side Airbag has been deactivated. Serious injuries could otherwise occur to the child. Ask your Volkswagen dealer about the conversion.
As soon as the child seat is no longer needed, the passenger-side Airbag should again be made operational.
Attention
• The steering wheel paddedplate and the padded surface of the airbag module on the passenger side of dash panel must not be bonded or covered or reworked in any other way. It must only be cleaned with a dry cloth or a cloth damped with water.
• No modifications of any kind may be undertaken on the parts of the Airbag System. • All work on the Airbag System as well as removing and installing system parts due to other repair work e.g. removing steering wheel) should only be carried out by Volkswagen dealers.
• The protective function of the Airbag System is only sufficient for one accident. If the Airbag is activated, the system must be exchanged. • No other persons, animals or articles should be carried between the front-seat occupants and the effective range of the Airbag.
• If you sell the vehicle, please pass on this Instruction Manual to the new owner.
20
Page 28 of 156
Downloaded from www.Manualslib.com manuals search engine CONTROLS AND EQUIPMENT
2 -Adjusting backrest angle
Take weight off back rest and turn knob.
The backrest of the driv er's seat shou ld be adjusted so that the top of the steerin g
whee l can be reached with the arms angled slightly.
Attention
Do not lower the backrest too far
when on the move because the seat belts are then no longer fully effective.
3 -Releasing backrest
(2 door vehicl es only)
Lif t the
lever (also belt holder) and move the
back rest forward. Before releasing the
backrest pull
belt out of the belt holder (see
page 17).
Attention For safety reasons, ensure that the backrest lock is engaged when the vehicle is moving!
4 -Adjusting angle of the seat
cushion*
If the angle of the seat cushion is to be changed, pull lever up and bring seat
cushion to the desired angle by placing
mo
re or less weight on the backrest.
5 -Adjusting seat height*
Take weight off seat cushion and pull up lever. The whole seat cushion moves up
war ds. To adjust the seat cushion down
w ards, push seat downwards with body
weight.
Attention • For safety reasons the height of the driver's seat must only be adjusted when vehicle is stationary. • Be careful when adjusting the seat height! Careless and uncontrolled adjustment can cause injuries.
6 -Adjusting lumbar support
By turn ing the hand-wheel the seat padding in the lumbar area of the spine can be made
to arch forward slightly. This gives effective
support to the natura l curvatu re of the spine
so that t
he sitting position is less fatigui ng ,
particul arly on long trips
26
Page 34 of 156
Downloaded from www.Manualslib.com manuals search engine Automatic gearbox*
Driving programmes
The gearbox control unit is equipped with two driving programmes:
• Sport programme
• Economy programme
The programme is selected automatically depending on operation of the accel
erator pedal.
The sport programme is selected if the
accelerator pedal is operated rapidly. In this
case the accelerator pedal need not be de
pressed to the point of kick-down (see
Page 33). In the sport programme, full use is made of the engine's power reserves
through delayed change to higher gear
The
economy programme is selected
when the acce lerator, pedal is operated
s lowly or normally. Fuel consumption is reduced by changing early into higher gear and later into lower.
Selector lever lock
In positions "P" and " N" with the ignition
s wi tc h on the selector lever is locked . To move the selector lever out of these posi
t ions the brake pedal must be depressed and the selector lever button pushed in .
This prevents a gear being engaged inadver
tently
and the vehicle unintentional ly mov
ing off .
A de l
ay circuit prevents the selector lever
f rom locking when it is moved quickly past the" N" position (for Instan ce from" R" to "
D " ) This enables for examp
le the vehicle
to be " rocked" out of a "bogged down "
position The shift lock only locks the selec
tor
leve r if it is left in the " N" position for
more than about 1 second without the
brake pedal being depressed.
At speeds above 5 km/h the selector lever
is automatically switched-off in position "N".
Selector lever positions
P -Parking lock
The driving wheels are lock ed mechanically
The parking lock may only be engaged
when the vehicle is stationary. Before mov
ing the lever in or out of the" P" position the
lock button in the selector lever handle
must be pressed. Before moving the selec
tor lever out of
the" P" pOSition, the brake
pedal must also be depressed w hen the
ignition is switched on .
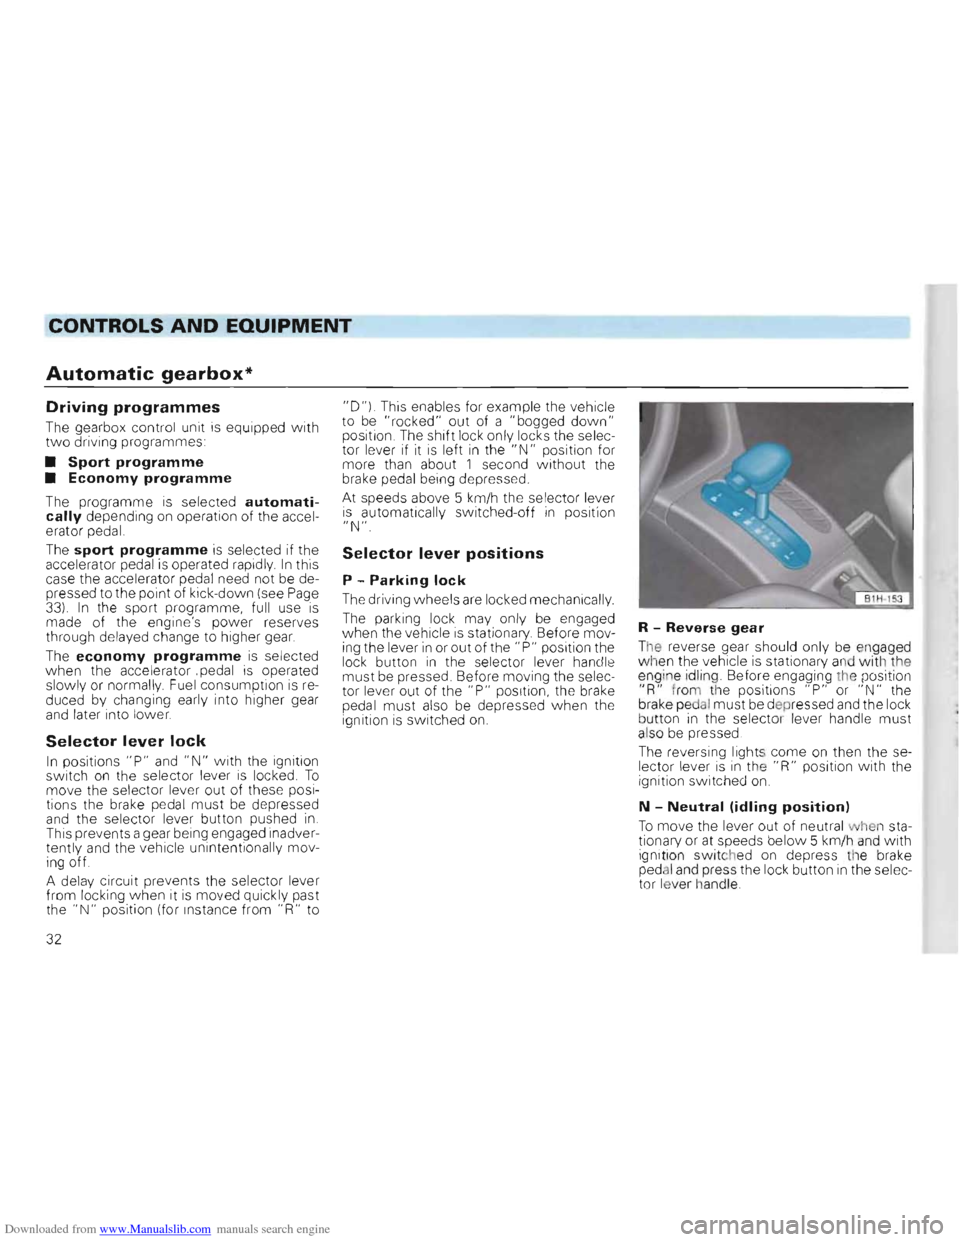
R -Reverse gear
The reverse gear should only be engaged
when the vehicle is station ary and with the
eng ine id ling. Before engaging the position
"R " from the positions "P" or "N " the
brake pedal must be d epr essed and the lock
b u tton in the selecto r lever handle must
also be p re ssed .
The
reversing lights come on then the se
l e cto r leve r is in the "R" position with the
ignition switched on.
N -Neutral (idling position)
To move the leve r out of neutral when sta
tionary or at speeds below 5 km/h and with
ignit ion switc hed on depress the brake
ped al and press the lock button in the selec
t or lever handle .
32
Page 36 of 156
Downloaded from www.Manualslib.com manuals search engine CONTROLS AND EQUIPMENT
• Attention • When the engine is running it is necessary to hold the vehicle with the foot brake in all gears. Because with an automatic gearbox the transfer of power is not fully interrupted even at idling speed -and the vehicle tends to "creep". If a driving range is selected while the vehicle is stationary, the throttle must on no account be opened (e.g. by hand from inside the engine compartment). The vehicle can then start moving, possibly even when the hand brake is applied.
Before working on a running engine, ensure that selector lever is
in position "p" and thatthe handbrake is applied.
Moving off
Select driving range (R, 0, 3, 2, 1) Wait until the gearbox has shifted and the power flow is made to the driving
wheels (light selection jerk perceptible). Then one can accelerate.
Stopping
To stop vehicle temporarily such as at traffic
lights, it is only necessary to apply the
brakes. It is not necessary to move selector
lever to "N". The engine should however on ly be running at idling speed.
Parking
On level ground all you need do is engage
the parking lock. On a gradient the hand
brake should be applied firmly first and then
the parking lock engaged. This will ensure
that the locking mechanism
is not too heav
ily loaded and makes the lock easier to dis
engage .
Tow starting
On vehicles w ith automatic gearbox the en
gine cannot be started by towing or pushing
the vehicle. See page130 .
When the battery
is flat. the engine can be started from the battery of another vehicle
by using jumper cables See" Emergency starting", page 128.
Towing
If the vehicle has to be towed at any time ,
you must read the instructions in the sec
tion "Towing/tow starting on page 129.
Emergency programme
If functional defects occur in the electronic system the gearbox can, amongst other
things, carry on operating in two emergency
programmes: •
The gearbox continues to change up
and
down automatically as before but hard shift
jerks are however noticeable. The vehicle
should
be taken to a Volkswagen dealer.
• The gearbox no longer changes up and
down automatically.
The gearbox can then be shifted manually
but in the selector leve r positions "0", "3"
and "2" only the 3rd gear is available.
I n se lector lever positions " 1 " and " R", the
1 st and reverse gears
are available as nor
mal .
However, the converter must. due to the
absence of 2nd gear work harder ,
and under
certain circumstances this causes the con
verte r to overheat.
In a case such as this the
vehicle should be taken, as soon as poss
ible, to a Volkswagen dealer.
34
Page 77 of 156
Downloaded from www.Manualslib.com manuals search engine DRIVING TIPS
Brakes
General notes
• Brake lining wear depends to a la rge ex
t e nt on the operating conditions and style of riving. On vehicles which are used mainly
n town traffi c and stop/start conditions or are driven hard it may be nece ssary to have the thickness of the brake linings checked by a Volkswagen dealer in be tween the in
t er vals given in the Ser vice Schedule. On 'ehic les with brake pad wear indicato r, worn front pads w ill b e indic ated by a wa rnIng lamp -see page 48.
• Change down in good time when driving
d ownhill , in order to make use of the engine
braking effect. This relieves strain on the
brake system . When the brakes are appl ied
d o not keep them on conti nuo usly, apply
a n d release alternately.
• Under certain
operating conditions, for
ex ample after driv ing through water, after
h eavy ra in or after washi ng the vehicle the
braking effect may be reduced by wet, or in linter iced-up brake discs and linings -the
brakes must be dried out first by applying th e footbrake. The
fu
ll braking effect may also be reduced
when vehicle has been driven for som e
tim e on heavily salted roads witho ut using the bra kes, because th e layer of salt on
discs and pads has to wear off first.
Attention
If a front spoiler or full size wheel trims are retrofitted, it is necessary to ensure that the flow of air to the front brakes is not restricted -otherwise the brakes can overheat.
Brake serve
Attention The servo is operated by vacuum which is only generated when en
gine is running. For this reason the vehicle should not be allowed to roll with the engine switched off.
When the brake servo is not working because, for example, the vehicle is being towed or because a defect has occurred on the brake servo itself, the brake pedal must be pressed considerably harder to compensate for the absence of servo assistance.
75
Page 80 of 156
Downloaded from www.Manualslib.com manuals search engine DRIVING TIPS
Driving instructions
To obtain the best possible handling of ve
hicle and trailer, the following should be
noted :
•
Try to avoid driving w ith an unladen ve
hicle and a loaded trailer. If this cannot be
avoided, only drive
slowly to allow for the
unfavourable weight distribution .
• As driving stability
of vehicle and trailer
decreases when the speed increases do not drive at the maximum permissible top speed in unfavourable road, weather or wind conditions -particularly when going
downhill.
In any case the speed must be reduced im
mediately the trailer shows the slightest
sign of snaking . On no account try to stop
the snakin g by accelerating.
• For safety reasons one should not drive
faster than 80
km/h (50 mph). This also
applies in countries where higher speeds
are permitted. •
Al
ways brake in good time. If the trailer
has an overrun brake, apply the brakes gen
tl y at firs t then firmly. This will avoid the Je rk
ing caused by the trailer wheels loc king. Change down before going down a steep
hill so that the engine can act as a braka.
•
When a lon g climb in a low gear with ex
tremel y high engine revs must be nego
tiated at exceptionally high ambient temperatures the coolant temperature gauge must be observed. When the gauge needle
moves to the upper end of the scale, the
road speed must be reduced immediately
If nevertheles s the warning lamp flashes,
stop
immediatel y and allow the engine to
cool off at id l ing speed for several minutes.
• The coo ling
effect of the radiator fan can
not be increased by changing down, be
cause the speed of the fan is not dependent
on the engine speed. One should the refore
not change down even when towing a
trailer as 10ll g as the engine can cope without the vehicle speed dropping too much .
General notes
• It is advisable to hav e the vehicle serviced between the Insp ection in tervals it it
is used frequently for towing a trailer .
• The trailer and draw
bar load figures on
the data plate of the towing bracke t are for test ce rtific ation only. The correct figures
for the vehicle, which may be lower t han
th ese figures, are given in the eh icle documents and in this manual.
78
Page 107 of 156
Downloaded from www.Manualslib.com manuals search engine GENERAL MAINTENANCE
Wheels
General notes
• New tyres do not give maximum grip
str aight away and should therefore be run in
a moderate speeds and a careful style of
driving for about the first 100 km . This will
"Ielp to make the tyres last longer.
• The tread depth of
new tyres can vary
du e to constructi on and design features,
and depending on version and manufac
:u res.
• Check tyres for damage from
time to
-lin e (cuts, splits, cracks and lumps) and re
m ove any foreign bodies embedded in the
- r eads.
•
To a v oid damage to tyres and wheels
drive over curbs and similar obst acles very
slowly and as nearly at right angles as poss
Ible .
Damage to w he els and tyres is not always
e asy to see, so if you think that a wheel is
d a maged, It must be checked by a Volks
w agen dealer.
• Keep grease,
011 and fuel off the tyres.
• Replace missing dust caps as soon as possib le.
• Mark wheels before taking them off so
that they rotate in the same direction when put back on again
•
When taken off, the tyres should be
stored in a cool, dry and preferably dark
place
T y res
which are not on wheels shou ld be
stored In a vertical position.
Tyre life
Tyre life depends to a considerable extent
on the following factors:
Inflation pressure ..-
Tyre pressures can be found on page 141
and on a sticker on the inside of of the tank
filler flap -see page 81.
The inflation pressure
is very important par
ticularly at high speeds . Therefore, the pres
sures should be che cked at least once a
month and before every long Journey.
At this opportunity do not
forget the spare
w heel
• On the temporary spare the pressure is shown on the side wall.
• The spare
wheel w ith normal tyre shou ld alw ays be inflated to the highest pressure required on the veh icle. •
Always check the pressures
when the
ty res are cold. When warm, the pressure is higher but do not reduce. If the load changes a great deal the pressure must be altered to suit.
Pressures
which are too high or too low short en tyre life -quite apart from the detrimental influence on vehicle handling .
Attention
At continuous high speeds a tyre
in which the pressure is too low
flexes more and heats up excess
ively. This can cause tread separ
ation and tyre blowout.
dit-. A pressure which is too low in~creases the fuel consumption and this burdens the environment unnecessarily.
Mode of driving
Fast cornering, hard acceleration and Viol
ent braking also increase tyre wear.
105
Page 109 of 156
Downloaded from www.Manualslib.com manuals search engine GENERAL MAINTENANCE
I S1H-053 I
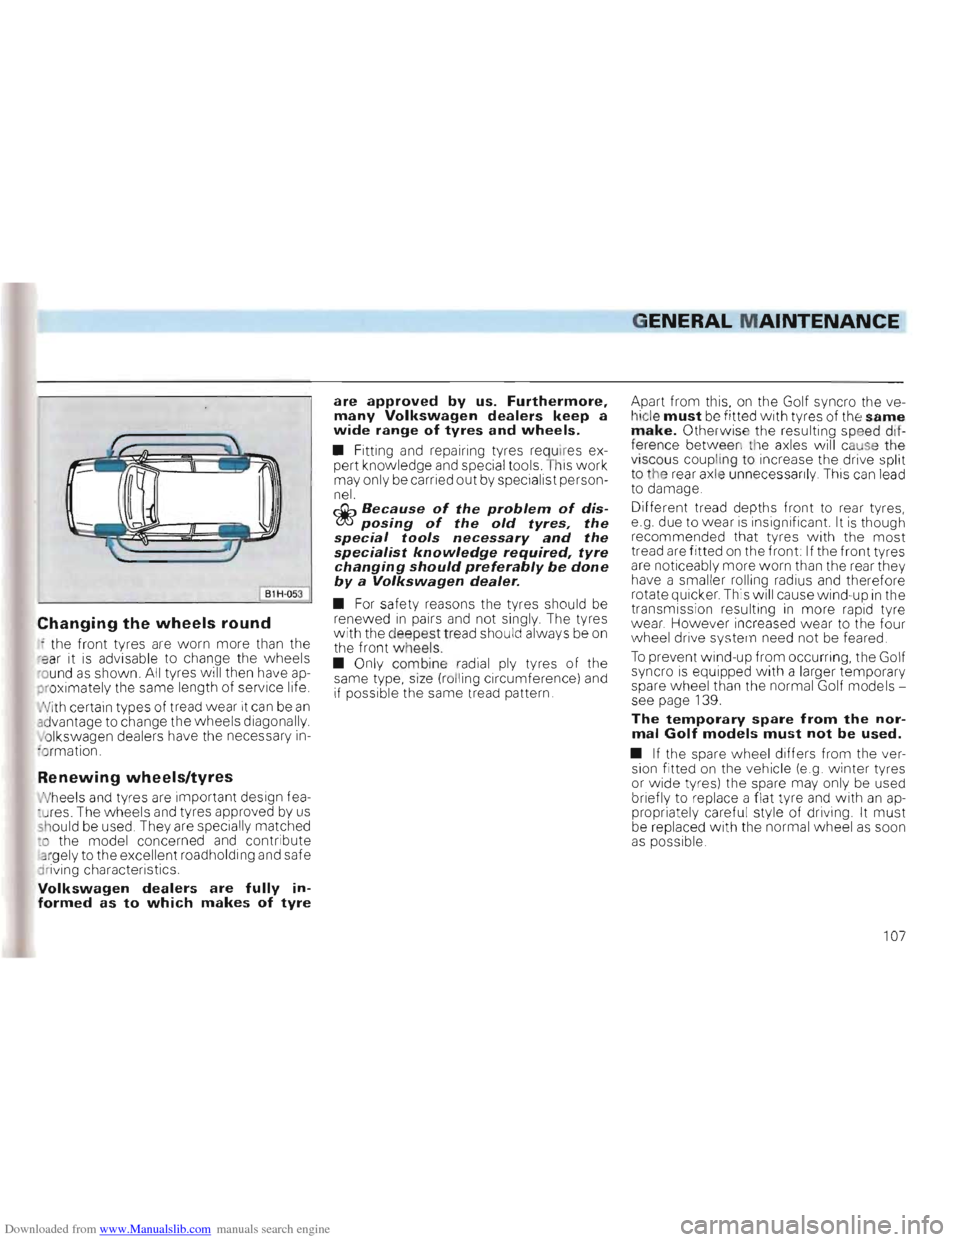
Changing the wheels round
, the front tyres are worn more than the
r ear it is advi sable to change the wheels
r o und as shown . All tyres wi ll then have ap
proximately the same length of servic e life.
N ith certain types of tread wear it
can be an advantag e to change the wheels diagonally. Jo lkswagen dealers have the necessa ry in
:or mation.
Renewing wheels/tyres
N heels and ty res are important design fea
. u res. The w heels and tyres approved by us sh ou ld be used. They are special ly matched ~o the model concerned and contribute argely to the excellent roadhold ing and safe
driving characteri stics.
Volkswagen dealers are fully informed as to which makes of tyre
are approved by us. Furthermore, many Volkswagen dealers keep a wide range of tyres and wheels.
• Fitting and repairing tyres requires ex
pert knowledge and specia l tools. This work may only be carried out by spec ialist person
nel.
r.Q:., Because of the problem of dis'{!J!J posing of the old tyres, the special tools necessary and the specialist knowledge required, tyre changing should preferably be done by a Vo/kswagen dealer.
• For saf ety reasons the tyres shou ld be renewed in pairs and not singly. The tyres with the dee pest tread should always be on the front w heels.
• Only combin e r
adial ply tyres of the
same type, size (rolling circumference) and
if possible the same tread pattern . Apart
from th
is, on the Golf syncro the ve
h icl e m ust be fitted with tyres of th e same mak e. Other w ise the resulting speed dif
ference between th e axles wil l cause the
viscous coupling to increase the drive sp lit
to t he rear axle unnece ssa rily Thi s can lead
to damage.
D i
fferent tread depths front to rear tyres,
e.g. due to wear is insignif icant. It is though
recommended that tyres with the most
tread are fitted on the front If the front tyres
are noticeably more worn than the rear they
have a smal ler ro lli ng radius and therefore
rotate quicker. This wi ll cause wind-up in the
transmission resulti ng in more rapid tyre wear. However increased wear to the four
wheel drive system need not be feared .
To pre vent wind-u p from occurring , the Golf
syncro is equ ipped with a larger temporar y
spare wheel than the normal
Golf models
see page 1 39.
The temporary spare from the normal Golf m odels must not be used.
• If the spare wheel differs from the ver
sion fitted on the vehicle (e.g. winter tyres
or wide tyres) the spare may only be used
briefly to replace a flat tyre and with an ap
propriately careful style of drivi ng . It mus t be replaced with the normal w heel as soon as possib le
107