1993 PONTIAC BONNEVILLE display
[x] Cancel search: displayPage 46 of 322
... Part 2
Features & Controls
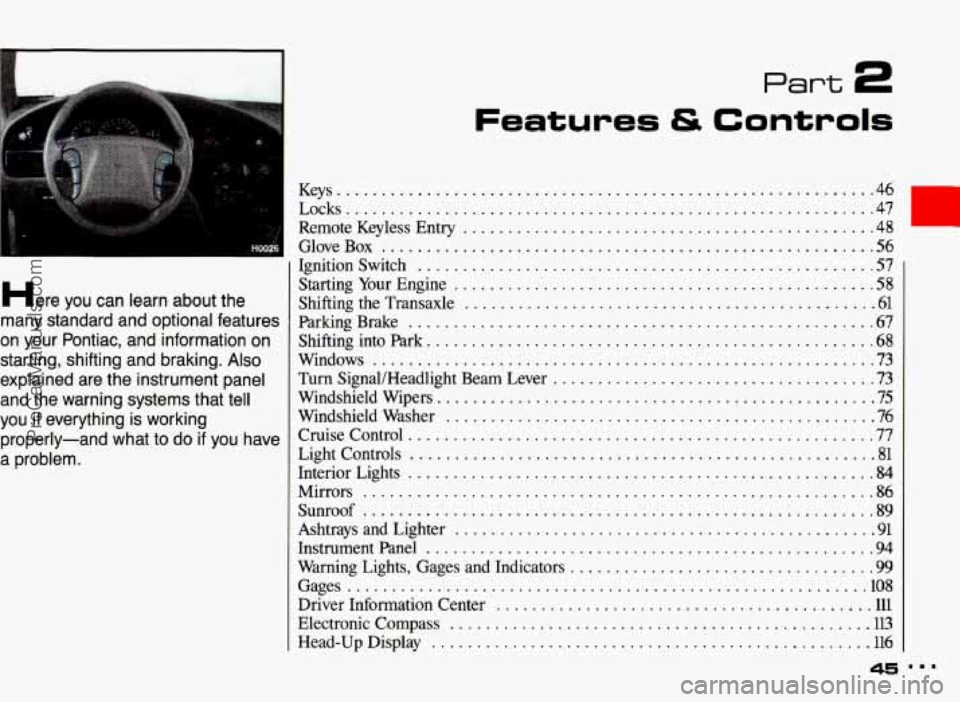
Here you can learn about the
many standard and optional features
on your Pontiac. and information on
starting. shifting and braking
. Also
explained are the instrument panel
and the warning systems that tell
you
if everything is working
properly-and what to do
if you have
a problem
.
Keys ............................................................ 46
Locks
........................................................... 47
Remote Keyless Entry
.............................................. 48
GloveBox
....................................................... 56
Ignitionswitch ................................................... 57
StartingYourEngine
............................................... 58
Shifting the Transaxle
............................................. -61
ParkingBrake .................................................... 67
Shifting into Park
........ ...................................... 68
Windows ........................................................ 73
Turn SignaUHeadlight Beam Lever
.................................... 73
Windshield Wipers
................................................. 75
Windshield Washer
................................................ 76
CruiseControl
.................................................... 77
Lightcontrols
.................................................... 81
Interior Lights .................................................... 84
Mirrors
......................................................... 86
Sunroof ......................................................... 89
Ashtrays and Lighter
.............................................. -91
Instrument Panel ................................................... 94
Warning Lights, Gages and Indicators
.................................. 99
Gages
.......................................................... 108
Driver Information Center .......................................... 111
Electronic Compass ............................................... 113
Head-Up Display ............................................... 116
ProCarManuals.com
Page 58 of 322
New Venice bbBreak-ln”
Your modern Pontiac doesn’t need
an elaborate “break-in.” But it will
perform better
in the long run if
you follow these guidelines:
Don’t drive at any one speed-
fast or slow-for the first
500
.miles (804 km). Don’t make full-
throttle
starts.
Avoid making hard stops for the
first 200 miles (322 km) or so.
During this time your new brake
linings aren’t yet broken in. Hard
stops
with new linings can mean
premature wear and earlier
replacement. Follow this “breaking-in” guideline every
time you get
new brake linings.
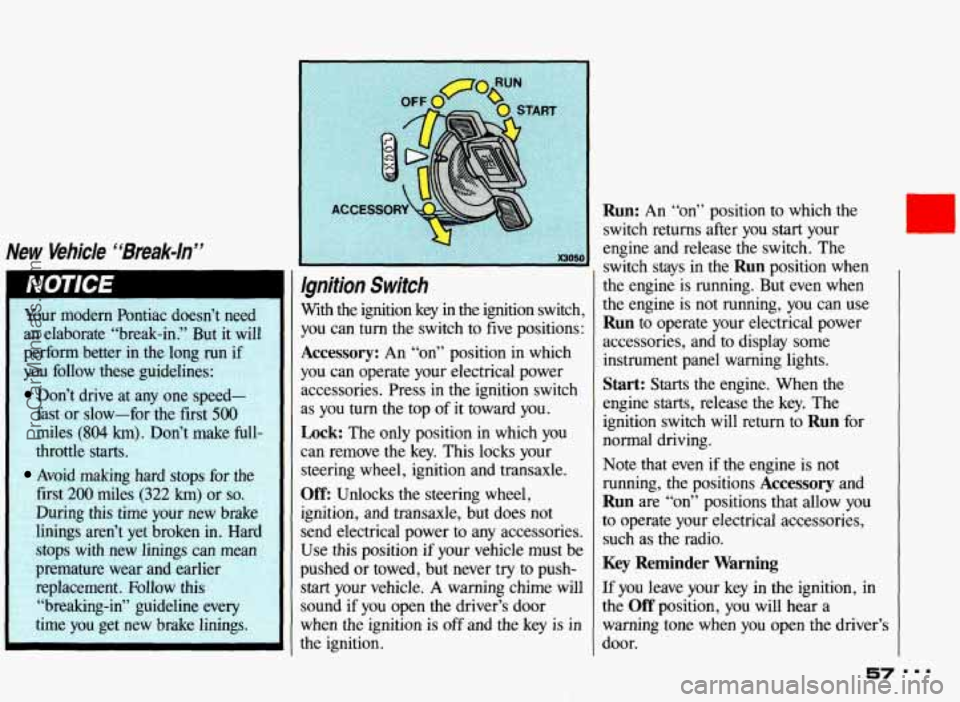
Ignition Switch
With the ignition key in the ignition switch,
you can turn the switch to five positions:
Accessory: An “on” position in which
you can operate your electrical power
accessories. Press in the ignition switch
as
you turn the top of it toward you.
Lock: The only position in which you
can remove the key. This locks your
steering wheel, ignition and transaxle.
Off: Unlocks the steering wheel,
ignition, and transaxle, but does not
send electrical power to any accessories.
Use this position if your vehicle must be
pushed or towed, but never try to push-
start your vehicle. A warning chime will
sound if you open the driver’s door
when the ignition is
off and the key is in
the ignition.
Run: An “on” position to which the
switch returns after you
start your
engine and release the switch. The
switch stays in the
Run position when
the engine is running. But even when
the engine is not running, you can use
Run to operate your electrical power
accessories, and to display some
instrument panel warning lights.
Start: Starts the engine. When the
engine starts, release the key. The
ignition switch will return to
Run for
normal driving.
Note that even if the engine
is not
running, the positions
Accessory and
Run are “on” positions that allow you
to operate your electrical accessories,
such as the radio.
Key Reminder Warning
If you leave your key in the ignition, in
the
Off position, you will hear a
warning tone when you open the driver’s
door.
57 ===
ProCarManuals.com
Page 85 of 322
Features & Controls
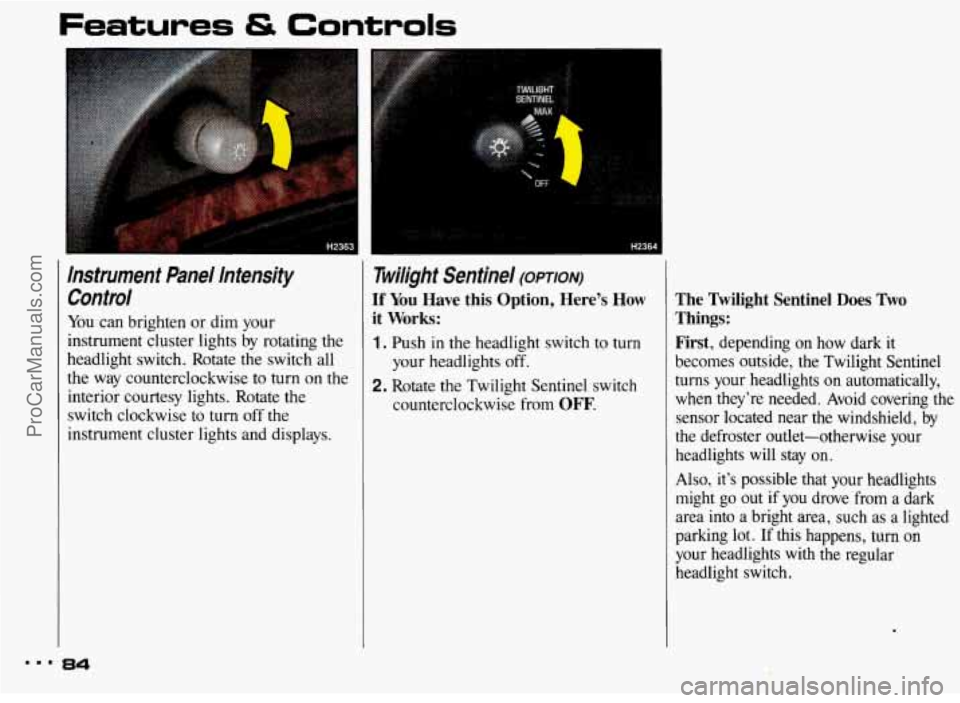
Instrument Panel Intensity Control
You can brighten or dim your
instrument cluster lights by rotating the
headlight switch. Rotate the switch all
the way counterclockwise to turn on the
interior courtesy lights. Rotate the
switch clockwise to turn off the
instrument cluster lights and displays.
~ Twilight Sentinel (opTIoN)
If You Have this Option, Here’s How
1. Push in the headlight switch to turn
2. Rotate the Twilight Sentinel switch
l it Works:
your headlights off.
counterclockwise from
OFF.
The Twilight Sentinel Does Two
Things: First,
depending on how dark it
becomes outside, the Twilight Sentinel
turns your headlights on automatically,
when they’re needed. Avoid covering the
sensor located near the windshield, by
the defroster outlet-otherwise your
headlights will
stay on.
Also, it’s possible that your headlights might go out if you drove from a dark
area into
a bright area, such as a lighted
parking lot. If this happens, turn on
your headlights with the regular
headlight switch.
mmm 84
ProCarManuals.com
Page 96 of 322
r
The Instrument &ne/-
bur Information System
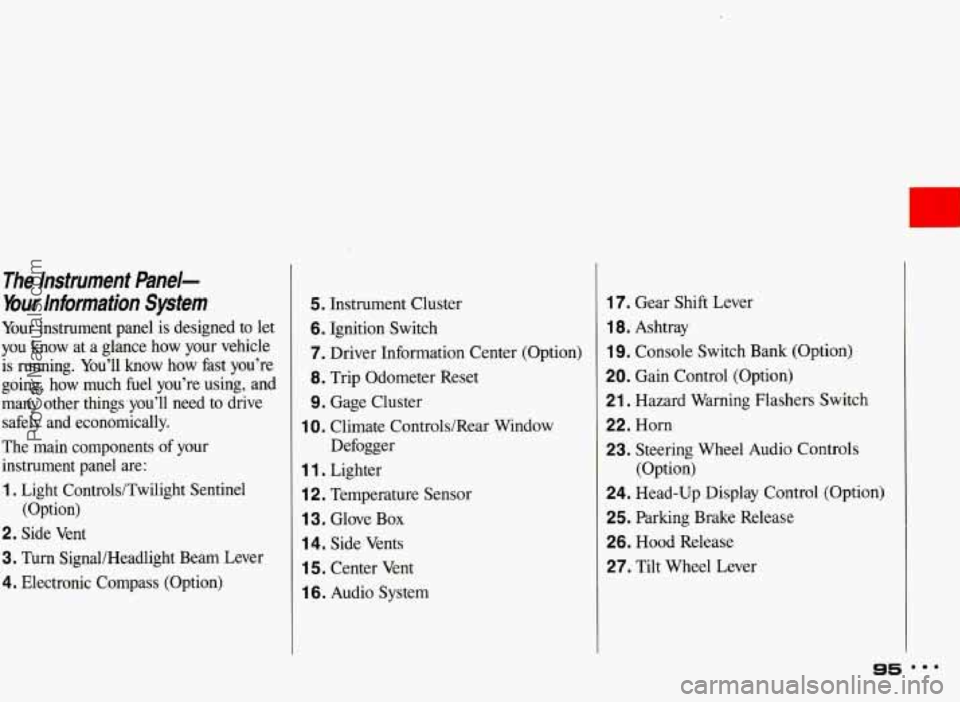
Your instrument panel is designed to let
you know at a glance how your vehicle
is running. You’ll know how fast you’re
going, how much fuel you’re using, and
many other things you’ll need to drive
safely and economically.
The main components of your
instrument panel are:
1. Light Controls/Twilight Sentinel
2. Side Vent
3. Turn SignaUHeadlight Beam Lever
4. Electronic Compass (Option) (Option)
5. Instrument Cluster
6. Ignition Switch
7. Driver Information Center
(Option)
8. Trip Odometer Reset
9. Gage Cluster
Defogger
1 0. Climate Controls/Rear Window
1 1 . Lighter
i 2. Temperature Sensor
1 3. Glove Box
14. Side Vents
1 5. Center Vent
1 6. Audio System
17. Gear Shift Lever
1 8. Ashtray
19. Console Switch Bank (Option)
20. Gain Control (Option)
21. Hazard Warning Flashers Switch
22. Horn
23. Steering Wheel Audio Controls
24. Head-Up Display Control (Option)
25. Parking Brake Release
26. Hood Release
27. Tilt Wheel Lever (Option)
95 mmm
ProCarManuals.com
Page 99 of 322
Features & Controls
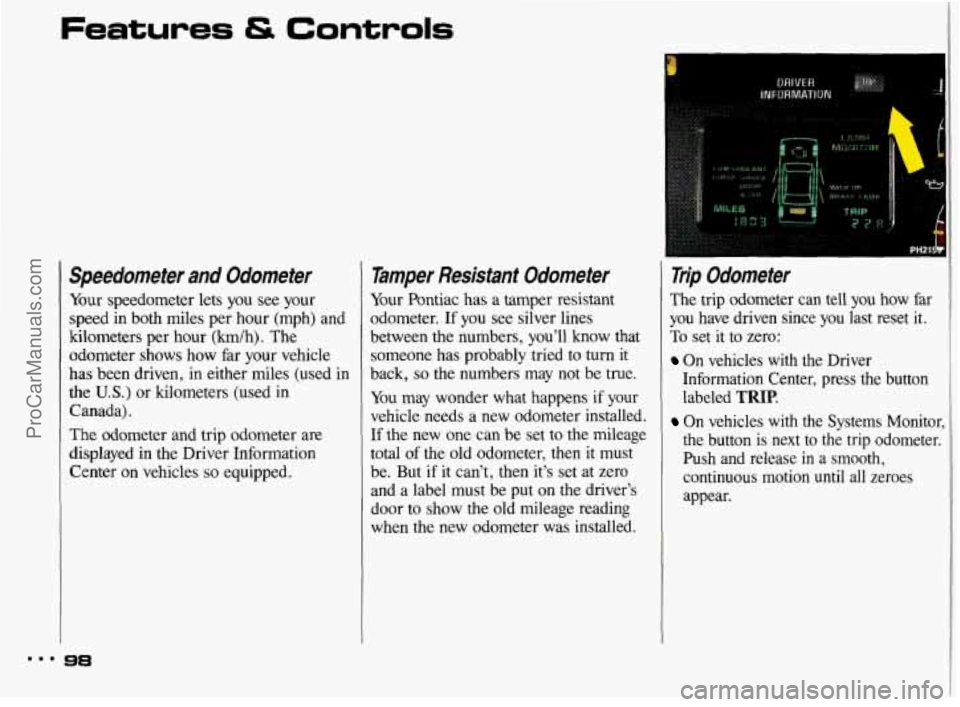
Speedometer and Odometer
Your speedometer lets you see your
speed in both miles per hour (mph) and
kilometers per hour
(km/h). The
odometer shows how far your vehicle
has been driven, in either miles (used in
the U.S.) or kilometers (used in
Canada).
The odometer and trip odometer are
displayed
in the Driver Information
Center on vehicles
so equipped.
Tamper Resistant Odometer
Your Pontiac has a tamper resistant
odometer. If you see silver lines
between the numbers, you’ll know that
someone has probably tried to turn
it
back, so the numbers may not be true.
You may wonder what happens if your
vehicle needs a new odometer installed.
If the new one can be set to the mileage
total of the old odometer, then it must
be. But if it can’t, then it’s set at zero
and a label must be put on the driver’s
door to show the old mileage reading
when the new odometer was installed.
Trip Odometer
The trip odometer can tell you how far
you have driven since you last reset it.
To set it to zero:
On vehicles with the Driver
Information Center, press the button
labeled
TRIP.
On vehicles with the Systems Monitor,
the button
is next to the trip odometer.
Push and release in a smooth,
continuous motion
until all zeroes
appear.
ProCarManuals.com
Page 112 of 322
Boost Gage (OPTION)
Vehicles equipped with the supercharged
engine have this boost gage that indicates vacuum during light to
moderate throttle and boost under
heavier throttle. The gage displays the
air pressure level
in psi going into the
engine’s combustion chamber.
The gage is automatically centered at
zero psi
every time the engine is started.
Actual vacuum or boost
is displayed
from this zero point. Changes
in
ambient pressure, such as driving in
mountains and changing weather, will slightly change
the zero reading.
I
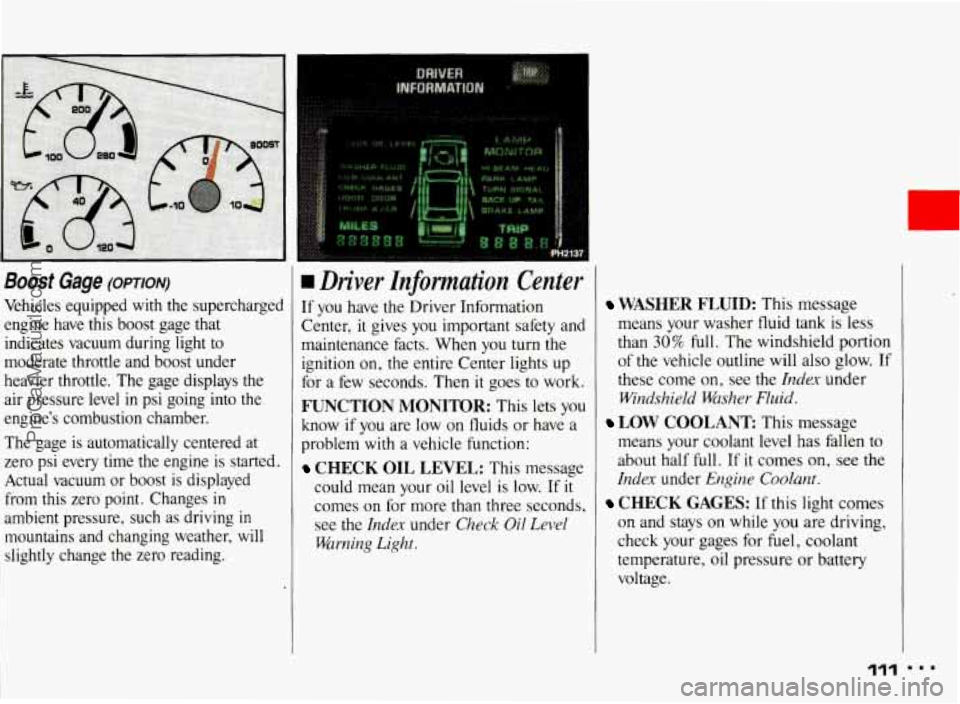
rn Driver Znformation Center
If you have the Driver Information
Center, it gives you important safety and
maintenance facts. When you turn the ignition on, the entire Center lights up
for a few seconds. Then it goes to work.
FUNCTION MONITOR: This lets you
know if you are low
on fluids or have a
problem with a vehicle function:
CHECK OIL LEVEL: This message
could mean your oil level is low. If
it
comes on for more than three seconds, see
the Index under Check Oil Level
Warning Light.
WASHER FLUID: This message
means your washer fluid tank is less
than
30% full. The windshield portion
of the vehicle outline will also glow. If
these come on, see the
Index under
Windshield Washer Fluid.
means your coolant level has fallen to
about half full. If it comes on,
see the
Index under Engine Coolant.
CHECK GAGES: If this light comes
on and stays on while
you are driving,
check your gages for fuel, coolant
temperature, oil pressure or battery
voltage.
LOW COOLANT This message
111
ProCarManuals.com
Page 114 of 322
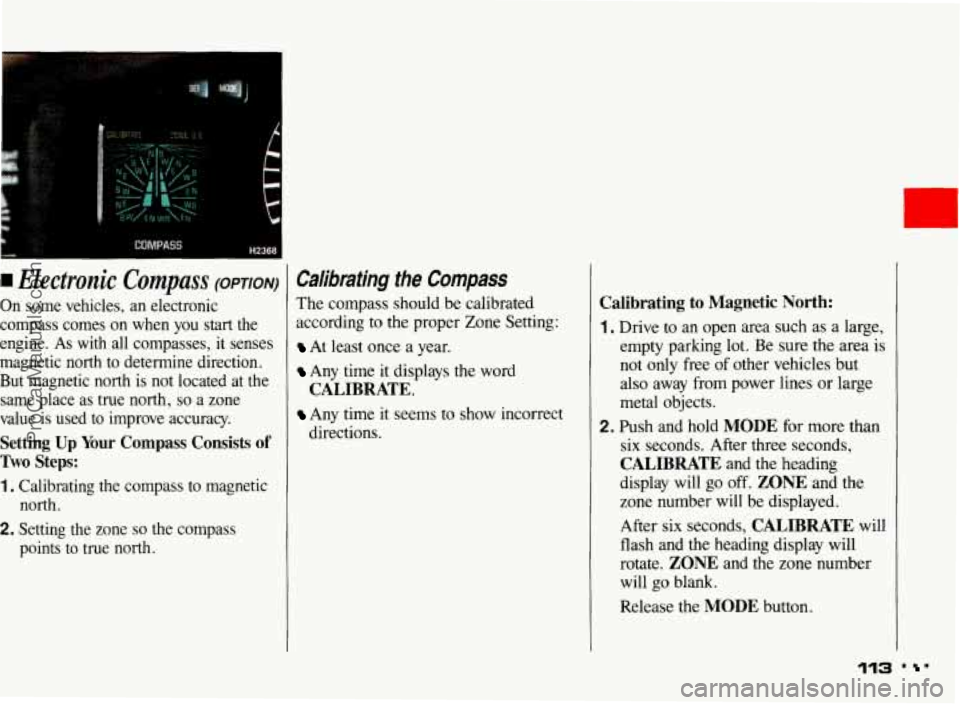
I Electronic Compass (OPTION)
On some vehicles, an electronic
compass comes on when you start the
engine. As
with all compasses, it senses
magnetic north to determine direction.
But magnetic north is not located at the same place as true north,
so a zone
value is used to improve accuracy.
Setting Up Your Compass Consists of
Two Steps:
1. Calibrating the compass to magnetic north.
2. Setting the zone so the compass
points to true north.
Calibrating the Compass
The compass should be calibrated
according to the proper Zone Setting:
At least once a year.
Any time it displays the word
Any time it seems to show incorrect
CALIBRATE.
directions.
Calibrating to Magnetic North:
1. Drive to an open area such as a large,
empty parking lot. Be sure the area is
not only free
of other vehicles but
also away from power lines or large
metal objects.
2. Push and hold MODE for more than
six seconds. After
three seconds,
CALIBRATE and the heading
display will
go off. ZONE and the
zone number will be displayed.
After six seconds,
CALIBRATE will
flash and the heading display will
rotate.
ZONE and the zone number
will go blank.
Release the
MODE button.
113 . '
ProCarManuals.com
Page 116 of 322
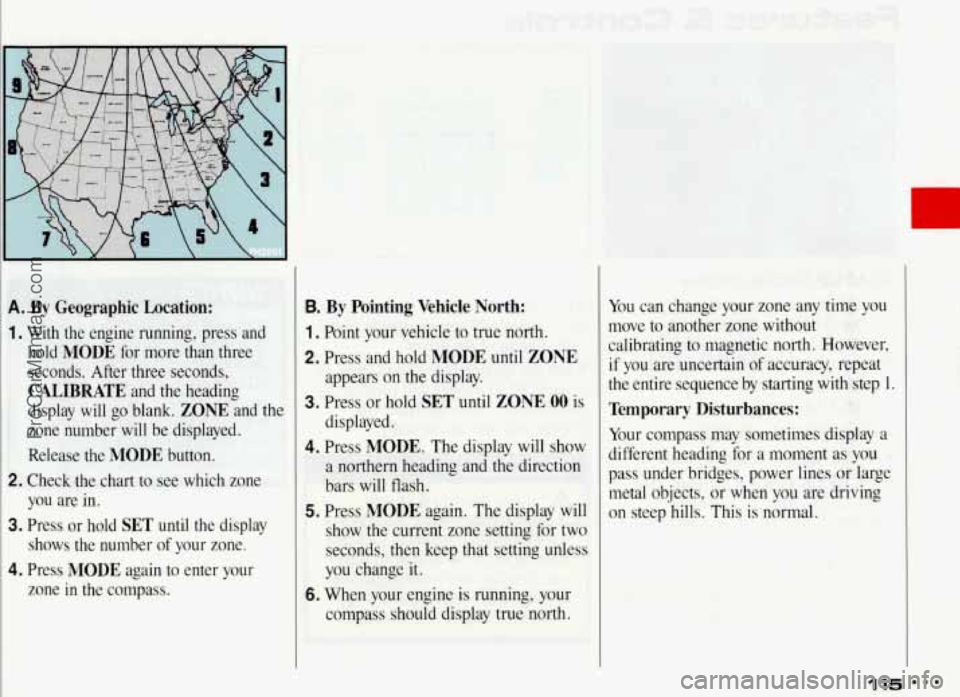
A. By Geographic Location:
1. With the engine running, press and hold
MODE for more than three
seconds. After three seconds,
CALIBRATE and the heading
display will go blank.
ZONE and the
zone number will be displayed.
Release the
MODE button.
2. Check,the chart to see which zone
you are in.
3. Press or hold SET until the display
shows the number
of your zone.
4. Press MODE again to enter your
zone in the compass.
B. By Pointing Vehicle North:
1 . Point your vehicle to true north.
2. Press and hold MODE until ZONE
appears on the display.
3. Press or hold SET until ZONE 00 is
displayed.
4. Press MODE. The display will show
a northern heading and the direction
bars will flash.
5. Press MODE again. The display will
show the current zone setting for two
seconds, then keep that setting unless
you change it.
6. When your engine is running, your
comoass should display true north. You
can change your zone any time you
move to another zone without
calibrating to magnetic north. However, if you are uncertain of accuracy, repeat
the entire sequence by starting with step 1.
Temporary Disturbances:
Your compass may sometimes display a
different heading for a moment
as you
pass under bridges, power lines
or large
metal objects,
or when you are driving
on steep hills. This is normal.
115 ProCarManuals.com