Page 53 of 356

Downloaded from www.Manualslib.com manuals search engine Features & Controls
Here you can learn about the many standard and optional featur\
es on your
vehicle, and information on starting, shifting, and braking. Als\
o explained are
the instrument panel and the warning systems that tell you
if everything is
working properly-and what to do if you have a problem.
For explanation of vehicle symbols, refer to “Vehicle Symbols” in
Section 0.
Keys ......................,.........................,...........~...........\
...............................,...........,. 2-3
Your Doors and How They Work
............................................~.......................... \
2-5
Side Doors
.............I............r............................ .................................... .... ......... 2-5
Door Locks
........................................................................\
.................................. .- . , 2-6
Theft
........................................................................\
............................................... 2-8
New Vehicle Break-In
........................................................................\
............,...... 2-9
Ignition Switch
........................................................................\
............................... 2-9
Starting Your Engine
........................................................................\
................... 2-11
Driving Through Deep Standing Water
..................................................... .... 2-14
Automatic Transmission
........................................................................\
.............. 2-1 6
Five-Speed Manual Transmission ...................................................................... 2-1 9
Locking Rear
Axle ...... 1 ........................................................................\
................ 2-21
Parking Brake
........................................................................\
.............................. 2-21
Parking Over Things That Burn
........................................................................\
. 2-25
-
2-1
Page 81 of 356

Downloaded from www.Manualslib.com manuals search engine 4 LOW: This setting also engages your front axle to give you extra traction.
You may never need
4 LOW. It sends the maximum power to all four wheels.
You might choose
4 LOW if you were driving off-road in sand, mud, or deep
snow and climbing or descending steep hills.
You can shift from
2 WHEEL to 4 HIGH or from 4 HIGH to 2 WHEEL while
the vehicle is moving.
It is not necessary for you to press the transfer case
shift lever button. Your front axle will engage faster if you take your foot
off
of the accelerator for a few seconds after you shift.
To shift into or out of 4 LOW or N SET PARKING BRAKE:
-
1. Stop your vehicle and shift your transmission into neutral.
2. Press the transfer case shift button and shift in one continuous motion.
Don’t pause in
N SET PARKING BRAKE as you shift into or out of 4 LOW,
or your gears could clash.
Remember that driving in
4 HIGH or 4 LOW may reduce fuel economy. Also,
driving in four-wheel drive on dry pavement could cause your tires to wear
faster and make your transfer case harder to shift.
Electronic Transfer Case
1
KO41 2
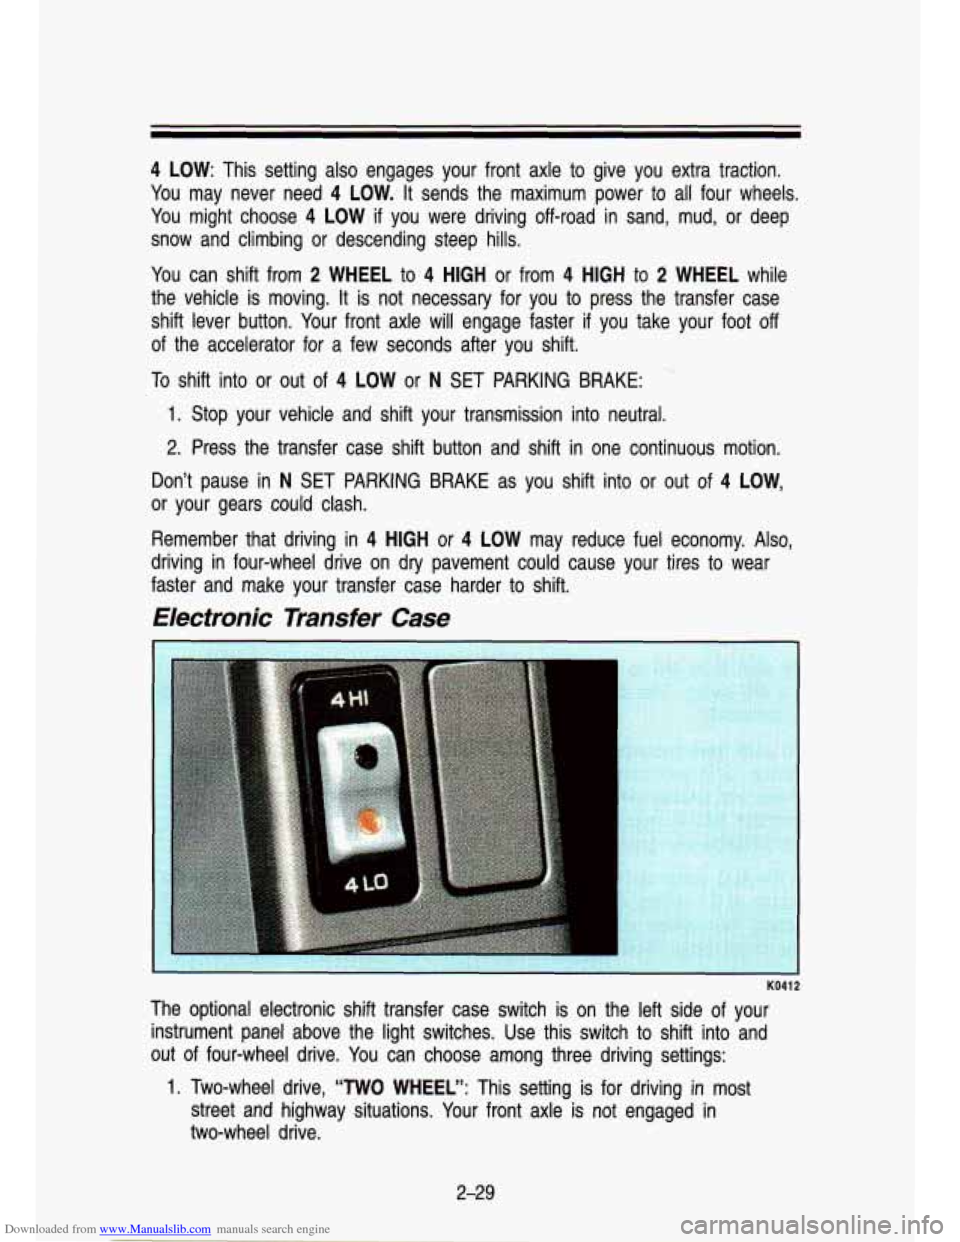
The optional electronic shift transfer case switch is on the left side of your
instrument panel above the light switches. Use this switch to \
shift into and
out of four-wheel drive. You can choose among three driving settings:
1. Two-wheel drive, “TWO WHEEL”: This setting is for driving in most
street and highway situations. Your front axle
is not engaged in
two-wheel drive.
2-29
Page 88 of 356
Downloaded from www.Manualslib.com manuals search engine Features & Controls
Turn Signal and Lane Change Indicator
The turn signal has two upward (for Right) and two downward (for Lef\
t)
positions. These positions allow you to signal a turn or a la\
ne change.
PO1 78
I To signal a turn, move the lever all the way up or down. When the turn is
finished, the lever will return automatically.
Standard Cluster Digital Cluster
PO251 I
A green arrow on the instrument panel will flash in the directio\
n of the turn
or lane change.
2-36
Page 90 of 356
Downloaded from www.Manualslib.com manuals search engine Features & Controls
Headlight High-Low Beam
. .-
PI m
To change the headlights from low beam to high or high to low, pull the turn
signal lever all the way toward you. Then release
it. When the high beams
are on, a blue light on the instrument panel also will be on\
.
Windshield Wipers
r
PO1 80
I You control the windshield wipers by turning the band with the wiper symbol
on it.
2-38
Page 98 of 356
Downloaded from www.Manualslib.com manuals search engine Features & Contmls
To Erase Speed Memory
When you turn off the Cruise Control or the ignition, your Cruise Control set
speed memory is erased.
Lights
Your light switches are on the left side of your instrument panel.
KO239
Push the top switch to turn on:
Parking Lights
Sidemarker Lights
Taillights
License Plate Lights
Instrument Panel Lights
Transfer Case Shift Indicator Panel
Push the bottom switch to turn on the headlights, together wit\
h:
Parking Lights
Sidemarker Lights
Taillights
License Plate Lights
Instrument Panel Lights
Transfer Case Shift Indicator Panel
2-46
Page 99 of 356

Downloaded from www.Manualslib.com manuals search engine Push the switch marked OFF to turn off your lights.
Turn the dial above the headlight switch to the right to make your instrument
panel and transfer case lights brighter. Turning the dial all the way to the
right until it clicks will turn on the interior lights.
Turn the dial to the left to dim your instrument panel and transfer case
indicator lights.
You can switch your headlights from high to low beam by pulling on the
multifunction lever.
A circuit breaker protects your headlights. If you have an electrical overload,
your headlights will flicker on and
off. Have your headlight wiring checked
right away
if this happens.
Fog Lamps
KO940
Use your optional fog lamps for better vision in foggy or misty conditions.
Your parking lights and/or low beam headlights must be on or your lamps
won’t work.
The fog lamp switch is on the instrument panel under the headlight switch.
Press the right side of the switch to turn the fog lamps on, and the left side
of the switch to turn them
off. A light will glow in the right side of the switch
when they are on.
2-47
Page 100 of 356
Downloaded from www.Manualslib.com manuals search engine Featums & Controls
KO241
Remember, fog lamps alone will not give off as much light as your headlights.
Never use your fog lamps in the dark without turning on your headlights.
Fog lamps will go
off whenever your high beam headlights come on. When
the high beams go off, the fog lamps will come on again.
Daytime Running Lights (DRL) Indicator Light (Canada Only)
r
KO242
If your vehicle was first sold, when new, in Canada, you will have this light
on the instrument panel. It goes on whenever the Daytime Running Lights are
on.
2-48
Page 101 of 356

Downloaded from www.Manualslib.com manuals search engine Dayiime Running Lights (Canada Only)
The Canadian Federal Government has decided that “Daytime Run\
ning Lights” (DRL) are a useful feature, in that DRL can make \
your vehicle more
visible to pedestrians and other drivers during daylight hours. \
DRL is required
on all new vehicles sold in Canada.
The high beam headlights will come on at reduced brightness in\
daylight when:
The ignition is on
The headlight switch is off, and
The parking brake is released.
vvnen you turn on your headlights, the DRL will switch
off and the exrerlor
lights will come on. When you turn
off the headlights, the exterior lights will
go out and high beams will change to the reduced brightness of DRL again.
The DRL indicator light on the instrument panel will go on wh\
enever the DRL is on. This light means that only the DRL is on. When you turn \
on your
exterior lights, this light will go out. Of course, you may still turn on the
headlights any time you need to.
To idle your vehicle with the DRL
off, set the parking brake. The DRL will
stay
off until you release the parking brake.
Headlights-On Reminder
A reminder tone will sound when your headlights are turned on an\
d your
ignition is in
Off, LOCK or Acc. To turn the tone off, turn the dimmer dial all
the way to the left.
2-49